
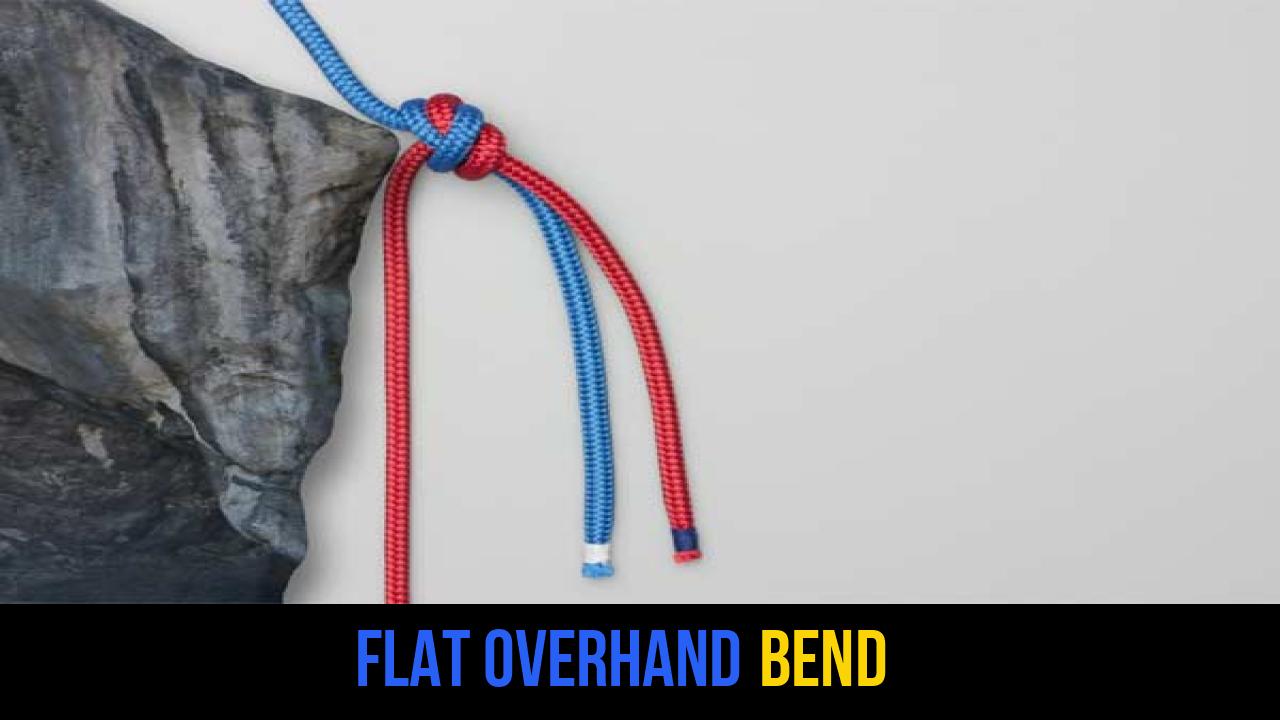
In the world of rope knots and outdoor rope techniques, few knots are as debated, misunderstood, and ultimately essential as the Flat Overhand Bend. Known for its simplicity and its specific profile, this knot has become a staple for mountain guides and search-and-rescue teams globally. While it may appear deceptively basic—essentially just an overhand knot tied with two strands—its geometry offers a mechanical advantage that few other bends can replicate when it comes to rope retrieval.
Whether you are an aspiring climber, a seasoned arborist, or an outdoor enthusiast looking to expand your utility skills, understanding how to properly tie and dress the Flat Overhand Bend is a critical competency. This article dives deep into the technical specifications, the safety requirements, and the step-by-step process of mastering this essential bend.
Alternative Names: Offset Overhand Bend, Euro Death Knot (EDK), One-Sided Overhand Bend.
What Is a Flat Overhand Bend?
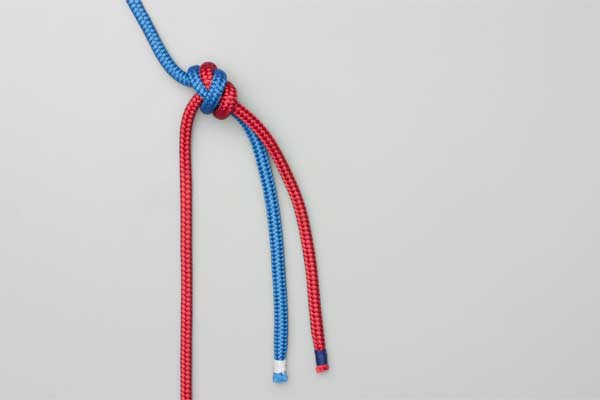
The Flat Overhand Bend is a knot used to join two ropes of similar diameter together. Unlike a traditional "inline" bend—such as the Double Fisherman’s Knot—the Flat Overhand Bend is an "offset" knot. This means the bulk of the knot sits on one side of the rope, while the other side remains relatively flat.
Practical Applications in the Wild
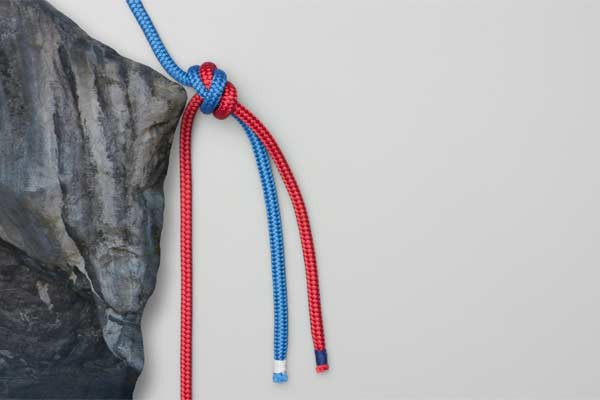
The primary reason professionals use the Flat Overhand Bend is for rappelling (abseiling). When a climber needs to descend a distance longer than a single rope length, they must join two ropes together. Once they reach the bottom, they pull one end of the rope to retrieve both.
A traditional, bulky knot can easily get stuck in cracks or behind flakes of rock during retrieval. However, because the Flat Overhand Bend is offset, the knot naturally orients itself so the flat side faces the obstruction, allowing it to "glide" over edges where other knots would snag. This characteristic makes it one of the most valued outdoor rope techniques for complex descents.
Materials and Tools Needed
To practice or utilize the Flat Overhand Bend knot, you need specific materials to ensure maximum safety and efficiency.
- Ropes of Similar Diameter: This knot performs best when joining two ropes of the same thickness. While it can be used on ropes of slightly different diameters, the risk of "rolling" increases.
- Rope Type: Static or dynamic kernmantle ropes are the standard. The knot also works well with high-strength accessory cords or paracord for non-life-safety utility purposes.
- Clean Working Surface: When learning, use a flat surface to ensure you can see the "dressing" of the knot clearly.
- Hands-on Testing: Once tied, the knot requires significant manual tensioning to "set" the strands.
How to Tie Flat Overhand Bend?
To ensure safety and reliability, follow these instructions precisely. The Flat Overhand Bend relies on proper tail length and dressing to function correctly under load.
- Use enough rope to allow for the long tail ends. In professional climbing scenarios, it is recommended to have at least 12 to 18 inches (30-50 cm) of tail.
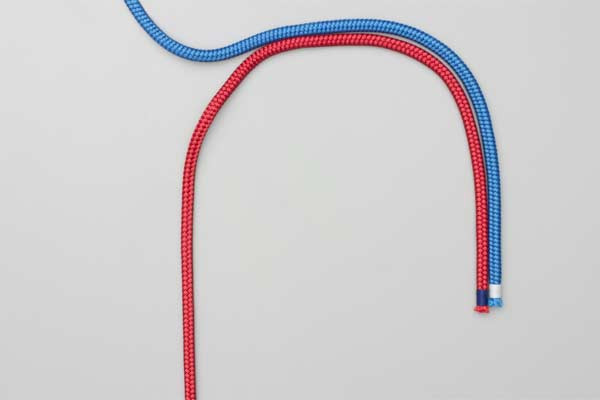
- Use both ends together to form a loop. Lay the two rope ends parallel to each other, pointing in the same direction, and treat them as a single strand.
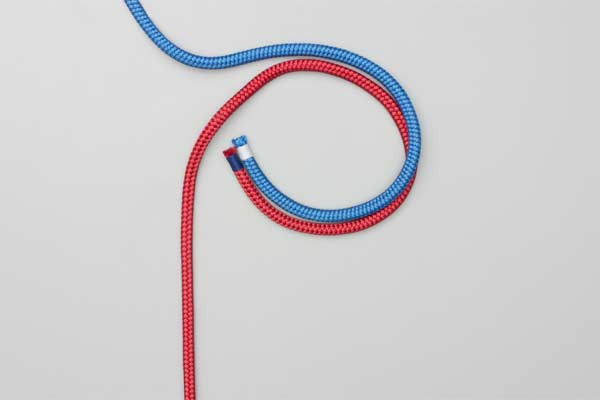
- Pass the two ends through the loop. This creates the basic overhand structure with both ropes traveling through the turn simultaneously.
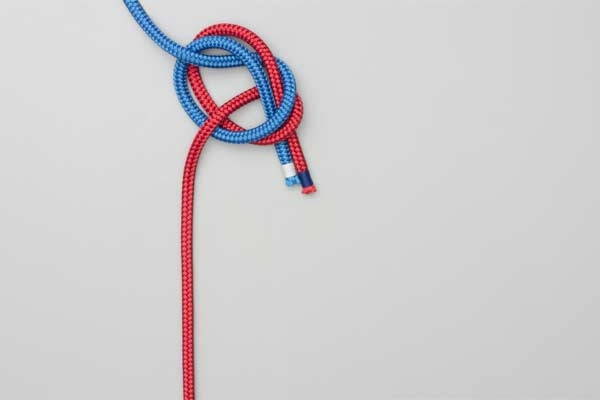
- Tighten and dress the knot. Pull each of the four strands (the two standing lines and the two tails) individually to ensure the knot is snug and the ropes are not crossing awkwardly inside the knot.
- The underside of the knot is unlikely to catch on an obstruction. This flat profile is the key benefit of the bend.
Common Mistakes to Avoid
While the Flat Overhand Bend knot is simple, errors in its execution can be catastrophic. Safety is paramount when using this knot in high-stakes environments.
1. Insufficient Tail Length
The most common and dangerous mistake is leaving tails that are too short. Under high loads, the Flat Overhand Bend has the potential to "roll" or "capsize." If the tails are too short, the knot could roll right off the ends of the rope. Always ensure at least 30cm of tail.
2. Poor Dressing
A "messy" knot—where the strands cross over each other inside the loop—is weaker and more prone to deformation. A properly dressed knot should have the strands lying flat and parallel within the overhand turn.
3. Using the "Flat Figure-Eight" Instead
Many beginners assume that if an overhand is good, a Figure-Eight must be better. This is a dangerous misconception. The Flat Figure-Eight Bend is notorious for rolling much more easily than the Flat Overhand Bend. In the climbing community, the Flat Figure-Eight is generally considered unsafe for joining rappel ropes, whereas the Overhand version is the industry standard.
4. Failure to Pre-Tension
This knot must be "set" before use. You should pull on all four ends with significant force to ensure the knot is compact. An unseated knot is more likely to shift when it first receives a load.
Related Knots and Splicing
Understanding the Flat Overhand Bend is just one part of a comprehensive knowledge of rope knots. Here are several related techniques often used in similar contexts:
- Double Fisherman’s Knot: A highly secure, non-offset bend used for creating permanent loops or joining ropes where snagging is not a concern.
- Water Knot (Tape Knot): Essentially a "re-threaded" overhand knot used primarily with flat nylon webbing rather than round rope.
- Alpine Butterfly Bend: A secure bend that is easy to untie after heavy loading but lacks the anti-snagging profile of the flat overhand.
- Figure-Eight Follow-Through: The gold standard for tying into a climbing harness; it is incredibly strong but much bulkier than a simple overhand.
Final Words
The Flat Overhand Bend is a testament to the idea that sometimes, simpler is better. By utilizing the basic geometry of an overhand turn and offsetting the tails, this knot solves one of the most frustrating problems in vertical movement: the snagged rope.
However, its simplicity should never lead to complacency. Professional outdoor rope techniques require constant practice and a "safety-first" mindset. Always remember to allow for long tails, dress the knot until it is perfectly flat, and tension each strand individually. When tied correctly, the Flat Overhand Bend is a reliable, efficient, and life-saving tool in any adventurer’s kit. Whether you are descending a granite face in the Sierras or simply joining two utility cords at home, mastering this knot is an essential skill for anyone working with rope.
