
In the world of rope knots and rigging, few techniques are as specialized and reliable for their specific purpose as the Barrel Hitch. Whether you are working on a construction site, preparing for a maritime expedition, or simply organizing your garage, understanding how to secure cylindrical objects is a fundamental skill. The Barrel Hitch is designed to provide a secure "basket" for upright containers, allowing them to be hoisted vertically without the risk of slipping or tipping.
While modern logistics often rely on mechanical slings and specialized machinery, the ability to create a secure lifting harness using nothing but a length of rope remains a vital part of outdoor rope techniques. This knot allows the user to maintain the center of gravity of the load, ensuring that the contents of a barrel or drum remain upright during transport.
Beyond its functional utility, mastering the Barrel Hitch connects the modern outdoorsman to centuries of maritime and industrial history. It is a testament to the elegance of knot-making—where a simple sequence of loops creates a powerful mechanical advantage.
Alternative Names: The Barrel Hitch is also frequently referred to as the Drum Hitch, Cask Sling, or Barrel Sling.
What Is a Barrel Hitch?
The Barrel Hitch is a method of forming a sling around a cylindrical object (like a barrel, drum, or bucket) so that it can be lifted in an upright position. Unlike a simple loop, which might slip off the smooth sides of a container, the Barrel Hitch creates a supportive "cradle" that grips the sides of the object.
Practical Uses and Applications
The primary utility of this knot is found in vertical lifting. Because the rope encircles the body of the barrel and is secured over the top, the tension of the lift actually tightens the grip on the object.
- Maritime Operations: Historically used to hoist water, oil, or food stores from docks onto ships.
- Construction: Useful for lifting buckets of tools, mortar, or debris to higher scaffolding levels.
- Outdoor and Survival: Ideal for hoisting food stores away from wildlife or organizing gear in a camp setting.
- DIY and Home Improvement: Perfect for moving heavy planters or cylindrical storage bins without damaging the base.
It is important to note that the Barrel Hitch is intended for lifting containers that are open at the top or need to remain strictly vertical. It is not designed for horizontal transport or for objects that are significantly wider at the top than the bottom (unless there is a prominent rim for the rope to catch).
Materials and Tools Needed
To execute a safe and effective Barrel Hitch, you must choose the right equipment. The integrity of your rope knots is only as good as the material you use.
Rope Types
- Static Rope: This is the preferred choice for lifting. Static ropes have minimal stretch, ensuring that the knot remains tight and the load does not bounce during the hoist.
- Nylon Rope: While strong, nylon can stretch under load. If using nylon, ensure it is of a high-quality braided variety rather than a low-cost twisted version.
- Natural Fiber (Manila or Hemp): Often used in traditional maritime settings. These ropes provide excellent grip (friction) against the surface of the barrel but require careful inspection for rot or brittle fibers.
Diameter and Load Capacity
Always check the Working Load Limit (WLL) of your rope. The rope should be rated for at least five to seven times the weight of the object you are lifting. For a standard 55-gallon drum, a heavy-duty rope of at least 1/2 inch (12mm) to 5/8 inch (16mm) is typically recommended.
Necessary Tools
- The Load: A barrel, drum, or bucket with a sturdy rim.
- Gloves: Heavy-duty leather work gloves are essential to prevent rope burn during the tightening and lifting process.
- Safety Gear: If lifting heavy loads overhead, a hard hat and steel-toed boots are non-negotiable safety requirements.
How to Tie a Barrel Hitch?
Following the proper sequence is critical for the safety and stability of the load. Below are the exact steps to secure a Barrel Hitch correctly.
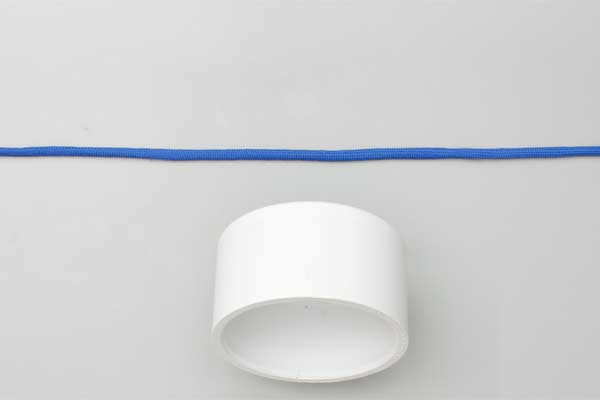
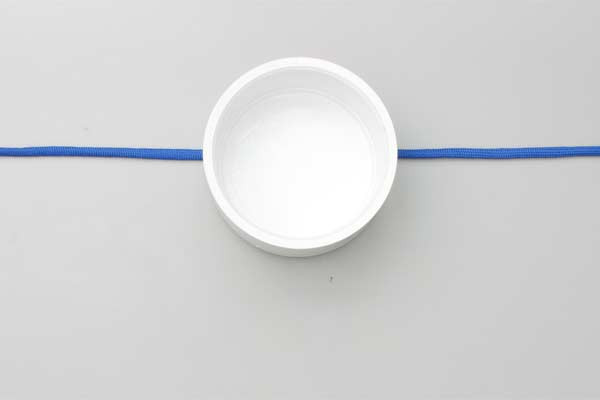
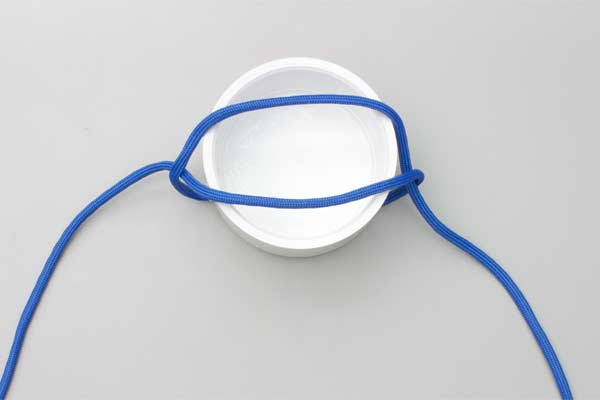
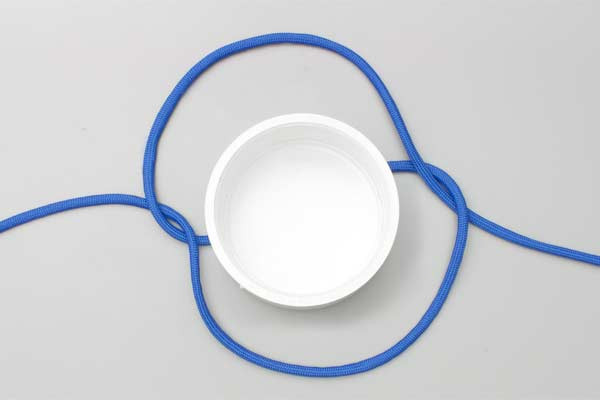
- Stand the barrel on the lifting rope.
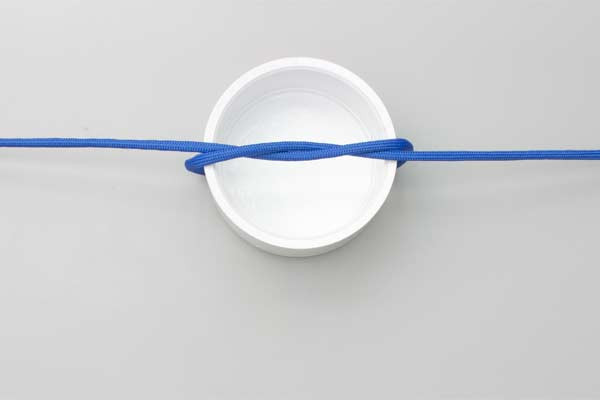
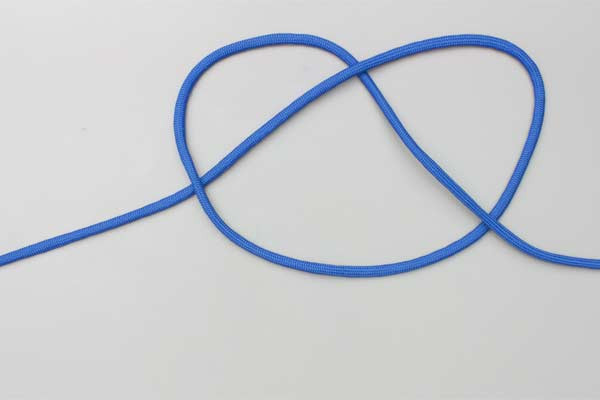
- Tie an Overhand Knot across the top.
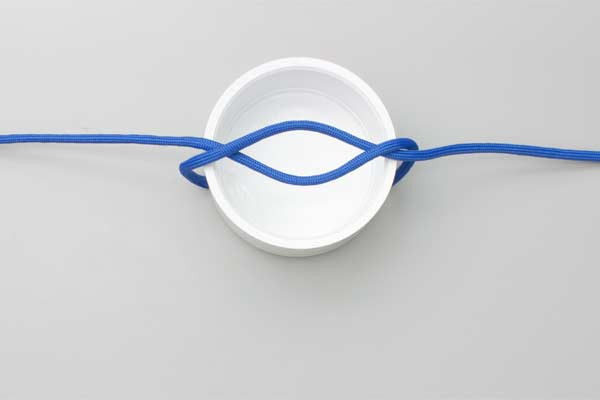
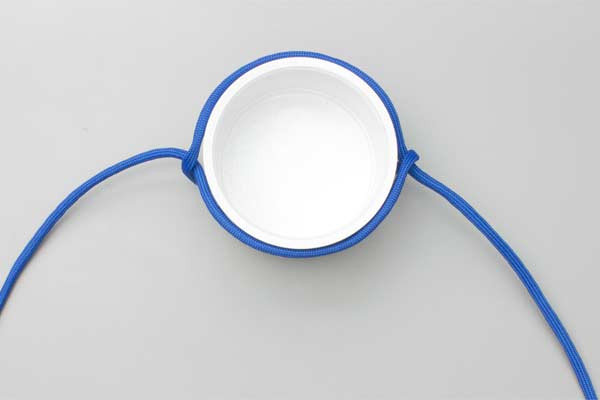
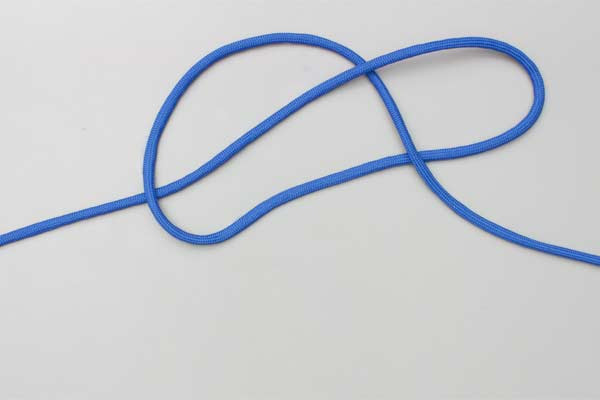
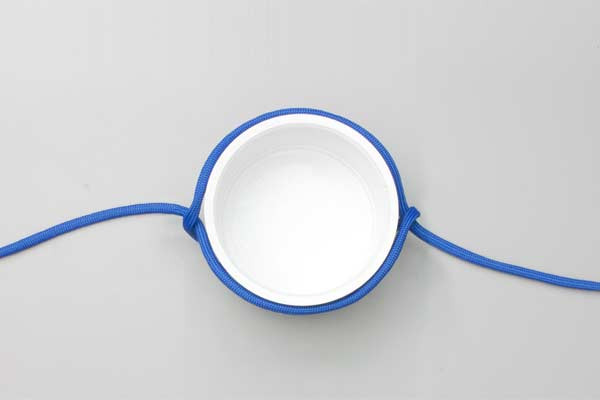
- Spread the Overhand Knot until it embraces the top of the barrel.
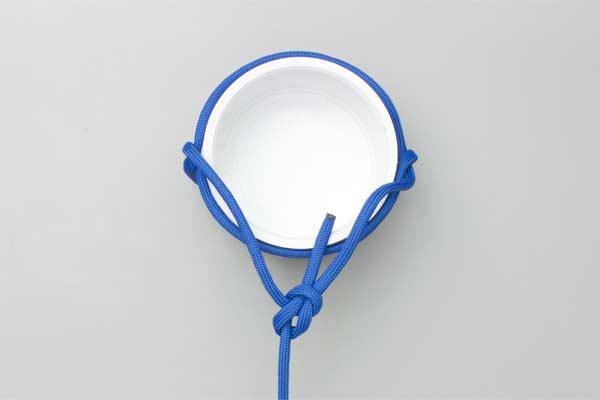
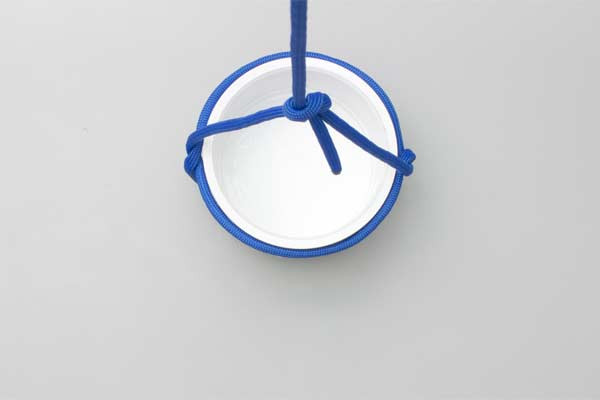
- Join the ends with a Bowline and lift.
Alternative Method
Alternatively, if you prefer to prepare the knot on the ground before placing the object:
- Lay the Overhand Knot on the floor, create the figure 8 appearance, and place the barrel on the center and tighten.

Common Mistakes to Avoid
Even experienced riggers can make errors when applying outdoor rope techniques. To ensure safety, watch out for these common pitfalls:
- Improper Knot Placement: The "arms" of the Barrel Hitch must sit below the uppermost rim of the barrel. If the rope is too high, it may slip off once the load is tensioned.
- Using Slippery Synthetic Ropes: Some polypro ropes are extremely slick. This can cause the Barrel Hitch to slide up the sides of the barrel. Always test the friction of the rope against the container material before a full lift.
- Neglecting the Bowline: The step of joining the ends with a Bowline is crucial. If this final connection is weak or tied incorrectly, the entire hitch will fail. Ensure the Bowline is "dressed" (tightened and organized) properly.
- Ignoring the Center of Gravity: If the barrel is loaded unevenly, it may tilt. While the Barrel Hitch is stable, an extreme imbalance can cause the rope to shift.
- Failure to Inspect the Rope: Always check for frays, burns, or chemical damage. A knot creates a point of stress on the rope; if the fibers are already weakened, the rope may snap at the knot.
Related Knots and Splicing
Understanding the Barrel Hitch is often a gateway to learning other essential rope knots. Here are a few related techniques:
- Bowline: Known as the "King of Knots," it creates a fixed loop at the end of a rope that will not slip or bind under load.
- Overhand Knot: The simplest of all knots, used as a stopper or the foundation for more complex hitches like the Barrel Hitch.
- Clove Hitch: A quick way to secure a rope to a post or spar; however, it is less secure than a Barrel Hitch for vertical lifting.
- Figure Eight Knot: A highly secure stopper knot that is easy to inspect and undo, even after being subjected to heavy tension.
- Sheet Bend: Used for joining two ropes of different thicknesses together, essential for extending your reach during a lift.
Final Words
The Barrel Hitch is a masterclass in functional simplicity. By utilizing the basic Overhand Knot and the reliable Bowline, you can create a lifting harness that is both robust and easy to disassemble once the job is done. Whether you are practicing outdoor rope techniques for utility or survival, the ability to lift heavy, awkward loads safely is an invaluable asset.
Always remember that safety is the priority. Practice tying the Barrel Hitch with empty containers before attempting to lift heavy or hazardous materials. By mastering the tension and placement of the rope, you ensure that your gear—and your team—remain safe during any hoisting operation. With these steps and tips in mind, you are now ready to implement the Barrel Hitch in your next project or outdoor adventure.