
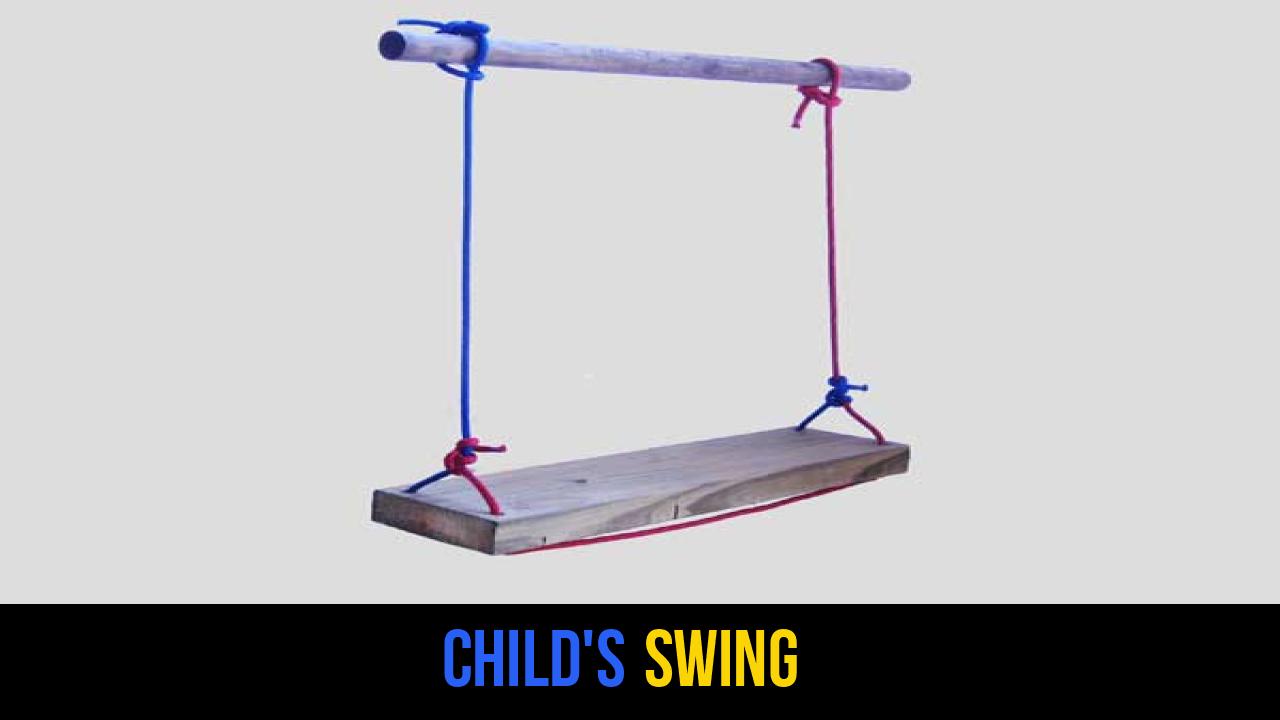
The image of a Child’s Swing gently swaying from a sturdy oak branch is a quintessential symbol of childhood joy and outdoor play. However, as any technical outdoor gear specialist will tell you, the magic of a swing lies not just in its movement, but in the structural integrity of the knots that hold it aloft. When dealing with the safety of a child, understanding outdoor rope techniques is not just a hobby—it is a critical skill.
Securing a swing requires a blend of friction physics and knot security. A poorly tied knot can slip under the dynamic load of a swinging child, leading to potential injury. In this comprehensive guide, we will explore the professional methods for installing a Child’s Swing, focusing on the specific knots required to ensure a lifetime of safe backyard memories.
Also known as: Rope Swing, Tree Swing, Garden Swing, Backyard Seat Swing.
What Is a Child’s Swing?
A Child’s Swing is a piece of recreational equipment consisting of a seat suspended by ropes or chains from a fixed overhead structure, most commonly a tree branch or a wooden A-frame. While modern playgrounds often use galvanized steel and plastic, the traditional Child’s Swing utilizes high-quality rope and timber, offering a natural aesthetic that blends seamlessly into a garden environment.
The practical application of a swing goes beyond simple fun. It serves as a tool for developing a child’s vestibular system (balance) and proprioception (body awareness). From a technical standpoint, a swing is a pendulum. The ropes must be able to withstand "live loads"—the weight of the child plus the centrifugal force generated during the arc of the swing. This makes the choice of rope knots the most vital component of the entire build.
Materials and Tools Needed
Before you begin tying your Child’s Swing knot, you must gather the correct materials. Using the wrong rope or a weak branch can compromise the entire project.
1. The Rope
For a Child’s Swing, you need a rope that offers high tensile strength, UV resistance, and low stretch.
- Polyester (Dacron): This is the gold standard for swings. It doesn’t stretch as much as nylon and resists weather damage effectively.
- Polypropylene: Often used because it’s inexpensive and floats, but it is susceptible to UV degradation and can be slippery.
- Manila Rope: A classic choice for a rustic look, but it is prone to rot if not treated and can be rough on small hands.
- Diameter: Aim for a diameter of at least 5/8 inch (16mm) to 3/4 inch (19mm) for a comfortable grip and high break strength.
2. The Seat
Whether you choose a wooden plank, a rubber belt, or a disc seat, ensure it is rated for outdoor use. Wooden seats should be sanded smooth and sealed with a weatherproof finish to prevent splinters.
3. The Tree Branch
Selection is critical. Look for:
- Species: Hardwoods like Oak, Maple, or Ash are preferred. Avoid brittle woods like Willow or Poplar.
- Health: Ensure the branch is living and free of cracks or fungus.
- Size: The branch should be at least 8 inches in diameter.
- Height: Ideally, the branch should be 10 to 15 feet from the ground.
4. Essential Tools
- A sturdy ladder.
- Measuring tape (to ensure the seat is level).
- A sharp knife or rope cutter.
- A lighter or heat tool (to sear the ends of synthetic ropes to prevent fraying).
How to Tie a Child’s Swing?
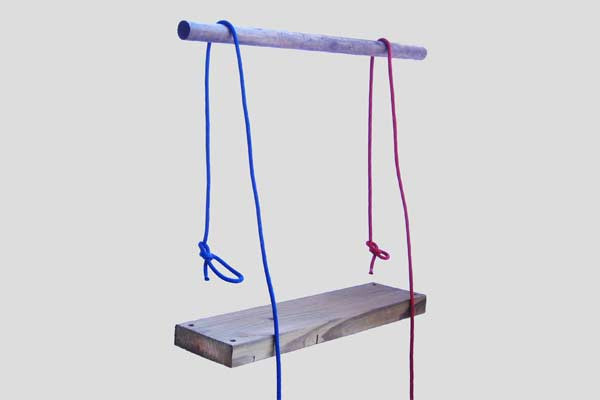
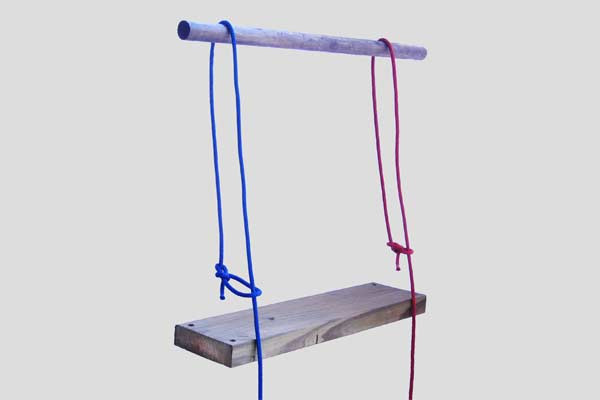
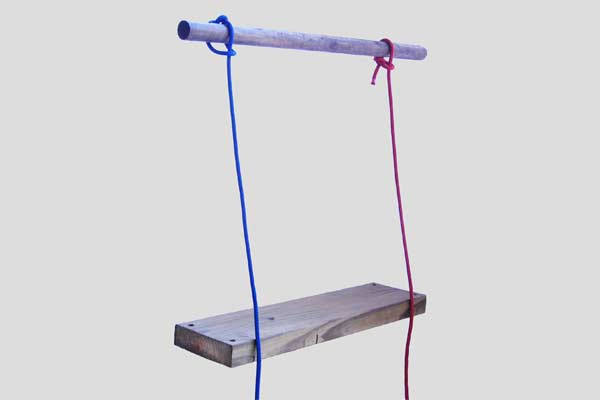
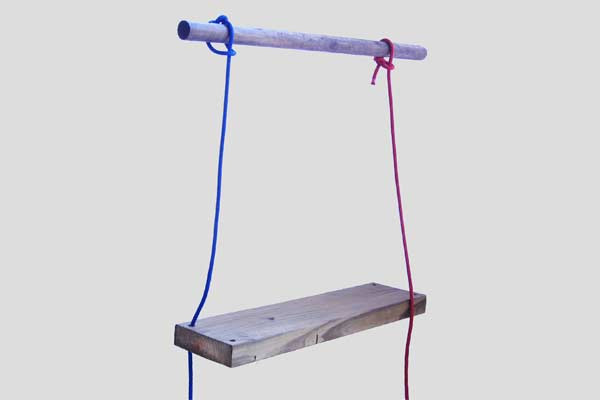
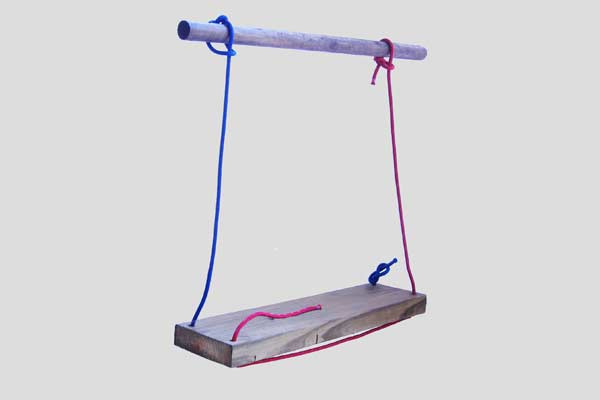
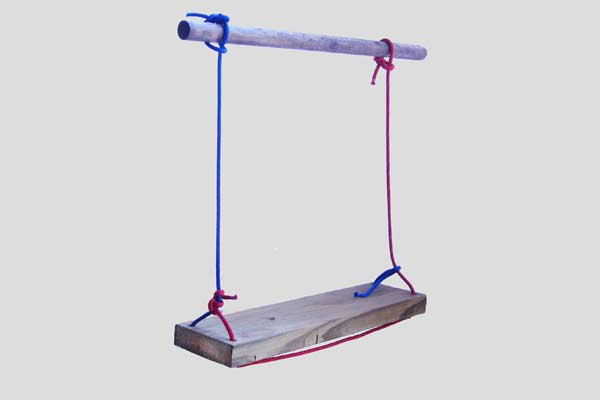
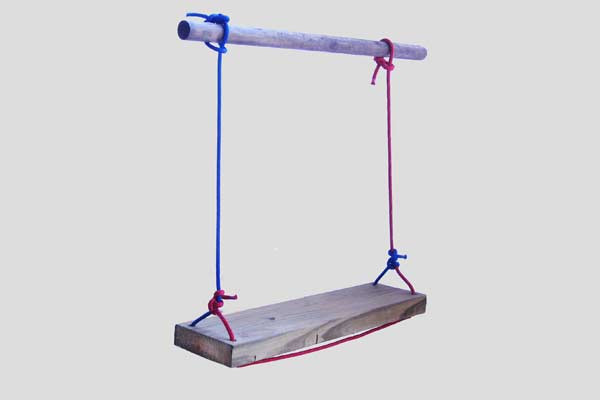
To ensure maximum safety and stability, follow these instructions precisely. The following steps utilize the Running Bowline for the anchor point and the Three Half Hitches for the seat attachment to provide a secure, non-slip finish.
- Attach each main rope to the branch of the tree using a running bowline.
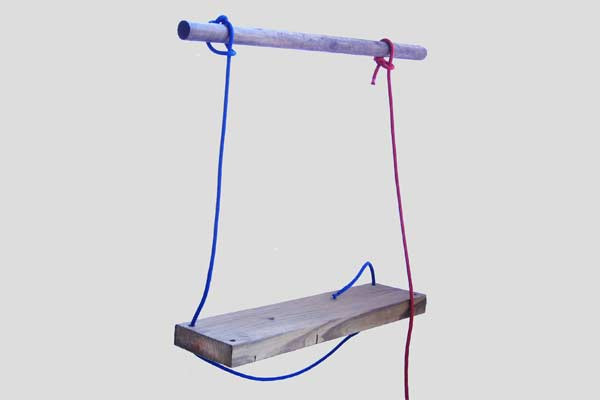
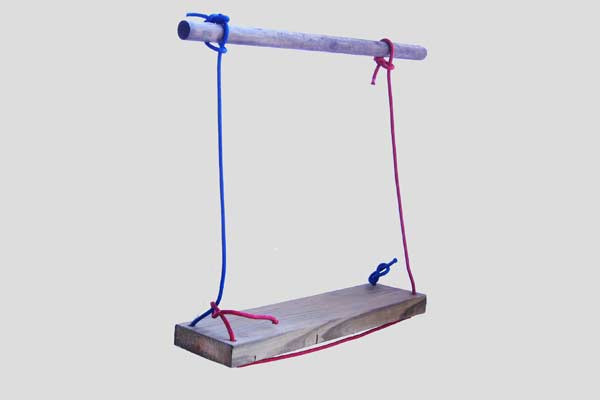
- Thread one rope under one edge of the seat and tie a temporary figure 8.
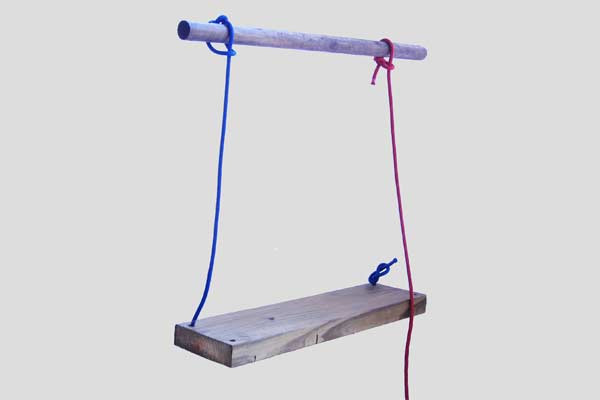
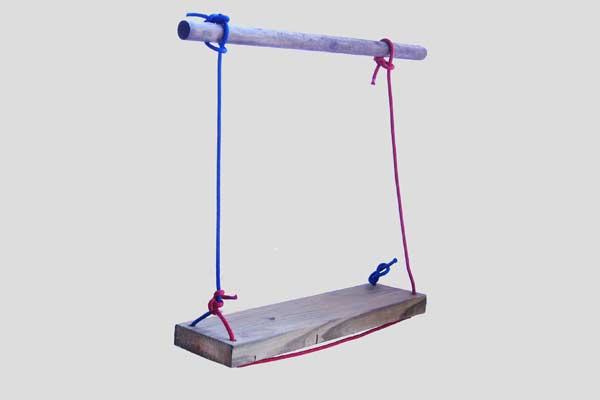
- Thread the other rope under the other edge and tie it with three Half Hitches.
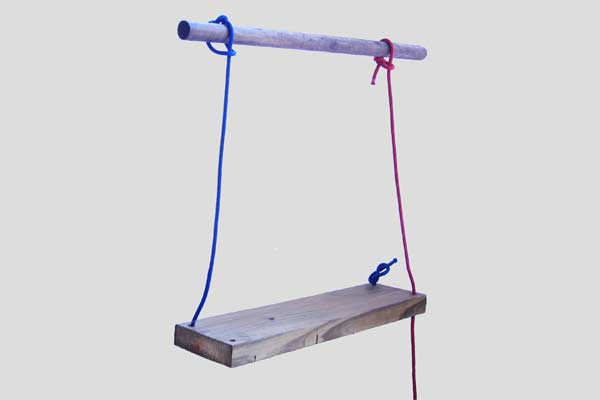
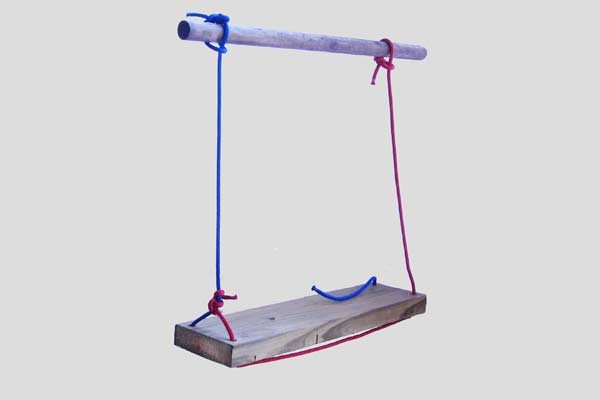
- Untie the Figure 8 and attach it also with three Half Hitches.
Common Mistakes to Avoid
Even experienced DIYers can make errors when applying outdoor rope techniques. Here are the most common pitfalls to watch out for:
Using the Wrong Branch
Never hang a Child’s Swing from a dead branch or one that shows signs of "v-crotch" splitting. Always test the branch with a weight significantly heavier than the child before allowing them to use it.
Friction and Bark Protection
Rope rubbing directly against a tree branch will eventually "girdle" the tree or saw through the rope. To prevent this, professional installers often use a section of rubber garden hose as a sleeve where the rope meets the branch, or they use wide tree straps.
Uneven Seat Height
If one side of the swing is even slightly higher than the other, the swing will not move in a straight line. This puts lateral stress on the knots and the branch. Use a spirit level on the seat during Step 3 and Step 4 of the tying process.
Neglecting the "Tail"
When tying three Half Hitches, ensure you leave at least 4 to 6 inches of "tail" (the end of the rope). If the rope settles or tightens under a heavy load, you need that extra length to prevent the knot from unraveling.
Related Knots and Splicing
Understanding a variety of rope knots enhances your ability to maintain and adjust your outdoor gear. Here are a few related techniques:
- The Bowline: Often called the "King of Knots," it creates a fixed loop at the end of a rope that will not slip or bind under load.
- Figure 8 Knot: A fundamental stopper knot used in climbing and sailing to prevent a rope from slipping through a hole or a pulley.
- Clove Hitch: A simple binding knot used to secure a rope to a cylindrical object; however, it can slip under heavy rotation.
- Taut-Line Hitch: An adjustable friction hitch used on lines under tension, useful if you need to frequently adjust the height of a swing.
- Eye Splice: A method of creating a permanent loop in the end of a rope by weaving the strands back into itself, offering 100% strength retention.
Safety and Maintenance
A Child’s Swing is not a "set it and forget it" project. Because it is exposed to the elements, regular maintenance is mandatory.
- Monthly Inspection: Check the knots for any signs of loosening. Inspect the rope for "fuzzing" or discoloration, which indicates UV damage.
- Yearly Replacement: Depending on your climate, rope should generally be replaced every 2 to 3 years.
- Weight Limits: Clearly define who can use the swing. A swing designed for a 50lb child may not support a 180lb adult.
Final Words
Building a Child’s Swing is a rewarding project that combines craftsmanship with the joy of outdoor play. By using the running bowline for your anchor and the three Half Hitches for the seat, you are employing time-tested outdoor rope techniques that prioritize safety above all else. Remember that the quality of your rope and the health of your tree are just as important as the knots themselves. Take your time, follow the steps precisely, and you will create a safe haven for play that will last for seasons to come.
Whether you are an enthusiast of rope knots or a parent looking to upgrade the backyard, mastering these technical skills ensures that your outdoor installations are professional, secure, and—most importantly—safe for the little ones.
