
In the world of outdoor rope techniques, few knots are as ubiquitous or as fundamentally important as the Clove Hitch using Half Hitches. Whether you are a seasoned sailor, an expert climber, or a weekend camping enthusiast, understanding how to secure a line to a fixed object is a non-negotiable skill. The Clove Hitch is often one of the first rope knots taught in scouting and maritime academies because of its simplicity and effectiveness.
While there are multiple ways to tie this hitch—including the "throwing" method or the "end-around" method—the technique utilizing two identical loops (half hitches) is often the most reliable for beginners and professionals alike when a post or spar is accessible. This method allows for rapid deployment and easy adjustment, making it a staple in various industrial and recreational settings.
Throughout this guide, we will explore the mechanics of this knot, the best materials to use, and a step-by-step breakdown of the tying process. By the end of this article, you will have a professional-level understanding of how to implement this knot in your next adventure.
Alternative Names: Ratline Hitch, Two Half Hitches (Method), Double Hitch, Builder’s Knot.
What Is a Clove Hitch using Half Hitches?
The Clove Hitch using Half Hitches is a binding knot used to secure a rope to a cylindrical object, such as a post, pole, or tree trunk. Technically, a Clove Hitch consists of two successive half hitches made around an object. When these hitches are "stacked" correctly, they create a self-binding mechanism where the tension of the rope actually holds the knot in place against the surface of the post.
Practical Uses and Applications
The versatility of this knot cannot be overstated. In outdoor rope techniques, it is frequently used for:
- Pioneering and Lashings: It is the standard knot used to start and finish most lashings (square, tripod, or sheer).
- Boating: Securing a fender to a rail or temporarily mooring a boat to a piling.
- Camping: Hanging a bear bag or securing a ridge line for a tarp setup.
- Construction: Lifting cylindrical loads like pipes or timber, provided the tension remains constant.
However, it is important to note that the Clove Hitch using Half Hitches is considered a "temporary" hitch. While highly effective under constant tension, it can slip if the rope is rotating or if the tension is intermittent.
Materials and Tools Needed
To master the Clove Hitch using Half Hitches knot, you must first select the appropriate materials. Not all ropes are created equal, and the performance of your knot depends heavily on the interaction between the rope fibers and the object being tied to.
Rope Selection
- Nylon Rope: Excellent for its elasticity and strength. However, it can be slippery, meaning the Clove Hitch may require an extra "safety" half hitch to prevent crawling.
- Polyester Rope: Offers less stretch than nylon and better UV resistance. It is often the preferred choice for marine applications.
- Natural Fibers (Manila/Sisal): These provide excellent "grip" or friction. The Clove Hitch bites very well into natural fibers, making it ideal for traditional wood-pole lashings.
- Kernmantle (Climbing Rope): While strong, the smooth sheath of a climbing rope can cause hitches to slip on smooth metal surfaces.
Essential Tools
- The Post/Anchor: A cylindrical object is best. The smoother the surface (like polished stainless steel), the more likely the knot is to slip. A rough wooden post provides the best security.
- Gloves: Especially when working with heavy-duty synthetic or natural fiber ropes to prevent rope burn during tightening.
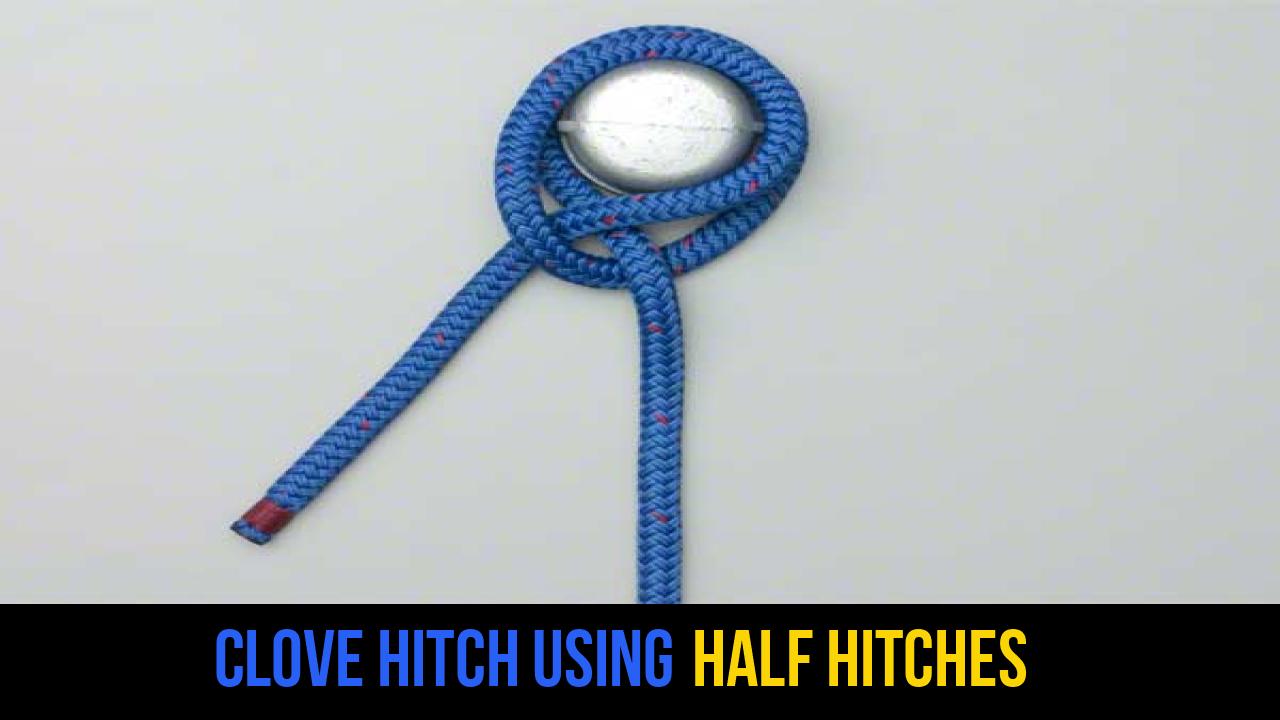
How to Tie Clove Hitch using Half Hitches?
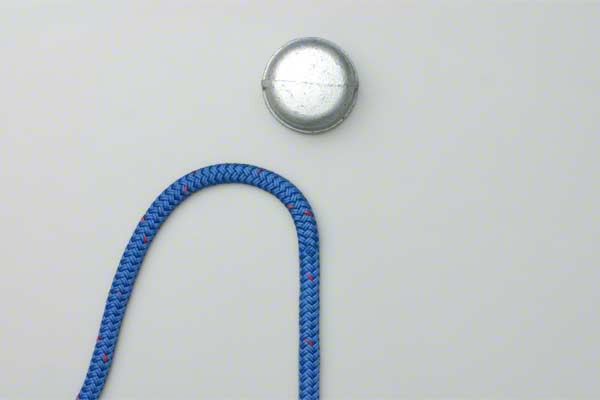
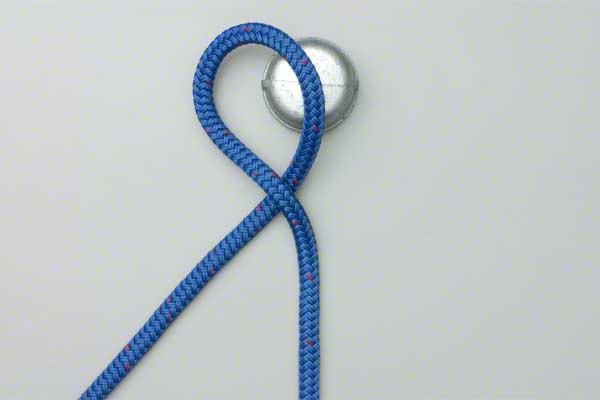
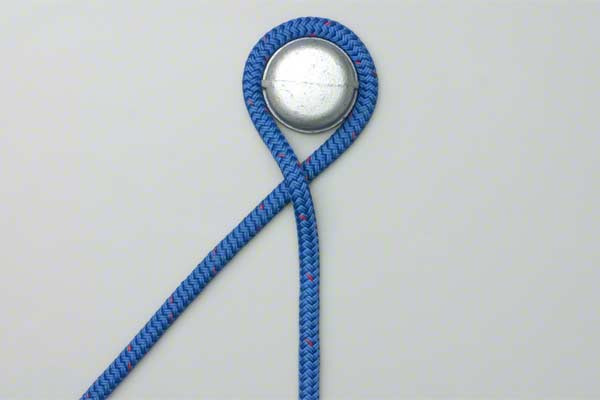
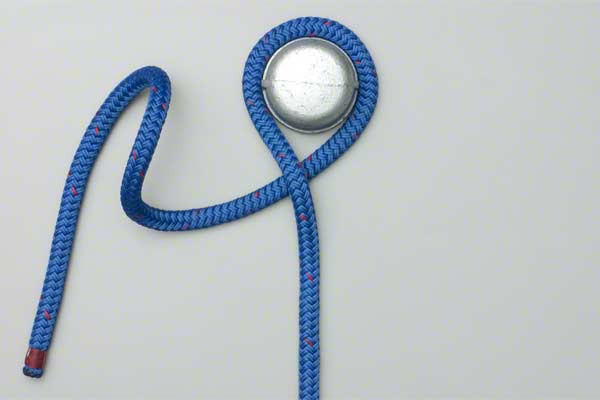
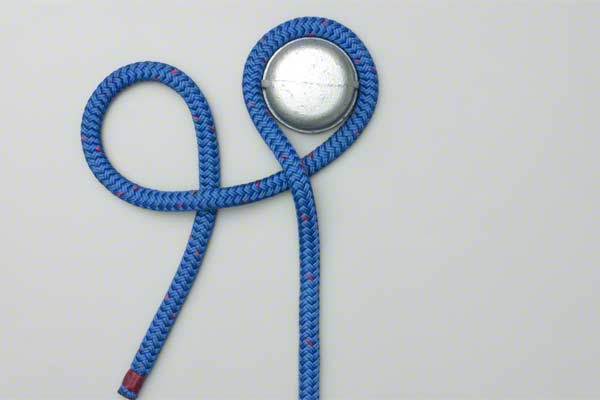
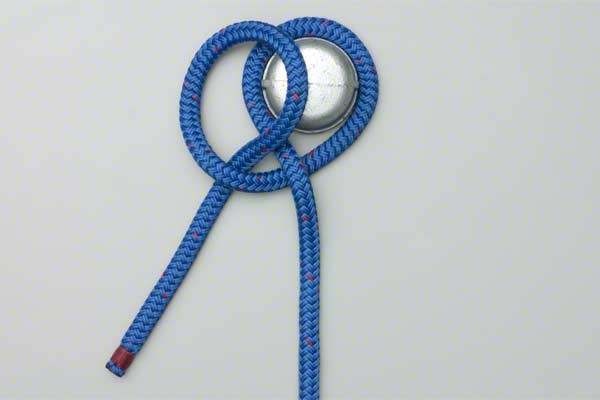
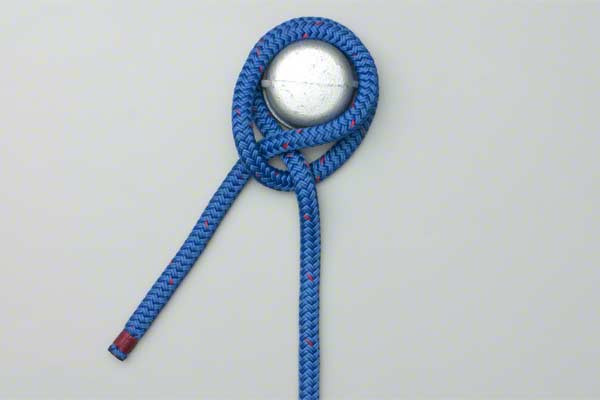
The following method is the most efficient way to tie this knot when you have access to the top of a post. It involves creating two loops and dropping them over the anchor. Follow these steps exactly to ensure a secure and professional finish.
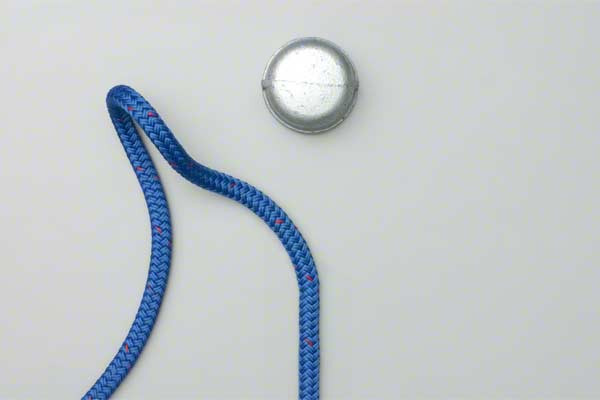
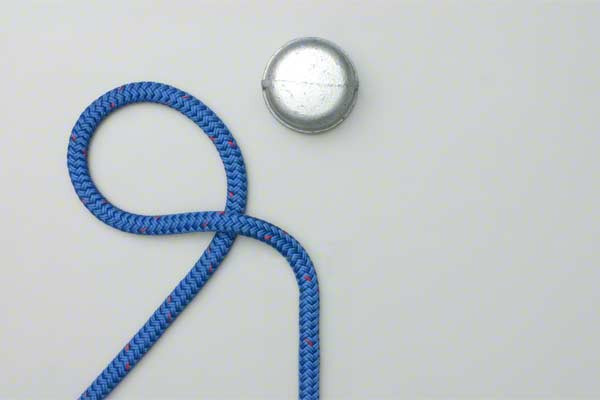
- Form a loop in the working end of the rope.
- Place it over the post.
- Form a second loop identical to the first.
- Place it over the post and tighten.
Pro Tip: Ensure that the two loops are oriented so that the working end and the standing part of the rope emerge from the center of the knot, trapped by the "bridge" created by the outer wraps.
Common Mistakes to Avoid
Even though the Clove Hitch using Half Hitches is simple, errors can lead to knot failure. As an expert in outdoor rope techniques, I recommend keeping an eye out for these common pitfalls:
1. Reversing the Second Loop
The most frequent mistake is forming the second loop in the opposite direction of the first. If the loops are not identical, they will not "bind" against each other. Instead of a Clove Hitch, you will end up with a messy tangle that will slide down the post immediately upon loading.
2. Using on Square or Flat Objects
The physics of the Clove Hitch relies on the rope maintaining constant contact with a curved surface. On a square post, the rope only touches the corners, leaving "gaps" where friction is lost. This significantly increases the risk of the knot slipping.
3. Lack of Constant Tension
The Clove Hitch is notorious for "walking" or "creeping" if the load is not constant. If you are using this knot in a situation where the rope will be pulled and then slackened repeatedly (like a boat bobbing in waves), you must add a "stopper knot" or an extra half hitch on the standing line for safety.
4. Ignoring Rope Diameter
If the rope is too thick for the post, the loops won’t be able to "bite" effectively. Conversely, if the rope is too thin (like paracord on a large tree), the friction might be so high that the knot becomes nearly impossible to untie after being loaded.
Related Knots and Splicing
Expanding your repertoire of rope knots is essential for any technical specialist. Here are four knots closely related to the Clove Hitch that every outdoorsman should know:
- The Bowline: Often called the "King of Knots," the Bowline creates a fixed loop at the end of a rope that will not slip or bind under load, making it essential for rescue and sailing.
- The Taut-Line Hitch: An adjustable friction hitch used on lines under tension. It is perfect for tent guy-lines because it can be slid up and down to adjust tension and then "locks" in place.
- The Figure Eight Knot: A foundational stopper knot in climbing and rigging. Its symmetrical shape makes it easy to inspect and prevents the rope from unreeving through a pulley or fairlead.
- The Timber Hitch: Specifically designed for towing logs or cylindrical objects. It is more secure than a Clove Hitch for dragging heavy timber because it "bites" harder as more tension is applied.
Final Words
The Clove Hitch using Half Hitches remains a cornerstone of outdoor rope techniques due to its speed and utility. While it has its limitations—specifically regarding intermittent tension—its role in pioneering, temporary rigging, and basic camp craft is irreplaceable.
Mastering this knot is more than just memorizing steps; it is about understanding the balance between friction and tension. By following the precise steps of forming identical loops and placing them over your anchor, you ensure a clean, professional, and functional hitch every time. Practice with different rope diameters and surfaces to truly appreciate the mechanical elegance of this classic knot. Whether you’re securing a hammock or starting a complex lashing, the Clove Hitch is a tool you will return to time and time again.
