
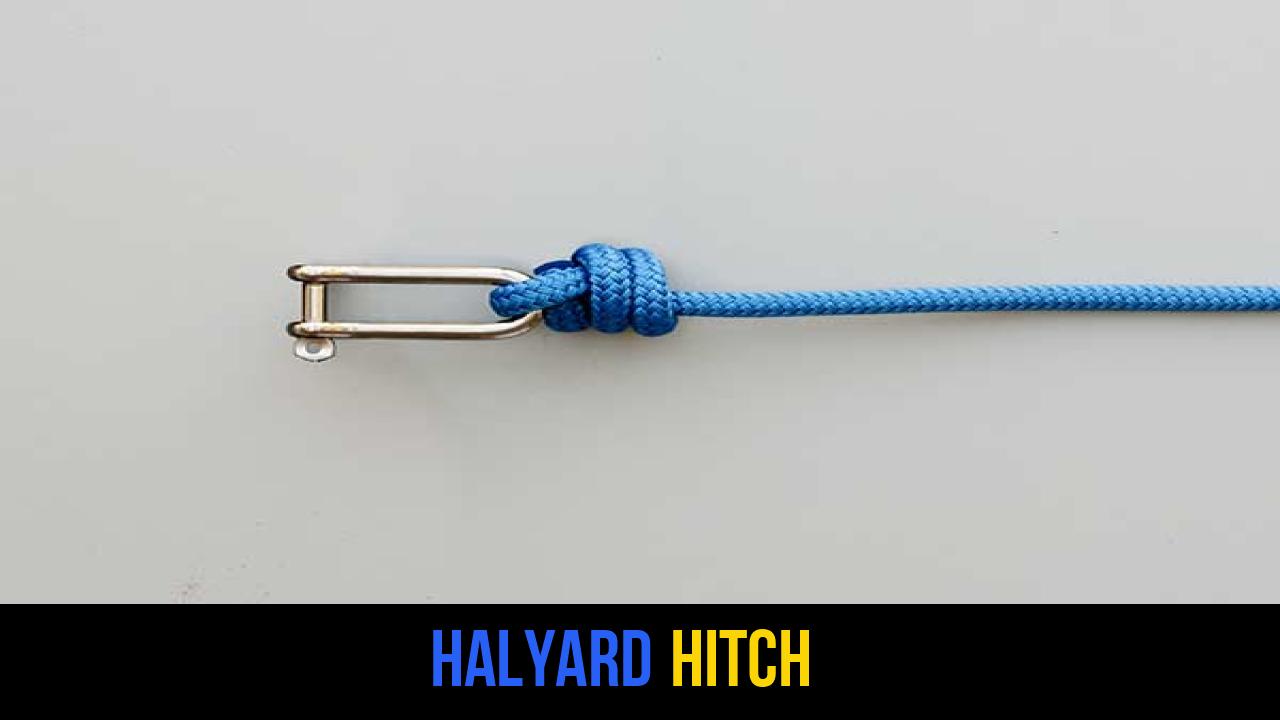
In the world of maritime tradition and technical rigging, few knots are as indispensable as the Halyard Hitch. Whether you are a seasoned sailor preparing for a blue-water crossing or an outdoor enthusiast looking to refine your rope knots repertoire, mastering this specific hitch is a rite of passage. The Halyard Hitch is celebrated for its compact profile and its remarkable ability to remain secure under the constant vibration and tension typical of a sailing environment.
Unlike bulkier knots that can get caught in blocks or sheaves, the Halyard Hitch is designed to sit tight against a shackle, providing a streamlined connection that maximizes the "hoist" of a sail. In this comprehensive guide, we will explore the mechanics, applications, and precise methodology required to execute this knot perfectly every time.
Alternative Names: Shackle Hitch, Buntline Halyard Hitch, Sail Hitch.
What Is a Halyard Hitch?
The Halyard Hitch is a specialized terminal knot used primarily in the nautical world to attach a halyard (the rope used to raise a sail) to a shackle or a headboard. Technically, it is a variation of a Buntline Hitch, but it is specifically tailored for high-tension applications where space is at a premium.
Practical Uses in the Modern World
While its origins are firmly rooted in the golden age of sail, the Halyard Hitch remains highly relevant today. Its primary function is to provide a "set-and-forget" connection. Once tightened, the knot becomes extremely difficult to undo, which is exactly what you want when your mainsail is at the top of a 50-foot mast in a gale.
Beyond the marina, this knot is a staple in various outdoor rope techniques. It is used by arborists for light rigging, by campers for creating semi-permanent tension lines, and in general utility where a rope needs to be secured permanently to a ring or carabiner.
Why It Stands Out
The beauty of the Halyard Hitch lies in its self-binding nature. As tension is applied to the standing end, the wraps around the standing part compress the tail, creating a mechanical lock. The more the rope pulls, the tighter the knot grips.
Materials and Tools Needed
To tie a secure and professional-grade Halyard Hitch, you need more than just a piece of string. The quality of your materials directly impacts the safety and longevity of the knot.
1. Rope Selection
- Polyester (Dacron): This is the standard for most halyards. It offers low stretch and excellent UV resistance, making it perfect for the Halyard Hitch.
- High-Modulus Polyethylene (Dyneema/Spectra): For performance racing, these "super-fibers" are common. Note that they are very slippery, requiring extra care during the tightening phase.
- Nylon: While strong, nylon stretches significantly. It is rarely used for halyards but can be used for practice or general utility hitches.
2. The Hardware
- Shackle: Typically a D-shackle or a snap shackle. The Halyard Hitch is designed to be tied directly onto the bail of the shackle.
3. Essential Tools
- Marlinspike or Fid: Useful for tucking ends or loosening the knot if it has been under extreme load for years.
- Sharp Knife: For a clean trim.
- Butane Torch or Lighter: Essential for the final step of heat-sealing synthetic fibers to prevent fraying.
How to Tie Halyard Hitch?
Follow these steps precisely to ensure the knot is secure and follows professional standards. This method focuses on creating the necessary friction to prevent the tail from slipping under load.
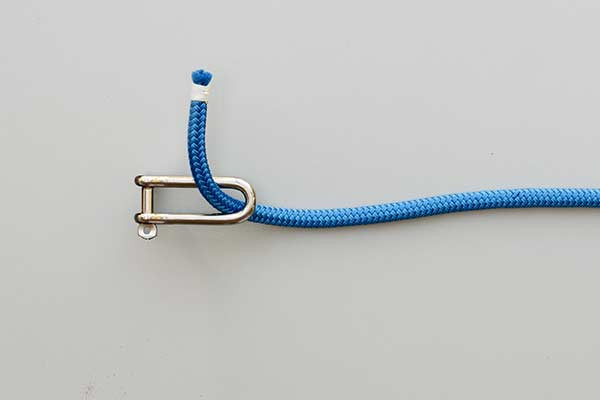
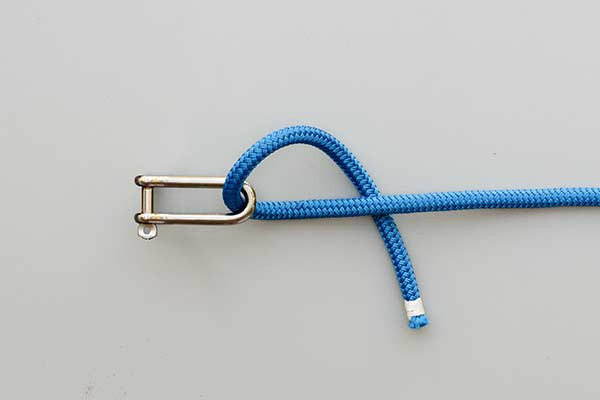
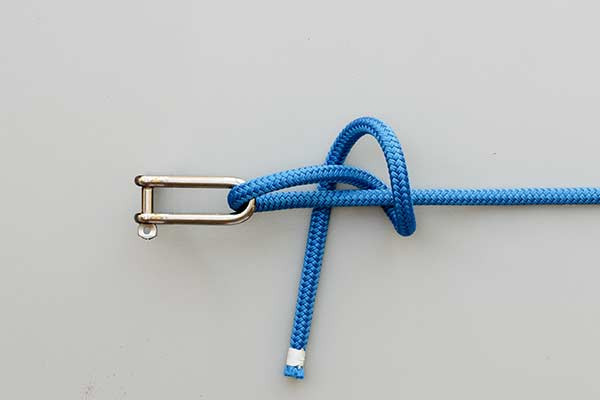
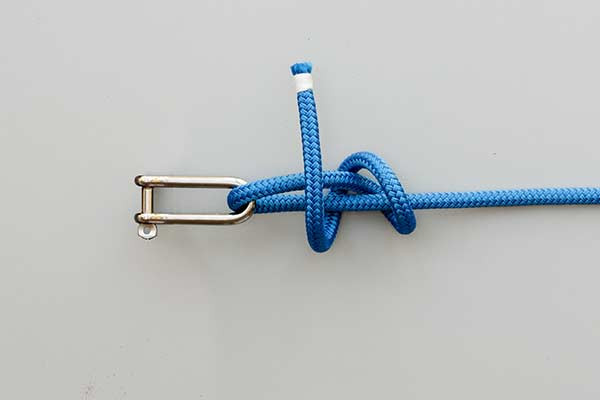
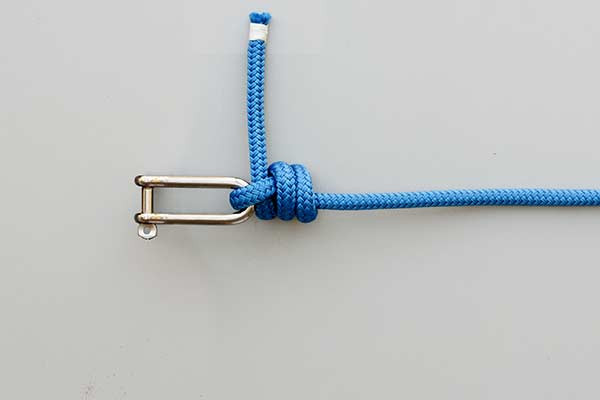
- Pass the tail through the shackle and then twice around the standing end.
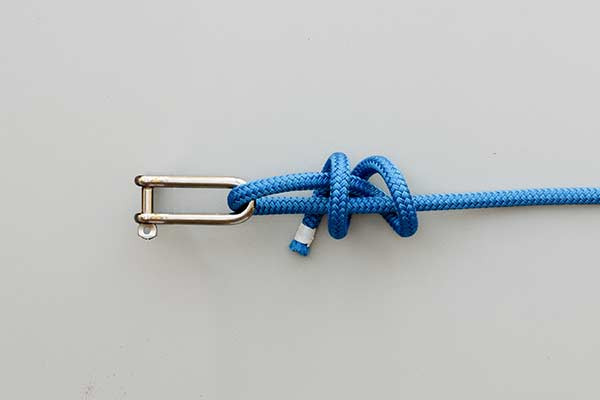
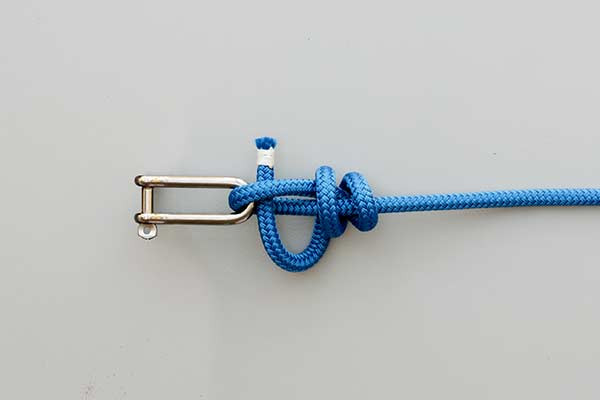
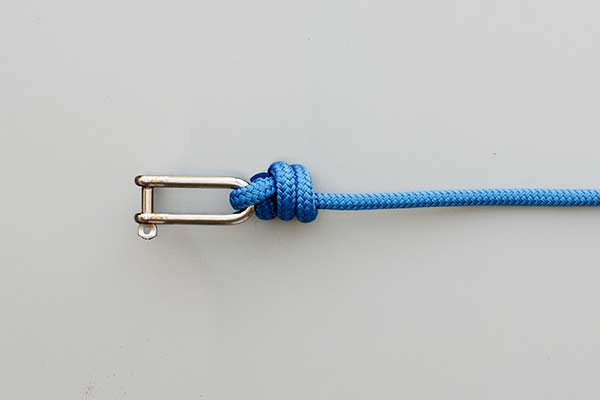
- Pass the end through the loop beside the shackle and pull very tight.
- Trim and heat-seal the end close to the knot.
Technical Breakdown of the Steps
While the instructions above are the gold standard for execution, understanding the why behind each movement can help you master the technique.
The "Twice Around" Logic
Passing the tail twice around the standing end is what differentiates this from a simple hitch. These two wraps create a "clove hitch" structure around the standing part of the rope. This double wrap provides the surface area necessary for friction to take hold. If you only went around once, the knot would likely slip under the high loads of a flapping sail.
The Critical "Pull Very Tight"
Because the Halyard Hitch is often intended to stay in place for an entire season (or longer), it must be "set" with significant force. In professional rigging, this is often done by putting the line on a winch and tensioning it until the knot is rock-solid. For manual applications, use a pair of pliers on the tail or a marlinspike to ensure no slack remains in the internal loops.
The Finish: Trimming and Sealing
Since this knot is permanent, a long tail is a liability—it can snag on rigging or spreaders. By trimming and heat-sealing the end close to the knot, you create a "mushroom" head on the rope fibers. This acts as a final mechanical stop, ensuring the tail cannot accidentally pull back through the knot.

Common Mistakes to Avoid
Even experienced riggers can occasionally fail when tying rope knots if they become complacent. Here are the most frequent errors seen with the Halyard Hitch:
- Incorrect Wrap Direction: Ensure the wraps around the standing part are consistent. Crossing the rope over itself in the wrong direction can lead to a knot that capsizes (deforms) under load.
- Insufficient Tensioning: If the knot is not pulled "very tight" during the initial tie, it may shift later. This shifting can cause chafe, which eventually weakens the rope fibers.
- Neglecting the Heat-Seal: In modern braided ropes, the outer sheath and inner core can slide independently. Failing to heat-seal the end allows the core to "milk" out of the sheath, potentially leading to knot failure.
- Using Natural Fibers: The Halyard Hitch is not well-suited for Manila or Sisal rope. These fibers are too brittle and thick, preventing the knot from seating properly against the shackle.
Related Knots and Splicing
Understanding how the Halyard Hitch fits into the wider world of outdoor rope techniques involves looking at its "relatives."
- Buntline Hitch: A very similar knot used for securing lines to rings. It is essentially a clove hitch tied around the standing part, known for its security.
- Bowline: The "King of Knots." While more famous, it is much bulkier than the Halyard Hitch and can catch on equipment when used at the head of a sail.
- Anchor Bend: A robust knot for attaching a rope to an anchor or a heavy ring. It involves an extra turn around the hardware for added chafe resistance.
- Eye Splice: The professional alternative to the Halyard Hitch. A splice is stronger but permanent and requires much more time and skill to execute.
Final Words
The Halyard Hitch is a testament to the efficiency of traditional maritime engineering. It is a compact, incredibly strong, and reliable method for securing lines under high-load conditions. By following the precise steps of passing the tail through the shackle, wrapping the standing end twice, and finishing with a tight pull and a heat-seal, you ensure a professional result that stands up to the elements.
Whether you are rigging a sailboat or securing gear for an outdoor expedition, the Halyard Hitch is a vital addition to your toolkit of rope knots. Practice it until the movements become second nature, and you will have a dependable connection that you can trust in even the harshest conditions.
Remember, in the world of outdoor rope techniques, a knot is only as good as the person who ties it. Take your time, ensure your wraps are clean, and always prioritize safety by inspecting your knots regularly for wear and chafe.
