
In the world of technical rescue, mountaineering, and tactical fieldcraft, the ability to improvise is often the difference between a successful mission and a critical failure. While modern commercial climbing harnesses are the gold standard for safety and comfort, there are moments—emergency evacuations, unexpected equipment loss, or rapid extraction scenarios—where a specialized harness is simply not available. This is where the Hasty Harness becomes an indispensable tool in your repertoire of rope knots and outdoor rope techniques.
The Hasty Harness is a field-expedient solution designed to create a secure attachment point on a human subject using nothing more than a length of webbing or rope. It is prized for its speed of application and its ability to be constructed with minimal gear. However, because it is an improvised system, understanding the nuances of its construction and the physics of its load distribution is vital for any outdoor professional.
Alternative names for this technique include: Emergency Webbing Harness, Diaper Sling, Quick-Wrap Harness, and Improvised Rescue Seat.
What Is a Hasty Harness?
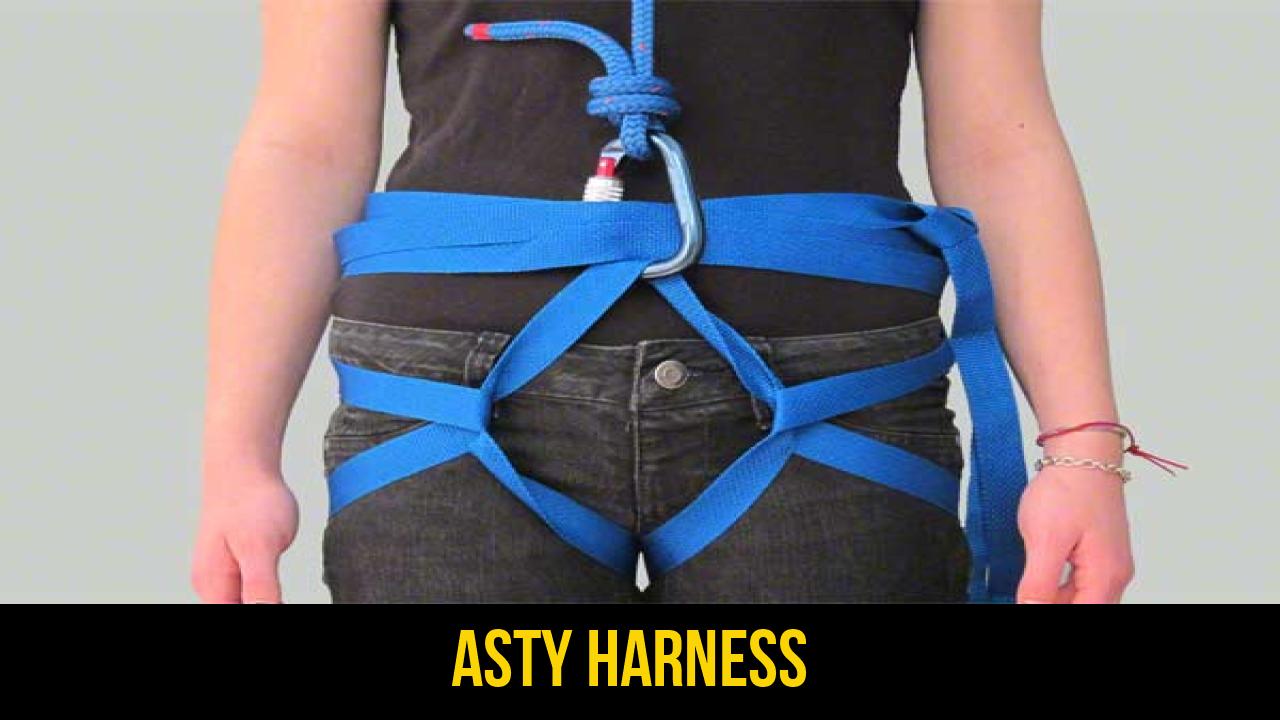
A Hasty Harness is a temporary, improvised seat harness used primarily for hoisting or lowering a person in emergency situations. Unlike a "Swiss Seat," which involves multiple intricate wraps and a more complex tying process, the Hasty Harness is designed for speed (hence the name "hasty").
Practical Uses
- Search and Rescue (SAR): When a victim needs to be lifted vertically out of a confined space or off a ledge and a full rescue litter is unavailable.
- Emergency Self-Rescue: If a climber loses their harness or needs to assist a partner who has suffered equipment failure.
- Tactical Extractions: Used by military personnel for rapid hoisting into helicopters or across high-line traverses.
- Scouting and Training: A fundamental skill taught to demonstrate the versatility of rope knots in survival situations.
While highly effective, it is important to remember that the Hasty Harness is not intended for long-term suspension. The lack of padding and the narrow surface area of the straps can lead to discomfort or restricted blood flow if the subject is suspended for an extended period.
Materials and Tools Needed
To construct a safe and reliable Hasty Harness, the choice of material is paramount. While the steps remain the same, the behavior of the material under tension can vary.
1. The Strap (Webbing or Rope)
- Tubular Webbing: This is the preferred material for a Hasty Harness. One-inch (25mm) nylon tubular webbing is standard in the rescue industry. It has a high tensile strength (usually rated around 4,000 lbs) and its flat profile distributes weight more evenly against the body than round rope.
- Static or Dynamic Rope: If webbing is unavailable, a 7mm to 11mm rope can be used. Note that round rope will "bite" into the legs and waist more significantly than webbing, increasing discomfort.
- Length: You typically need between 15 and 20 feet (4.5 to 6 meters) of material to ensure there is enough length to wrap the waist and secure the knots.
2. Hardware
- Locking Carabiner: A high-strength (minimum 22kN) locking carabiner is essential. It serves as the primary connection point between the harness and the lifting line. Using a non-locking carabiner is a major safety risk as the gate could be forced open by the webbing or the subject’s body.
3. Personal Protective Equipment (PPE)
- As with all outdoor rope techniques, wearing gloves can prevent rope burn during the tying process, and ensuring the subject’s clothing is tucked in will prevent skin chafing.
How to Tie a Hasty Harness?
Follow these steps exactly to ensure the harness is configured according to standard emergency protocols. Precision in the sequence is vital for the structural integrity of the seat.
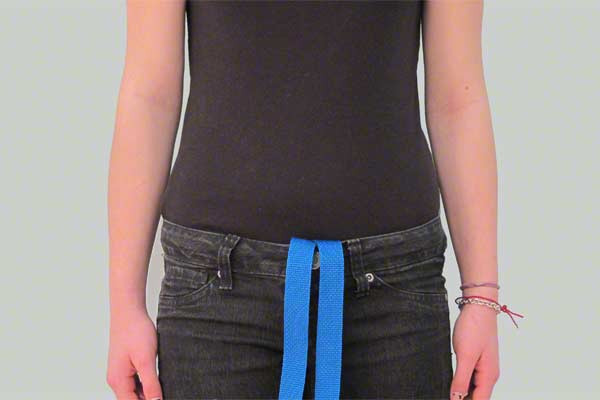
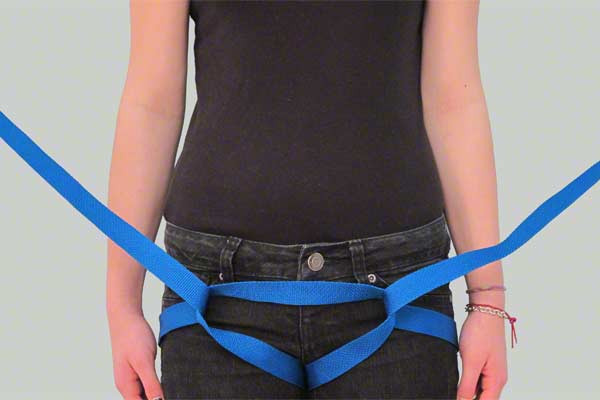
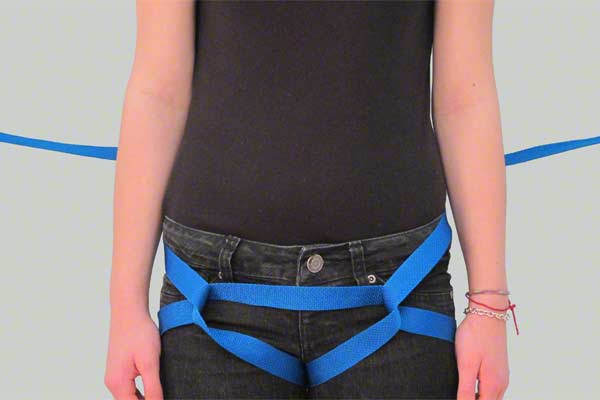
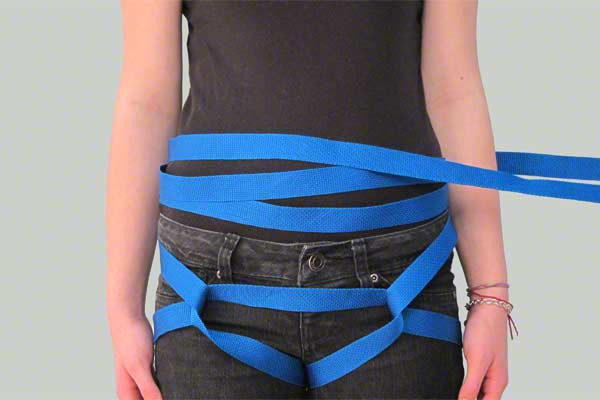
- Tuck a loop of the strap into the waistband.
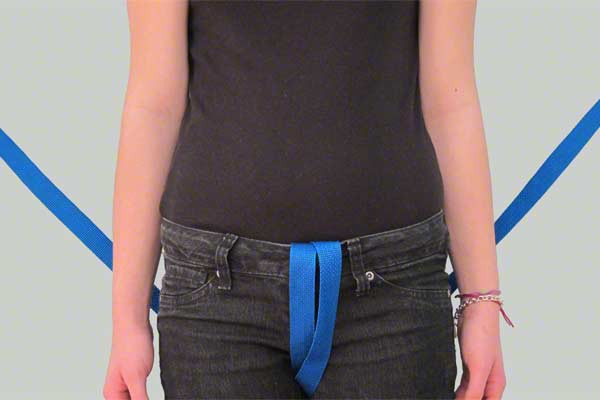
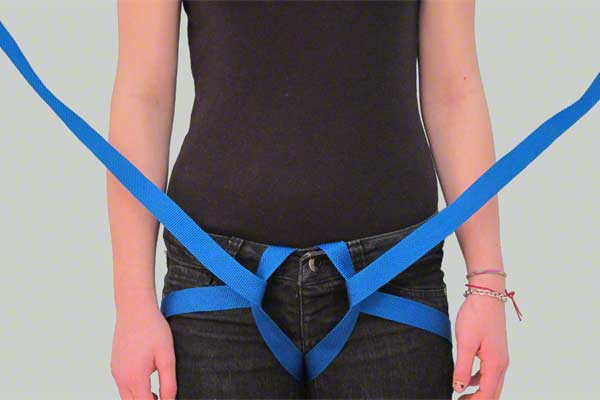
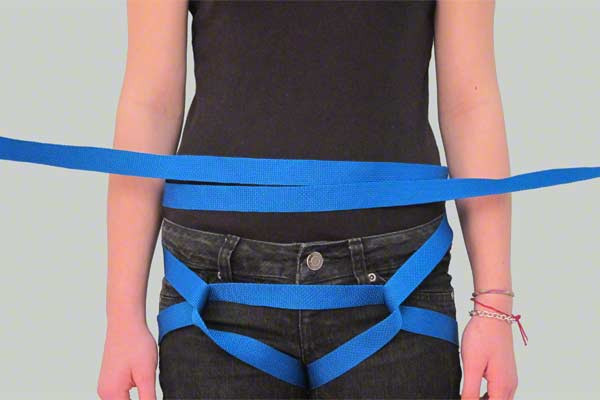
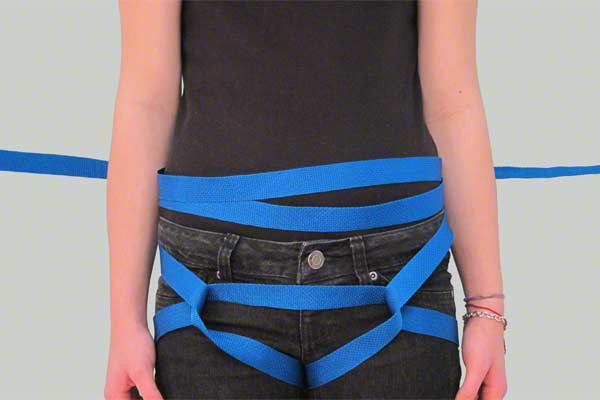
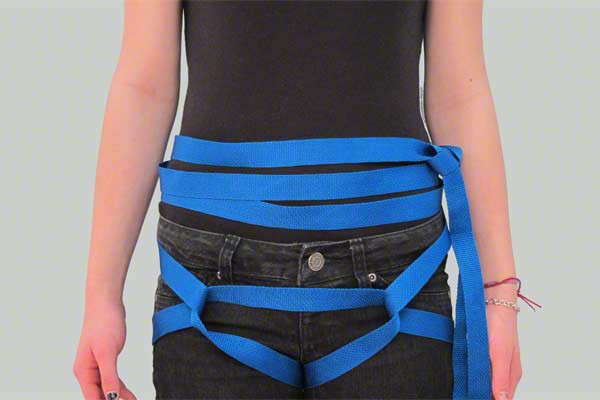
- Pass both ends back between the legs, around the thighs, through the initial loop and around the waist to use up the strap.
- Secure it with a Square (Reef) knot backed up with Half Hitches.
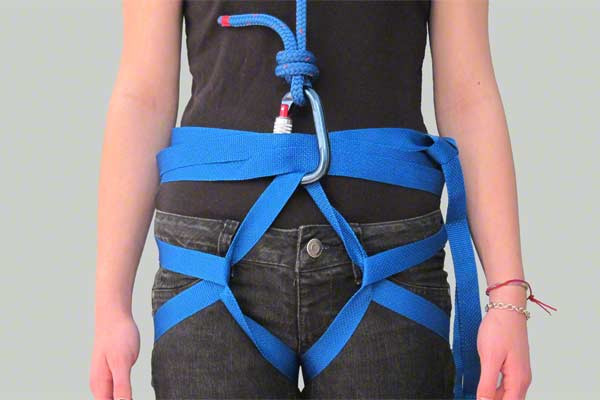
- Lift with a carabiner through the loop and waist turns.
Common Mistakes to Avoid
Even for those experienced in rope knots, the pressure of an emergency can lead to errors. Pay close attention to these common pitfalls:
1. Incorrect Knot Choice
The instruction specifies a Square (Reef) knot backed up with Half Hitches. A common mistake is tying a "Granny Knot" instead of a Square Knot. A Granny Knot is unstable and can slip under load. Furthermore, the Half Hitches are not optional; they are the primary safety mechanism that prevents the Square Knot from capsizing or untying.
2. Loose Wraps
If the strap is not pulled snug during the "around the thighs" and "around the waist" steps, the harness will shift when weight is applied. This can lead to the "initial loop" moving upward toward the chest, which is both uncomfortable and dangerous.
3. Improper Carabiner Clipping
The final step is critical. The carabiner must capture both the initial loop and the turns around the waist. If you only clip the loop, the harness may fail to distribute the weight to the waist, putting all the pressure on the leg loops and potentially causing the subject to flip backward.
4. Ignoring the "Bite"
When using rope instead of webbing, ensure the rope is positioned over clothing. Direct contact with skin under tension can cause "rope burn" or bruising.
Related Knots and Outdoor Rope Techniques
Understanding the Hasty Harness is just one part of a comprehensive rope-work skillset. Here are several related knots that complement this technique:
- Bowline: A classic loop knot used for securing a line around an object; it is known for being easy to tie and untie after loading.
- Figure-Eight Follow-Through: The gold standard for tying into a climbing harness, providing a strong, visually easy-to-inspect connection.
- Water Knot: Specifically used for joining two ends of webbing together, making it essential for creating slings or extending harness straps.
- Swiss Seat: A more complex improvised harness that provides greater stability than the Hasty Harness by using multiple wraps and a dedicated seat structure.
- Munter Hitch: A friction hitch used by climbers and rescuers for belaying or rappelling without a dedicated mechanical device.
Technical Insights: The Physics of the Hasty Harness
As an expert gear specialist, it is important to understand why the Hasty Harness works. The design utilizes the concept of load distribution. By passing the webbing between the legs and around the thighs, the harness creates a "cradle" for the pelvic bone.
When the carabiner lifts the "initial loop" and the "waist turns" simultaneously, the force is split between the lower extremities and the core of the body. This prevents the harness from acting like a simple belt, which would squeeze the diaphragm and restrict breathing.
Furthermore, the use of Half Hitches as a backup is a standard practice in outdoor rope techniques. A Square Knot is excellent for joining two ends of a rope that are under equal tension, but in a harness, the tension can be dynamic. The Half Hitches ensure that even if the main knot is jarred, the bitter ends of the strap remain secure.
Final Words
The Hasty Harness is a testament to the power of simplicity in survival and rescue scenarios. While it should never replace a UIAA-certified climbing harness for recreational use, its value in a crisis cannot be overstated. By mastering the sequence—tucking the loop, wrapping the thighs, securing the waist with a Square Knot and Half Hitches, and properly placing the carabiner—you equip yourself with a life-saving skill.
Practice this technique in a controlled environment with a partner before attempting to use it in the field. Remember: in the world of rope knots, proficiency is built through repetition and a relentless focus on safety. Whether you are an outdoor enthusiast or a professional rescuer, the Hasty Harness is a vital addition to your technical toolkit.
Stay safe, stay prepared, and always double-check your knots.
