
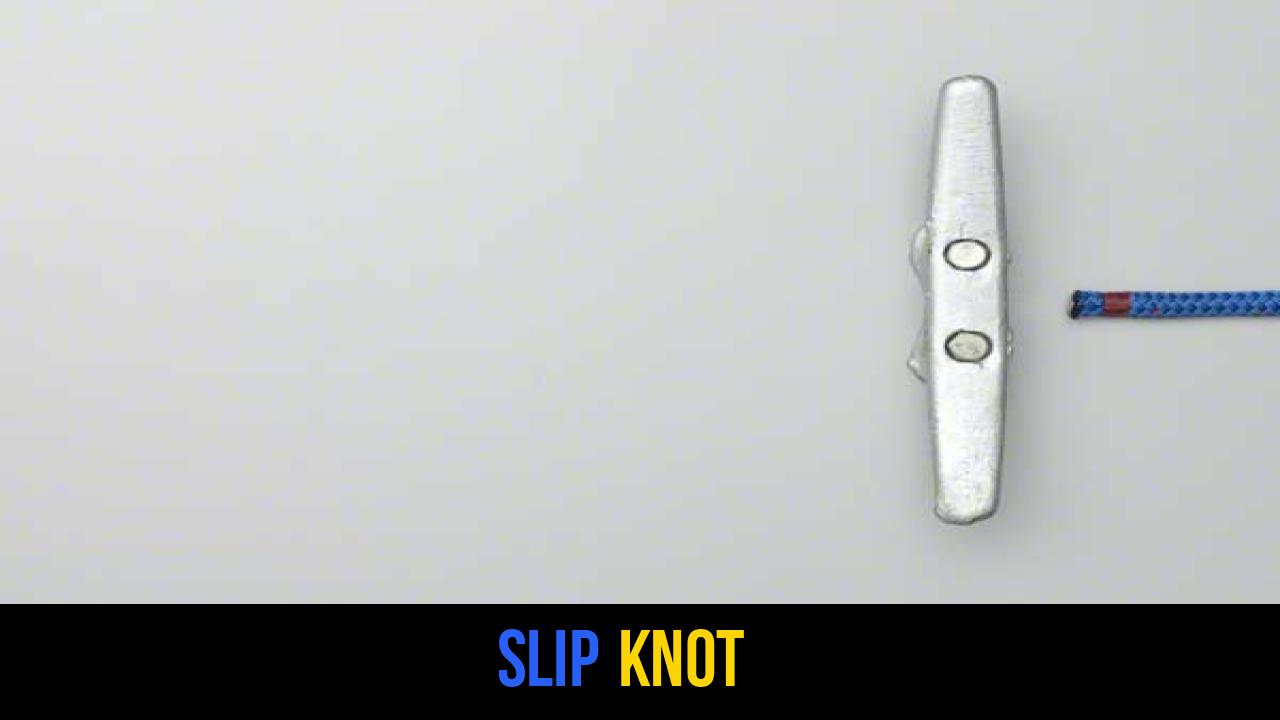
In the world of outdoor rope techniques, few maneuvers are as fundamental and universally applicable as the Slip Knot. Whether you are an experienced mountaineer, a weekend camper, or a DIY enthusiast, understanding how to manipulate cordage is a skill that pays dividends in safety, efficiency, and convenience. The Slip Knot knot is often one of the first lessons in any survival or scouting curriculum because of its simplicity and its "quick-release" nature.
Knots serve as the primary interface between human intent and the physical environment. In a wilderness setting, a knot can be the difference between a secure shelter and a collapsed tent. The Slip Knot, specifically, is prized for its ability to be tied in seconds and untied even faster. It belongs to a family of knots that rely on a "bight" (a U-shaped curve in the rope) to create a temporary hold that can be collapsed with a single tug on the working end.
Throughout this guide, we will explore the technical nuances of this knot, where it excels, and the specific steps required to master it. By the end of this article, you will not only know how to tie it but also understand the mechanics that make it a staple in rope knots education.
Alternative Names: Running Knot, Simple Slip Loop, Overhand Slip Knot, Quick-Release Loop.
What Is a Slip Knot?
At its core, a Slip Knot is a variation of the basic overhand knot. However, instead of passing the entire end of the rope through the loop, you pass a bight (a fold of rope) through it. This creates a loop that can slide along the standing part of the rope or be pulled completely free with a sharp tug.
Definition and Mechanics
The Slip Knot is technically a "hitch" when tied around an object, but it is most commonly categorized as a sliding loop knot. Its primary mechanical characteristic is that tension on the standing part of the rope will cause the loop to tighten around whatever it is holding. Conversely, because the knot is held together by the friction of the bight, pulling the "dead end" (the short end) causes the knot to instantly disintegrate—a feature known as "explosive" or "quick" release.
Practical Uses in the Outdoors
The versatility of this knot makes it indispensable for various outdoor rope techniques:
- Temporary Stopper Knot: As mentioned in our primary instruction, it can prevent a rope from sliding through a pulley or a grommet temporarily.
- Gear Organization: Use it to bundle kindling, secure a rolled-up sleeping pad, or hang a lightweight lantern from a ridgeline.
- Tensioning Lines: It can serve as a starting point for more complex tensioning systems like the Trucker’s Hitch.
- Fishing: Many anglers use variations of the slip knot to attach lures or create adjustable rigs.
- Crafting and Utility: From crochet beginnings to securing a load in a truck bed for a short distance, its applications are endless.
Materials and Tools Needed
While you can tie a Slip Knot with almost any flexible material—including string, yarn, or even a vine—certain materials are better suited for specific tasks in outdoor environments.
Rope Types
- Paracord (550 Cord): The gold standard for outdoor utility. Its nylon sheath and inner strands provide excellent friction for the Slip Knot knot to hold securely while remaining easy to release.
- Static Rope: If you are using the knot as a temporary stopper in a hauling system, a low-stretch static rope is ideal.
- Natural Fibers (Hemp/Cotton): These ropes have high surface friction, which makes the knot very "bitey." However, they can be harder to release if they get wet and the fibers swell.
- Synthetic Polypropylene: Often used in marine environments, these are slick. A slip knot here may require more "dressing" (tightening and straightening) to ensure it doesn’t slip prematurely.
Considerations
When choosing your cordage, consider the rope’s diameter and limpness. A very stiff, thick rope may not hold a small slip knot well, as the bight may tend to push itself back out of the loop. For the best results, use a rope that is supple enough to hold the tight turns of an overhand structure.
How to Tie a Slip Knot?
To ensure the highest level of accuracy, the following instructions are provided exactly as per the technical source. Mastery of rope knots begins with following these precise movements.
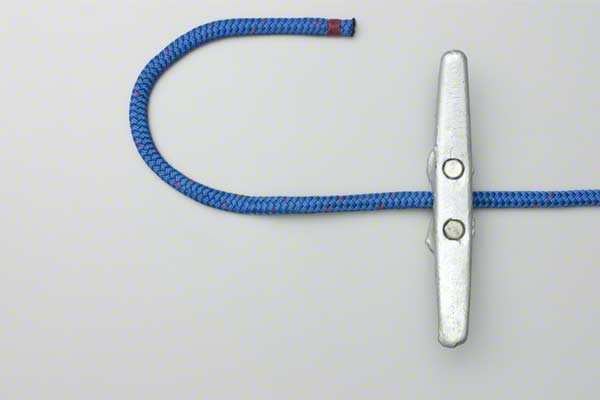
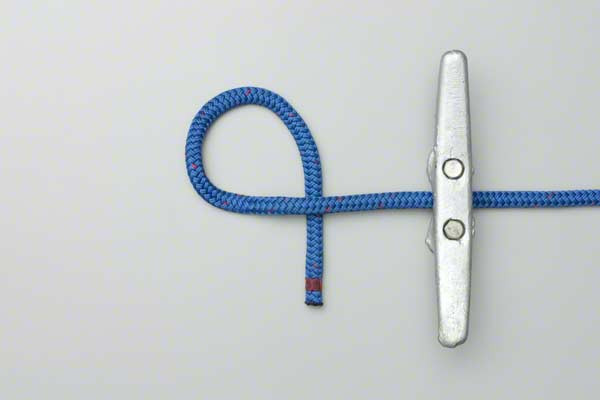
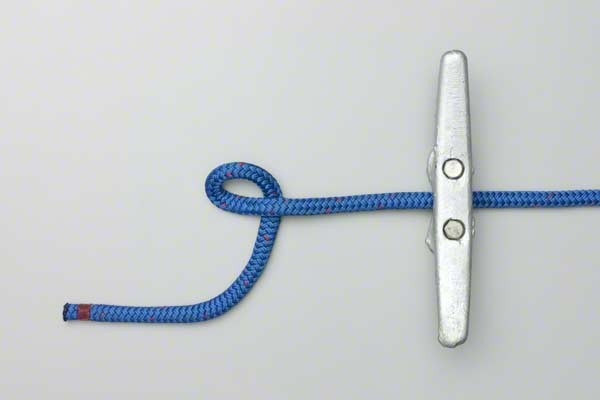
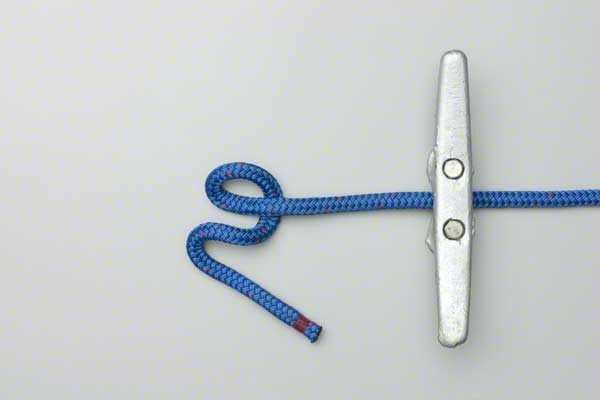
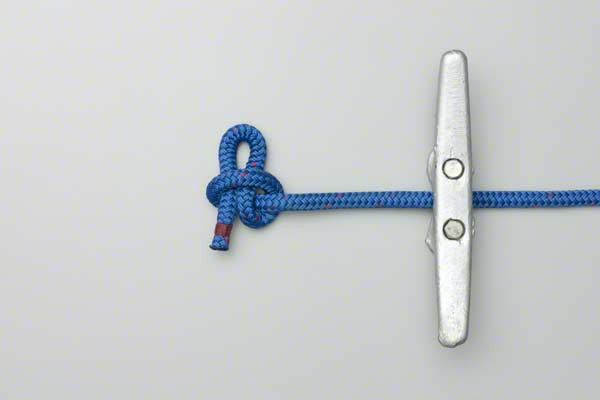
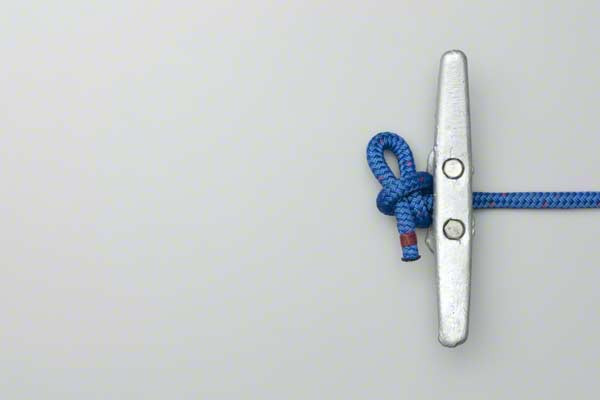
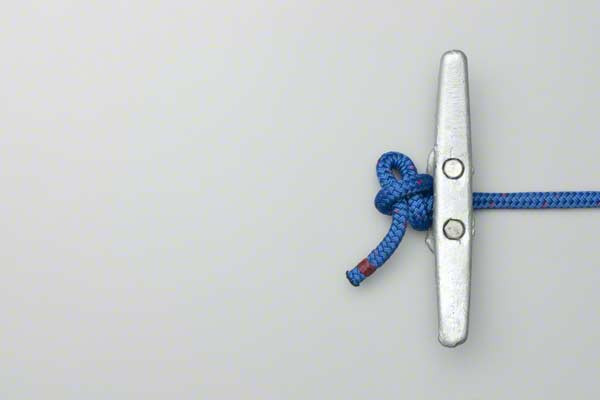
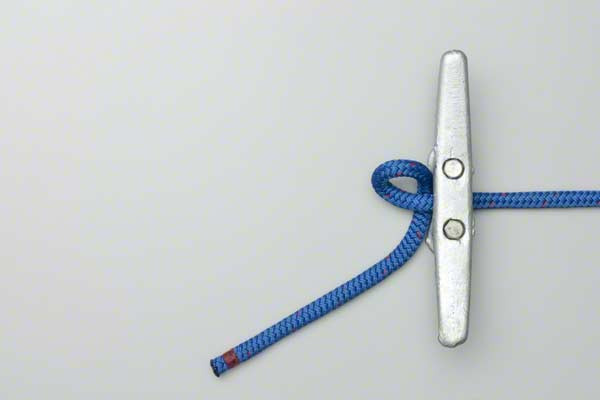
- Form a loop in the end of the rope.
- Prepare a bight in the short end.
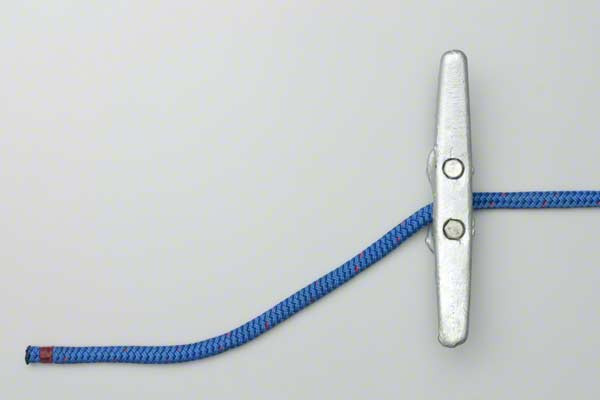
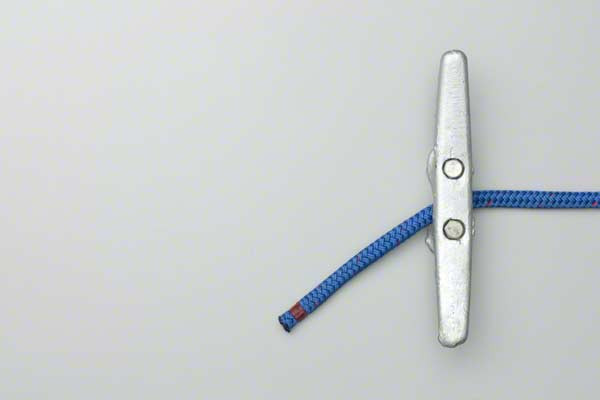
- Tuck the bight through the loop and tighten.
- The knot can be used as a temporary stopper knot.
Common Mistakes to Avoid
Even a knot as simple as the Slip Knot can be tied incorrectly, leading to potential failure or safety hazards. Here are the most common errors seen by instructors of outdoor rope techniques.
1. Tucking the Standing End Instead of the Short End
If you tuck a bight from the long (standing) end of the rope through the loop instead of the short end, you have technically created a "Noose" or a "Slipping Overhand." While they look similar, the mechanical behavior is different. Ensure you are using the short end to form your bight to maintain the true slip knot structure.
2. Failure to "Dress" the Knot
"Dressing" a knot means straightening the strands so they lie parallel and tightening them so the friction is maximized. A loose Slip Knot can accidentally snag on a branch or piece of gear and pull itself untied before you want it to. Always pull the bight and the standing part simultaneously to seat the knot firmly.
3. Using it for Critical Loads
The Slip Knot is a temporary solution. It should never be used for life-critical applications such as climbing, rappelling, or securing heavy loads over people. Because it is designed to release easily, any accidental tug on the short end could cause the entire system to fail instantly.
4. Ignoring Rope Memory
If you are using a brand-new synthetic rope that has been coiled for a long time, the "memory" of the rope might cause the loop to twist. This can make the bight difficult to tuck or cause the knot to capsize (deform) under tension.
Related Knots and Splicing
To become a true expert in rope knots, you should understand how the Slip Knot relates to other common hitches and loops.
- Overhand Knot: The simplest stopper knot, forming the basis for many more complex hitches and loops.
- Figure-Eight Knot: A reliable stopper knot that is easy to untie after being heavily loaded, unlike the overhand.
- Bowline: Known as the "King of Knots," it creates a fixed loop at the end of a rope that won’t slip or bind.
- Clove Hitch: A quick way to secure a rope to a post or spar, though it can slip under heavy, fluctuating loads.
- Noose Knot: A sliding loop that tightens under load but is structured so the "slip" occurs on the standing part rather than the end.
Final Words
The Slip Knot is a testament to the idea that the most effective tools are often the simplest. In the context of outdoor rope techniques, it serves as a foundational building block for more complex rigging and a standalone hero for quick, temporary tasks. By following the steps to form a loop, prepare a bight, and tuck it through, you gain a versatile tool that can function as a temporary stopper knot or a quick-release tie-down.
As with all rope knots, proficiency comes with practice. We recommend grabbing a length of paracord and tying this knot fifty times while watching your favorite outdoor documentary. Soon, the movements will be muscle memory, and you’ll find yourself reaching for the Slip Knot in dozens of daily scenarios. Stay safe, keep your lines tensioned, and always double-check your work before trusting a knot with your gear.
