
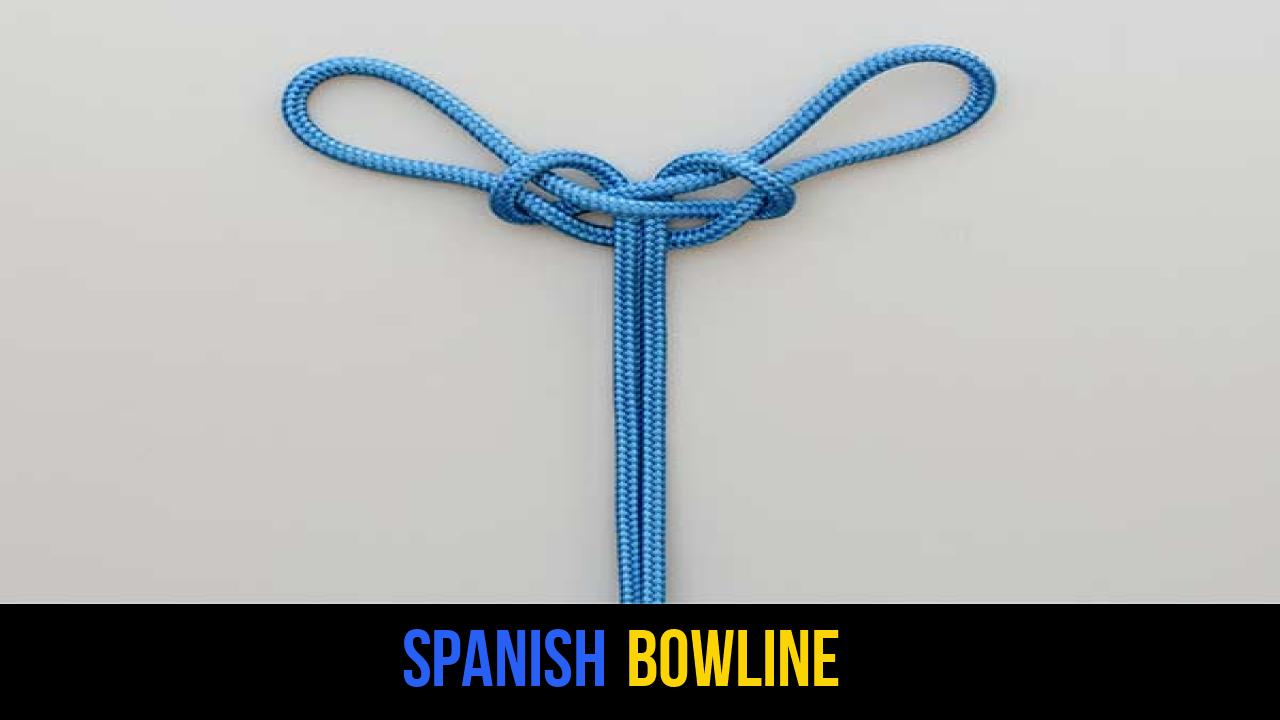
In the world of rope knots, few configurations are as visually distinct and functionally specialized as the Spanish Bowline. This knot is a variant of the traditional bowline, but it offers a unique advantage: it creates two fixed loops in the middle or at the end of a rope. Historically, this knot has been a staple in maritime and rescue operations, serving as a makeshift "bosun’s chair" or a harness for hoisting individuals or equipment.
As an expert in outdoor rope techniques, I have seen the Spanish Bowline save time and provide security in complex rigging scenarios. Unlike a standard bowline, which provides a single loop, the Spanish Bowline’s dual loops allow for weight distribution across two points—such as two legs or under the arms and back—making it a preferred choice for emergency stabilization when specialized harnesses are unavailable.
Whether you are a scout, an aspiring arborist, or a maritime enthusiast, mastering this knot is a rite of passage. It demonstrates a deep understanding of rope geometry and load management. In the following sections, we will explore the history, materials, and precise method required to secure this essential knot.
Alternative Names: Boza Knot, Spanish Chair Knot, Double-Loop Bowline (Spanish variation).
What Is a Spanish Bowline?
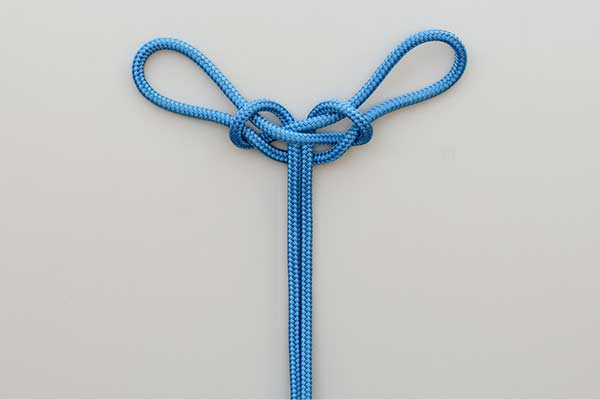
The Spanish Bowline knot is defined as a fixed-loop knot that produces two independent, non-slipping loops. While it shares a name with the common bowline, its construction method is significantly different, involving a unique folding and tucking process that creates a symmetrical and aesthetically pleasing finish.
Practical Applications
The primary utility of the Spanish Bowline lies in its ability to support weight in two places simultaneously.
- Emergency Rescue: In a "man overboard" or cliff-side recovery scenario, one loop can be placed under the person’s armpits while the other is placed behind the knees, creating a stable, seated position.
- Hoisting Equipment: It is frequently used to lift heavy tools or horizontal beams where two points of contact are necessary to maintain balance.
- Arboriculture: Climbers may use it as a secondary attachment point or for hauling gear into the canopy.
- Nautical Rigging: Sailors utilize it for temporary rigging where a secure, double-looped end is required in a single line.
Why It Matters
In the context of outdoor rope techniques, the Spanish Bowline is valued because it remains secure even when the loops are loaded differently. Furthermore, it is relatively easy to untie even after being subjected to heavy tension, a hallmark of all high-quality bowline variants.
Materials and Tools Needed
To tie a secure Spanish Bowline knot, you must select the appropriate rope based on your intended application. Not all ropes are created equal, and the friction characteristics of the material will influence how the knot "sets."
1. Rope Types
- Static Kernmantle: Ideal for rescue and hauling. This rope has low stretch, ensuring the loops remain the size you intended under load.
- Three-Strand Twisted Nylon: The traditional choice for maritime use. The texture of the strands helps "bite" into the knot, preventing slippage.
- Polyester/Dacron: Excellent for outdoor longevity due to UV resistance, though it can be slightly stiffer to dress (arrange neatly).
- Natural Fiber (Manila/Hemp): Great for practice and decorative knot work, but less reliable for modern safety-critical applications.
2. Rope Diameter
For practice, a 10mm to 12mm (3/8" to 1/2") diameter rope is recommended. This size is thick enough to see the architecture of the knot clearly but flexible enough to manipulate through the tucking stages.
3. Considerations
- Condition: Always inspect your rope for frays, "flat spots," or chemical damage before tying any load-bearing knot.
- Friction: If using high-tech, slippery ropes (like Dyneema or Spectra), be aware that the Spanish Bowline may require extra "dressing" or a finishing stopper knot to ensure it does not slip under extreme tension.
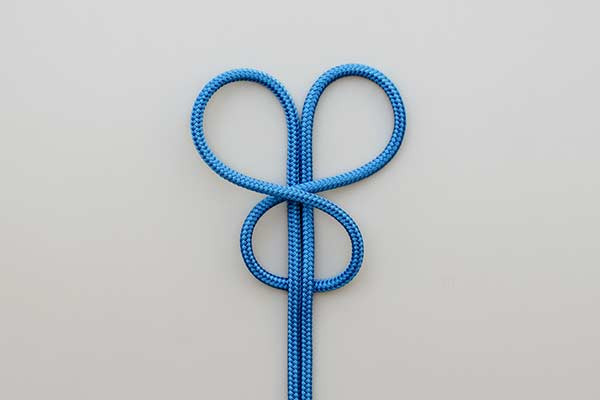
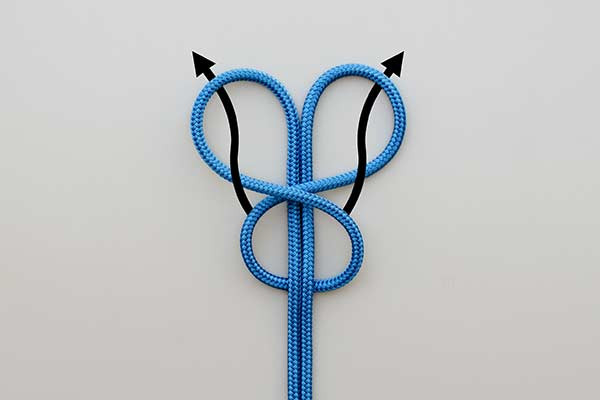
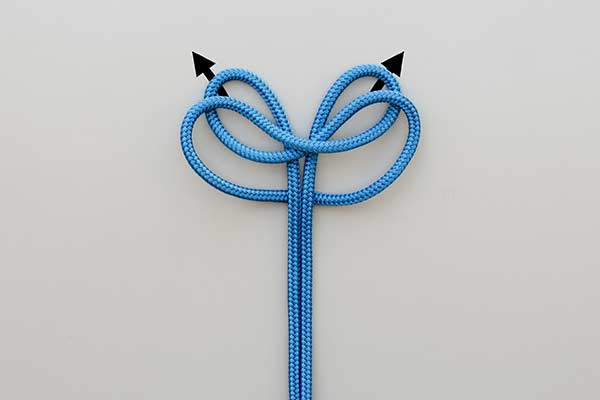
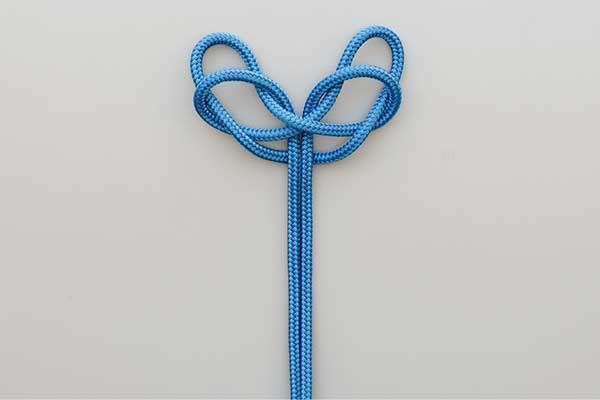
How to Tie Spanish Bowline?
To ensure the safety and integrity of the knot, follow these steps precisely. This method focuses on creating the loops through a series of folds and tucks that result in the classic dual-loop structure.
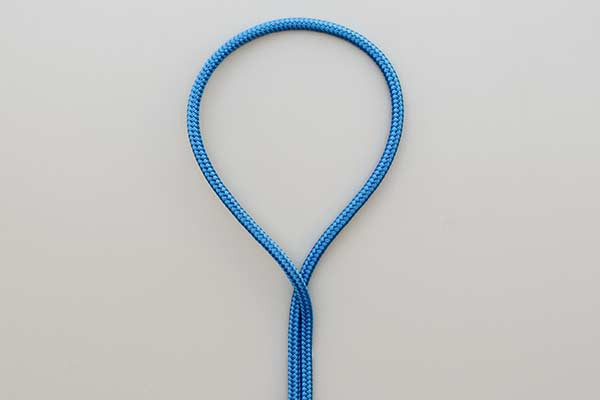
- Use the rope to form a loop.
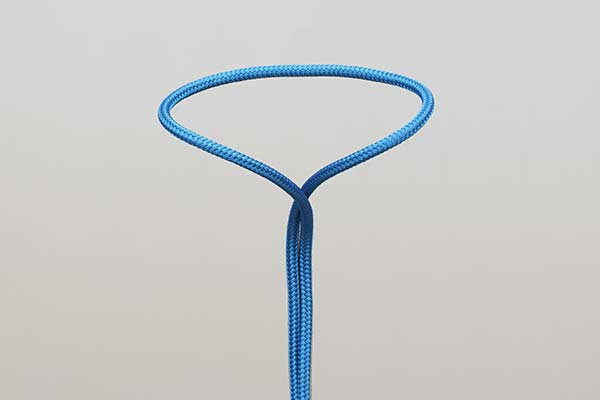
- Tuck the loop under the standing ends.
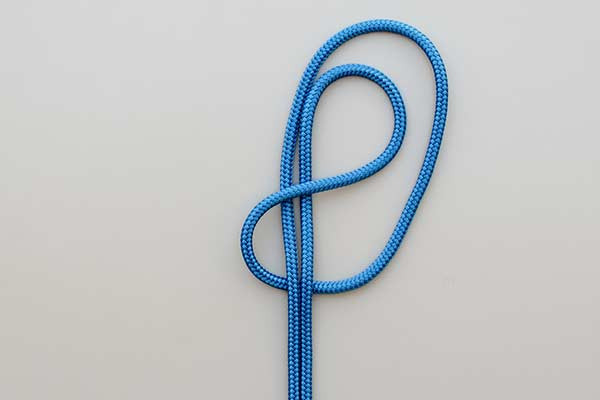
- Fold one half across the center and then fold the opposite half across to form two side loops and one central loop.
- Tuck each side of the central loop up through the side loops.
- Pull them through and tighten them.

Common Mistakes to Avoid
Even experienced practitioners can make errors when tying the Spanish Bowline. Because of its symmetrical nature, a small misalignment can lead to a knot that looks correct but fails under load.
1. Uneven Loop Sizes
One of the most frequent mistakes is failing to balance the loops during the final tightening phase. If one loop is significantly larger than the other, the load will shift, potentially causing the person or equipment being hoisted to tilt dangerously.
2. Crossing the Central Loop Incorrectly
In step 3, the folding of the "half across the center" is critical. If the folds are made in the wrong direction, the central loop will not properly lock the side loops when tucked. Ensure the folds create a clear "pretzel" shape before the final tucks.
3. Failure to "Dress" the Knot
"Dressing" a knot involves straightening the strands so they lie parallel and flat. A messy Spanish Bowline knot can create internal friction points that weaken the rope fibers over time. Always pull each of the four exiting ends (two loops and two standing ends) individually to seat the knot firmly.
4. Ignoring the Standing End Tension
The Spanish Bowline is most secure when both standing ends are kept under similar tension. If you are using it in a middle-of-the-line configuration, ensure both sides of the rope are anchored or held securely.
Related Knots and Splicing
Understanding the Spanish Bowline is often easier when you compare it to other rope knots in the same family. Here are a few related techniques:
- Bowline on a Bight: A fixed-loop knot tied in the middle of a rope that provides two loops, commonly used in climbing and rescue.
- Portuguese Bowline: A variant that allows the size of the two loops to be adjusted after the knot is tied, useful for fitting a harness to a person.
- French Bowline: Also known as a Rescue Bowline, it creates two loops that can be tightened independently to secure a person more snugly.
- Standard Bowline: The foundation of the family, creating a single, secure, non-slipping loop at the end of a line.
Final Words
The Spanish Bowline is more than just a decorative configuration; it is a vital tool in the arsenal of any serious outdoorsman or rescue professional. While it requires more practice than the standard bowline, its ability to provide two secure, fixed loops makes it indispensable for complex rigging and emergency safety.
By mastering these outdoor rope techniques, you increase your self-reliance in the field. Remember to always practice with non-load-bearing applications first, and always inspect your knots before putting them into service. The Spanish Bowline, when tied correctly, is a testament to the elegance and utility of traditional seamanship and modern safety practices.
Whether you are preparing for a sailing expedition or simply want to expand your knowledge of rope knots, the Spanish Bowline is a skill that, once learned, stays with you for a lifetime. Stay safe, keep your ropes dry, and always double-check your tucks!
