
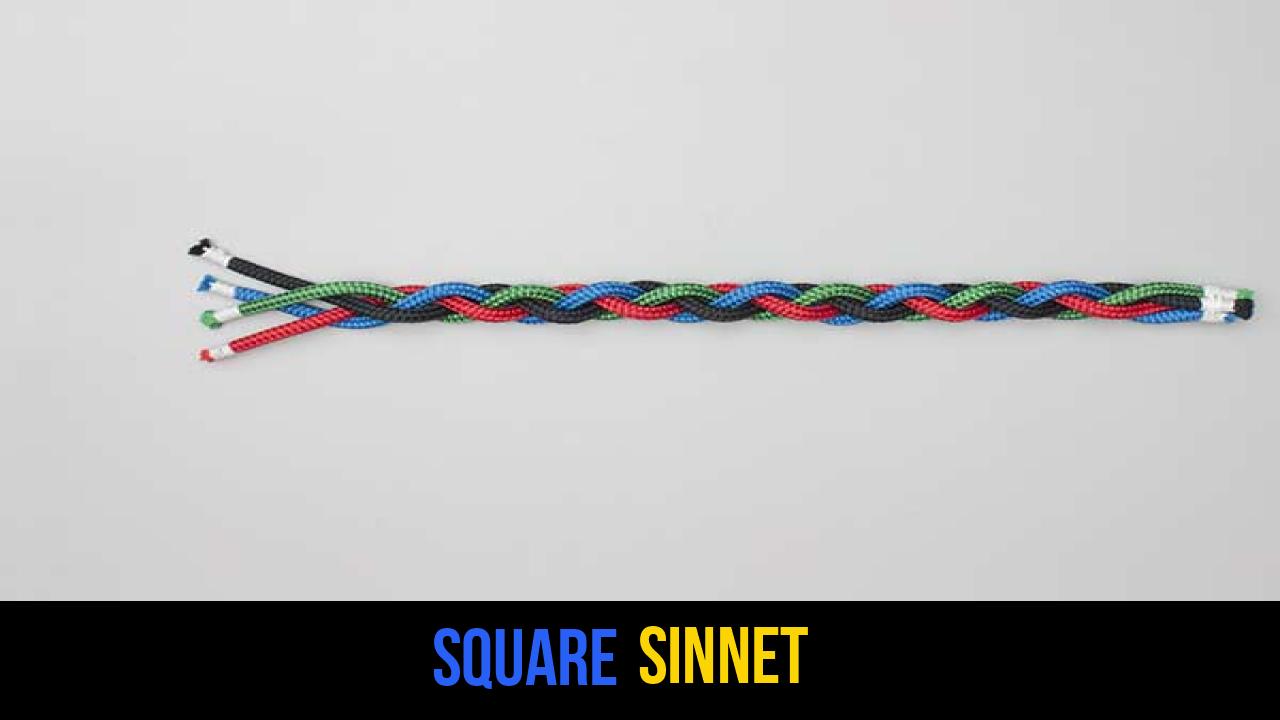
In the world of rope knots and marlingspike seamanship, few techniques offer the blend of structural integrity and aesthetic appeal found in the Square Sinnet. Whether you are a seasoned sailor, a tactical outdoor enthusiast, or a hobbyist working with paracord, mastering the Square Sinnet is a fundamental skill. This knot belongs to a family of "sinnets"—braided cordage created by plaiting three or more strands of rope together to create a thicker, stronger, and often more decorative line.
The Square Sinnet is particularly prized for its four-sided, architectural finish. Unlike standard flat braids, this technique builds volume, making it ideal for creating grips, lanyards, and heavy-duty utility cords. In the context of outdoor rope techniques, the ability to transform multiple thinner strands into a singular, robust handle can be a lifesaver or, at the very least, a significant convenience.
Commonly referred to by several names depending on the craft or industry, the Square Sinnet is a versatile staple in any knot-tyer’s repertoire.
Alternative Names: Box Knot, Crown Knot Sinnet, 4-Strand Braid, Square Braid, Scoubidou (in craft circles), and Macramé Square Knot.
What Is a Square Sinnet?
A Square Sinnet is a type of linear knotting produced by repeatedly tying a series of crown knots or similar crossings in a stacked fashion. The result is a solid, three-dimensional cord with a square cross-section. Because the strands are constantly interlocking at right angles, the resulting structure is incredibly stable and resistant to unraveling.
Practical Applications in the Outdoors
- Knife Fobs and Lanyards: One of the most common uses for the Square Sinnet in the survival community is creating fobs for fixed-blade knives or folding tools. It provides extra grip and makes the tool easier to retrieve from a pocket or sheath.
- Zipper Pulls: For winter camping or tactical operations where gloves are worn, adding a Square Sinnet pull to jacket or tent zippers allows for much easier manipulation.
- Handle Wraps: While often used as a standalone cord, the logic of the Square Sinnet can be applied to wrap around a core, such as a hiking staff or a tool handle, providing a non-slip, ergonomic surface.
- Emergency Cordage Storage: Braiding several feet of paracord into a compact sinnet allows you to carry a significant amount of rope in a small, organized footprint.
Materials and Tools Needed
To achieve a professional-grade Square Sinnet knot, your choice of material is paramount. While the technique remains the same, the "feel" and durability of the finished product will vary based on the cordage used.
Rope Types
- Paracord (550 Cord): The gold standard for outdoor enthusiasts. It is nylon-based, slightly elastic, and comes in a vast array of colors. It is perfect for learning the Square Sinnet because the strands are distinct and easy to manipulate.
- Hemp or Jute: For a more traditional, nautical, or rustic look, natural fibers provide excellent friction and a classic aesthetic.
- Nylon or Polypropylene: These are excellent for marine environments where rot resistance is necessary, though they can be slippery to tie.
Essential Tools
- Sharp Scissors or a Knife: For clean cuts.
- Lighter or Torch: Essential for synthetic ropes to "whip" or melt the ends to prevent fraying.
- Fid or Marlinspike: While not strictly necessary for the Square Sinnet, these tools help in tightening the strands evenly if you are working with very tight tolerances.
- A Work Surface or Jig: For beginners, taping the "bound ends" to a table can help maintain tension while you learn the rhythm of the cross.
How to Tie Square Sinnet?
The following instructions provide the standard technical approach to constructing this knot. For the best results, ensure that you maintain even tension on all four strands throughout the process.
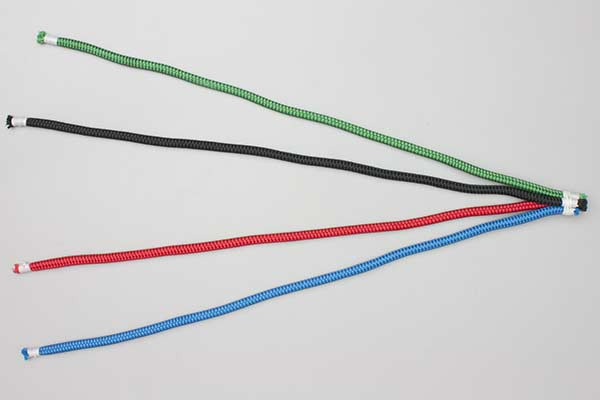
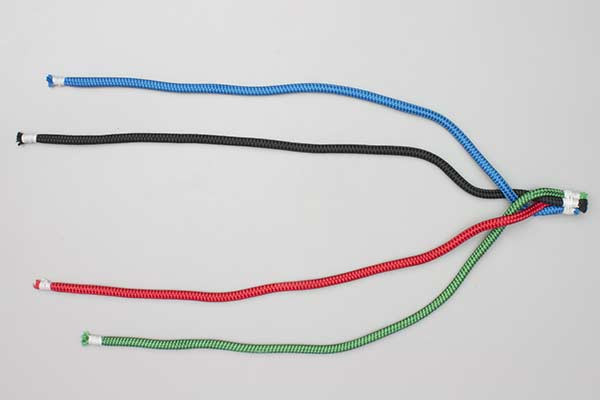
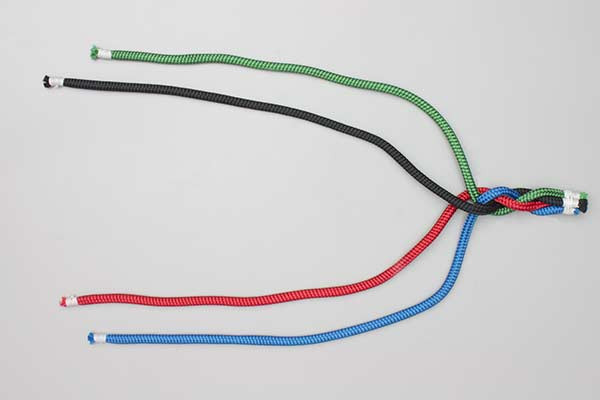
- Start with the ends bound together.
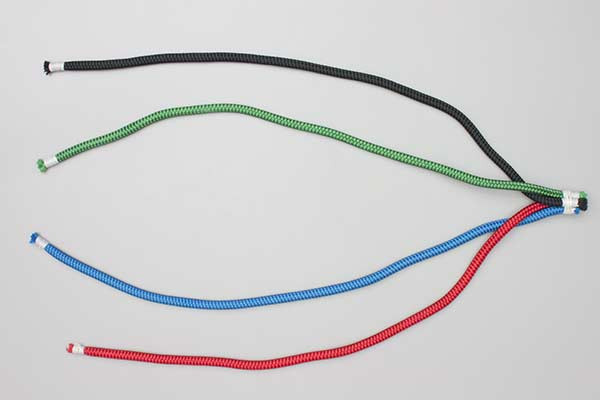
- Cross the first pair of lines in one direction and separate them to make a space.
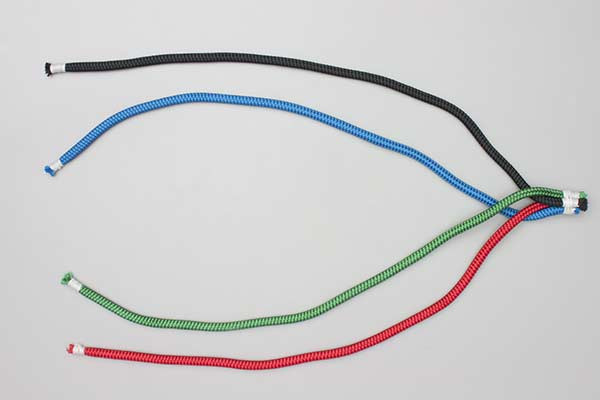
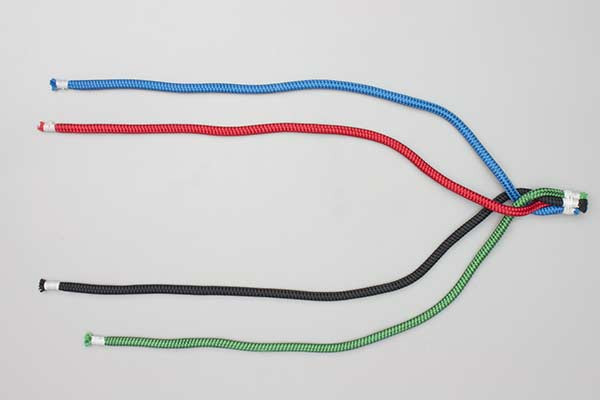
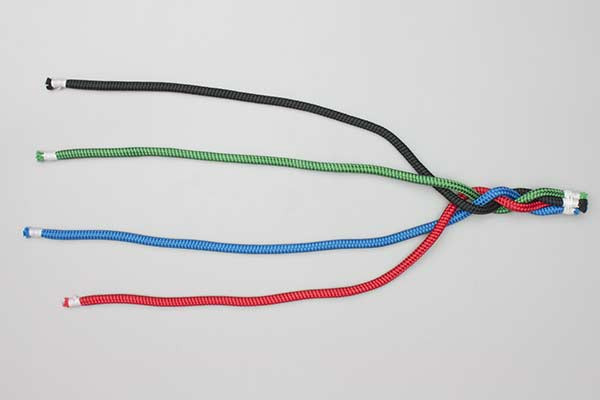
- Between them cross the second pair of lines in the opposite direction.
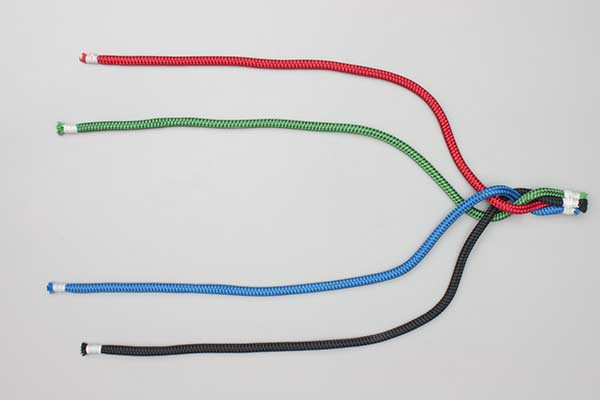
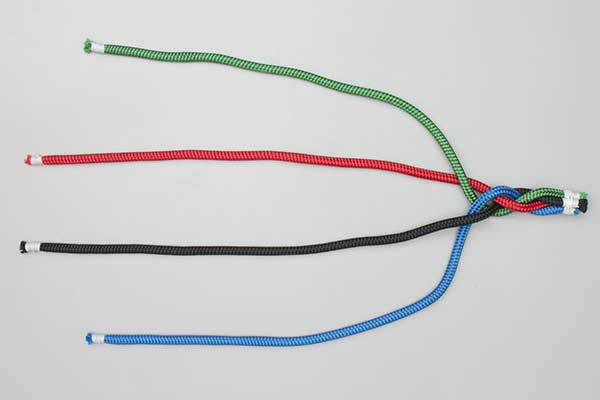
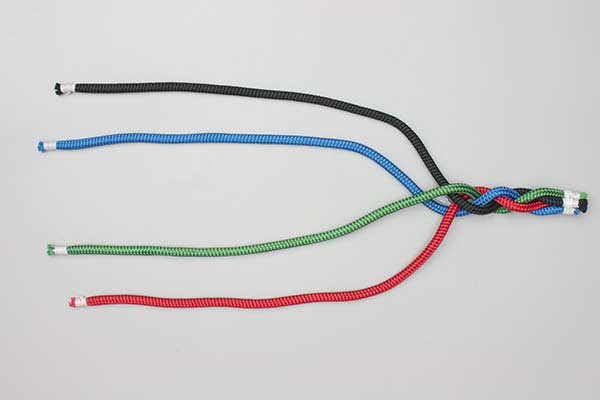
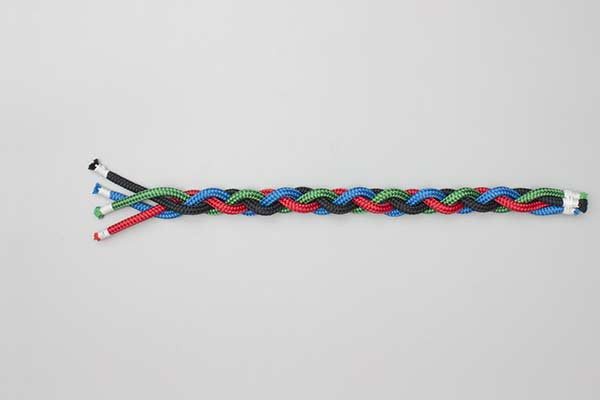
- Repeat with the first pair and then the second pair until you reach the intended length.
Pro Tip: When you "cross the first pair," you are essentially creating two loops. When you "cross the second pair" between them, you are weaving the strands through those loops. Pull all four ends simultaneously to "seat" the knot before starting the next repetition.
Common Mistakes to Avoid
Even for those experienced in rope knots, the Square Sinnet can sometimes result in a "twisted" or uneven appearance if certain precautions aren’t taken.
1. Uneven Tension
This is the most frequent error. If one strand is pulled tighter than the other three, the sinnet will begin to lean or curve. Always pull the four ends with equal force away from the center point of the braid.
2. Crossing in the Wrong Direction
The instructions specify crossing the second pair in the opposite direction. If you accidentally cross them in the same direction as the first pair every time, you will inadvertently create a Round Sinnet (a spiral pattern). While beautiful, it lacks the structural squareness of the intended knot.
3. Loose Starts
If the "bound ends" are not secured tightly at the beginning, the first few "tiers" of the sinnet will be wobbly. Ensure your anchor point is solid so you can pull against it to set the initial shape.
4. Overlapping Strands
In the heat of the process, it is easy to let one strand jump over another before it is crossed. This creates a "glitch" in the visual pattern. Periodically stop and inspect all four sides of the square to ensure the "bricks" of the braid are aligned.
Related Knots and Splicing
Understanding the Square Sinnet opens the door to a variety of other outdoor rope techniques. Here are a few related knots that complement this skill:
- Round Sinnet: A variation of the square version where strands are crossed in a circular sequence, resulting in a decorative spiral or cylindrical shape.
- Cobra Stitch (Solomon Bar): A flat, wide braid frequently used for survival bracelets; it uses a similar "over-under" logic but results in a 2D rather than 3D structure.
- Diamond Knot (Lanyard Knot): A complex stopper knot often used to finish a sinnet, providing a beautiful, bulbous end that prevents the braid from unraveling.
- Wall and Crown Knot: The individual component of the sinnet; learning to tie a single crown knot is the secret to understanding how the Square Sinnet stacks.
Final Words
The Square Sinnet is more than just a decorative braid; it is a testament to the utility and elegance of traditional knot-work. In a survival or outdoor scenario, the ability to create custom grips, extend pull-tabs, or organize cordage with a Square Sinnet knot is an invaluable asset.
By following the simple four-step process—starting with bound ends, crossing the first pair to create space, and weaving the second pair in the opposite direction—you can produce professional-grade gear that is both functional and visually striking. Practice with different materials and colors to see how the texture of the rope changes the final result. Whether you are at a campsite or in a workshop, the Square Sinnet remains a pinnacle of outdoor rope techniques that every enthusiast should master.
