
In the world of outdoor rope techniques, few maneuvers are as ubiquitous yet undervalued as the Strap Hitch. Whether you are an experienced arborist, a rock climber, or a weekend camper setting up a hammock, understanding how to secure webbing and straps is a fundamental skill. The Strap Hitch—often referred to by several other names depending on the industry—is the gold standard for simplicity and reliability when attaching a pre-sewn loop or a length of webbing to a fixed point.
Mastering rope knots is not just about memorization; it is about understanding the physics of friction and load distribution. The Strap Hitch knot excels because it utilizes the surface area of the strap to "bite" onto the anchor point, creating a secure connection that is easy to inspect and even easier to untie after it has been weighted. In this guide, we will explore the mechanical advantages of this hitch, the materials required to execute it safely, and the precise steps needed to ensure a perfect tie every time.
Alternative Names: Girth Hitch, Lark’s Head, Cow Hitch (webbing variation), Sling Hitch, and Ring Hitch.
What Is a Strap Hitch?
At its core, the Strap Hitch is a hitch used to bind a strap or a loop of webbing to an object, such as a climbing harness, a tree branch, or another rope. It is essentially a "cinching" knot. Unlike complex bends or decorative knots, the Strap Hitch relies on the strap passing through its own loop, creating a symmetrical wrap that tightens as tension is applied.
Practical Uses in the Field
The versatility of the Strap Hitch knot makes it a staple in various high-stakes and recreational environments:
- Rock Climbing: Climbers frequently use this hitch to attach a "runner" or sling to the tie-in points of their harness. It is also used to "girth hitch" a sling around a natural feature like a rock horn or a sturdy tree to create an anchor.
- Arboriculture: Tree surgeons use heavy-duty straps and hitches to secure rigging lines or to create a temporary attachment point for tools.
- Search and Rescue: In litter (stretcher) evacuations, straps are often hitched to the frame to provide secure handholds or to transition the load between rescuers.
- General Utility: From securing a kayak to a roof rack to hanging a heavy bear bag in the backcountry, the Strap Hitch provides a fast, non-permanent solution for gear management.
The primary advantage of using a strap (webbing) over a traditional round rope is the increased surface area. This prevents the "rope-on-rope" friction that can lead to melting or structural failure under high heat or extreme tension.
Materials and Tools Needed
Before you begin practicing your outdoor rope techniques, you must ensure you are using the correct equipment. Not all straps are created equal, and the material you choose will dictate the strength and safety of the hitch.
1. Webbing Types
- Tubular Webbing: This is the most common material used for rope knots in climbing and rescue. It is a flattened tube of nylon that is incredibly strong and supple, making it easy for the hitch to "set" and remain tight.
- Flat Webbing: Often found in heavy-duty tie-down straps or seatbelts. While very strong, it is stiffer than tubular webbing and requires more attention to ensure it lies flat within the hitch.
- Dyneema/Spectra Slings: These are high-modulus polyethylene materials. They are incredibly thin and light but have a lower melting point than nylon. When using these for a Strap Hitch, you must be extra careful to avoid "creeping" or internal friction.
2. The Anchor
The Strap Hitch can be applied to:
- Harnesses: Specifically the belay loop or tie-in points.
- Ropes: To create a "Prusik-like" effect for light loads.
- Fixed Anchors: Such as steel rings, trees, or structural beams.
3. Inspection Tools
Always have a keen eye for gear health. Check your straps for:
- UV Damage: Fading or "crunchiness" in the fabric.
- Abrasions: Fraying or nicks in the edges of the webbing.
- Chemical Contamination: Stains from oil, gasoline, or battery acid.
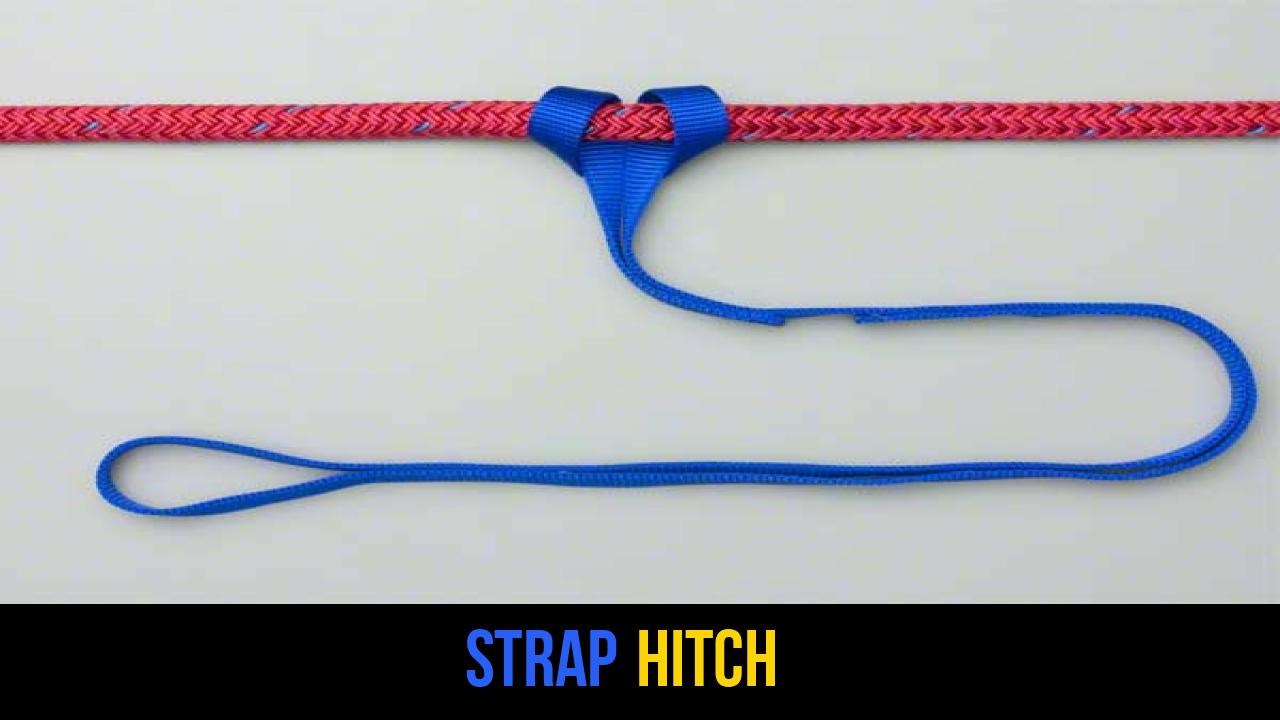
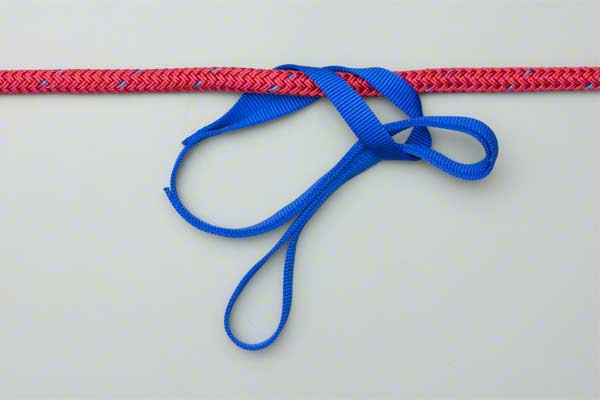
How to Tie a Strap Hitch?
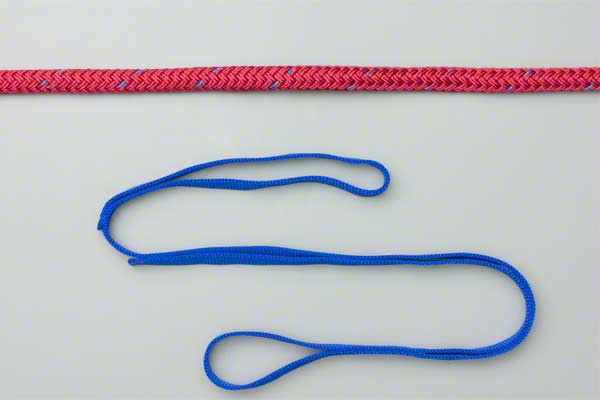
The beauty of the Strap Hitch lies in its simplicity. To ensure maximum safety and strength, follow these instructions precisely as outlined in the technical standard.
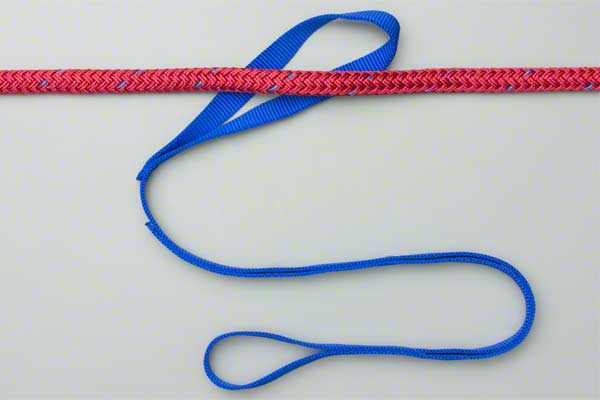
- Pass the loop of the strap around the harness, strap, or rope.
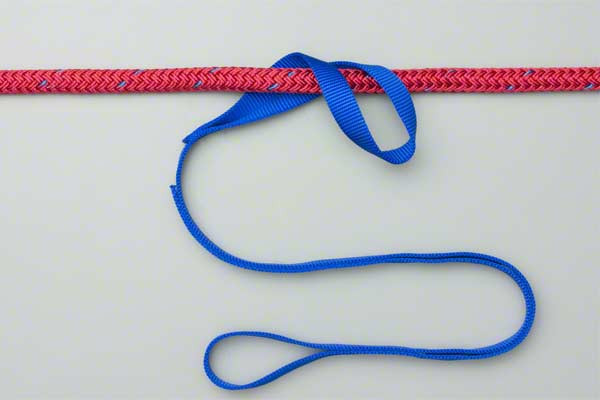
- Thread the other end of the strap through the loop.
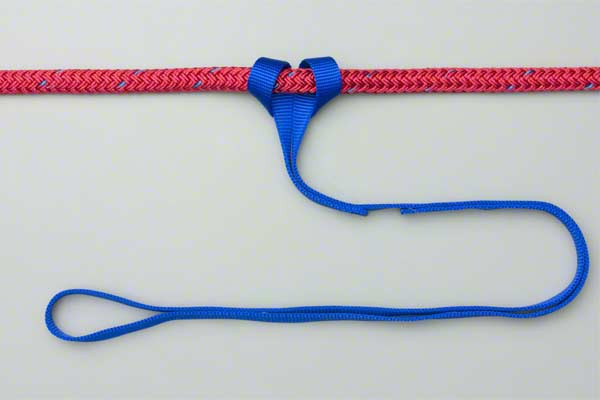
- Make sure the strap lies neatly and then pull it tight.
Practical Tips for a Perfect Strap Hitch
While the steps are simple, the execution is where the expertise of a specialist comes in. To elevate your outdoor rope techniques, keep these nuances in mind:
Dressing the Knot
"Dressing" a knot means ensuring all the layers of the strap lie flat against each other without any twists. If the webbing is twisted inside the Strap Hitch, the load will not be distributed evenly across the width of the fabric. This creates "stress risers" that can significantly reduce the breaking strength of the material.
Setting the Hitch
Once you have pulled the end through the loop, don’t just let it hang. Give it a firm tug to "set" the hitch against the anchor. A loose Strap Hitch can migrate or slide, especially if the anchor point is smooth (like a polished metal bar).
Managing the "Tail"
If you are using a long strap to create the hitch, ensure the remaining length is managed correctly so it doesn’t become a tripping hazard or get caught in moving machinery.

Common Mistakes to Avoid
Even seasoned professionals can make errors when they become complacent. When working with rope knots, safety is paramount.
- Twisting the Webbing: As mentioned, a twisted strap reduces the surface area contact. Always perform a visual check to ensure the strap looks like a neat "U" shape around the anchor.
- Using on Sharp Edges: While straps are durable, a Strap Hitch placed over a sharp metal edge can be sheared under load. Always use a "softener" (like a piece of fire hose or a heavy-duty cloth) if you must hitch to a sharp-angled anchor.
- Misidentifying the Load Path: Ensure the "pull" on the strap is coming from the correct direction. The hitch is designed to be pulled away from the anchor. If the load moves side-to-side (lateral loading), the hitch may loosen.
- Incompatible Materials: Never use a very thin cord to hitch onto a very thick rope, or vice versa, if you expect the hitch to grip. The diameter/width ratio matters for friction-based outdoor rope techniques.
Related Knots and Splicing
Understanding the Strap Hitch knot is often the gateway to learning more complex friction-based systems. Here are a few related techniques:
- The Prusik Knot: A friction hitch used to attach a loop of cord around a rope, allowing it to slide when loose but lock when weighted; essential for ascending.
- The Water Knot: Also known as the Tape Knot, this is the primary method for joining two ends of webbing together to create a permanent loop.
- The Clove Hitch: A quick-to-tie hitch used for securing a rope to a cylindrical object; unlike the Strap Hitch, it is easily adjustable without untying.
- The Figure Eight Follow-Through: The primary knot for tying a climbing rope directly into a harness, offering high strength and easy visual inspection.
- The Cow Hitch: Very similar to the Strap Hitch but usually refers to the knot when tied with the ends of a rope rather than a pre-formed loop.
Final Words
The Strap Hitch is a testament to the idea that the most effective solutions are often the simplest. In the context of outdoor rope techniques, it provides a reliable, fast, and incredibly strong method for gear management and anchor building. By following the exact steps of passing the loop, threading the end, and dressing it neatly, you ensure that your equipment performs at its peak capacity.
Whether you call it a Strap Hitch knot, a Girth Hitch, or a Lark’s Head, the principle remains the same: friction is your friend. Always prioritize gear inspection and practice your rope knots in a low-risk environment before heading out into the field. With these skills in your toolkit, you are better prepared for the rigors of the great outdoors.
