
In the world of high-stakes offshore fishing and technical rope knots, few connections command as much respect as the Australian Braid. Originally developed by the legendary anglers of the Great Barrier Reef to tackle massive black marlin, this knot has transitioned from a localized secret to a global standard for creating high-strength double lines. Whether you are rigging for a world-record catch or exploring advanced outdoor rope techniques, mastering the Australian Braid knot is a rite of passage for any serious outdoorsman.
Unlike traditional knots that rely on a single pinch point, the Australian Braid utilizes a series of weaving wraps to distribute tension across a long section of the line. This prevents the line from cutting itself under extreme pressure, maintaining a higher percentage of the line’s original breaking strain. It is widely considered a sleeker, more streamlined alternative to the Bimini Twist, making it ideal for passing through rod guides or pulley systems with minimal friction.
Alternative Names: Aussie Braid, Australian Plait, The Plait Knot, 12-Strand Braid Knot.
What Is an Australian Braid?
The Australian Braid is a specialized method used to form a permanent, high-strength loop at the end of a line. Technically categorized under "plaited" rope knots, it involves weaving a tag end around a standing line to create a "double line" section.
Practical Uses and Applications
- Offshore Trolling: Its primary use is in heavy tackle fishing to create a double line that is then connected to a leader via a Cat’s Paw or a swivel.
- Big Game Rigging: Because it is incredibly slim, it is the preferred choice for anglers using wind-on leaders where the knot must travel through narrow guide rings without snagging.
- Outdoor Rope Techniques: In general utility scenarios, the braid can be used with smaller diameter cords to create a non-slip loop that handles shock loads better than a standard Bowline or Figure-Eight.
- Load Distribution: By spreading the load over several inches of braided line, the Australian Braid knot minimizes the risk of sudden line failure at the knot’s entry point.
Materials and Tools Needed
To achieve a perfect Australian Braid, the quality of your materials and the precision of your environment matter. While it can be tied in the field, practicing with the right tools will ensure a "100% strength" connection.
- Line Types: This technique works best on monofilament, fluorocarbon, and certain types of hollow-core braided lines. In a general "outdoor rope" context, it can be applied to paracord or nylon utility lines.
- A Fixed Point: You will need something to hook the loop onto while you braid. Expert anglers often use a boat cleat, a door handle, or even their own toe to maintain constant, even tension.
- Cutting Tool: A sharp pair of braid scissors or a dedicated line nipper is essential for a clean finish.
- Lubricant: To prevent friction heat during the final tightening, have water, saliva, or a dedicated knot lubricant ready.
- Gloves: When working with heavy-duty lines (above 80lb test), gloves help you pull the knot tight without risking "line cuts" on your hands.
How to Tie Australian Braid?
Precision is paramount when executing this technique. Follow these steps exactly as outlined to ensure the integrity of the braid and the safety of your connection.
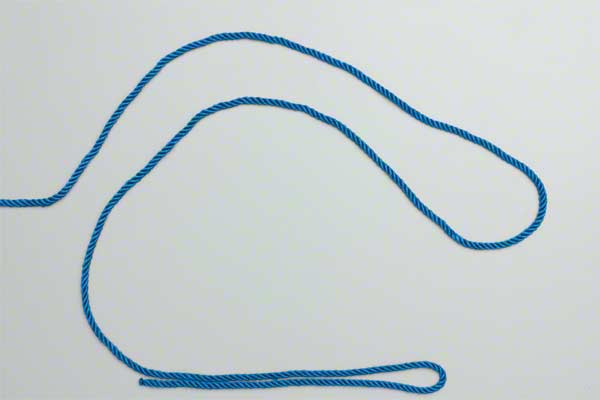
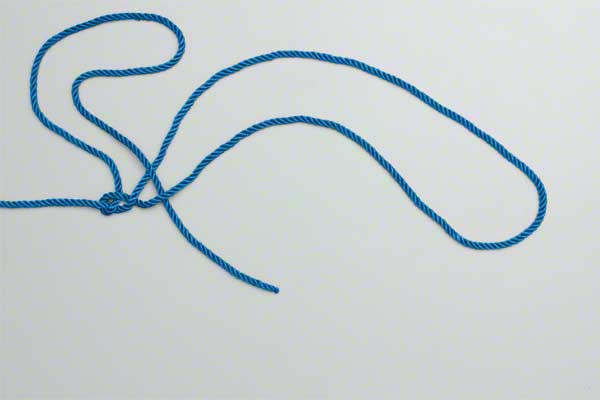
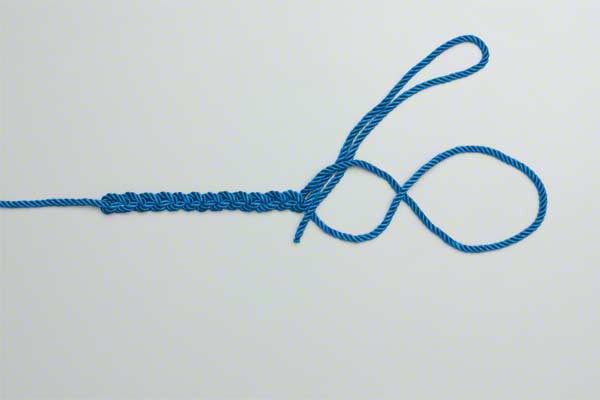
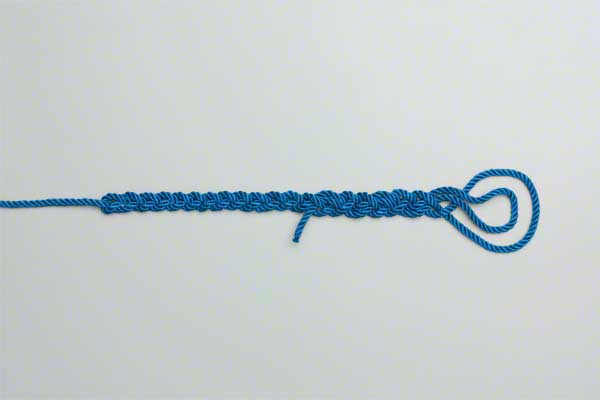
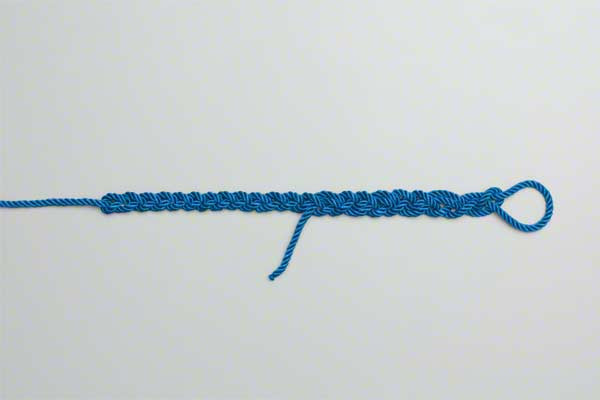
- Form a loop leaving a long tag end.
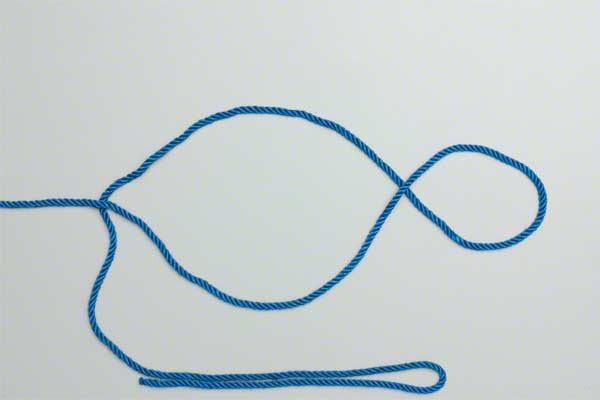
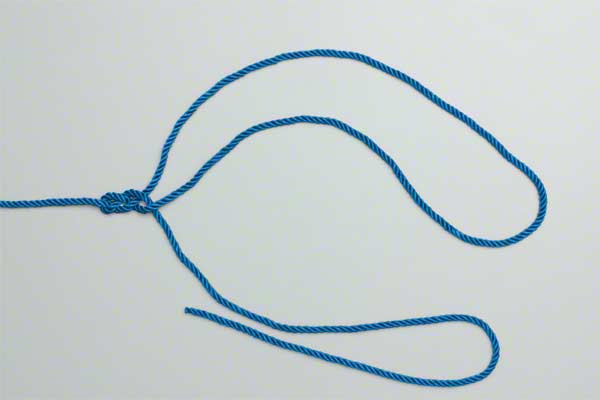
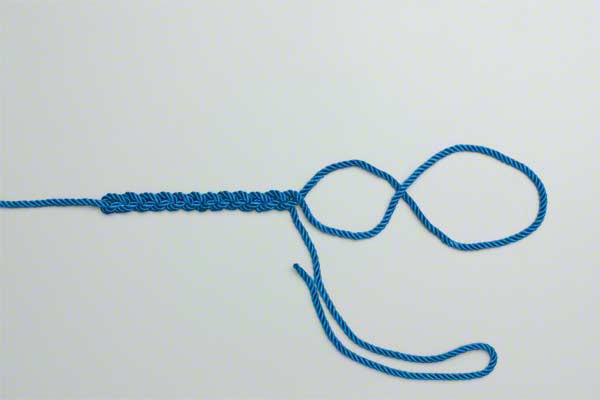
- Braid the loop and tag end tightly together (the actual braid length depends on the line weight).
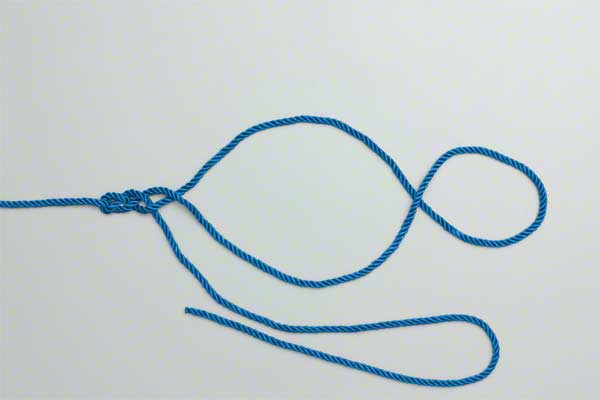
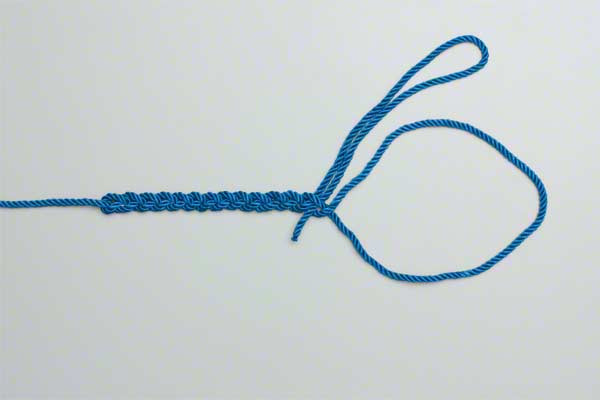
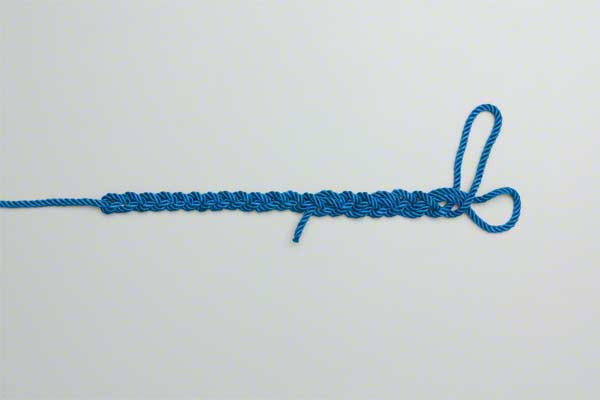
- Complete the braid using a bight in the tag end.
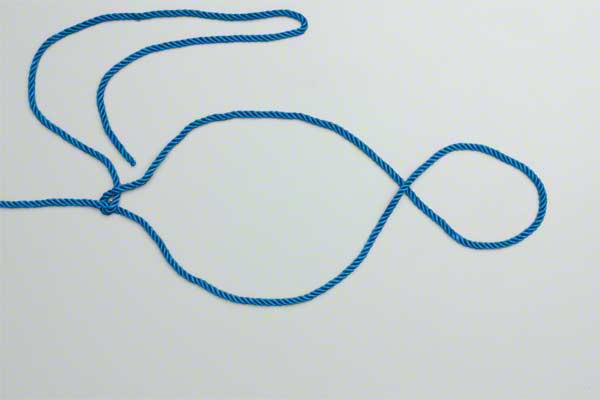
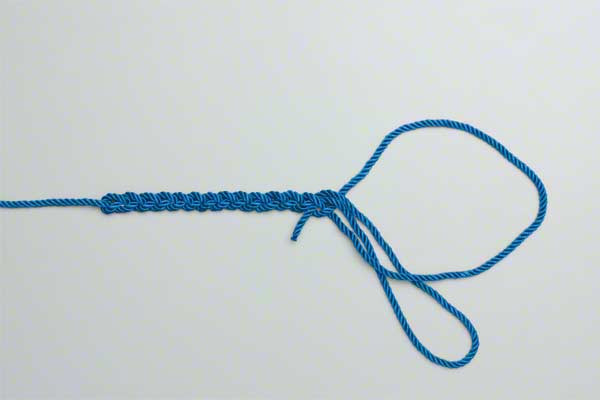
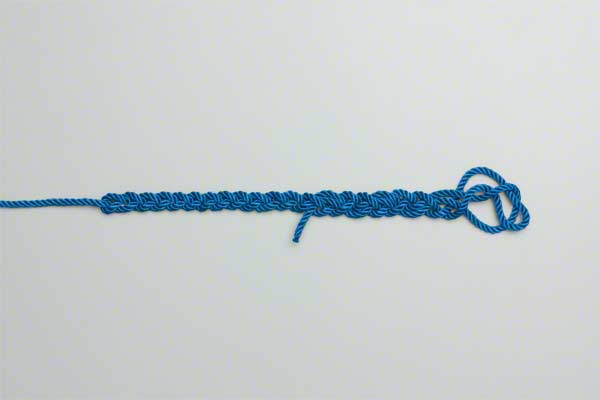
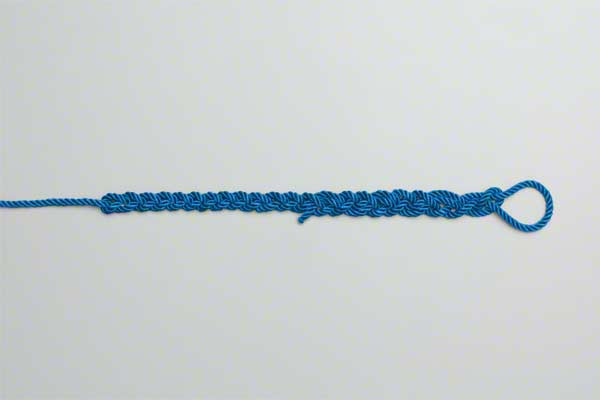
- Pull the original loop through the bight.
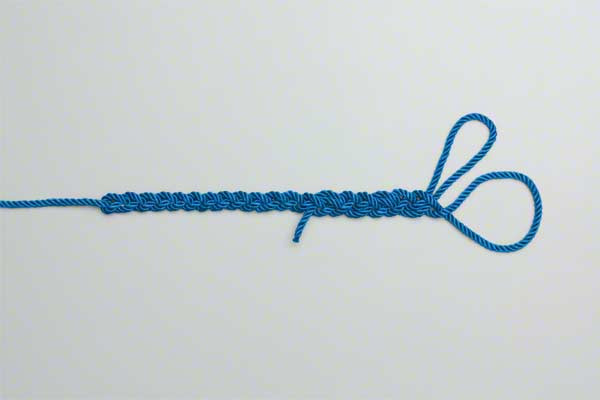
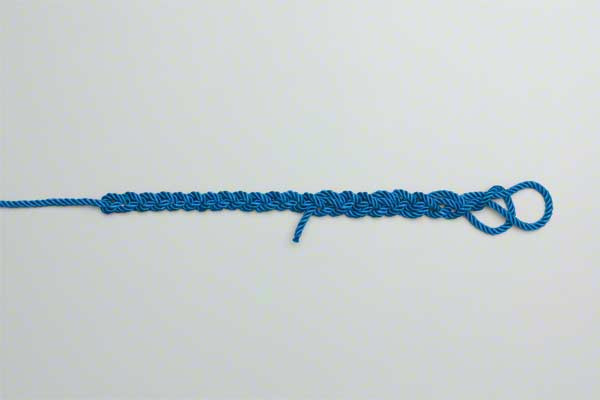
- Lubricate and then tighten the bight by pulling smoothly on the tag end.
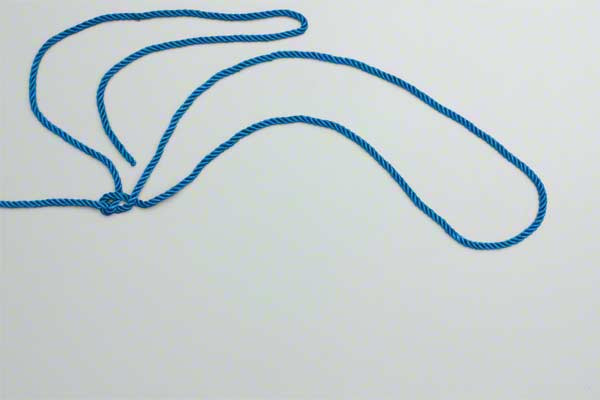
- Trim the tag end.
The Physics of the Braid: Why It Works
Understanding the mechanics of outdoor rope techniques can help you appreciate why the Australian Braid knot is so effective. In a standard knot, the line often crosses over itself at a sharp angle. Under a heavy load, that "cross-over" point acts like a saw, eventually cutting through the line.
The Australian Braid eliminates this by using a parallel weaving pattern. As the load increases, the braid constricts—much like a "Chinese finger trap"—gripping the main line tighter and tighter. This friction-based grip means the force is distributed over the entire length of the braid (usually 3 to 6 inches), rather than a single millimeter of plastic.
Choosing the Right Braid Length
As mentioned in the instructions, the length of your braid depends on the weight of your line:
- Light Line (15lb – 30lb): A shorter braid of 2-3 inches is usually sufficient.
- Medium Line (50lb – 80lb): Aim for 4-5 inches to ensure enough surface area for friction.
- Heavy Tackle (100lb+): A 6-inch braid provides maximum security against the massive surges of pelagic fish.
Common Mistakes to Avoid
Even seasoned professionals can make errors when tying the Australian Braid knot. To ensure your gear doesn’t fail at the critical moment, watch out for these common pitfalls:
- Uneven Tension: If one strand of the braid is tighter than the others, the load will not be distributed evenly. This can cause the "loose" strand to slip or the "tight" strand to snap.
- Insufficient Lubrication: This is the #1 cause of knot failure. When you tighten the bight, the friction generates heat. In monofilament, this heat can "cook" the line, making it brittle and prone to breaking at 50% of its rated strength.
- Too Few Braids: If the braid is too short for the line diameter, it may "creep" or slip out under a sustained heavy load.
- Loose Finishing: The final step—pulling the original loop through the bight—must be done with a smooth, firm motion. If this finish is loose, the entire braid can unravel from the bottom up.
- Rough Trimming: Always leave a tiny "nub" (1-2mm) when you trim the tag end. If you cut it too flush, the slight settling of the knot under its first load might pull the tag end back into the braid, causing it to fail.
Related Knots and Splicing
To round out your knowledge of rope knots and specialized rigging, consider learning these related techniques:
- Bimini Twist: The most famous alternative to the Australian Braid; it creates a 100% strength loop using a series of twists and a "wrap-back" method.
- Spider Hitch: A much faster but slightly weaker way to create a double line; ideal for light tackle and quick rigging in the field.
- FG Knot: A revolutionary slimline knot used specifically for joining braided mainlines to fluorocarbon leaders without a loop.
- PR Bobbin Knot: A heavy-duty connection similar to the FG knot but requiring a weighted bobbin tool to achieve maximum compression.
- Cat’s Paw: Not a knot for the line itself, but the standard way to join two loops together (such as an Australian Braid loop to a swivel).
Field Maintenance and Inspection
Once you have mastered the Australian Braid, it is important to remember that no knot is permanent. In the harsh environment of salt air, UV rays, and extreme tension, even the best outdoor rope techniques require maintenance.
- Check for "Whiting": If the braid looks white or opaque, it has been overstretched or heat-damaged. Retie it immediately.
- Feel for Burrs: Run your fingers over the braid. If you feel any nicks or fraying, the structural integrity is compromised.
- Post-Catch Inspection: After landing a significant fish or freeing a snag, the braid may have tightened significantly. This "crushing" can weaken the internal core of the line. It is best practice to cut and retie your Australian Braid knot after every major battle.
Final Words
The Australian Braid is more than just a fishing knot; it is a masterclass in friction-based outdoor rope techniques. By following the structured steps of forming a loop, braiding tightly, and finishing with a secure bight, you create a connection that is both incredibly strong and remarkably low-profile.
Whether you are an angler heading to the canyons or an outdoor enthusiast looking to expand your repertoire of rope knots, the Australian Braid offers a level of reliability that few other connections can match. Take the time to practice with different line weights, remember to always lubricate before the final pull, and you will have a double-line loop that you can trust in the toughest conditions on earth. Happy rigging![/content]