
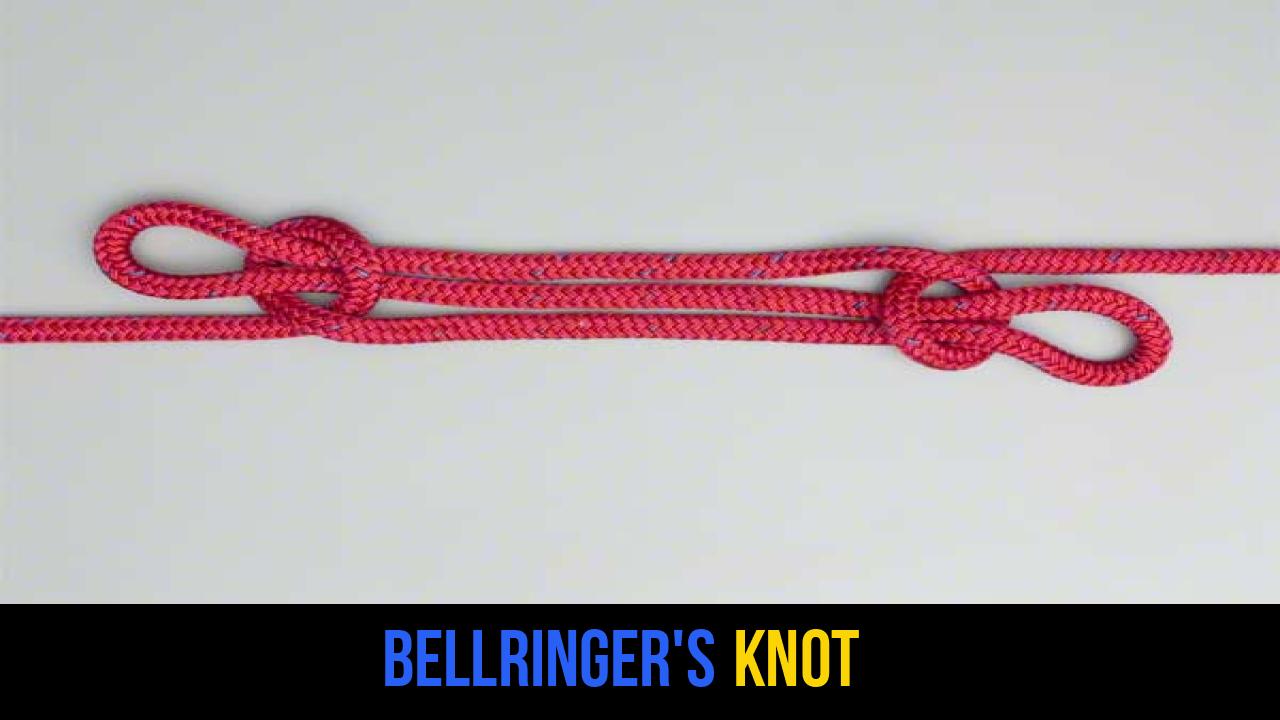
In the world of rope knots and outdoor rope techniques, the ability to adapt to changing circumstances is what separates a novice from an expert. Whether you are managing a campsite, securing a load on a trailer, or working in a traditional maritime or architectural setting, rope management is a critical skill. One of the most specialized and historical techniques in a rigger’s repertoire is the Bellringer’s Knot.
The Bellringer’s Knot is a functional shortening knot, designed to take up the slack in a line without the need to cut the rope or untie the ends from their anchors. While modern synthetic ropes and mechanical tensioners have changed the landscape of rigging, the elegance and utility of this knot remain relevant for those who appreciate traditional craftsmanship and practical field solutions. Understanding how to manipulate a line to adjust its length while maintaining its integrity is a cornerstone of advanced rope work.
Alternative names for the Bellringer’s Knot include: The Bell-ringer’s Hitch, The Sheepshank (variation), and the Rope Shortener.
What Is a Bellringer’s Knot?
The Bellringer’s Knot is primarily categorized as a shortening knot. Its name originates from the historical practice of church bell ringing. In tall belfries, the long ropes used to swing heavy bronze bells would often stretch or shrink depending on the humidity and temperature. To ensure the ringer could reach the rope comfortably and maintain the correct "stroke" without having to re-splice the entire line, they employed this specific hitch to adjust the height of the rope ends.
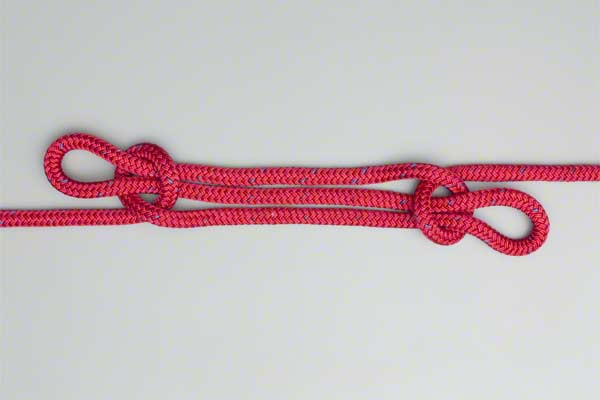
Practically, the knot works by creating a triple-layered section of rope in the middle of a line, secured by two half hitches. It is functionally very similar to the standard Sheepshank, but it is often considered more stable in specific orientations where the rope hangs vertically.
Practical Uses in Modern Contexts
While you might not find yourself in a 14th-century bell tower, the Bellringer’s Knot has several modern applications:
- Temporary Rigging: If you have a 50-foot rope but only need 30 feet to secure a tarp, this knot allows you to "shorten" the line without leaving long, dangling tails that could become trip hazards.
- Tension Management: It can be used to take up slack in non-critical loads where a mechanical tensioner is unavailable.
- Aesthetic and Decorative Work: In traditional nautical decor, this knot is used to create a thickened, ornamental section in a rope.
- Utility Gardening: Adjusting the height of hanging plants or temporary support structures for climbing vines.
Important Note: Like most shortening knots, the Bellringer’s Knot depends entirely on constant tension. If the line goes slack, the half hitches can slip off the bights, causing the knot to fail. It should never be used for life-safety applications such as climbing or arboriculture.
Materials and Tools Needed
Before attempting to tie the Bellringer’s Knot, it is essential to understand the materials you are working with. The performance of any knot is dictated by the interaction between the rope’s fibers and the friction generated by the hitches.
Rope Selection
- Natural Fibers (Manila, Hemp, Cotton): These are the traditional choices. The high "tooth" or friction of natural fibers makes the Bellringer’s Knot very secure. It is less likely to slip even if the tension fluctuates slightly.
- Synthetic Ropes (Nylon, Polyester): These are common in outdoor rope techniques. While strong, they are often "slicker." When using nylon or polypropylene, extra care must be taken to ensure the hitches are tightened firmly.
- Kernmantle Ropes: These are the standard for modern climbing. Because they have a smooth outer sheath, they are not ideal for shortening knots like the Bellringer’s Knot, as the internal core can shift.
Tools and Considerations
No specialized tools are required to tie this knot, but a few considerations will improve your success:
- Gloves: When working with natural fibers or applying heavy loads, gloves protect against rope burn and splinters.
- Clear Workspace: Ensure the rope is free of tangles and "hockles" (kinks) before you begin.
- Load Awareness: Always assess the weight the knot will be holding. The Bellringer’s Knot is best suited for static, consistent loads.
How to Tie Bellringer’s Knot?
To ensure the highest level of accuracy and safety, follow these steps exactly as they have been handed down through technical rigging manuals.
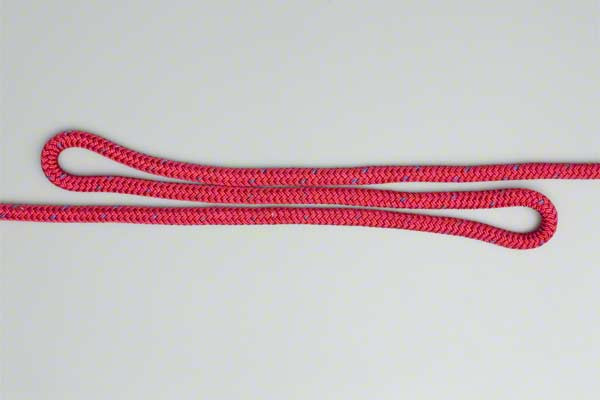
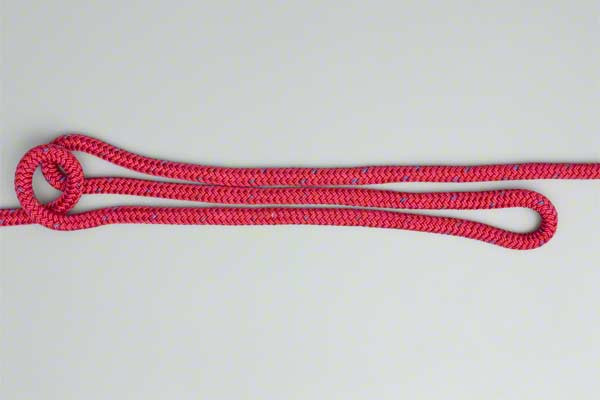
- Fold the rope to approximately the desired new length.
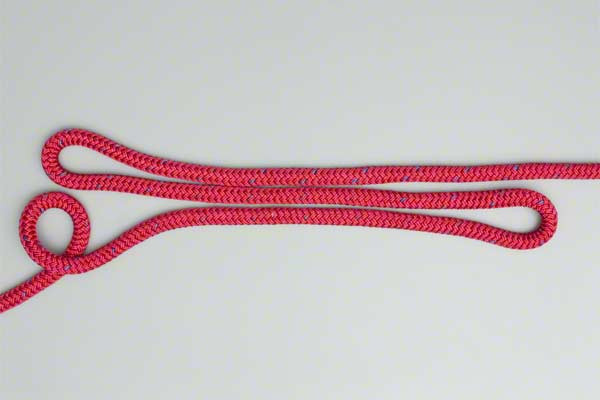
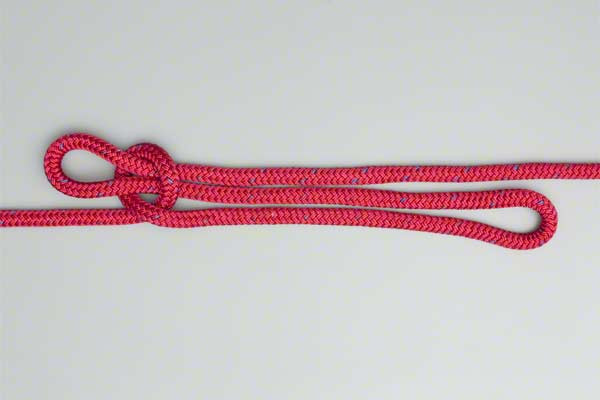
- Form a Half Hitch in one standing end, drop it over the adjacent bight, and tighten it.
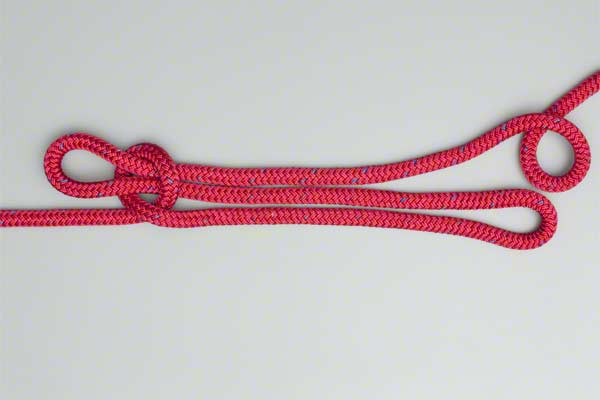
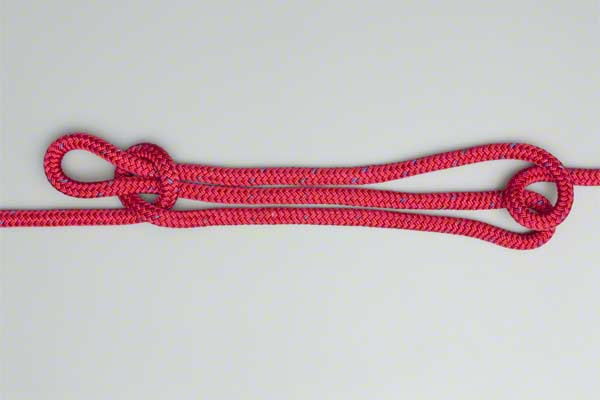
- Form a Half Hitch in the other standing end, drop it over its adjacent bight, and then tighten it too.
- Apply the load carefully.
Common Mistakes to Avoid
Even seasoned experts can make errors when tying shortening knots. To ensure your Bellringer’s Knot remains secure, watch out for these common pitfalls:
1. Insufficient Tension
The most common cause of failure for this knot is a lack of constant tension. If the rope "pulses" (alternates between tight and slack), the half hitches can work themselves loose. If you expect the load to shift, consider "seizing" the bights (tying them down with smaller cordage) for extra security.
2. Improper Half Hitch Direction
When you Form a Half Hitch, the "running" part of the rope must cross over the "standing" part in a way that the load actually cinches the loop tighter. If the hitch is formed backwards, it will simply unroll when the load is applied.
3. Using "Slippery" Synthetic Lines
Modern high-tech ropes like Dyneema or Spectra have extremely low coefficients of friction. The Bellringer’s Knot is likely to slip or "creep" on these materials. Stick to traditional braided or twisted ropes for this technique.
4. Ignoring the "Apply Load Carefully" Instruction
Abruptly dropping a heavy weight onto the knot can cause the hitches to capsize or the rope to snap at the stress points. Always transition the weight onto the knot gradually to allow the fibers to settle and grip one another.
Related Knots and Splicing
Expanding your knowledge of rope knots involves understanding how different hitches and loops interact. Here are a few knots related to the Bellringer’s Knot:
- Sheepshank: A traditional shortening knot that uses three parallel lengths of rope secured with half hitches at both ends to take up slack.
- Bowline: Known as the "King of Knots," it creates a secure, fixed loop at the end of a rope that will not slip or bind under load.
- Clove Hitch: A fundamental binding knot used to secure a rope to a cylindrical object, often used as a starting point for lashings.
- Figure Eight: A highly visible and secure stopper knot used to prevent the end of a rope from slipping through a pulley or a hole.
- Trucker’s Hitch: A compound knot that provides a mechanical advantage for tensioning lines, often incorporating a shortening element.
Final Words
The Bellringer’s Knot is more than just a relic of the past; it is a testament to the ingenuity of early riggers and a vital tool for modern outdoor rope techniques. By mastering the ability to Fold the rope, Form a Half Hitch, and Apply the load carefully, you gain a significant advantage in field rope management.
Whether you are shortening a clothesline, rigging a temporary shelter, or simply practicing the craft of knot-tying, the Bellringer’s Knot offers a blend of historical significance and practical utility. Remember that the key to any successful knot is practice and a deep respect for the limitations of your equipment. Always test your knots in a safe, low-stakes environment before relying on them in the field. With these skills, you are well on your way to becoming an expert in the versatile world of rigging.
