
In the world of professional rigging, maritime operations, and outdoor exploration, the ability to manage cordage efficiently is a hallmark of expertise. Among the most versatile and aesthetically pleasing techniques in a specialist’s toolkit is the Braid Single Rope. Often overlooked by beginners who favor complex hitches, this specific braiding technique offers a unique blend of utility, aesthetics, and organizational brilliance.
Whether you are a seasoned arborist looking to manage your throw lines, a sailor organizing dock lines, or a DIY enthusiast working with paracord, understanding the Braid Single Rope is essential. This technique is not just about looks; it is a functional method to shorten a rope without cutting it, preventing tangles during storage while ensuring the rope can be deployed quickly when needed.
This article provides a comprehensive deep dive into the Braid Single Rope, covering its mechanical advantages, the materials required, and a strict step-by-step guide on how to execute it perfectly every time.
Alternative Names: Chain Sinnet, Monkey Braid, Daisy Chain, Crochet Braid, Chain Stitching.
What Is a Braid Single Rope?
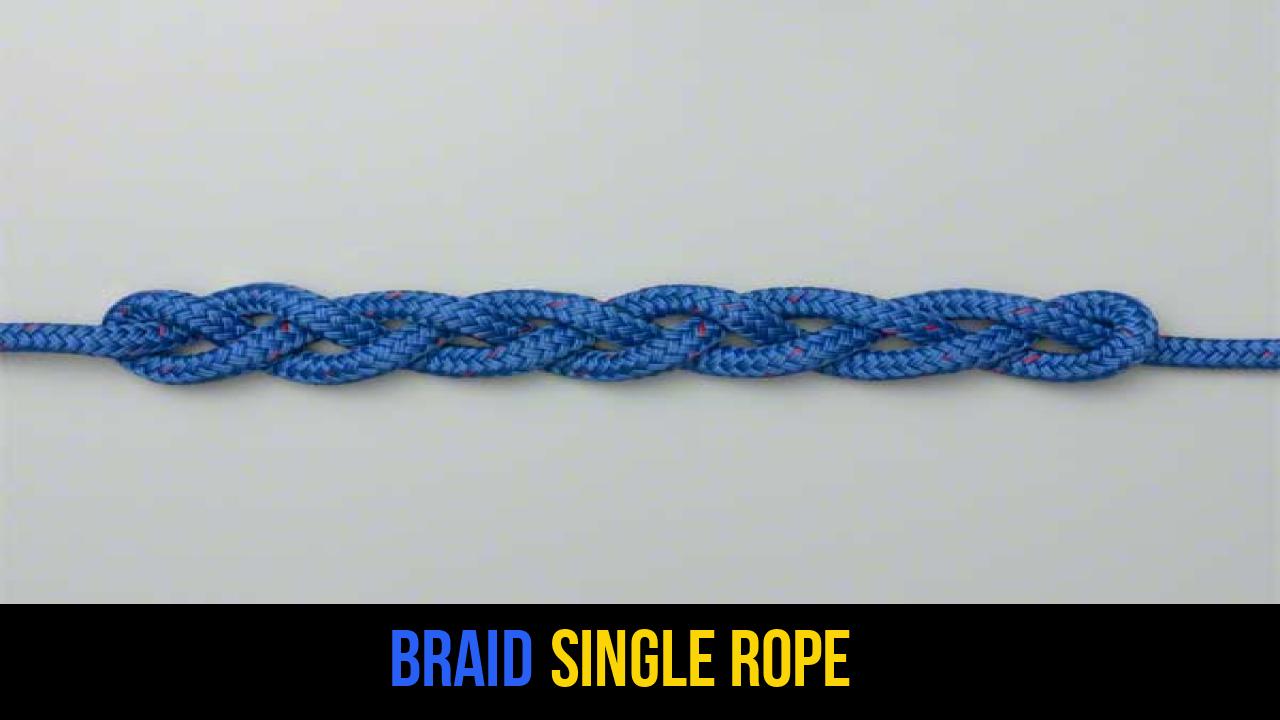
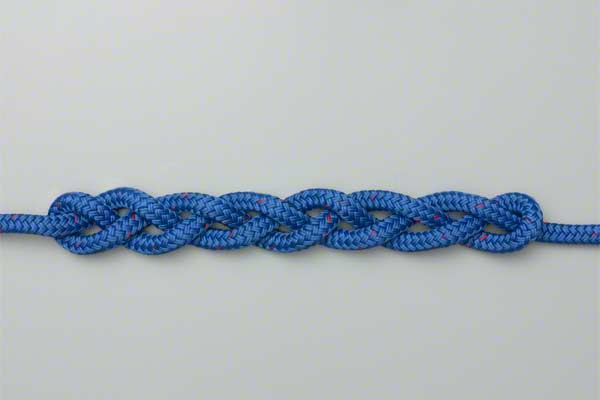
The Braid Single Rope is a method of "shortening" a length of cordage by creating a series of interlocking loops. Mechanically, it is classified as a sinnet—a decorative or functional braid made from one or more strands. When applied to a single rope, it transforms a long, cumbersome line into a thick, manageable chain.
Practical Applications
- Storage and Organization: One of the primary uses of the Braid Single Rope knot is to store long ropes (like extension cords or tow ropes) in a way that prevents "spaghetti" tangles.
- Shortening Lines: If you have a rope that is too long for a specific task but you do not want to cut it, this braid allows you to reduce its length significantly while maintaining the integrity of the fiber.
- Shock Absorption: Because the braid consists of multiple loops, it can act as a rudimentary shock absorber in low-load decorative or utility applications.
- Aesthetics: In the world of "knot art" or tactical gear customization, this braid is used to create bulky handles for bags or zipper pulls.
Materials and Tools Needed
To master the Braid Single Rope, you don’t need expensive machinery, but choosing the right rope knots and materials is vital for a clean finish.
Recommended Rope Types
- Paracord (550 Cord): Ideal for practice and decorative projects due to its flexibility and wide range of colors.
- Nylon Kernmantle: Excellent for utility purposes as it has a slight stretch that helps the loops seat firmly.
- Synthetic Polypro: Often used in marine environments; the braid helps keep these buoyant but stiff ropes organized.
- Natural Fibers (Cotton/Manila): These provide a traditional look and high friction, making the braid very secure, though they are less flexible.
Essential Tools
- Your Hands: The primary tool for this technique.
- Marlinspike or Fid: While not strictly necessary for a single rope braid, a spike can help tighten loops if you are working with very thick or stiff industrial rope.
- Heat Source: If using synthetic rope, you may need a lighter to sear the ends to prevent fraying before you begin your braid.
How to Tie Braid Single Rope?
The following instructions are the definitive steps to creating a secure and professional-grade braid. Follow these steps exactly as outlined to ensure the structural integrity of your outdoor rope techniques.
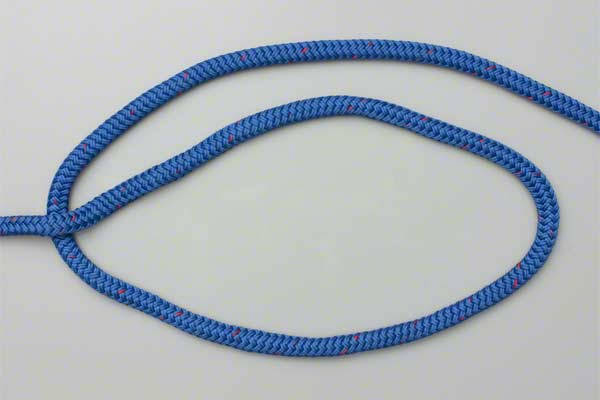
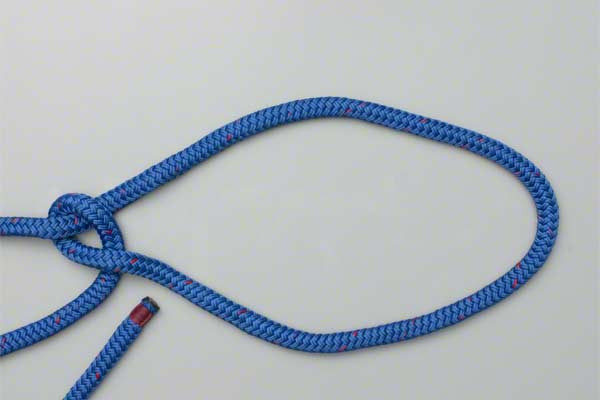
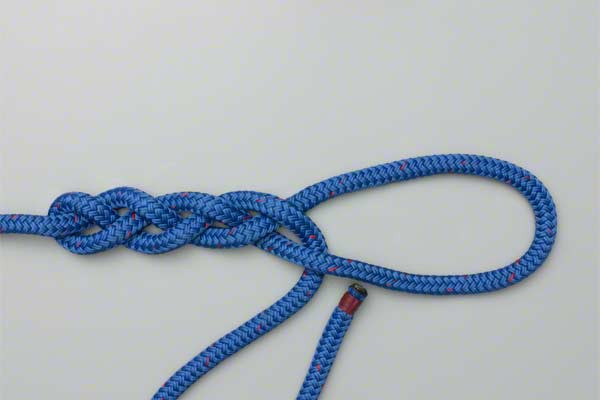
- Make a loop which is about the length needed for the braid.
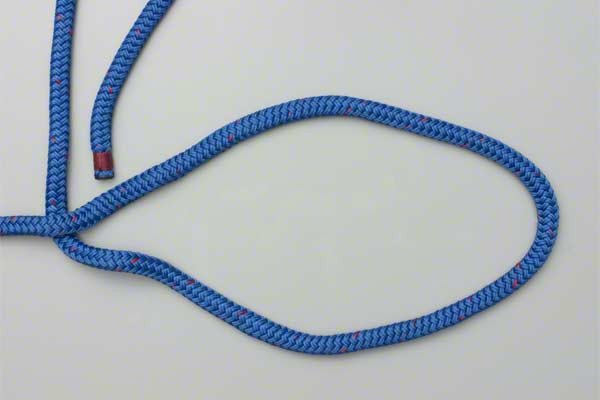
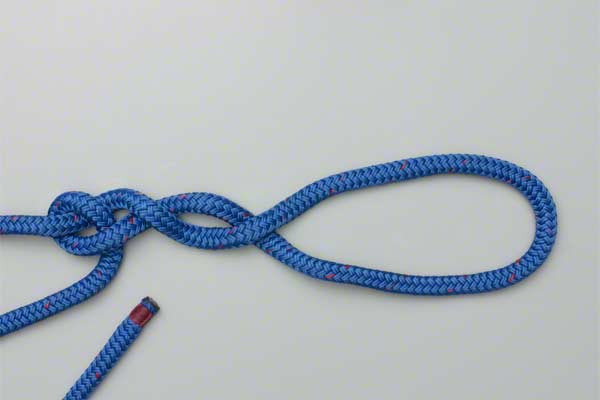
- Pass the end through the loop.
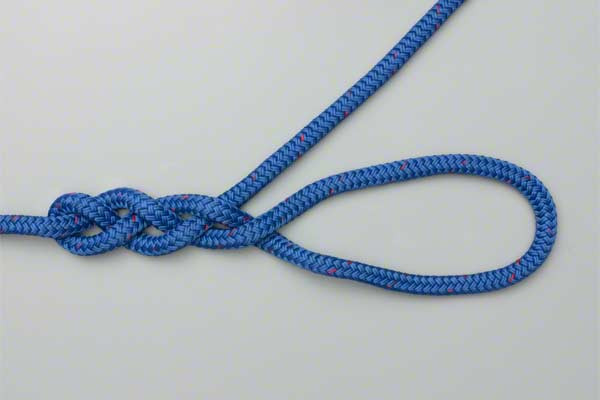
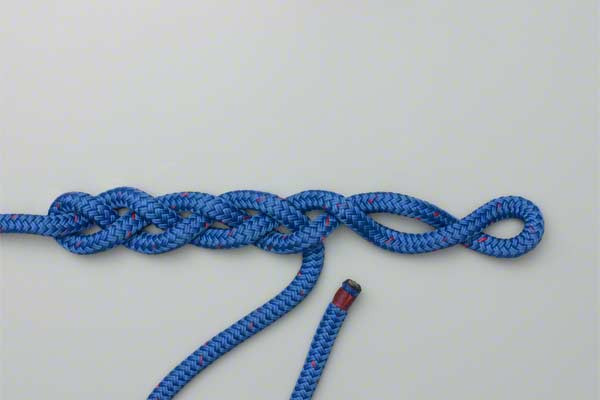
- Twist the loop to create the next hole for the end to pass through.
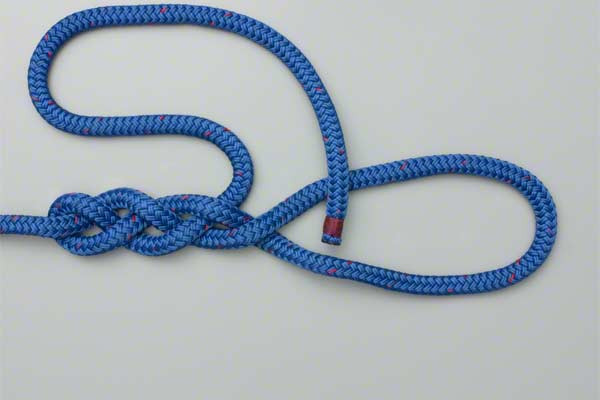
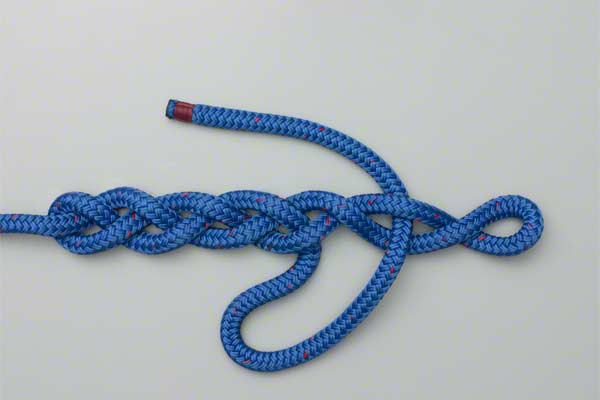
- Repeat as often as required to complete the braid.
Technical Breakdown of the Steps
While the instructions above are the core of the technique, understanding the nuance of each movement can elevate your skill from beginner to professional.
Step 1: The Foundation Loop
The initial loop sets the "gauge" of your braid. If you make this loop too large, the braid will be loose and sloppy. For most utility ropes, a loop the size of your palm is a standard starting point. Ensure the standing part of the rope (the long end) is positioned correctly to be pulled through.
Step 2: The First Pass
When you pass the end through the loop, you are essentially creating a "slip knot" structure. This is the "interlock" that gives the braid its strength. Professionals often call this "drawing a bight" through the previous loop.
Step 3: The Twist
This is the secret to a professional Braid Single Rope. By twisting the loop, you create a mechanical lock. This twist prevents the braid from unraveling prematurely and gives it that signature "chain" appearance. The direction of the twist should be consistent throughout the entire process to maintain symmetry.
Step 4: Consistency and Completion
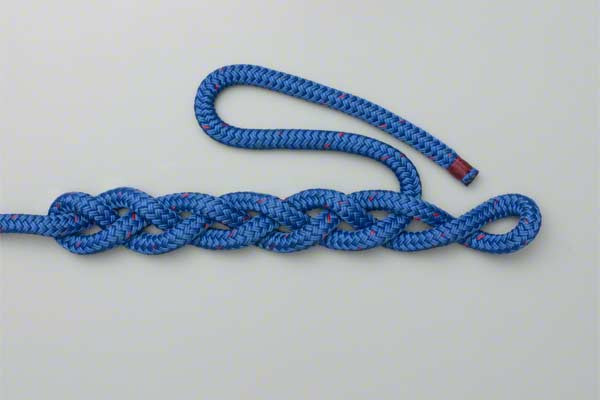
To repeat as often as required, you must maintain even tension. If one loop is tighter than the next, the braid will curve or look uneven. Once you reach the end of your rope, you can "lock" the braid by passing the entire remaining tail through the final loop instead of just a bight.
Common Mistakes to Avoid
Even experienced outdoor enthusiasts can make errors when performing rope knots under pressure. Here are the most common pitfalls:
- Inconsistent Loop Size: This leads to a braid that is structurally weak in some sections and overly tight in others. Try to use your fingers as a measuring tool for each loop.
- Forgetting the Twist: If you skip the twist of the loop, the braid becomes a simple "daisy chain" which can be pulled apart too easily. The twist adds the friction necessary for the braid to hold its shape.
- Over-Tightening: If you pull the loops too tight, the rope may become stiff and difficult to undo. This is particularly problematic with natural fibers like manila, which can "set" over time.
- Safety Warning: Never use a Braid Single Rope as a load-bearing "shortener" in life-critical situations (like climbing or high-angle rescue) unless specifically trained to do so. While strong, the braid is primarily an organizational and management tool, not a replacement for a structural splice.
Related Knots and Splicing
Expanding your knowledge of outdoor rope techniques involves understanding how different knots interact. Here are a few related techniques:
- Chain Sinnet: Virtually identical to the Braid Single Rope, this is the standard term used by sailors to manage long lines on deck.
- Overhand Knot: The simplest stopper knot; it is often used at the very end of a braid to ensure the tail doesn’t slip back through the final loop.
- Figure-Eight Knot: A more secure stopper knot than the overhand, preferred by climbers to prevent a rope from running through a device or a braid.
- Monkey’s Fist: A complex decorative knot used to weight the end of a rope, often seen at the end of a braided lanyard for added utility.
Practical Maintenance for Braided Ropes
When you use the Braid Single Rope for long-term storage, you must consider the health of the rope fibers.
- Avoid Moisture: Never braid and store a wet rope. Moisture trapped within the interlocking loops can lead to mold, mildew, and fiber rot (especially in natural ropes).
- Inspect Regularly: Occasionally undo the braid to inspect the rope for internal wear or "kinking." The constant looping can sometimes stress the core of cheaper synthetic ropes.
- UV Protection: If your braided rope is stored outdoors (such as on a boat or at a campsite), ensure it is made of UV-stabilized material like polyester, as the increased surface area of the braid can lead to faster sun degradation.
Final Words
The Braid Single Rope is a masterclass in functional simplicity. It serves as a bridge between basic utility and advanced rope craft, proving that you don’t need complex hitches to manage cordage effectively. By mastering the loop, the pass, and the twist, you ensure that your gear remains organized, your ropes stay tangle-free, and your workspace remains professional.
From the deck of a ship to the deep woods of a backcountry trail, the Braid Single Rope knot is a reliable companion for any gear specialist. Practice with different materials and tensions to find the style that best suits your needs, and you will soon find this technique becoming second nature in all your outdoor adventures.
