
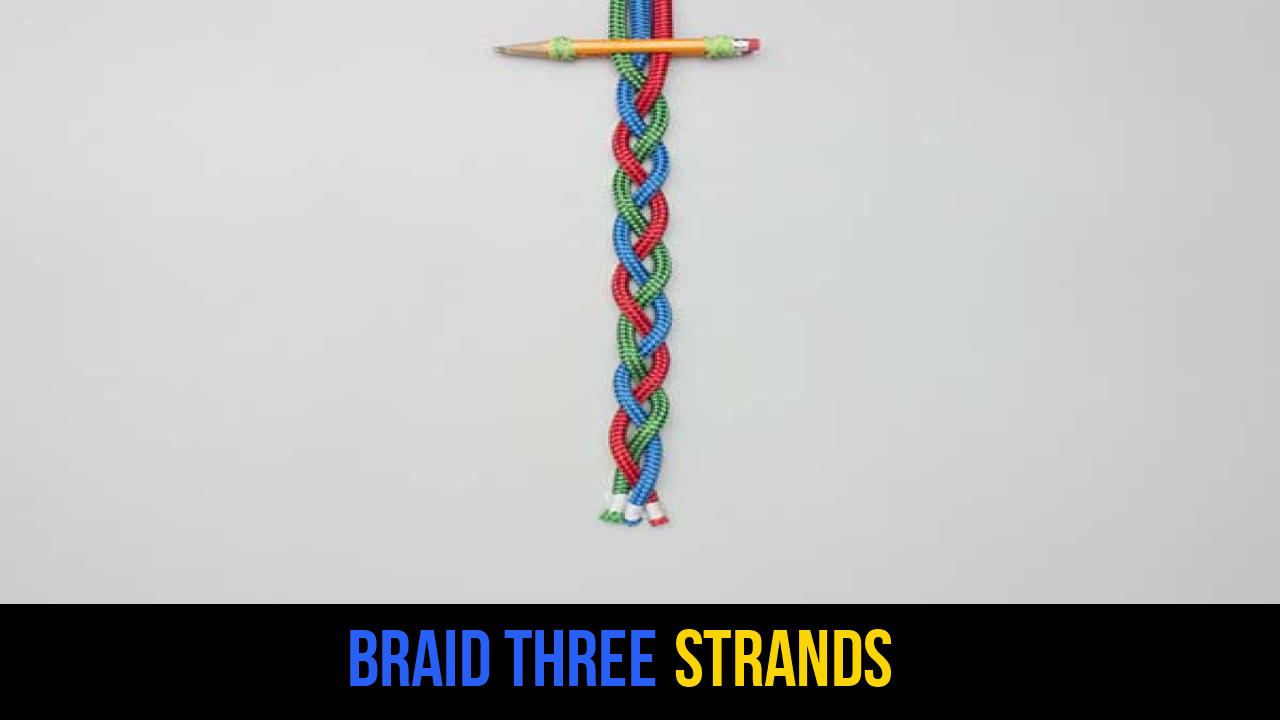
In the world of survival, maritime operations, and general outdoor utility, the ability to manipulate cordage is a fundamental skill that separates the novice from the expert. Among the most foundational techniques in any rigger’s repertoire is the Braid Three Strands. While it is often associated with aesthetic applications, the structural integrity and load-sharing capabilities of a well-executed braid are indispensable in the field.
Whether you are looking to create a custom tow line, organize paracord for a survival kit, or simply reinforce a weakening section of rope, understanding the mechanics of the Braid Three Strands knot is essential. This technique transforms individual, potentially fragile strands into a cohesive, flexible, and high-strength unit. In this guide, we will explore the technical nuances of this braid, the materials best suited for the task, and the precise methodology required to achieve a professional result.
Alternative names for this technique include: Three-Strand Plait, Standard Braid, Common Braid, and Pigtail Braid.
What Is a Braid Three Strands?
The Braid Three Strands is a method of interlacing three flexible components—typically rope, cord, or twine—to form a single, thicker, and more durable strand. Unlike a standard twist (laid rope), which relies on the internal friction of fibers twisted in opposite directions, a braid utilizes a repeating overlapping pattern. This geometry ensures that the tension is distributed evenly across all three strands, significantly reducing the risk of a single point of failure.
Practical Applications in the Outdoors
In the context of outdoor rope techniques, the three-strand braid serves several critical functions:
- Strength Augmentation: By braiding three smaller cords together (such as 550 Paracord), you create a composite rope with a much higher breaking strength than a single strand.
- Shock Absorption: The overlapping structure of a braid provides a slight "give" or elasticity, which is beneficial in applications like dog leashes or temporary moorings where sudden tension spikes might occur.
- Organization and Storage: Braiding is an excellent way to manage long lengths of cordage, preventing tangles and bird-nesting in your pack.
- Repair and Salvage: If a section of a larger rope is frayed, one can unlay the rope and re-braid the healthy strands to create a functional (though shorter) utility cord.
Materials and Tools Needed
To execute a perfect Braid Three Strands, selecting the right material is just as important as the technique itself. The choice of cordage affects the braid’s grip, weather resistance, and overall longevity.
Recommended Rope Types
- Paracord (Type III 550): The gold standard for outdoor enthusiasts. It is lightweight, durable, and the nylon construction allows for easy melting of the ends to prevent fraying.
- Nylon Rope: Excellent for marine environments due to its high elasticity and resistance to UV light.
- Manila or Hemp: Natural fibers provide a classic look and superior grip, though they are susceptible to rot if not dried properly.
- Polyester (Dacron): Best for applications requiring low stretch and high resistance to abrasion.
Essential Tools
- Cutting Tool: A sharp knife or specialized rope cutter to ensure clean ends.
- Binding Agent: Use electrical tape, masking tape, or a small piece of twine for "whipping" the ends. This is crucial for the first step of the process.
- Heat Source: A lighter or torch (for synthetic ropes) to cauterize the ends and prevent unravelling.
- Work Surface: While braiding can be done "in-hand," securing the bound end to a fixed point (like a carabiner or a heavy clip) allows for more consistent tension.
How to Tie Braid Three Strands?
Following the proper sequence is vital to ensure the braid is tight and uniform. Use the following steps to master this essential rope knot technique.
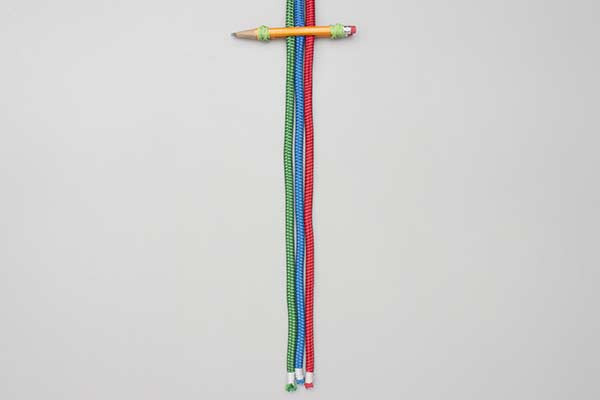
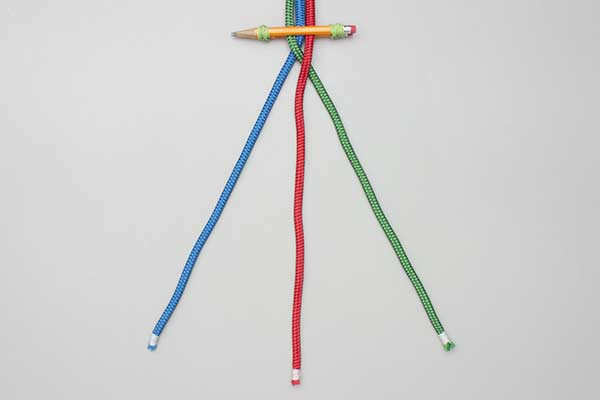
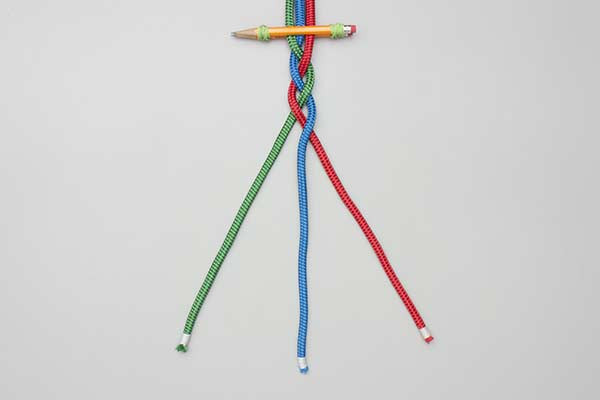
- Start with the ends bound together.
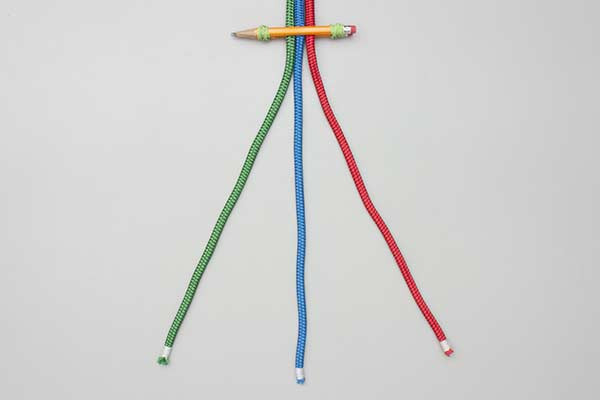
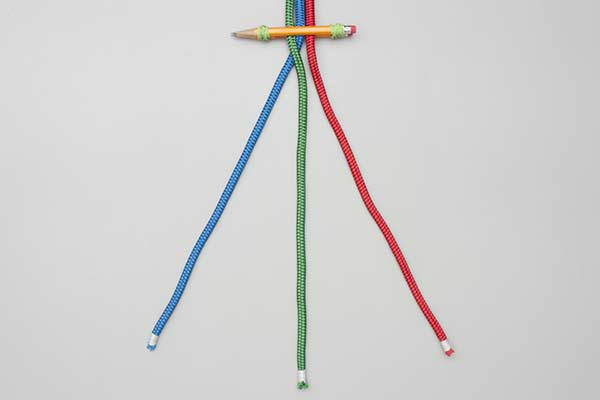
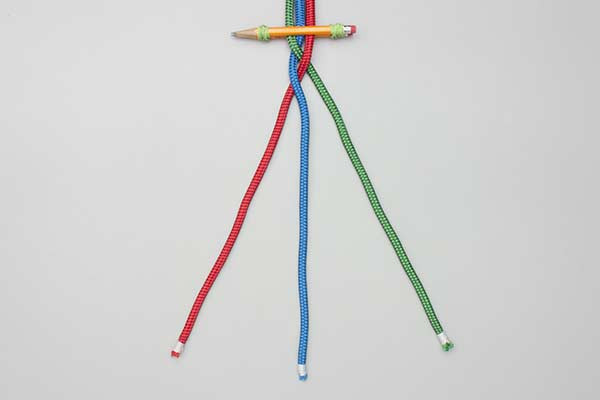
- Pass one outside strand across the center strand and then pass the other one across the center one.
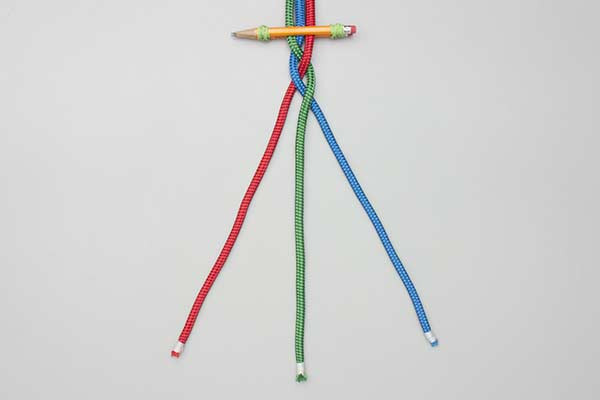
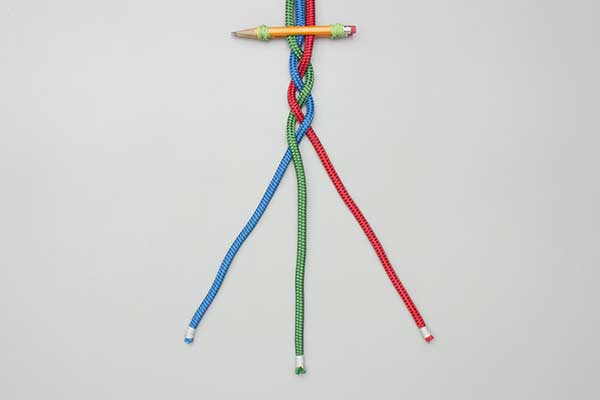
- Repeat alternating one side and then the other.
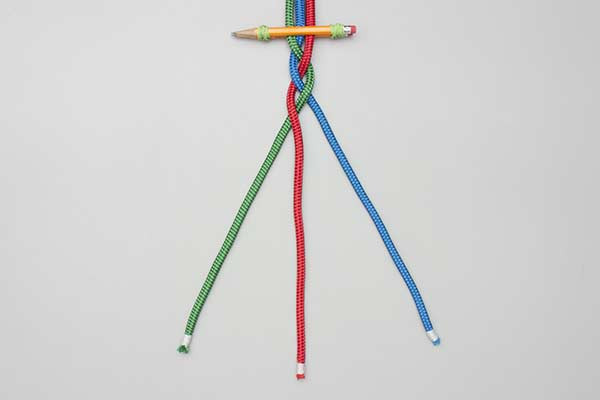
- Repeat again.
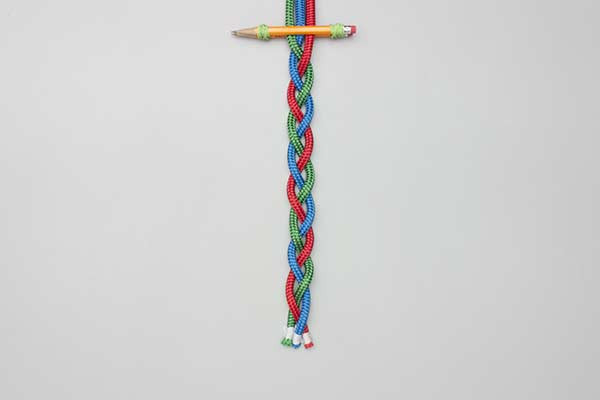
- Continue until you reach the desired length.
Common Mistakes to Avoid
Even seasoned professionals can make errors when performing outdoor rope techniques. To ensure your Braid Three Strands knot is structurally sound, keep an eye out for these common pitfalls:
1. Inconsistent Tension
The most frequent mistake is applying more pull to one side than the other. This results in a "lopsided" braid that looks spiral rather than flat. To avoid this, ensure you pull each strand with equal force after it crosses the center.
2. Failure to Bind the Ends
The instruction "Start with the ends bound together" is the most critical part of the setup. If the ends are loose, the strands will rotate during the braiding process, causing the individual fibers to untwist and weakening the final product.
3. Overlapping the Same Side Twice
Braiding requires a rhythmic left-over-center, right-over-center pattern. If you accidentally pass the left strand twice, you will break the geometric symmetry, creating a weak point in the cordage.
4. Ignoring Material Twist
As you pass the outside strands over the center, the strands themselves can begin to twist. Periodically "comb" through the loose ends of your strands with your fingers to ensure they remain flat and untangled.
Related Knots and Splicing
Expanding your knowledge of rope knots involves understanding how different techniques complement one another. Here are a few related methods:
- Square Knot (Reef Knot): A simple binding knot used to secure a rope or line around an object; it is often used to finish the ends of a braid.
- Four-Strand Braid: A more complex version of the three-strand technique that produces a rounder, denser cord suitable for heavy-duty handles.
- Eye Splice: A permanent loop formed at the end of a rope by intertwining the strands back into the standing part of the rope.
- Bowline Knot: Known as the "King of Knots," this creates a fixed loop at the end of a rope that will not slip or bind under load.
The Science of Braiding: Why It Works
From a technical standpoint, the Braid Three Strands is a marvel of friction and geometry. In a single strand of rope, the load is carried entirely by the longitudinal fibers. If one fiber snaps, the integrity is compromised. In a braid, the strands are positioned at an angle to the direction of the load.
When tension is applied to a braided rope, the strands compress against each other. This "constriction" increases the internal friction, meaning the harder you pull, the tighter the strands grip one another. This is why braided ropes are preferred for high-stakes outdoor activities like climbing and sailing. Furthermore, the three-strand configuration provides a balance between flexibility and bulk; it is thick enough to handle easily but supple enough to be coiled or knotted without difficulty.
Final Words
The Braid Three Strands is more than just a decorative pattern; it is a vital skill in the toolkit of any outdoor specialist. By mastering the simple rhythm of alternating outside strands over the center, you gain the ability to create custom gear, reinforce damaged lines, and manage your cordage with professional efficiency.
Remember that the key to a high-quality braid lies in the preparation—specifically, ensuring your ends are bound and your tension remains consistent throughout the process. Whether you are in the deep wilderness or working on a maritime vessel, the reliability of your rope knots can make all the difference. Practice this technique with various materials to understand how different fibers behave, and you will soon find the Braid Three Strands becoming second nature in your outdoor adventures.
