
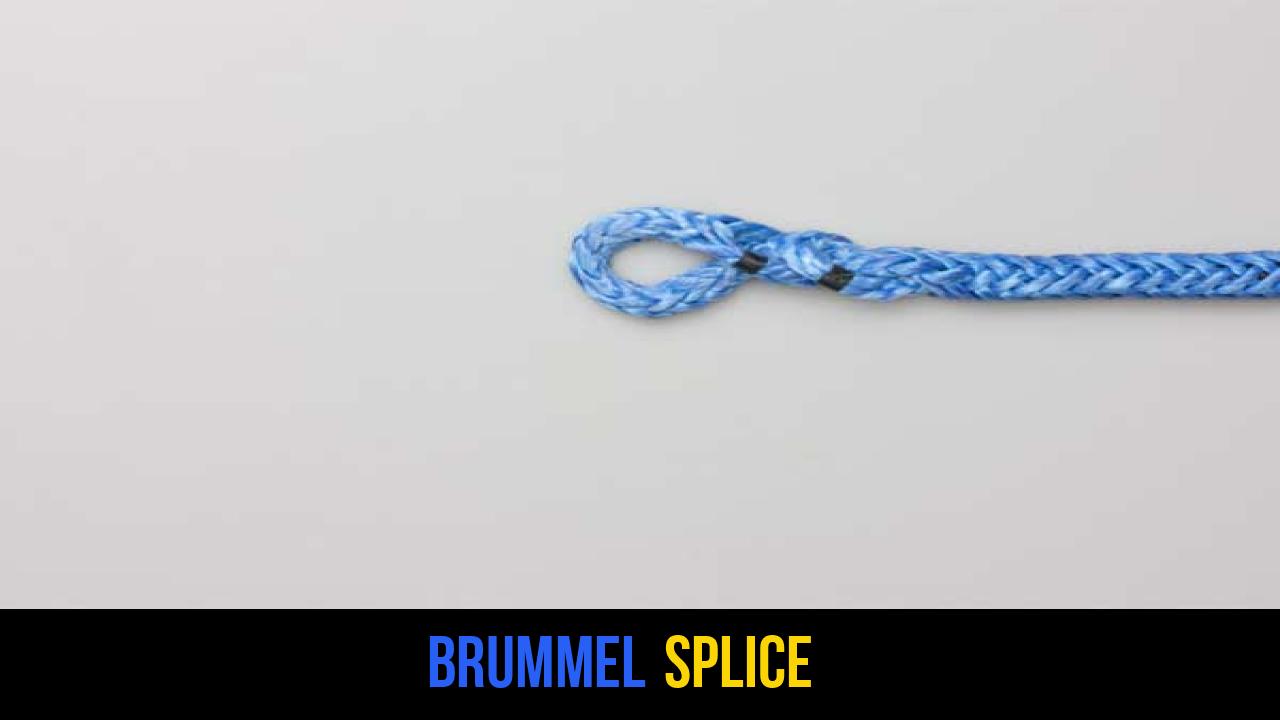
In the world of outdoor rope techniques, few methods are as respected and technically sound as the Brummel Splice. Whether you are a professional arborist, a competitive sailor, or an off-road enthusiast, understanding how to manipulate high-tech fibers like Dyneema and Spectra is a game-changing skill. While traditional rope knots have served humanity for millennia, modern synthetic fibers require a different approach to maintain their incredible breaking strength.
The Brummel Splice is the gold standard for creating a permanent, non-slip eye in hollow-braid rope. Unlike a standard knot, which can reduce a rope’s strength by up to 50%, a properly executed splice can retain nearly 100% of the line’s rated capacity. This article provides a comprehensive deep dive into the mechanics, applications, and step-by-step execution of this essential technique.
Alternative names for this technique include the Inverted Splice, the Locking Eye Splice, and the McDonald Brummel.
What Is a Brummel Splice?
The Brummel Splice is a specialized method used to create a fixed loop (an "eye") at the end of a hollow-braid synthetic rope. It is uniquely characterized by its "locking" mechanism. In a standard bury splice, the strength of the loop relies entirely on the friction of the rope’s cover gripping the "tail" hidden inside it. However, if the loop is not under constant tension, the tail can potentially slip out.
The Brummel variation solves this by passing the two parts of the rope through each other in a specific sequence. This creates a mechanical lock that prevents the splice from pulling apart even when the line is slack.
Practical Uses in the Field
- Sailing and Rigging: Used for halyards, sheets, and control lines where weight is a concern and high strength is non-negotiable.
- Arboriculture: Creating friction savers or static climbing lines that need to be slim enough to pass through crotches of trees.
- Off-Roading: Making soft shackles or winch line extensions that are safer and lighter than steel cables.
- Hammock Camping: Constructing "Whoopie Slings" for ultra-light, adjustable suspension systems.
Materials and Tools Needed
Before you begin the splicing process, you must ensure you have the correct materials. The Brummel Splice is specifically designed for hollow-braid ropes. It will not work on three-strand twisted rope or standard double-braid rope without significant modifications to the technique.
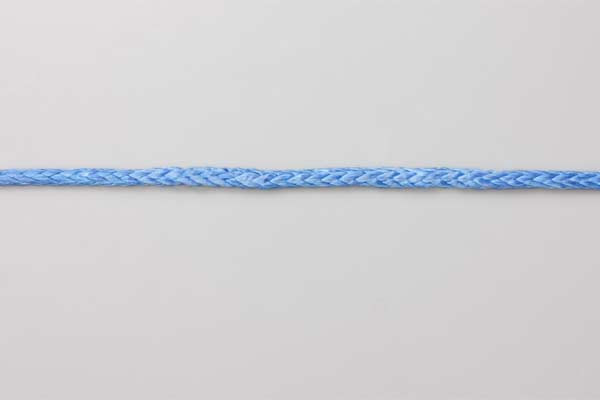
1. The Rope
The most common materials for this splice are Ultra-High-Molecular-Weight Polyethylene (UHMWPE), commonly known by brand names like Dyneema or Spectra. These ropes are incredibly strong, low-stretch, and have a hollow center that allows the rope to be tucked back into itself.
2. Splicing Fids or Pulling Needles
A fid is a tool used to help pull the rope through itself. For hollow braids, a Selma fid or a wire-loop pulling tool is ideal. The size of the fid must match the diameter of the rope you are working with.
3. Measuring and Marking Tools
Precision is key in splicing. You will need:
- A soft measuring tape.
- A permanent marker or "grease pencil" to mark the rope without damaging the fibers.
4. Cutting Tools
Because modern synthetics are designed to be abrasion-resistant, they are notoriously difficult to cut. A high-quality, serrated knife or specialized ceramic scissors are recommended for a clean edge.
How to Tie Brummel Splice?
Follow these steps exactly as outlined to ensure a secure and functional lock. Note that this specific sequence is designed for a "pass-through" method, which is the most reliable way to secure the eye.
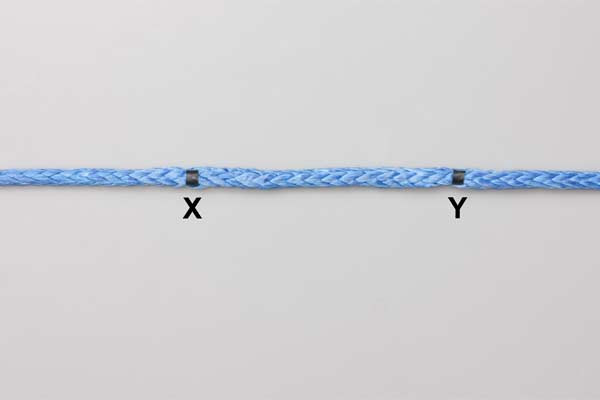
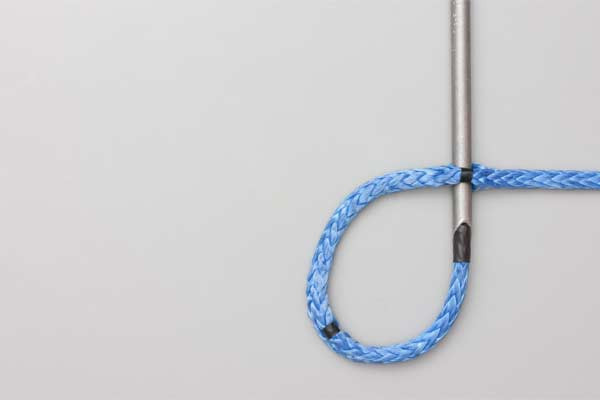
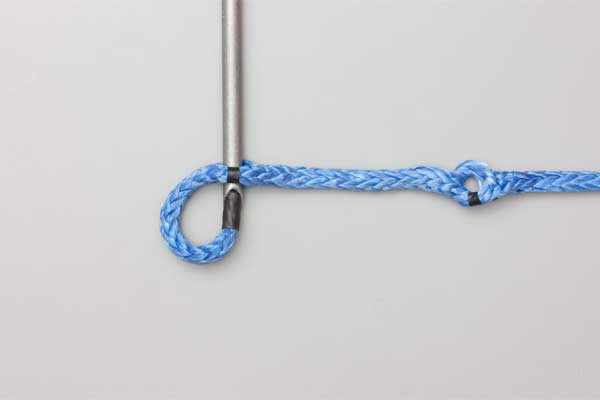
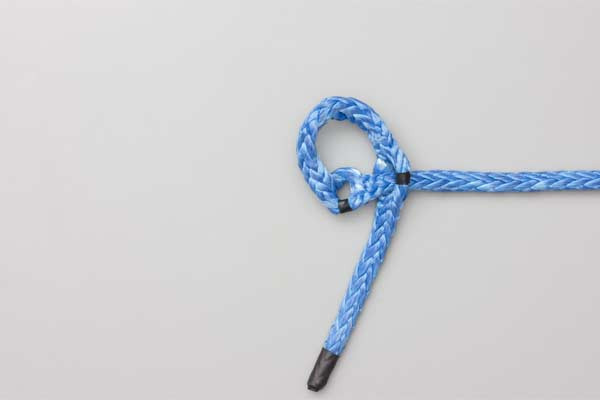
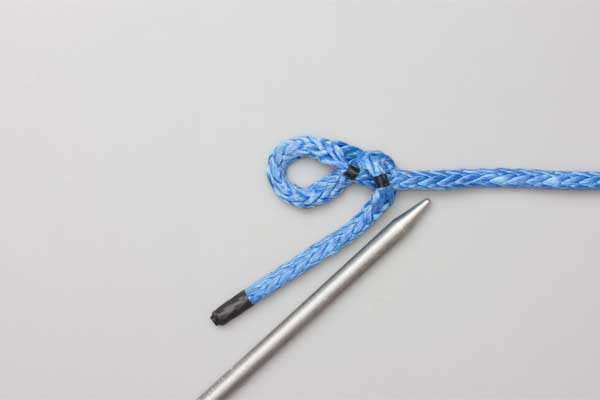
- Mark the length needed for the eye.
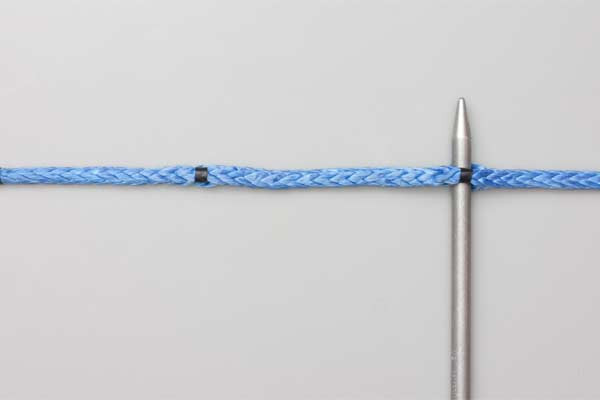
- Make a hole at each mark and pass the end through and pull.
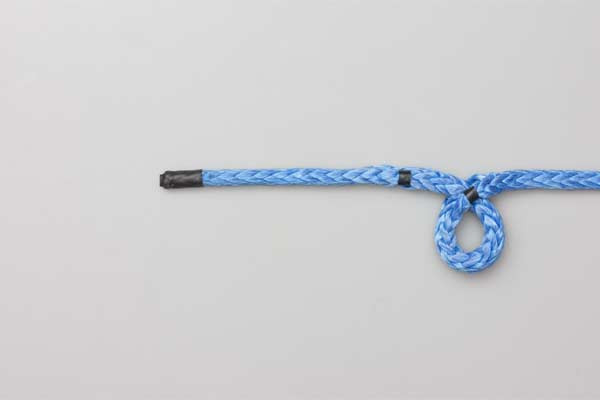
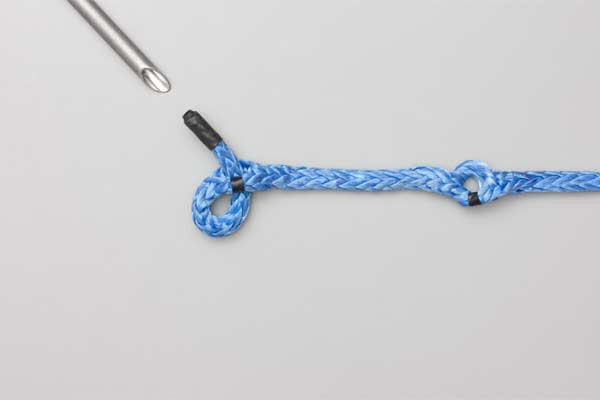
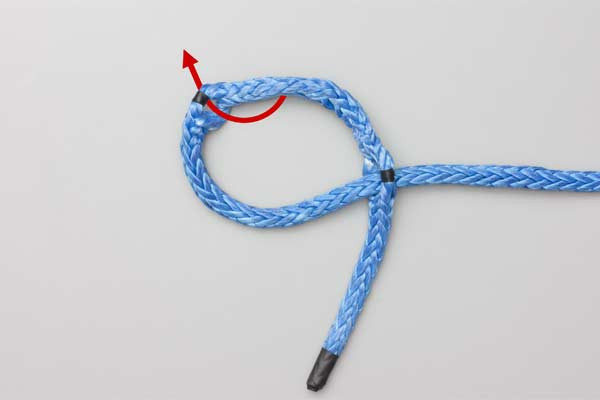
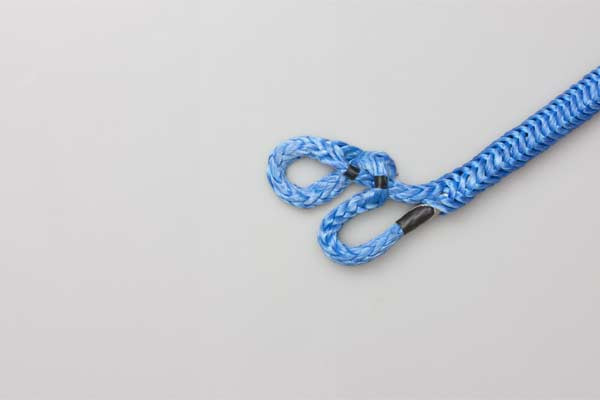
- Choose the hole nearest the end and pull a bight and the other hole through.
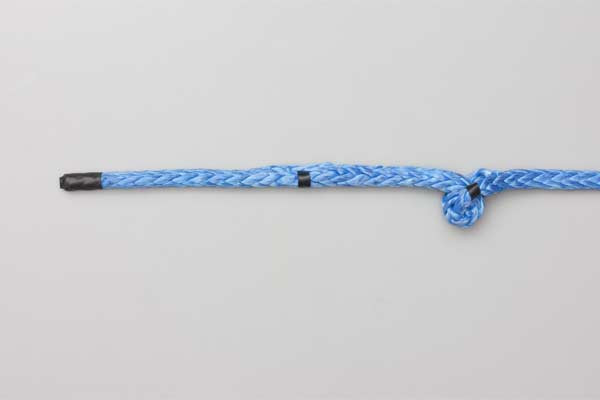
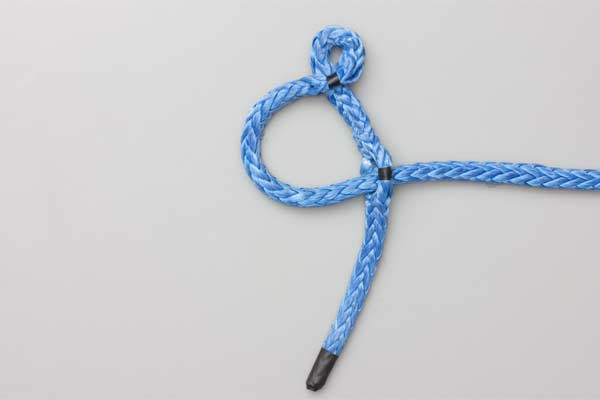
- Then, through the second hole pull a bight.
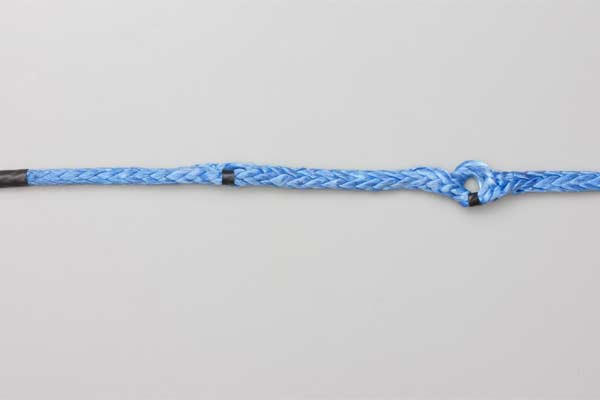
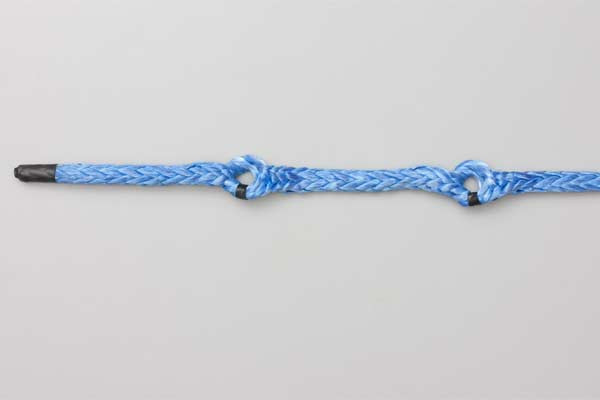
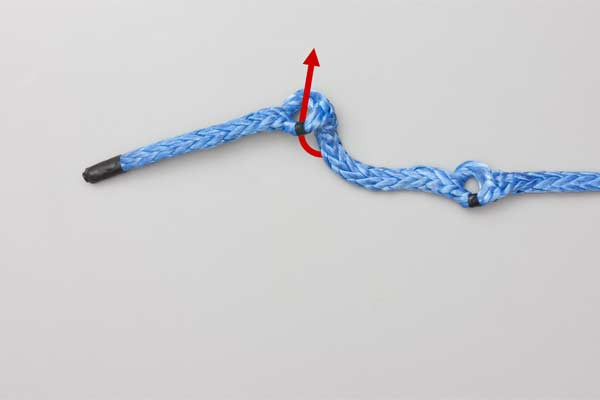
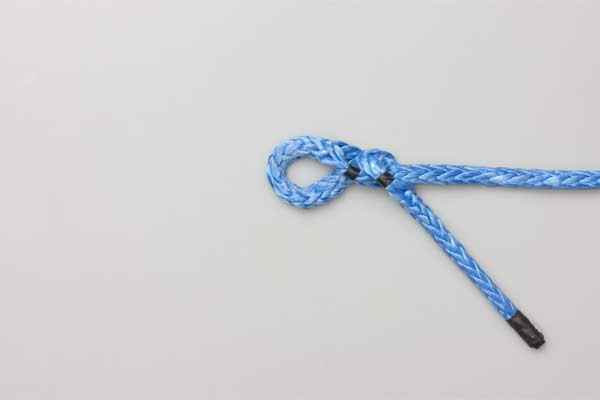
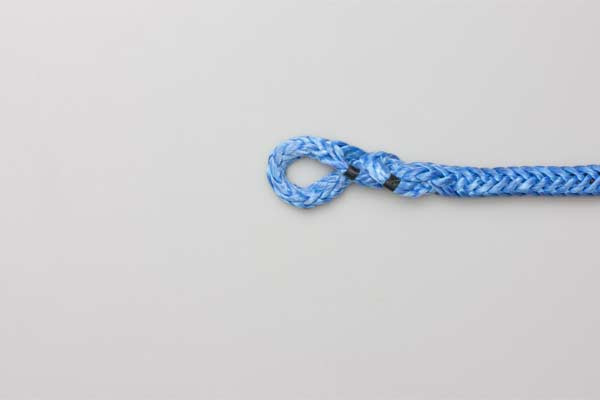
- Snug the splice together and pull the short end through the center of the standing end.


Common Mistakes to Avoid
Even for experienced riggers, the Brummel Splice can be tricky. Small errors in the locking sequence or the finishing "bury" can compromise the integrity of the rope.
1. Failing to Taper the Tail
After you complete the locking steps mentioned above, the remaining "short end" must be buried inside the "standing end." Before burying it, you must taper the tail by removing several strands. If you bury a blunt end, it creates a "stress riser"—a sharp change in the rope’s diameter that becomes a failure point under load.
2. Incorrect Locking Sequence
The magic of the Brummel is the way the rope passes through itself. If you pass the rope through the same hole twice or skip a step, you lose the mechanical lock. Always test the lock by pulling on the eye before performing the final bury; if it slides, the lock is incorrect.
3. Using the Wrong Rope Type
Attempting a Brummel Splice on a rope with a solid core (like paracord or climbing rope) is impossible. This technique relies on the "Chinese Finger Trap" physics of hollow-braid construction.
4. Ignoring the Bury Length
The mechanical lock provides security when the line is slack, but the friction bury provides the strength when the line is under load. Ensure the tail is buried for a length equal to at least 40 to 50 times the diameter of the rope to ensure maximum friction.
Related Knots and Splicing
Understanding the Brummel Splice opens the door to a variety of other outdoor rope techniques. Here are a few related methods you might encounter:
- Eye Splice (Standard): A traditional method of weaving strands back into a rope to create a loop, often used in 3-strand twisted rope for docking lines.
- Locked Brummel: A variation where the rope is passed through itself twice to create a mechanical lock before the bury, similar to the method described above but often used when only one end of the rope is accessible.
- Whoopie Sling: An adjustable loop using a bury splice, popular in arboriculture and hammock camping for easy tensioning without bulky hardware.
- Soft Shackle: A lightweight, high-strength connector made entirely of rope, utilizing a stopper knot and a Brummel-style loop to replace heavy steel carabiners.
Final Words
The Brummel Splice is more than just a way to tie a loop; it is a fundamental skill for anyone working with high-performance synthetic lines. By replacing traditional rope knots with this high-efficiency splice, you ensure that your gear remains as strong as possible while maintaining a sleek, professional profile.
While the steps may seem complex at first glance, practice is the key to mastery. Once you understand the "inner-to-outer" logic of the pass-throughs, you will find that the Brummel is one of the fastest and most secure splices in your repertoire. Always remember to inspect your splices regularly for signs of wear or "milking" (where the bury begins to creep out), and never compromise on the length of your taper or bury.
Whether you are securing a halyard in a gale or setting up a suspension system in the deep woods, the Brummel Splice offers the reliability and strength that modern adventurers demand.
