
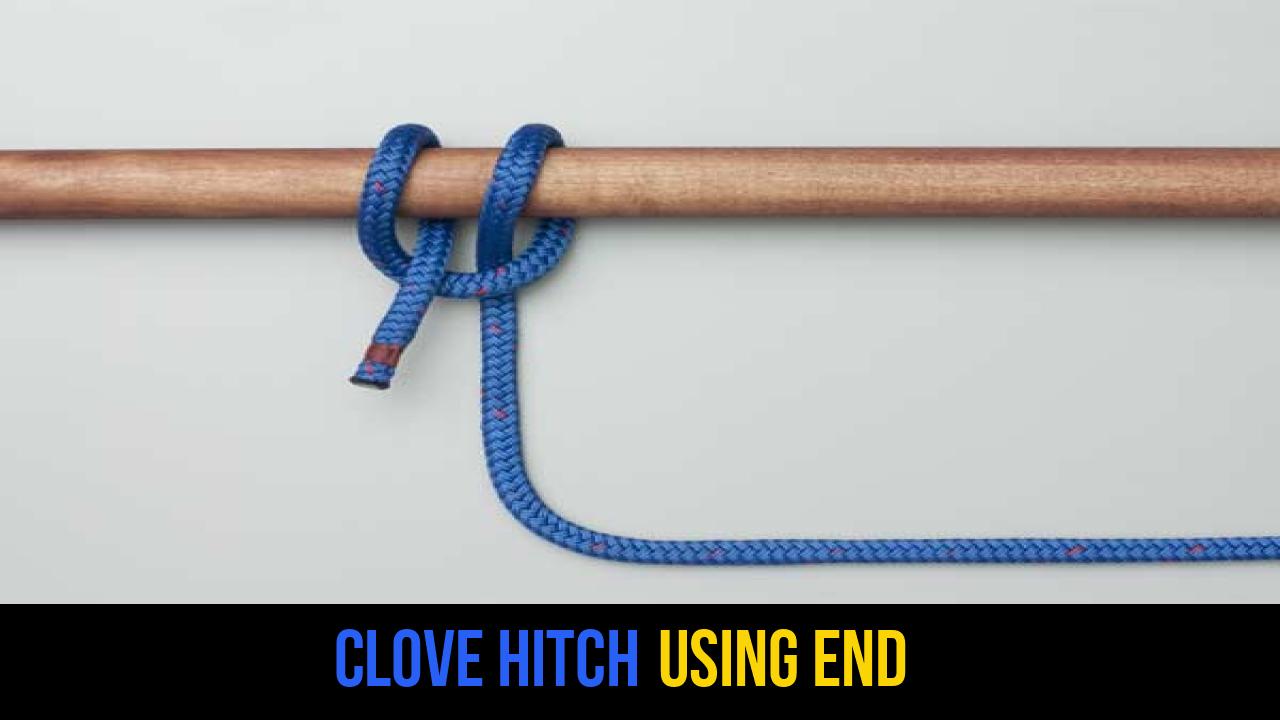
In the world of rope knots, few configurations are as iconic or as fundamentally necessary as the Clove Hitch. Whether you are a seasoned sailor, an arborist, or a weekend camping enthusiast, mastering outdoor rope techniques begins with the basics. Among the various ways to secure a line to a cylindrical object, the Clove Hitch using End stands out for its simplicity and efficiency.
A hitch is specifically designed to fasten a rope to another object, such as a post, a rail, or a spar. The "using end" method is the traditional approach, employed when the end of the rope is free and can be passed around the anchor point. While there are faster ways to "throw" a clove hitch over the top of a post (the "on the bight" method), the end-fed method is the most versatile because it can be used even when the top of the post is inaccessible.
In this comprehensive guide, we will explore the mechanics, applications, and safety considerations of this essential knot. By the end of this article, you will understand not just how to tie it, but why it remains a staple in the toolkit of professionals worldwide.
Alternative names: Double Hitch, Peg Knot, Builder’s Knot, Waterman’s Knot.
What Is a Clove Hitch using End?
The Clove Hitch using End is a binding knot used to secure a rope to a cylindrical object. It is categorized as a "hitch" because it relies entirely on the friction between the rope and the object it is tied around to remain secure.
Practical Uses
In practical scenarios, this knot is a "utility player." You will find it used in:
- Pioneering and Scouting: It is the standard knot used to start and finish most lashings (such as square or diagonal lashings).
- Boating: It is frequently used to temporarily secure fenders to a railing or a boat to a piling.
- Camping: Ideal for securing guy lines to trees or tent poles where the tension is relatively constant.
- Theater and Rigging: Used by stagehands to adjust the height of curtains or scenery on a batten.
Limitations
While highly effective, the Clove Hitch is not a "set and forget" knot for life-critical applications. Its primary weakness is that it can slip if the rope is very stiff or if the object it is tied around is rotating. It can also work itself loose if the tension on the rope is intermittent rather than constant. Therefore, understanding when not to use it is just as important as knowing how to tie it.
Materials and Tools Needed
To practice and master the Clove Hitch using End, you need to consider both the rope and the anchor point. Not all materials react the same way under tension.
Rope Types
- Nylon Rope: Excellent for its elasticity and strength. However, it can be slippery, meaning you must pull the clove hitch extra tight to ensure the friction "bites."
- Polyester Rope: Offers less stretch than nylon and is more resistant to UV rays, making it great for outdoor use.
- Manila or Hemp: These natural fibers provide excellent grip. The rough texture of the fibers creates high friction, making the clove hitch very stable.
- Kernmantle (Climbing Rope): While strong, these are often very supple. A clove hitch in a climbing rope should almost always be backed up with a half-hitch.
Anchor Points
The Clove Hitch using End requires a cylindrical or semi-cylindrical object to function correctly.
- Poles and Spars: The smoother the surface (like a PVC pipe), the more likely the knot is to slip.
- Trees: Bark provides excellent "tooth" for the knot.
- Railing: Ideal for temporary ties in maritime or domestic settings.
How to Tie Clove Hitch using End?
To ensure the highest level of security and professional form, follow these steps exactly as outlined. This method is used when you have access to the end of the rope and need to wrap it around a fixed object.
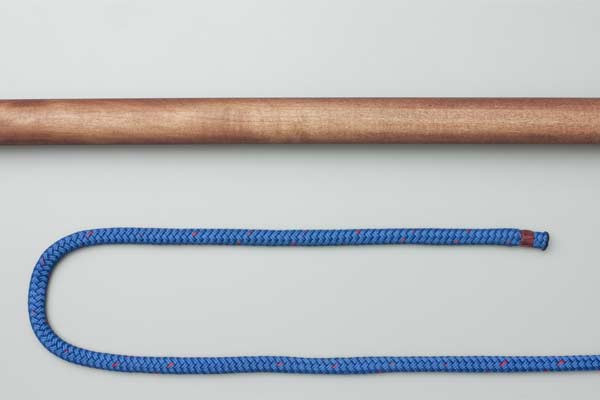
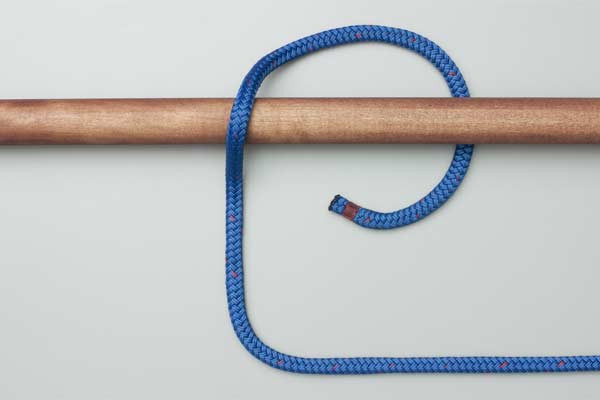
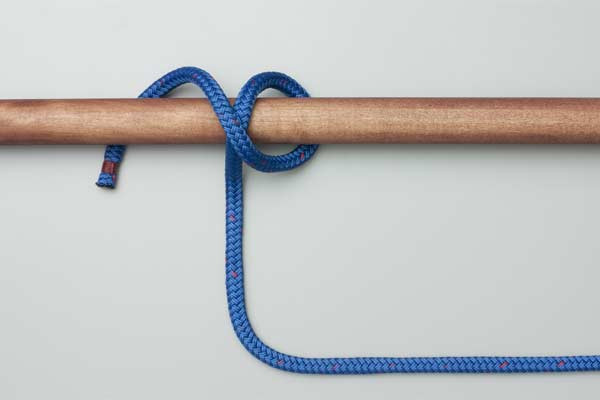
- Pass the end of the rope around the pole.
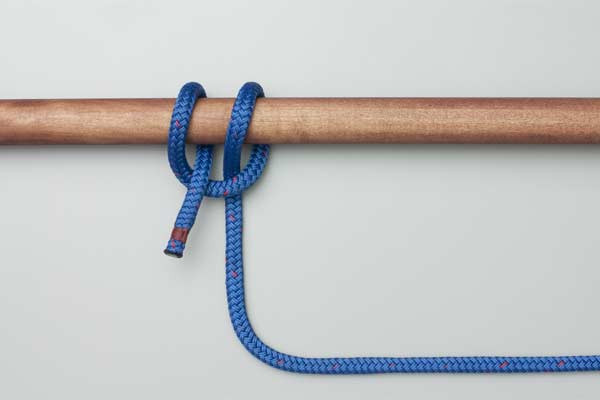
- Continue over the standing end and around the pole a second time.
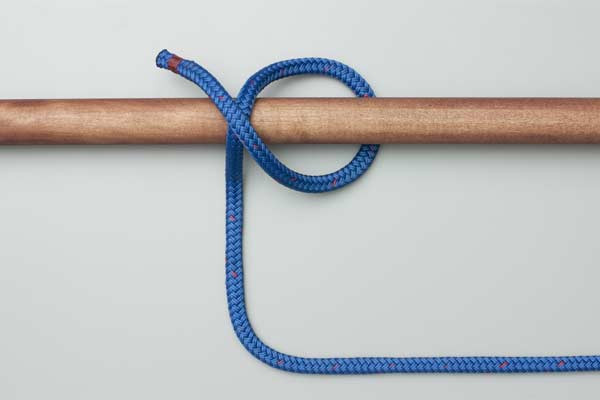
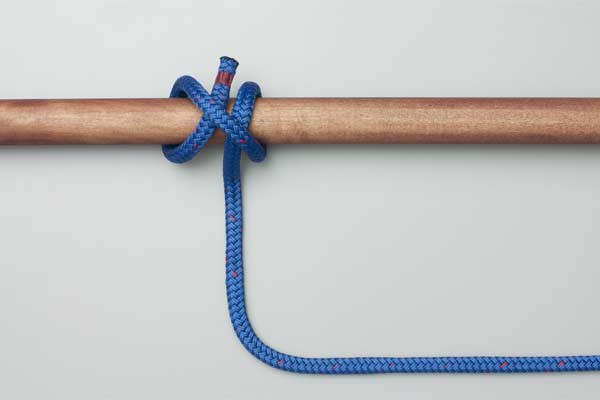
- Thread the end under itself and pull tight to form the clove hitch.
By following this sequence, you create a "crossing pattern" where the final tuck is held in place by the pressure of the preceding wrap. When finished, the two ends of the rope should emerge from the center of the knot, pointing in opposite directions, held down by a single diagonal bridge of rope.

Common Mistakes to Avoid
Even though the Clove Hitch using End is simple, beginners often make mistakes that can lead to knot failure.
1. Tying on Square Posts
The clove hitch relies on uniform friction around a circle. On a square post, the rope only touches the corners, leaving "gaps" of no tension on the flat sides. This significantly increases the risk of the knot sliding down the post or unraveling.
2. Lack of Constant Tension
A clove hitch is most secure when there is a constant load on the standing part of the rope. If the rope goes slack and then tight repeatedly (like a boat bobbing in heavy chop), the knot can "walk" or loosen. In these cases, always add a Half-Hitch to the standing end for extra security.
3. Incorrect Tucking
A common error in step 3 is threading the end under the wrong part of the wrap. If the end is not tucked directly under the second turn, you may accidentally create two separate loops that are not interconnected, which will fail immediately under load.
4. Ignoring Rope Diameter
If the rope is too thick for the diameter of the pole, the "bend radius" will be too sharp, preventing the knot from cinching down properly. Conversely, if the rope is too thin, it may not create enough surface area contact to hold.
Related Knots and Splicing
Understanding the Clove Hitch using End is a gateway to learning more complex rope knots. Here are a few related techniques:
- The Bowline: Often called the "King of Knots," the Bowline creates a fixed loop at the end of a rope that will not slip or bind, making it safer for rescue or heavy lifting.
- Round Turn and Two Half Hitches: This is a more secure alternative to the clove hitch for mooring. It involves an extra wrap around the pole to take the strain before the hitches are applied.
- The Timber Hitch: A specialized hitch used for dragging heavy logs. It is unique because it becomes more secure as the load increases but remains very easy to untie.
- Square Lashing: A structural technique that uses clove hitches as the "start" and "finish" points to join two poles together at a 90-degree angle.
- The Constrictor Knot: A more permanent version of the clove hitch that is notoriously difficult to untie once tightened, often used for hose repairs or bag closures.
Final Words
The Clove Hitch using End is an indispensable tool in the repertoire of anyone practicing outdoor rope techniques. Its beauty lies in its simplicity: it can be tied in seconds, adjusted easily, and untied without struggle, even after being subjected to a load.
However, professional expertise involves knowing the right tool for the right job. While the Clove Hitch using End is perfect for temporary attachments, lashings, and light-duty rigging, always remember to use backups or alternative knots for safety-critical applications.
Practice these steps until the movement becomes muscle memory. Whether you are at a campsite, on a dock, or in a backyard, the ability to throw a clean, tight clove hitch is a mark of a true outdoorsman and a skilled technician. Keep your ropes coiled, your hitches tight, and always prioritize safety in your rigging endeavors.
