
In the world of maritime operations and technical outdoor activities, the way you handle your line is just as important as the knot you use to secure it. A stray rope is more than just an eyesore; it is a significant safety hazard that can lead to trips, falls, or mechanical entanglements. This is where the Coil Attached Rope technique becomes indispensable.
A Coil Attached Rope is a specialized method used primarily to organize the "bitter end" or the excess slack of a line that has already been secured to a fixed point, typically a horn cleat. While many beginners simply pile rope on a deck or ground, professionals understand that a properly coiled and hung rope ensures the line remains kink-free and ready for immediate deployment. Whether you are docking a vessel in high winds or setting up a complex rigging system at a campsite, mastering outdoor rope techniques like this one is a hallmark of an experienced woodsman or sailor.
Alternative Names: Cleat Coil, Hanging Coil, Sailor’s Coil, Marine Coil, and Slack Management Loop.
What Is a Coil Attached Rope?
The Coil Attached Rope is a functional storage technique rather than a weight-bearing knot. Its primary purpose is to take the long tail of a rope that is already tied off and transform it into a neat, self-contained bundle that hangs securely off the ground or deck.
Practical Uses
- Maritime Docking: After securing a boat to a dock via a cleat hitch, the remaining rope is coiled to prevent it from floating in the water (where it could foul a propeller) or cluttering the dock.
- Industrial Rigging: Used to manage excess hoist lines so they do not interfere with moving machinery or foot traffic.
- Search and Rescue: Keeping throw bags or safety lines organized for rapid, snag-free use.
- General Camping: Managing long lengths of paracord or utility rope used for tarps and gear suspension.
The defining characteristic of this technique is the "over and under" coiling method. This specific motion neutralizes the natural twist of the rope fibers, preventing the dreaded "hockling" or kinking that occurs when a rope is wound repeatedly in the same direction.
Materials and Tools Needed
To execute a perfect Coil Attached Rope, you must consider the diameter and material of your line. Different ropes behave differently under tension and when being coiled.
Recommended Rope Types
- Three-Strand Nylon: The most common dock line. It is stretchy and durable but prone to kinking if not coiled with the "alternate turns" method.
- Double-Braided Polyester: Very smooth and easy to handle. It lays flat in a coil and is the preferred choice for high-end sailing yachts.
- Polypropylene: Often used for tow lines because it floats. It is stiffer and requires more deliberate "over/under" movements to stay organized.
Tools
- A Fixed Point: Usually a horn cleat (the standard T-shaped hardware found on docks and boats).
- Gloves: When working with heavy marine lines or coarse natural fibers like manila, gloves prevent rope burn and splinters.
How to Tie Coil Attached Rope?
Following the proper technical sequence is vital for ensuring the coil hangs correctly and can be released quickly without tangling.
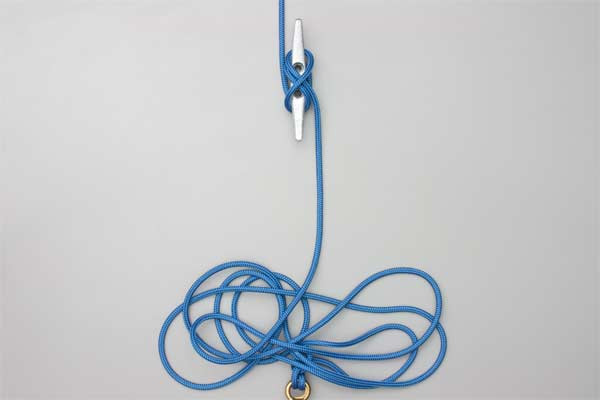
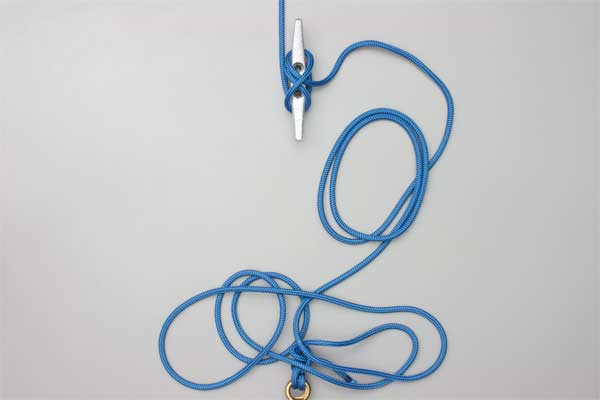
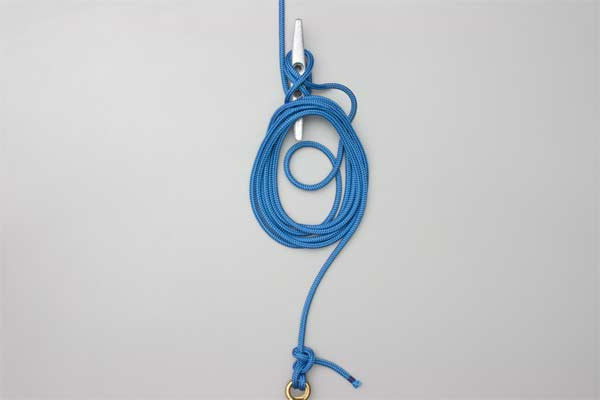
- Start from where the rope is attached to the cleat.
- Leave enough slack to form the final loop.
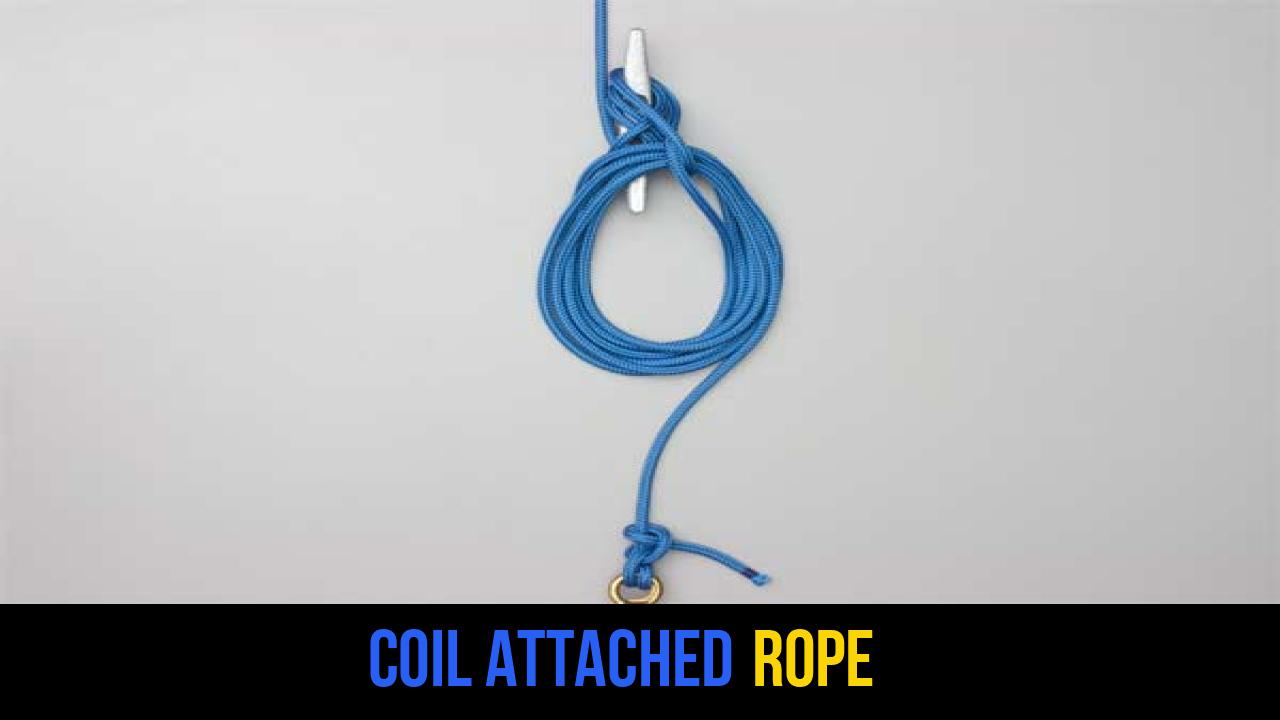
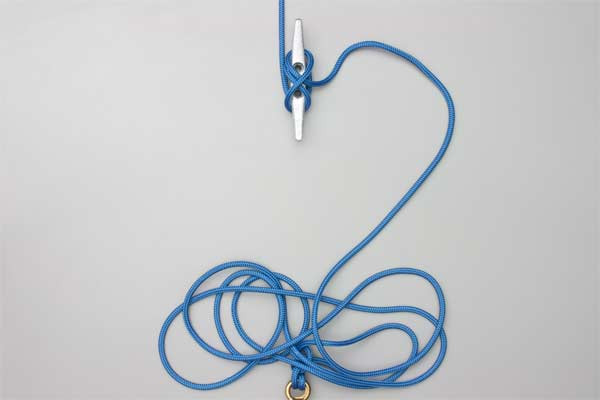
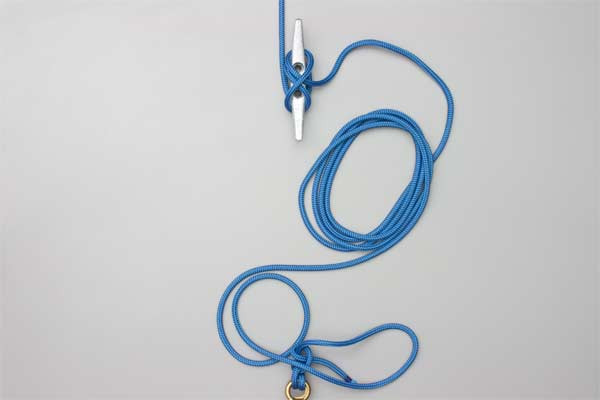
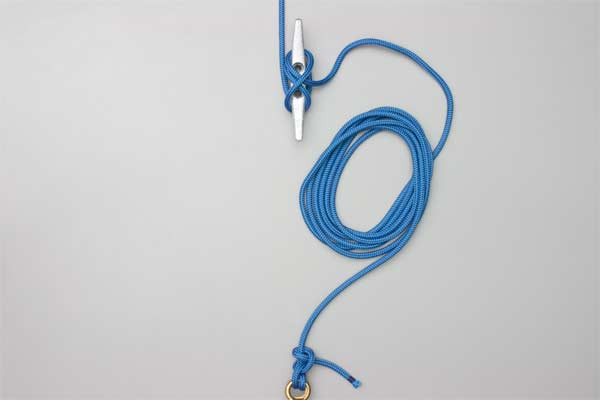
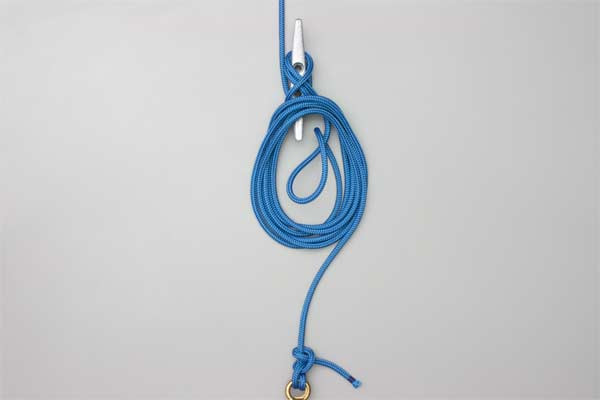
- Make the coil with alternate turns over and under the rope.
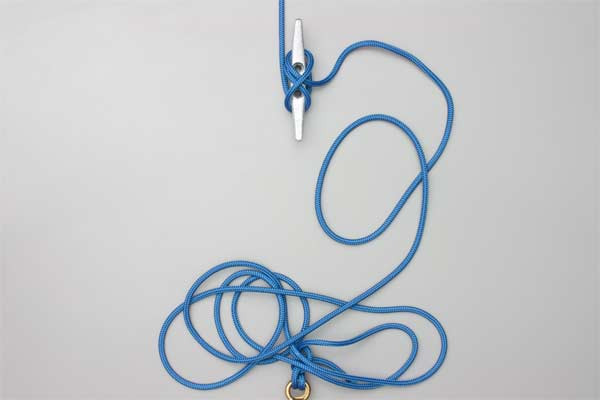
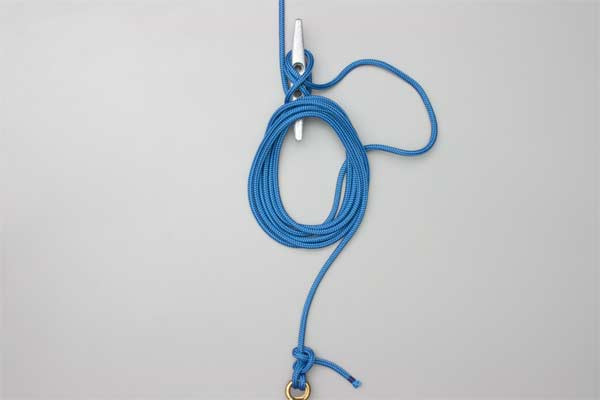
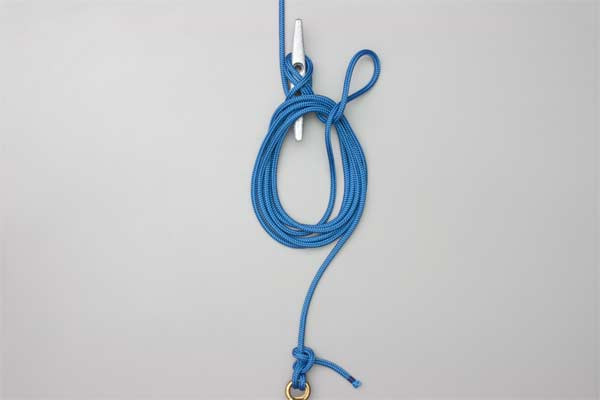
- Pull a twisted loop of the slack through the coil.
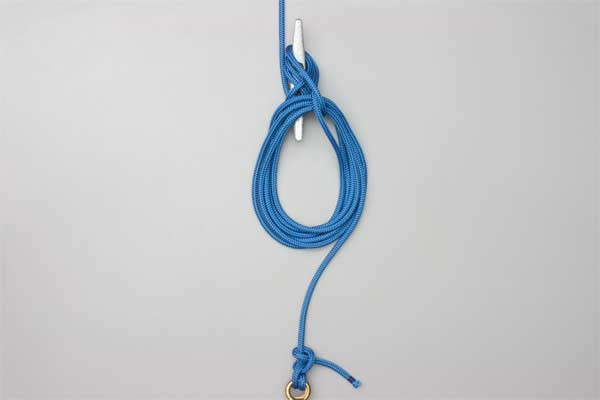
- Hang the loop on the cleat.
Technical Deep Dive: The "Over and Under" Method
The most critical part of the Coil Attached Rope instruction is the instruction to “Make the coil with alternate turns over and under the rope.” This is a professional technique used by film grips, electricians, and sailors worldwide.
When you coil a rope normally (all "over" turns), you introduce a half-twist into the rope with every loop. By the time you reach the end of a 50-foot line, you have introduced dozens of twists. When you try to pull that rope out, it will twist back on itself, creating knots. By alternating "over" (a standard loop) and "under" (flipping the wrist to reverse the twist), you create a "neutral" coil. This allows the rope to be dropped or thrown in a perfectly straight line without a single snag.
Common Mistakes to Avoid
Even seasoned outdoor enthusiasts can make errors when managing rope knots. Here are the most common pitfalls when performing a Coil Attached Rope:
- Coiling Too Tight: If the loops are pulled too tight, the rope fibers can become compressed over time, leading to permanent deformation or "memory" in the line. Keep your loops consistent and relaxed.
- Incorrect Slack Estimation: If you do not leave enough slack at the beginning (Step 2), you won’t have enough length to pull the twisted loop through the center. This often results in a messy finish that falls off the cleat.
- Neglecting the Twist: When pulling the final loop through (Step 4), the instruction specifies a twisted loop. This twist provides the friction necessary to keep the entire coil from sliding apart under its own weight.
- Ignoring Rope Lay: Natural fiber ropes have a "lay" (the direction the strands are twisted). Always feel the rope; if it resists a turn, you likely need to adjust your over/under rhythm.
Related Knots and Splicing
Understanding the Coil Attached Rope is part of a broader set of skills. Here are related outdoor rope techniques you should master:
The Cleat Hitch
The foundational knot used before you begin the coiling process. It involves a wrap around the base, a figure-eight over the horns, and a final locking tuck.
The Gasket Coil
A method used for storing free-standing ropes. Unlike the Coil Attached Rope, the Gasket Coil uses the tail of the rope to wrap around the middle of the bundle to secure it for transport.
The Flemish Flake
A decorative and functional way to lay rope flat on a deck in a spiral pattern. It is used when the rope needs to be ready to run out instantly without being hung on a cleat.
The Bowline
Often called the "King of Knots," the Bowline creates a fixed loop at the end of a rope. It is frequently used in conjunction with cleat work for temporary mooring.
Safety Considerations
While the Coil Attached Rope is an organizational tool, it plays a massive role in safety. On a moving vessel, a loose rope can become a "death trap" if it gets caught in a winch or wraps around a passenger’s ankle.
Pro Tip: Always ensure that your coil is hung on the horn of the cleat that is opposite the direction of the load. This prevents the weight of the coil from accidentally interfering with the tensioned part of the line, which could potentially uncleat the boat during a surge.
Final Words
The Coil Attached Rope is more than just a way to tidy up; it is a fundamental skill that demonstrates a high level of "seamanship" and attention to detail. By following the precise steps of starting at the cleat, utilizing the over/under coiling method, and securing the bundle with a twisted loop, you ensure that your gear remains in top condition and your environment stays safe.
Whether you are a professional mariner or a weekend hiker, integrating these rope knots and management styles into your routine will significantly improve your efficiency. Remember, a rope is a tool, and like any tool, it performs best when it is properly maintained and stored. Practice your over/under turns until they become muscle memory, and you will find that your lines last longer and your deployments are smoother than ever before.[/content]
