
In the world of seamanship, arboriculture, and general outdoor exploration, the longevity of your gear is often determined by how well you maintain it. One of the most fundamental yet overlooked skills in any rigger’s repertoire is the ability to secure the ends of a rope. Without proper treatment, even the highest quality natural or synthetic fiber ropes will eventually succumb to "unlaying"—the process where the strands unravel, rendering the rope useless and potentially dangerous.
The Common Whipping is the traditional solution to this problem. It is a sleek, reliable, and effective method of binding the end of a rope using a thinner piece of twine. Unlike modern shortcuts like using electrical tape or heat-sealing (which only works on synthetics), a properly executed whipping provides a permanent, professional finish that resists friction and environmental wear. Whether you are preparing lines for a sailing vessel or securing the ends of a heavy-duty camping rope, mastering this technique is a hallmark of a true rope specialist.
This technique is also known by several other names in various industries, including: Simple Whipping, Plain Whipping, and Ordinary Whipping.
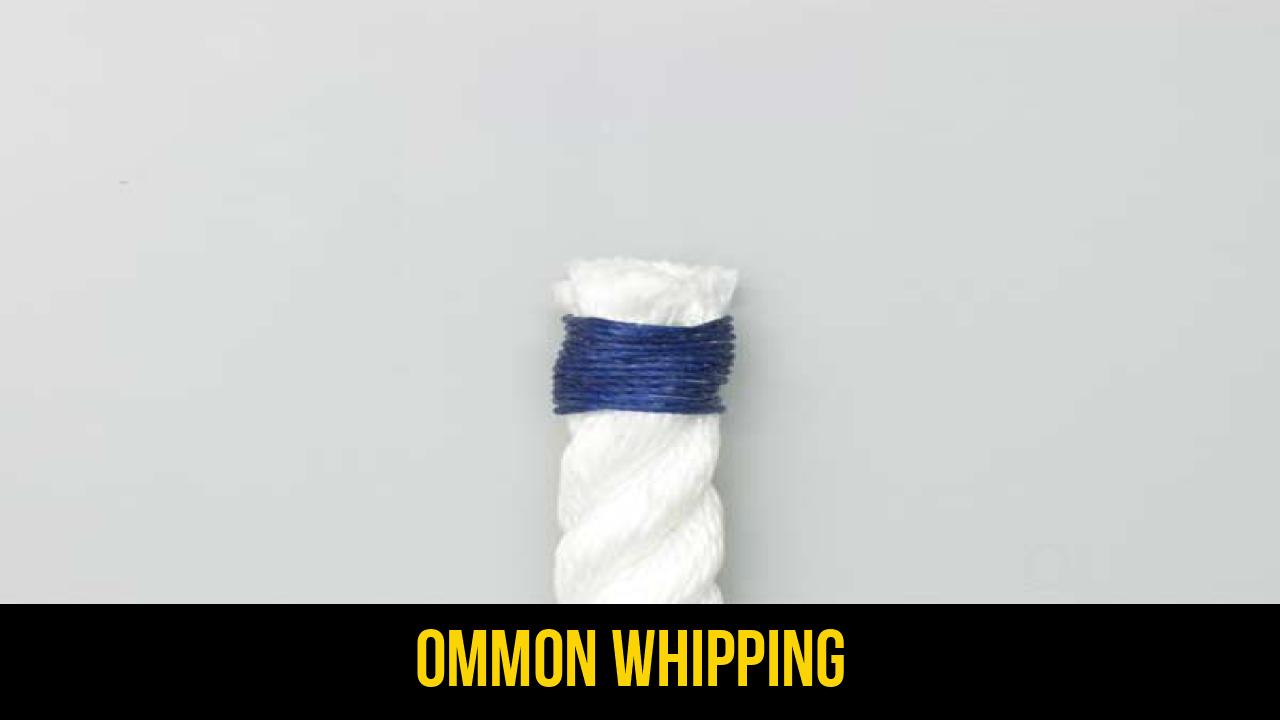
What Is a Common Whipping?
A Common Whipping is a series of tight turns made with a small diameter twine around the end of a larger rope. The primary purpose is to prevent the strands of the rope from fraying or untwisting. It is classified under the broader category of rope knots and "seizings," though it is technically a series of wraps secured by friction.
Practical Uses and Applications
The beauty of the Common Whipping knot lies in its simplicity and the fact that it requires no special tools, such as a sailmaker’s needle. It is particularly valued in the following scenarios:
- Natural Fiber Preservation: For ropes made of manila, sisal, or hemp, heat-sealing is impossible. Whipping is the only way to prevent unraveling.
- Aesthetic Finishing: In decorative knotwork or high-end marine rigging, a whipping provides a clean, tapered look that tape simply cannot match.
- Low-Profile Clearance: Because a whipping is flush against the rope, it allows the rope to pass through blocks, pulleys, or fairleads without snagging.
- Emergency Repairs: If a rope begins to fray in the field, a quick whipping can save the line from further degradation until a more permanent splice can be made.
Materials and Tools Needed
To achieve a professional-grade result, you must select the right materials. The effectiveness of outdoor rope techniques often depends on the synergy between the rope and the binding material.
1. The Rope
The Common Whipping can be applied to almost any rope type, including 3-strand twisted rope, braided cordage, and kernmantle lines. However, it is most commonly used on twisted natural fibers. Ensure the end of the rope is relatively clean before starting.
2. The Whipping Twine
The choice of twine is critical. For the best results:
- Material: Use waxed polyester or nylon twine for synthetic ropes. For natural ropes, a tarred marline or waxed linen thread is traditional and provides excellent grip.
- Thickness: The twine should be significantly thinner than the rope strands. A general rule of thumb is that the finished whipping should be at least as long as the diameter of the rope it is protecting.
3. Essential Tools
- Sharp Knife or Scissors: For trimming the twine and cleaning up the rope end.
- Small Pliers (Optional): These can be helpful for the final pull to secure the ends if the twine is particularly slick.
- Beeswax (Optional): If using unwaxed twine, rubbing it with beeswax will increase friction and weather resistance.
How to Tie Common Whipping?
Follow these steps precisely to ensure a secure and long-lasting bind. This method relies on internal friction to lock the twine in place without the need for bulky knots.
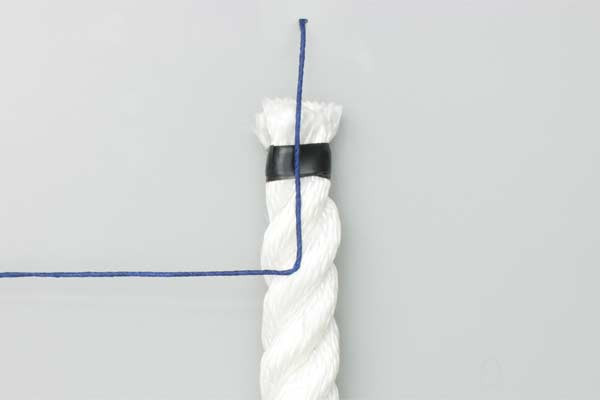
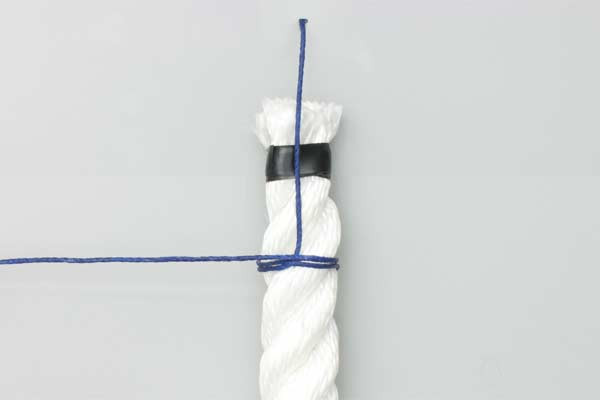
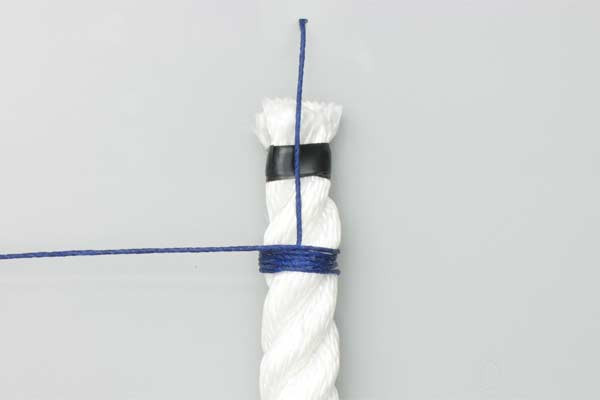
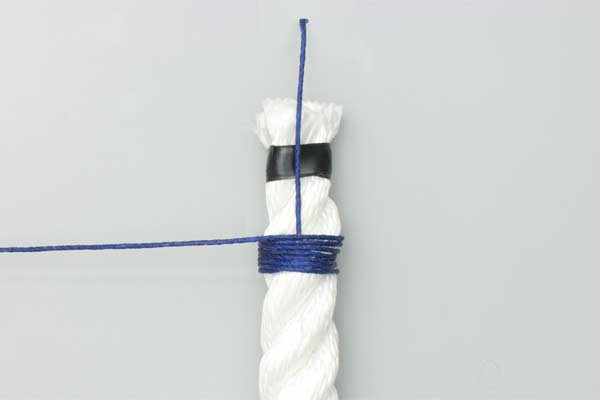
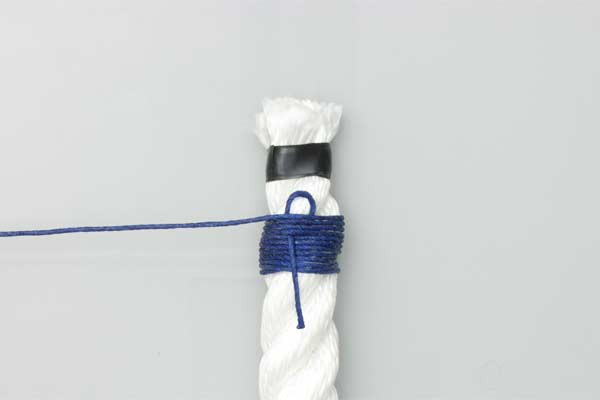
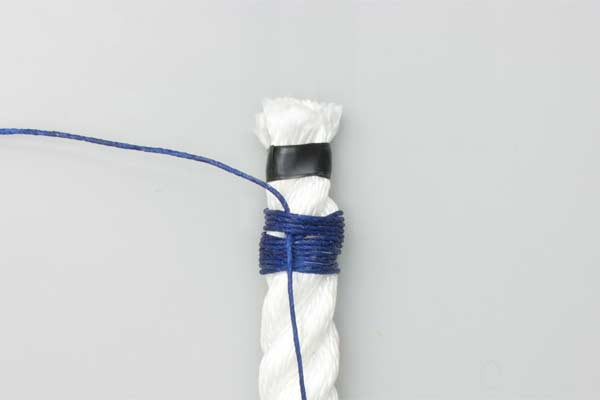
- Lay the twine against the rope and wrap the long end around the rope about 8 turns.
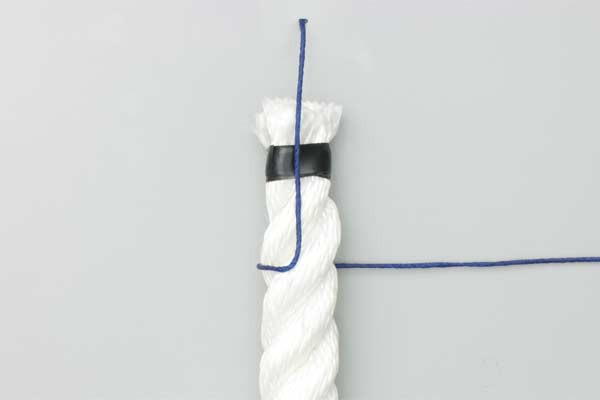
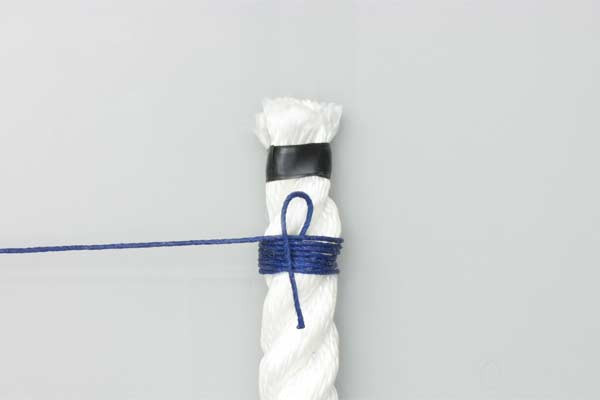
- Make a bight in the short end.
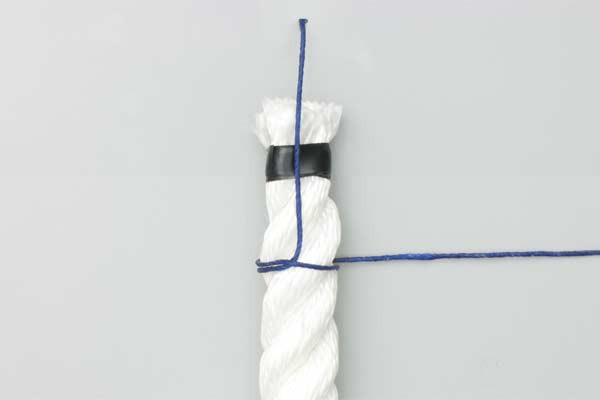
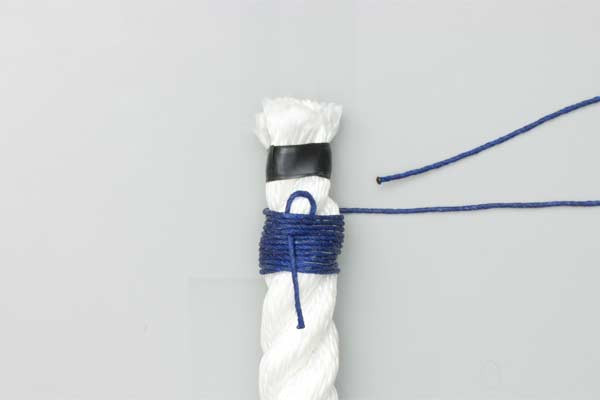
- Wrap the long end about 8 more times around both the rope and the bight.
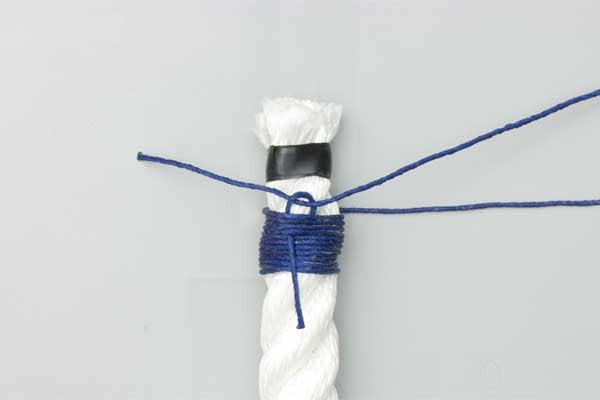
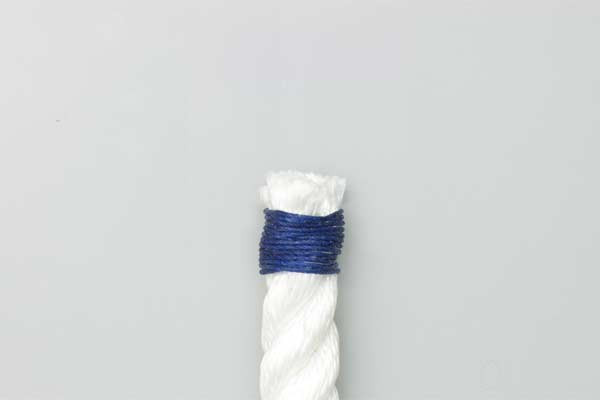
- On the final turn pass the long end through the bight.
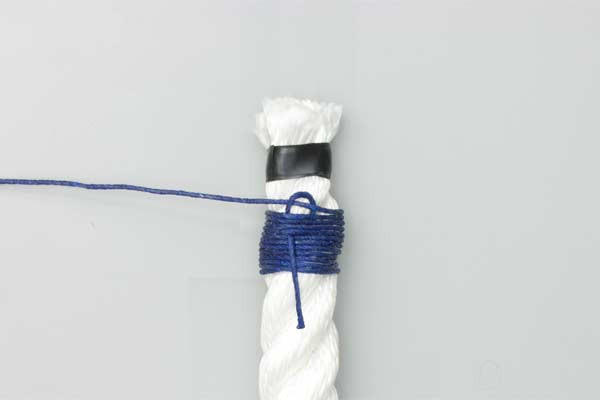
- Pull the short end to hide and secure the long one.
- Trim the ends off.


Common Mistakes to Avoid
Even though the Common Whipping knot is straightforward, small errors can lead to the whipping sliding off the end of the rope under tension.
1. Insufficient Tension
The most common mistake is not wrapping the twine tightly enough. Each turn must be laid under significant tension. If the wraps are loose, the internal "bight" will not be squeezed hard enough to lock the ends, and the whipping will eventually unravel.
2. Overlapping Turns
Each wrap should sit snugly against the previous one, like the coils of a spring. If the twine overlaps itself during the wrapping process, it creates a high point that is susceptible to abrasion and makes the whipping look unprofessional.
3. Incorrect Whipping Length
A whipping that is too short will not provide enough friction to stay in place. As a professional standard in outdoor rope techniques, the length of the whipping should be approximately 1 to 1.5 times the diameter of the rope.
4. Forgetting the "Hide"
When you pull the short end to hide and secure the long one, ensure the junction of the two ends is pulled roughly halfway underneath the wraps. If you don’t pull it far enough, the loop remains visible; if you pull too far, you might pull the end all the way through, causing the structure to fail.
Related Knots and Splicing
Understanding the Common Whipping is often a gateway to more advanced rope maintenance. Here are a few related techniques:
- Sailmaker’s Whipping: A more secure version of whipping that uses a needle to pass the twine through the strands of the rope, making it nearly impossible to slide off.
- West Country Whipping: This method uses a series of overhand knots on alternating sides of the rope. It is very easy to tie but results in a bulkier profile.
- French Whipping: A decorative technique similar to hitching that creates a spiral ridge along the whipping, often used for handles or railings.
- Back Splice: Instead of using twine, a back splice involves weaving the rope strands back into themselves. It is permanent but increases the rope’s diameter significantly.
Final Words
Mastering the Common Whipping is a fundamental skill for anyone serious about rope knots and gear maintenance. By taking the time to properly whip your rope ends, you demonstrate a level of craftsmanship and safety consciousness that defines an expert. Whether you are at sea, on a climb, or simply organizing your garage, these outdoor rope techniques ensure that your equipment remains in peak condition for years to come.
Remember, a rope is only as strong as its weakest point—don’t let a frayed end be the reason your gear fails. Practice these steps until the tension and placement become second nature, and you will have added a vital tool to your technical skillset.
