
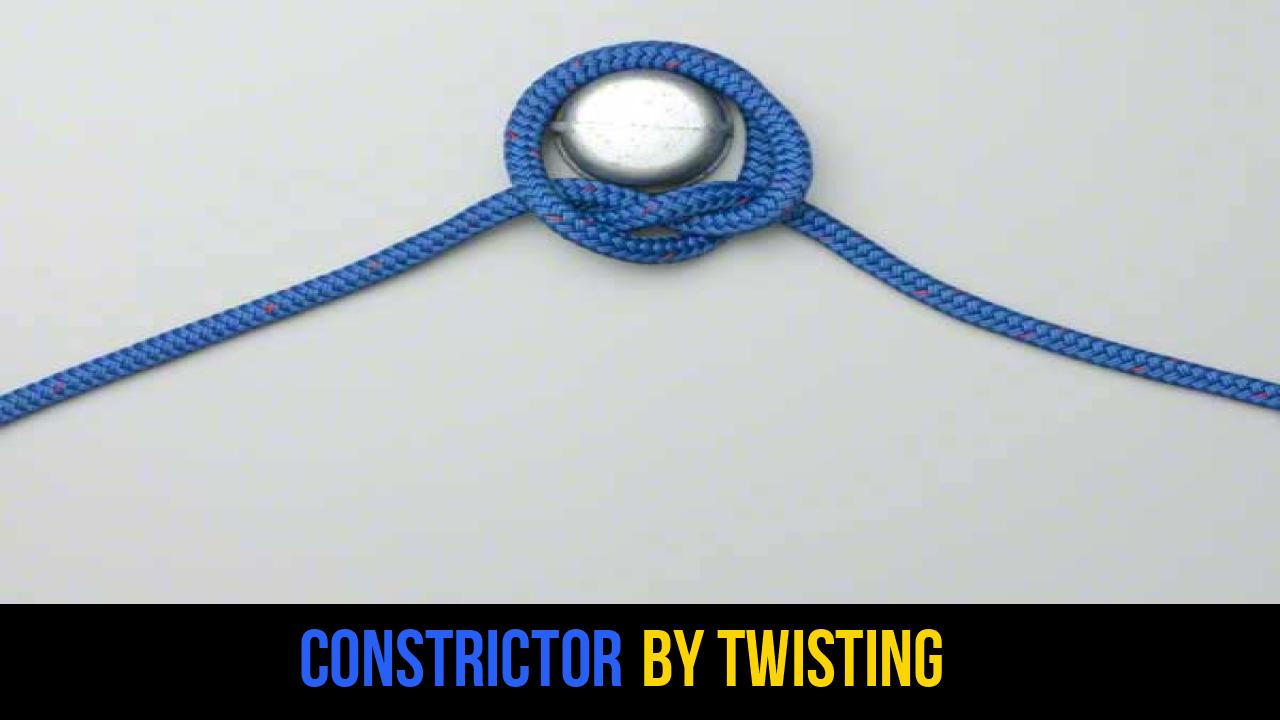
In the world of rope knots and outdoor rope techniques, few maneuvers are as respected for their sheer tenacity as the Constrictor Knot. While there are several ways to tie this legendary binder, the Constrictor by Twisting method is widely considered one of the most efficient and elegant techniques for applying the knot to the end of a post or a bundle.
Whether you are a seasoned sailor, a mountain rescue professional, or a DIY enthusiast working on home repairs, mastering the Constrictor by Twisting provides you with a "semi-permanent" solution for securing materials under tension. Unlike common hitches that may slip or loosen when the rope slackens, the Constrictor is designed to "bite" into the object it surrounds, becoming increasingly difficult to untie as more force is applied.
In this comprehensive guide, we will explore the mechanics of this knot, the best materials to use, and provide the exact steps needed to master the Constrictor by Twisting.
Alternative Names: The Constrictor Knot is also frequently referred to as the Gunner’s Knot, the Twisted Constrictor, or simply the Binding Hitch.
What Is a Constrictor by Twisting?
The Constrictor by Twisting is a specific method of forming the Constrictor Knot—one of the most effective binding knots ever devised. While the standard method involves threading the working end around an object, the "twisting" method allows the user to form the knot in their hands first (creating a "loop" version) and then drop it over the end of a post, a bag neck, or a pipe.
Definition and Mechanics
The knot functions through a combination of a clove hitch base and an overhand knot tucked underneath a riding turn. This structure creates massive friction. When tension is applied to the ends, the "bridge" of the knot presses down on the crossing strands, locking them against the object.
Practical Uses
The Constrictor by Twisting is indispensable in various fields:
- Outdoor Survival: Creating a sturdy tripod for cooking or shelter.
- Marine Applications: Seizing the ends of a rope to prevent fraying (temporary whipping) or securing items to a rail.
- Emergency Repairs: Acting as a temporary hose clamp for a leaking pipe or securing a split tool handle.
- Gardening and Agriculture: Tying off heavy sacks of grain or bundling firewood for transport.
- General Utility: Securing a coiled extension cord or garden hose.
Materials and Tools Needed
To achieve the best results with the Constrictor by Twisting, your choice of cordage is paramount. Because this knot relies on friction, the surface texture of the rope matters.
Recommended Rope Types
- Paracord (550 Cord): Excellent for small-scale tasks and survival kits. Its slightly elastic nature allows the knot to "grip" tightly.
- Nylon Rope: High strength and some stretch make it ideal for permanent or semi-permanent bindings.
- Natural Fibers (Manila or Cotton): These offer excellent "bite" because of their rough surface, making the knot nearly impossible to slip.
- High-Tech Synthetics (Dyneema/Spectra): Use caution here; these ropes are very "slick," and while the Constrictor is secure, it may require an extra turn (a Double Constrictor) to prevent creeping on such smooth surfaces.
Essential Tools
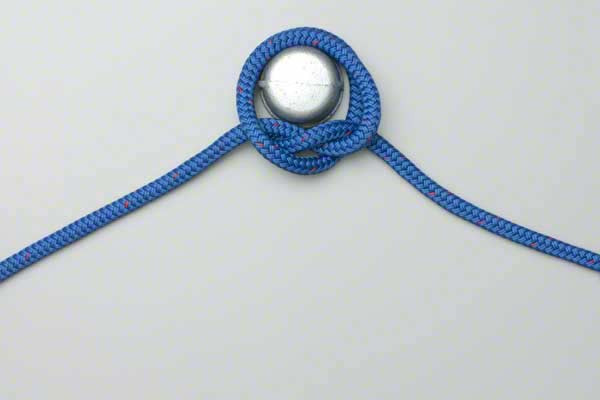
- The Object: A cylindrical object (post, pipe, or bag) is necessary to demonstrate the knot’s utility.
- Cutting Tool: A sharp knife or shears to trim the rope ends.
- Heat Source: If using synthetic rope, a lighter is needed to seal the ends to prevent unraveling.
How to Tie Constrictor by Twisting?
When learning rope knots, precision is key. Follow these instructions exactly as provided to ensure the knot is formed correctly and safely.
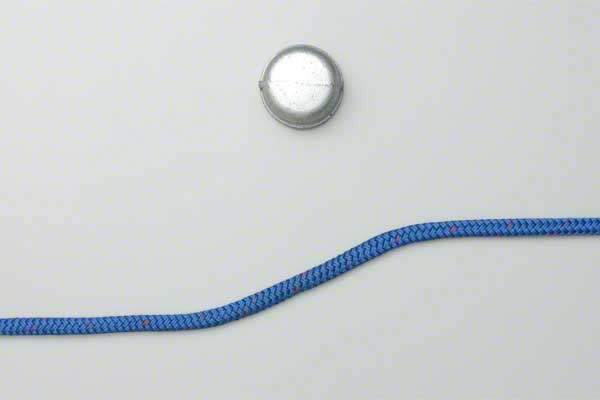
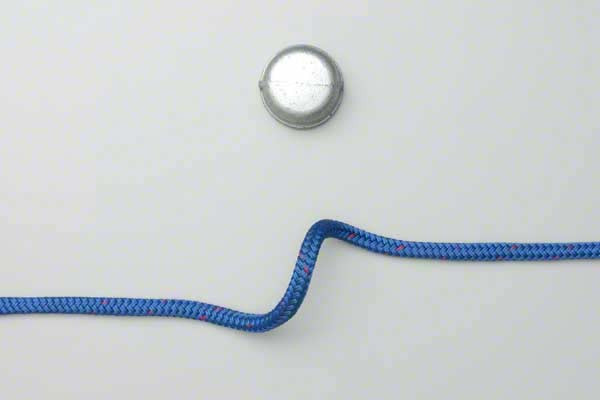
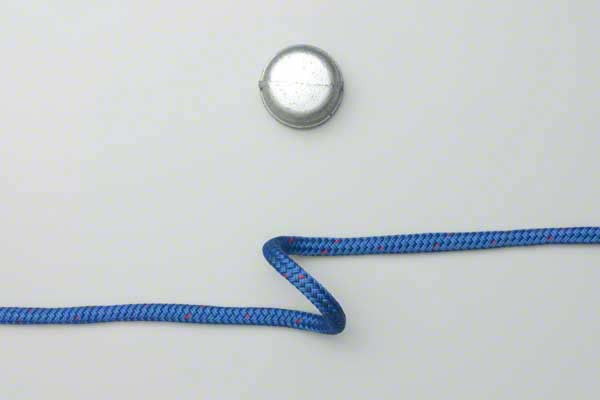
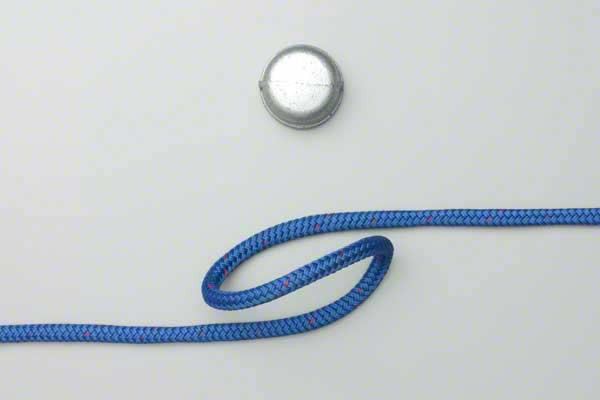
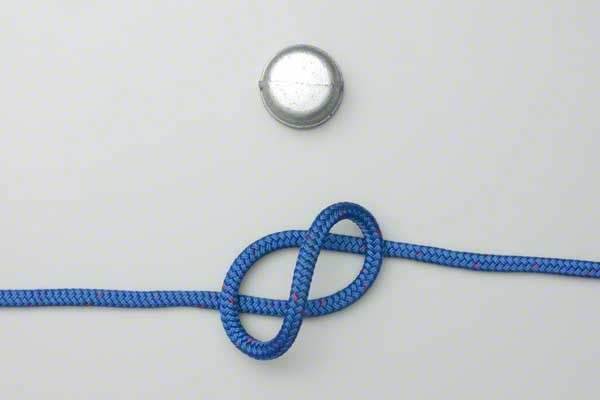
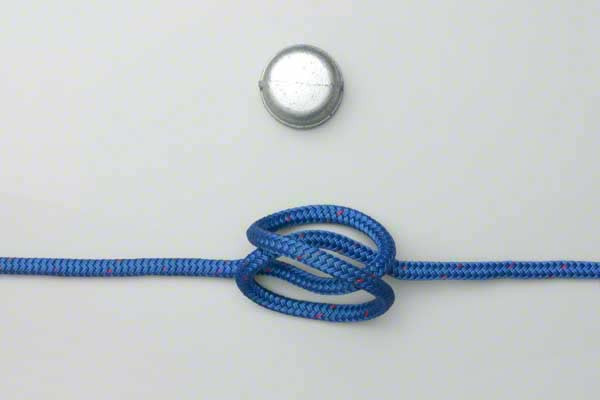
- Twist the rope to form a loose figure 8.
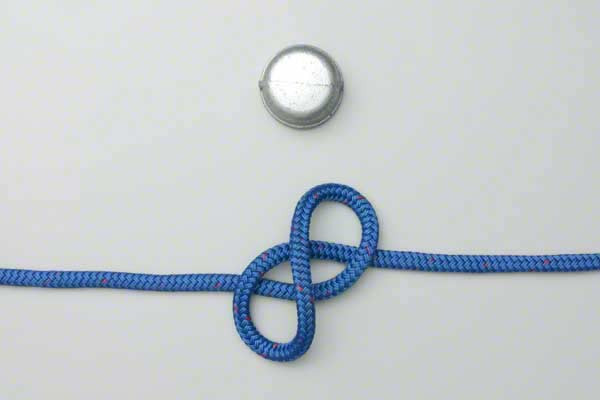
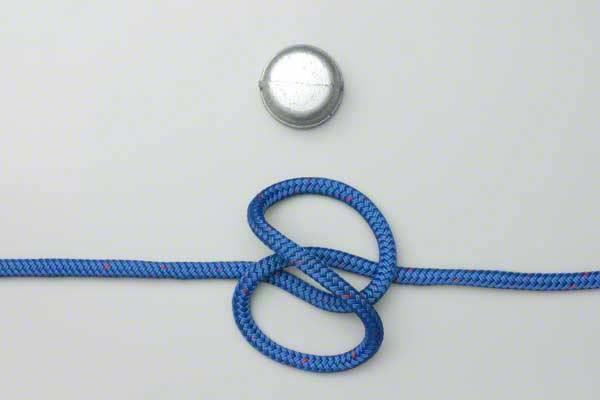
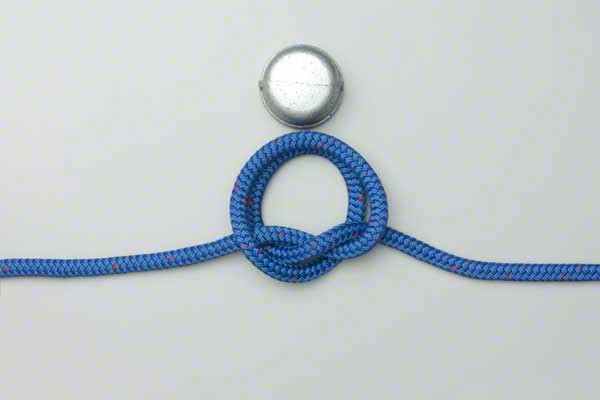
- Fold the loops down around the center to form the Constrictor Knot.
Note: Once these loops are folded, you simply slide the resulting double-loop over the end of your intended object and pull both ends outward simultaneously to tighten the bind.
Common Mistakes to Avoid
Even expert outdoorsmen can occasionally fumble the Constrictor by Twisting. To ensure your knot holds under pressure, avoid these common pitfalls:
1. Tying on Flat Surfaces
The Constrictor Knot is designed for curved or cylindrical objects. If you attempt to tie it around a flat box or a square beam, the lack of uniform pressure can cause the knot to fail or lose its "locking" mechanism.
2. Confusion with the Clove Hitch
At a quick glance, a loosely tied Constrictor looks like a Clove Hitch. However, the Clove Hitch will loosen if the tension is removed, whereas the Constrictor stays locked. Ensure the internal overhand knot is properly tucked under the riding turn.
3. Using "Slippery" Rope Without Care
If you are using a very smooth, plastic-like rope, the knot may not "bite" immediately. In these cases, you must manually dress the knot (tighten it and arrange the strands) very firmly before trusting it with a load.
4. Forgetting it is Semi-Permanent
Safety Tip: Never tie a Constrictor Knot around a part of the body or a living creature. Because it is so difficult to untie—often requiring the rope to be cut—it can easily cut off circulation or cause injury.
Related Knots and Splicing
Understanding how the Constrictor by Twisting relates to other knots will help you choose the right tool for the job.
- Clove Hitch: A fundamental hitch used to start many lashings; it is easier to tie and untie but lacks the permanent binding power of the Constrictor.
- Double Constrictor Knot: An advanced version of the standard Constrictor that adds an extra riding turn for even greater security on slippery surfaces.
- Miller’s Knot: Traditionally used for tying the tops of sacks; it is similar in structure but generally easier to untie than a fully tightened Constrictor.
- Boa Knot: A powerful binding knot that, like the Constrictor, excels at holding cylindrical objects but uses a slightly different folding pattern.
Final Words
The Constrictor by Twisting is a masterclass in efficiency. By utilizing the "figure 8" method, you can prep the knot in seconds and deploy it over any post or bundle with professional speed. It is a cornerstone of outdoor rope techniques, providing a level of security that few other knots can match.
As with all rope knots, the key to mastery is repetition. Practice the "twist and fold" motion until it becomes muscle memory. Once you can tie this knot in the dark or under pressure, you will have a vital tool in your technical repertoire that can handle everything from emergency repairs to heavy-duty campsite organization.
Remember: a knot is only as good as the person tying it. Always inspect your cordage for wear and ensure your Constrictor is properly dressed and tightened before use. Happy tying!
