
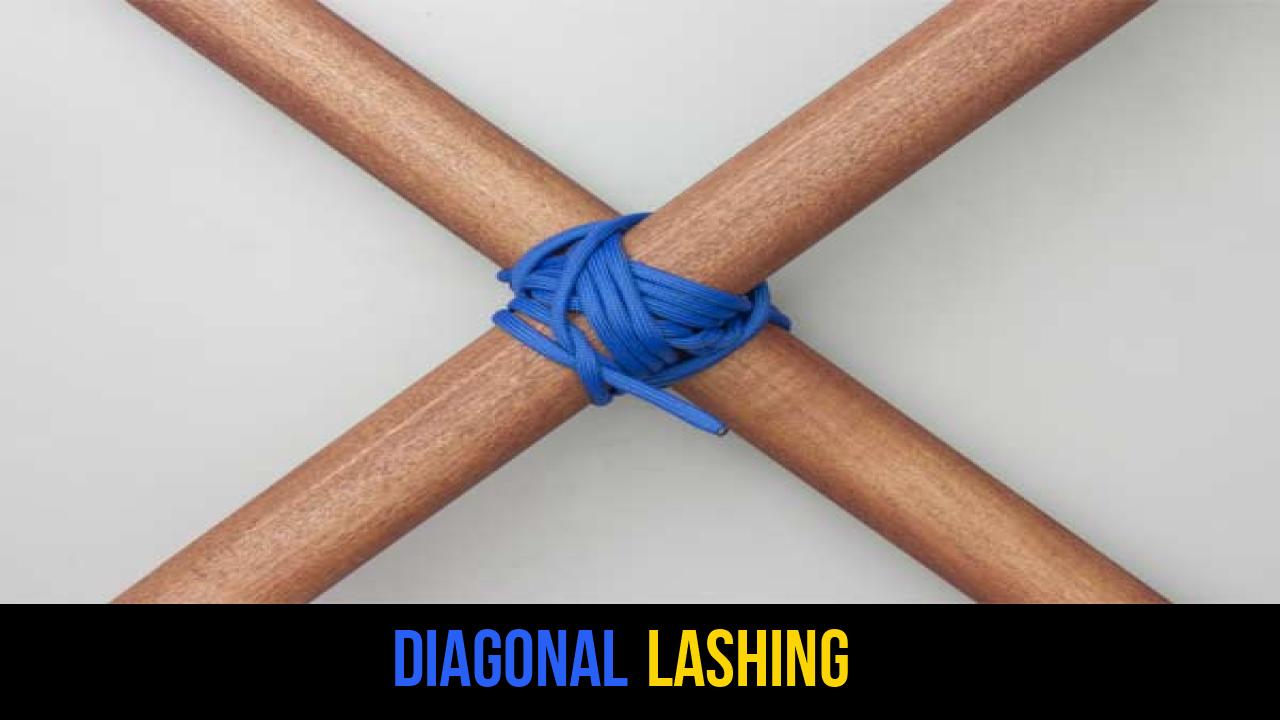
In the realm of outdoor survival, scouting, and traditional bushcraft, the ability to join two pieces of timber securely is a foundational skill. While modern construction relies on nails, screws, and brackets, the expert outdoorsman relies on rope knots and lashings. Among the most vital of these techniques is the Diagonal Lashing.
Unlike its cousin, the square lashing, which is designed to hold poles at a strict 90-degree angle, the Diagonal Lashing knot is the engineered solution for poles that cross at an angle or for situations where the poles are under tension and naturally want to spring apart. Whether you are building a bridge, a signal tower, or a simple camp chair, understanding the mechanics of this lashing is essential for structural integrity.
This guide provides a comprehensive look at the Diagonal Lashing, from its mechanical advantages to a detailed, step-by-step tutorial on how to execute it perfectly every time.
Alternative Names: Cross Lashing, Diamond Lashing, X-Lashing.
What Is a Diagonal Lashing?
A Diagonal Lashing is a specialized method used to bind two poles (often called spars) together where they cross, but do not necessarily touch, or where they cross at an angle other than 90 degrees. It is most commonly used in "X-frame" structures or as bracing in larger pioneering projects.
Practical Uses in the Field
The primary purpose of the Diagonal Lashing is to "pull" two poles together. In many structures, such as a trestle bridge, the diagonal braces are not flush against the vertical legs. The Diagonal Lashing is designed to bridge that gap, cinching the poles together with immense force.
- Trestle Bracing: Providing lateral stability to bridges and towers.
- X-Frames: Creating the supporting legs for camp tables or raised platforms.
- Gate Construction: Diagonal bracing prevents wooden gates or frames from sagging over time.
- Emergency Shelters: Securing angled roof supports against a ridge pole.
By mastering this knot, you transition from basic rope work to advanced outdoor rope techniques capable of supporting significant weight and resisting environmental stressors like wind and gravity.
Materials and Tools Needed
To execute a high-quality Diagonal Lashing, you must select the right materials. The strength of your lashing is only as good as the rope and timber you choose.
Choosing the Right Rope
For traditional pioneering, natural fiber ropes are often preferred because they have "tooth"—a natural friction that prevents the rope from sliding against the wood.
- Sisal Rope: The gold standard for scouting. It is biodegradable, affordable, and provides excellent grip.
- Manila Rope: Stronger and more durable than sisal, ideal for heavy-duty structures like bridges.
- Paracord (550 Cord): While popular for survival, its elasticity makes it less than ideal for large-scale lashings. If using paracord, ensure you use multiple wraps to compensate for the thin diameter.
- Synthetic Rope (Nylon/Polypropylene): These are often too slippery for effective lashings unless specialized tensioning techniques are used.
Spar Selection
The poles, or "spars," should be:
- Dry and Solid: Avoid rotting wood, which can compress and cause the lashing to loosen.
- Appropriate Diameter: The rope length should be roughly 1.5 to 2 meters for every inch of the combined diameter of the poles.
How to Tie Diagonal Lashing?
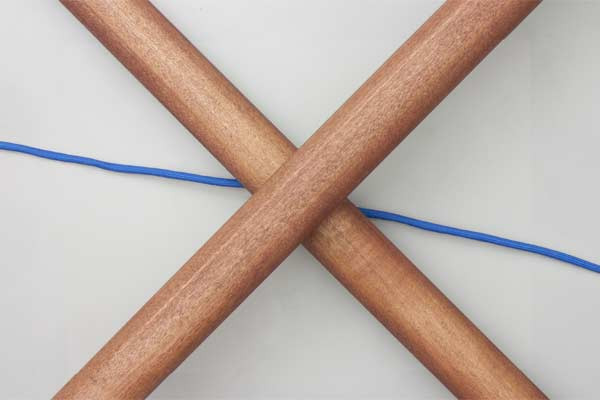
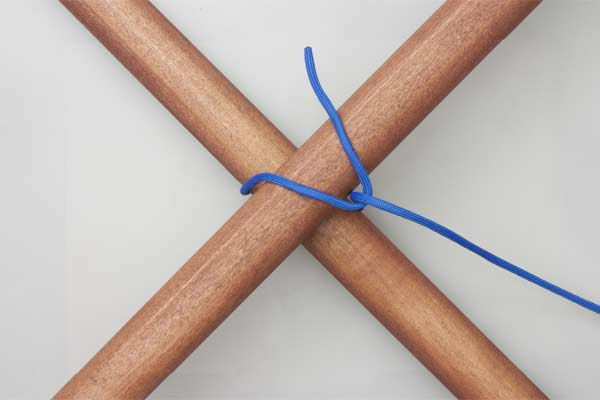
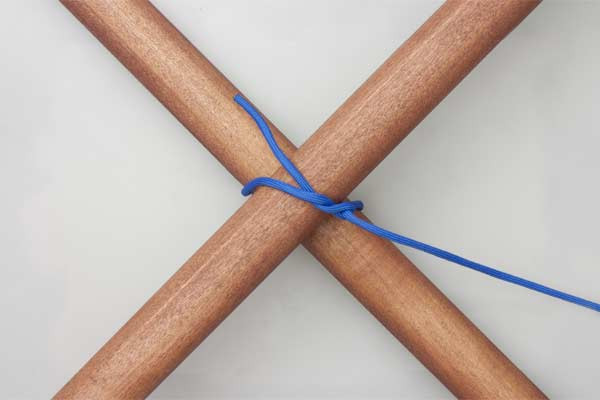
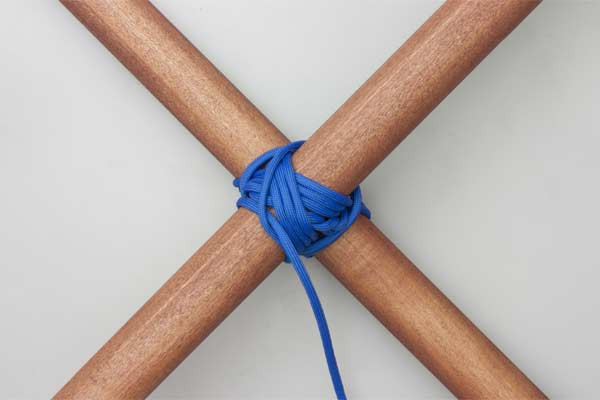
Following the traditional methods of pioneering, the Diagonal Lashing is constructed through a series of specific wraps and fraps. Follow these steps precisely to ensure a secure bind.
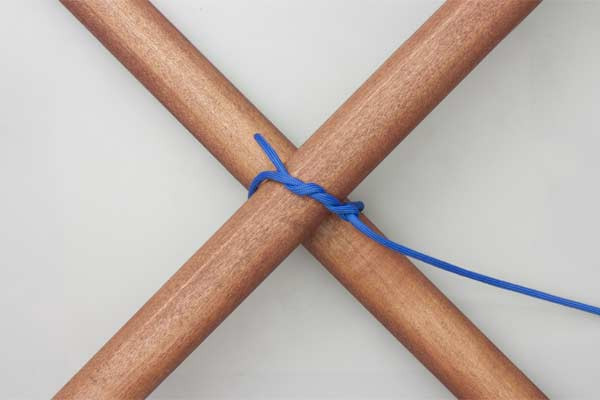
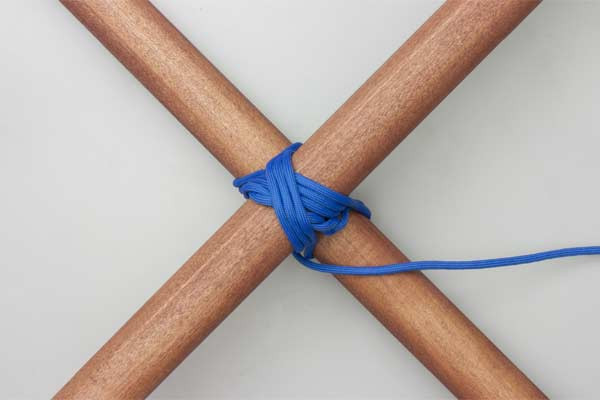
- Start with a single Timber Hitch around both poles. Ensure the hitch is pulled tight and the poles are drawn together at their intersection point.
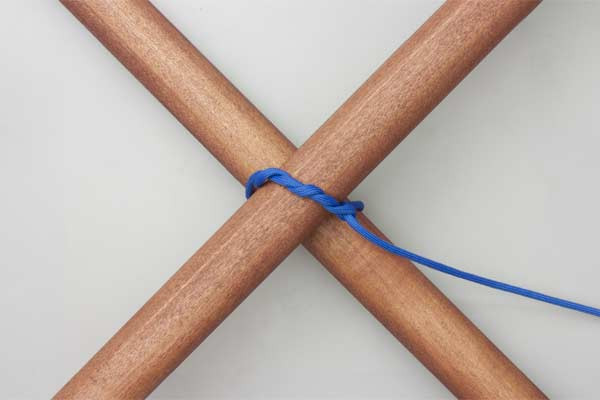
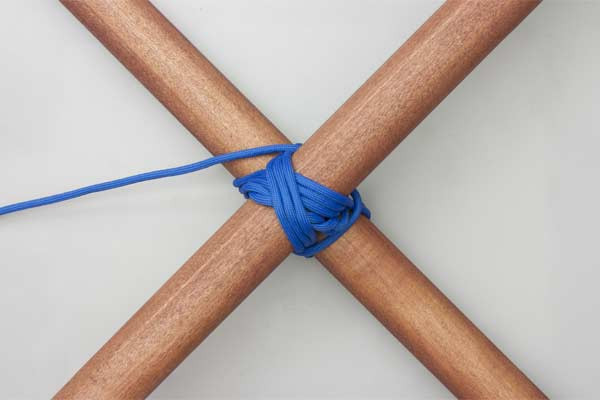
- Wrap three or four turns around the two poles in one axis followed by three or four turns in the other axis. These turns should be laid side-by-side, not overlapping, to maintain maximum surface contact with the wood.
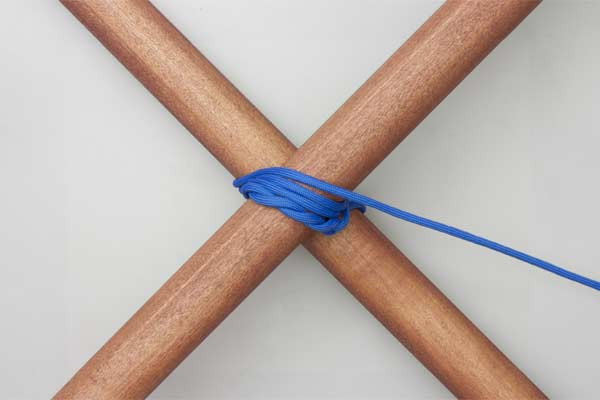
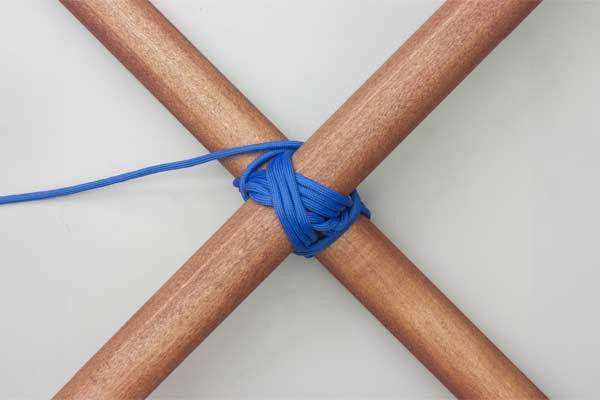
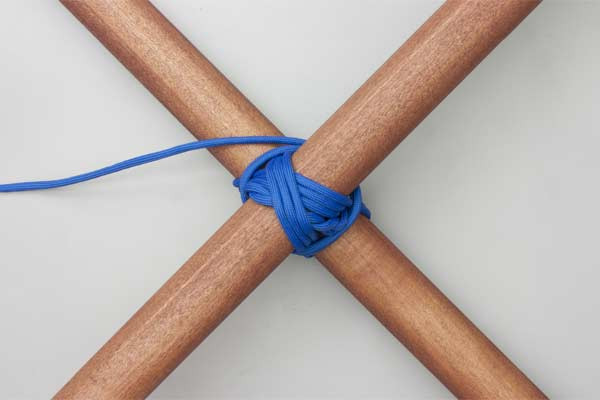
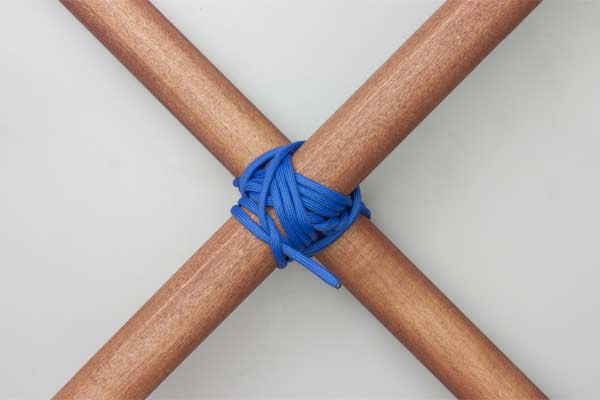
- Tighten the lashing by surrounding it with three or four frapping turns. These turns go between the poles and around the initial wraps. Pull them as tight as possible; this is where the real structural tension is created.
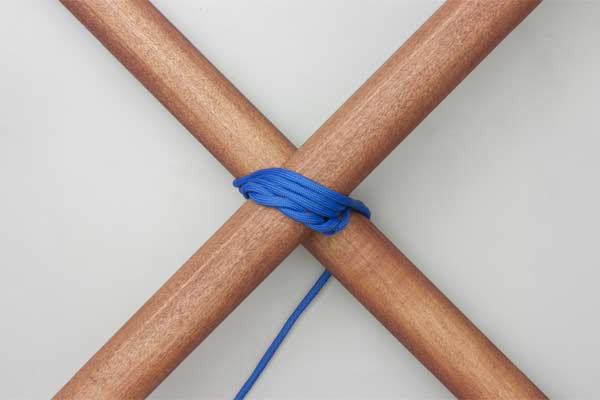
- Finish with a Clove Hitch. Secure the remaining rope to one of the poles to prevent the lashing from unraveling.


Common Mistakes to Avoid
Even experienced outdoorsmen can make errors that compromise the safety of a structure. When practicing outdoor rope techniques, keep an eye out for these common pitfalls:
- Overlapping Wraps: When the turns of the rope cross over each other rather than laying flat against the pole, the "high points" create friction that can eventually saw through the rope under load. Always lay wraps side-by-side.
- Insufficient Frapping: The frapping turns are the most important part of the lashing. If they are loose, the entire structure will wobble. Use your body weight to cinch these turns tight.
- Wrong Starting Knot: Starting with a clove hitch instead of a Timber Hitch for a Diagonal Lashing is a common mistake. The Timber Hitch is superior here because it can tighten around both poles simultaneously, whereas a clove hitch only grips one.
- Using Wet Rope: Rope stretches when wet and shrinks as it dries. If you tie a lashing with wet natural fiber rope, it may become dangerously tight as it dries, potentially snapping the fibers or crushing the wood.
Safety First
Always inspect your lashings daily if the structure is intended for long-term use. Natural fibers can degrade in UV light, and wood can shrink in dry weather, both of which require the lashing to be retied or tightened.
Related Knots and Splicing
To become a master of rope knots, you should understand how the Diagonal Lashing fits into the broader family of bindings.
- Square Lashing: The most common lashing, used specifically for joining poles at 90-degree angles where the poles are already touching.
- Shear Lashing: Used to join two poles in a parallel fashion, often to create an A-frame or to reinforce a weakened spar.
- Tripod Lashing: A variation of the shear lashing used to join three poles to create a stable, self-standing tripod base.
- Timber Hitch: A foundation knot that creates a secure, non-slip loop around timber; essential for starting the Diagonal Lashing.
- Clove Hitch: A classic binding knot that provides a quick and secure way to finish a lashing on a single spar.
Final Words
The Diagonal Lashing is more than just a knot; it is a vital component of wilderness engineering. By mastering the transition from the initial Timber Hitch to the final Clove Hitch, you gain the ability to create rigid, reliable structures in any environment.
Whether you are a scout working toward a pioneering badge or a bushcraft enthusiast building a permanent camp, the Diagonal Lashing knot is a tool that belongs in your mental kit. Practice these outdoor rope techniques regularly, and you will find that the possibilities for wooden construction are limited only by your imagination and the length of your rope. Remember: a good lashing is neat, tight, and follows the correct sequence. Happy building!
