
In the world of outdoor rope techniques, few families of knots are as respected and widely utilized as the Figure 8 family. Known for their strength, stability, and ease of inspection, these knots are the backbone of climbing, search and rescue, and sailing. However, while most people are familiar with the standard Figure 8 on a bight, the Directional Figure 8 Loop is a specialized tool that every serious outdoorsman, arborist, and technician should have in their repertoire.
The Directional Figure 8 Loop is a midline loop designed to take a load in one specific direction. Unlike the Alpine Butterfly, which can be loaded in multiple directions, this knot is optimized for linear tension. Whether you are setting up a tensioning system for a tent or creating a mechanical advantage system for hauling heavy gear, understanding this knot is vital.
Alternative Names: Directional Eight, Inline Figure Eight, Single-Loop Inline Figure-Eight, Directional Figure-of-Eight.
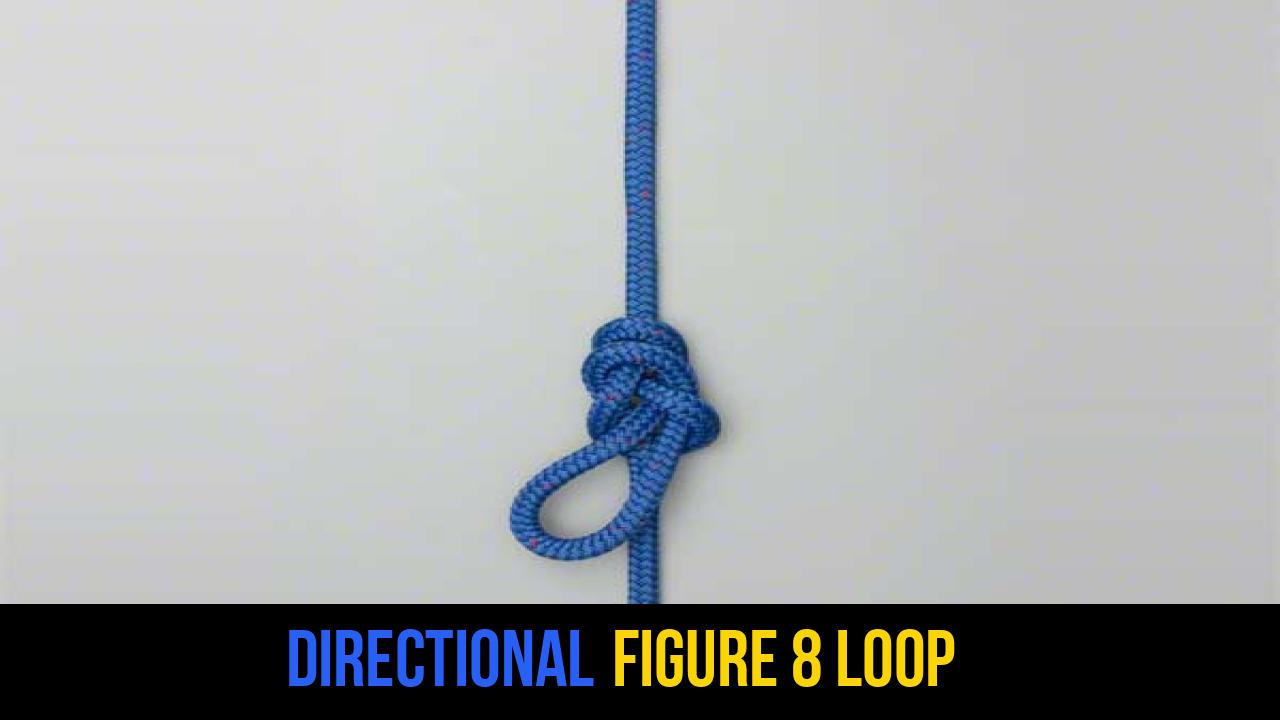
What Is a Directional Figure 8 Loop?
The Directional Figure 8 Loop is a midline knot that creates a fixed loop in the middle of a rope. Its primary characteristic is that the loop is designed to point toward one end of the rope—the "load-bearing" side. When weight is applied to the loop, it should pull toward the standing end of the rope rather than perpendicular to it.
Practical Applications
- Mechanical Advantage Systems: In a "Z-drag" or a 3:1 hauling system, the Directional Figure 8 Loop is often used to attach a pulley or a carabiner to the main line.
- Tensioning Lines: It is an excellent choice for creating a "trucker’s hitch" variant when you need to tighten a load on a vehicle or secure a large tarp.
- Hauling Gear: If you need to hoist a pack or equipment up a cliff face or into a tree, this knot provides a secure attachment point that won’t slip under linear tension.
- Arboriculture: Tree surgeons use this knot to create attachment points in rigging lines that only need to support weight in a downward direction.
While it is strong, it is important to remember that the Directional Figure 8 Loop is not considered "multi-directional." If you pull the loop in the wrong direction (toward the "tail" or the non-load end), the knot can deform or "capsize," significantly reducing its strength.
Materials and Tools Needed
To practice and master rope knots, you don’t need much, but using the right materials will help you understand how the knot behaves under different conditions.
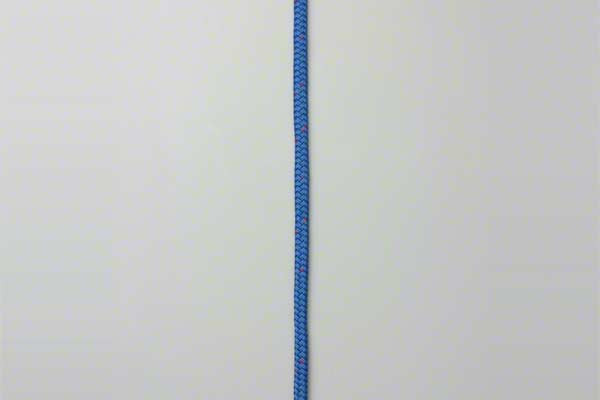
Rope Types
- Static Rope: Ideal for practicing this knot as it doesn’t stretch, allowing you to see the "dress" of the knot clearly. Static ropes are preferred for hauling systems where the Directional Figure 8 is most common.
- Dynamic Rope: While primarily used for climbing to absorb fall energy, you can tie this knot in dynamic rope. Note that the knot may tighten significantly under heavy loads.
- Paracord (550 Cord): Great for beginners and hobbyists. It is thin and easy to manipulate, making the structure of the knot easy to visualize.
- Accessory Cord: 6mm to 8mm cord is perfect for learning technical outdoor rope techniques.
Tools
- Gloves: When working with heavy loads or synthetic ropes that can cause rope burn, high-quality leather work gloves are recommended.
- Carabiner: Use a locking carabiner to clip into the loop once finished to test the "directional" nature of the pull.
How to Tie Directional Figure 8 Loop?
Tying the Directional Figure 8 Loop requires attention to the orientation of the loop. Follow these steps exactly as outlined to ensure a secure and functional knot.
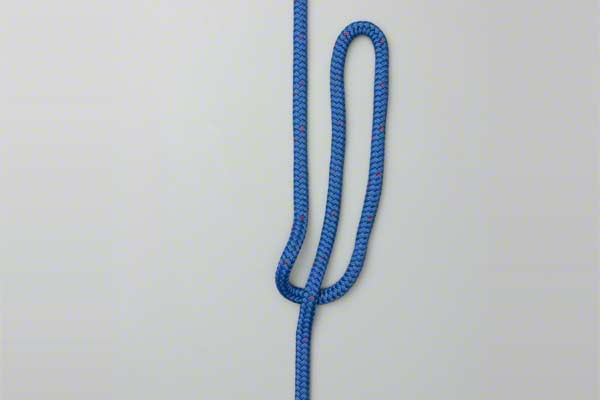
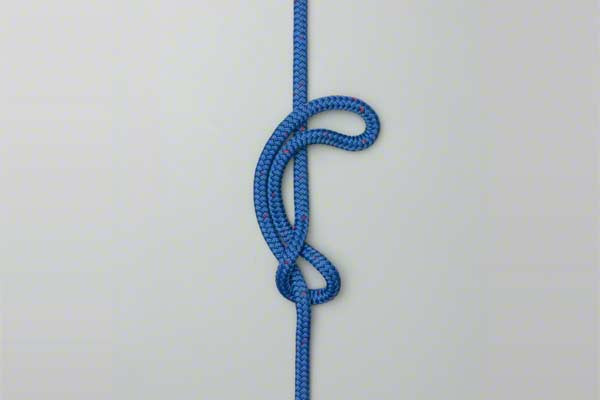
- Make a loop in the rope.
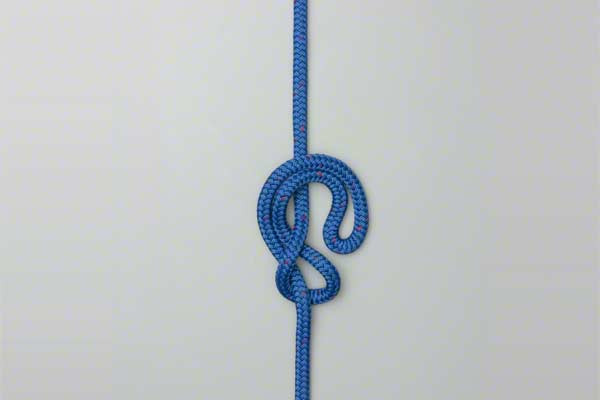
- Pass the loop behind the standing end.
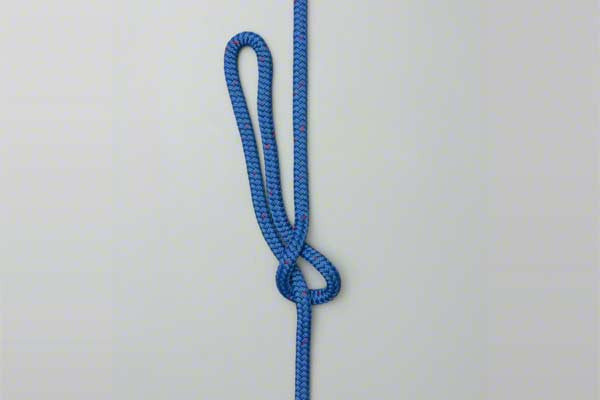
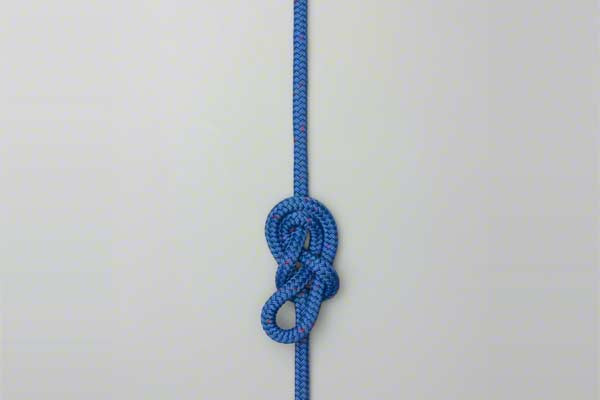
- Continue around and through the opening beside the tail.
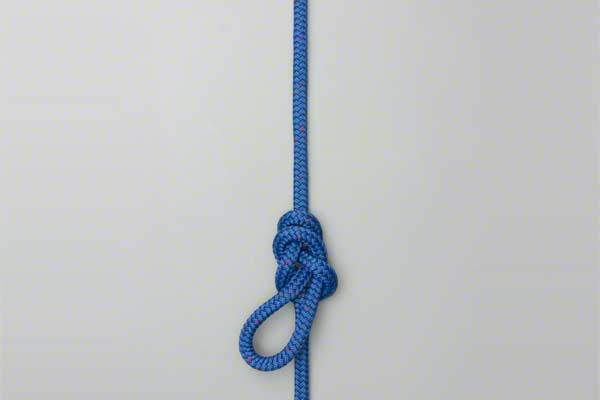
Once these steps are completed, it is essential to "dress" the knot. This means pulling each of the four strands emerging from the knot to ensure they are parallel and not crossing over one another. A well-dressed knot is easier to inspect and significantly stronger than a messy one.

Common Mistakes to Avoid
Even experienced practitioners can make errors when tying the Directional Figure 8 Loop knot. Safety is paramount when dealing with weighted lines.
1. Loading the Wrong Direction
The most common mistake is loading the loop toward the "dead end" or the tail of the rope. This knot is specifically designed to be pulled toward the standing part (the anchored end). If you need a loop that can be pulled in any direction, use an Alpine Butterfly instead.
2. Failure to "Dress and Set"
A "sloppy" knot where the strands cross over each other creates internal friction. This friction can weaken the rope fibers under high tension. Always ensure the strands are flat and neat. After dressing, "set" the knot by pulling it tight with your body weight or a firm tug.
3. Using the Wrong Knot for the Job
Never use a Directional Figure 8 Loop to tie into a climbing harness for lead climbing. While it is a member of the Figure 8 family, it is an inline knot, not an end-of-line loop. For harnesses, always use a Figure 8 Follow-Through.
4. Ignoring the Tail Length
When tying any loop in the middle of a line, ensure the "tail" side (the part of the rope not under load) has enough slack that it doesn’t accidentally get pulled into the knot’s structure if the rope stretches.
Related Knots and Splicing
Understanding how the Directional Figure 8 Loop fits into the wider world of rope knots will improve your versatility in the field.
- Figure 8 on a Bight: A non-directional loop tied at the end of a rope, commonly used for anchors in climbing and rescue.
- Alpine Butterfly Knot: A midline loop that is truly multi-directional and easier to untie after being heavily loaded than the Figure 8.
- Figure 8 Follow-Through: The gold standard for climbers, this knot allows you to tie a Figure 8 directly into a closed object like a harness or a ring.
- Prusik Knot: A friction hitch used to grab a rope; it is often used in conjunction with a Directional Figure 8 in hauling systems.
- Bowline Knot: A classic, ancient loop knot used at the end of a line; it is known for being easy to untie even after bearing immense weight.
Final Words
The Directional Figure 8 Loop is a specialized but indispensable tool for anyone involved in outdoor rope techniques. Its ability to provide a secure, stable loop for linear hauling and mechanical advantage makes it a favorite among rescue professionals and technical riggers.
By mastering the three simple steps—making the loop, passing it behind the standing end, and continuing through the opening—you add a layer of sophistication to your rope-work skills. Always remember to inspect your knots before applying a load, and ensure the direction of pull aligns with the knot’s design. With practice, the Directional Figure 8 Loop knot will become a reliable part of your outdoor toolkit, ensuring safety and efficiency in all your hauling and tensioning tasks.
Whether you are securing a load on a roof rack or rigging a complex rescue system, the integrity of your knots is your first line of defense. Keep practicing, stay safe, and always "dress" your knots for success!
