
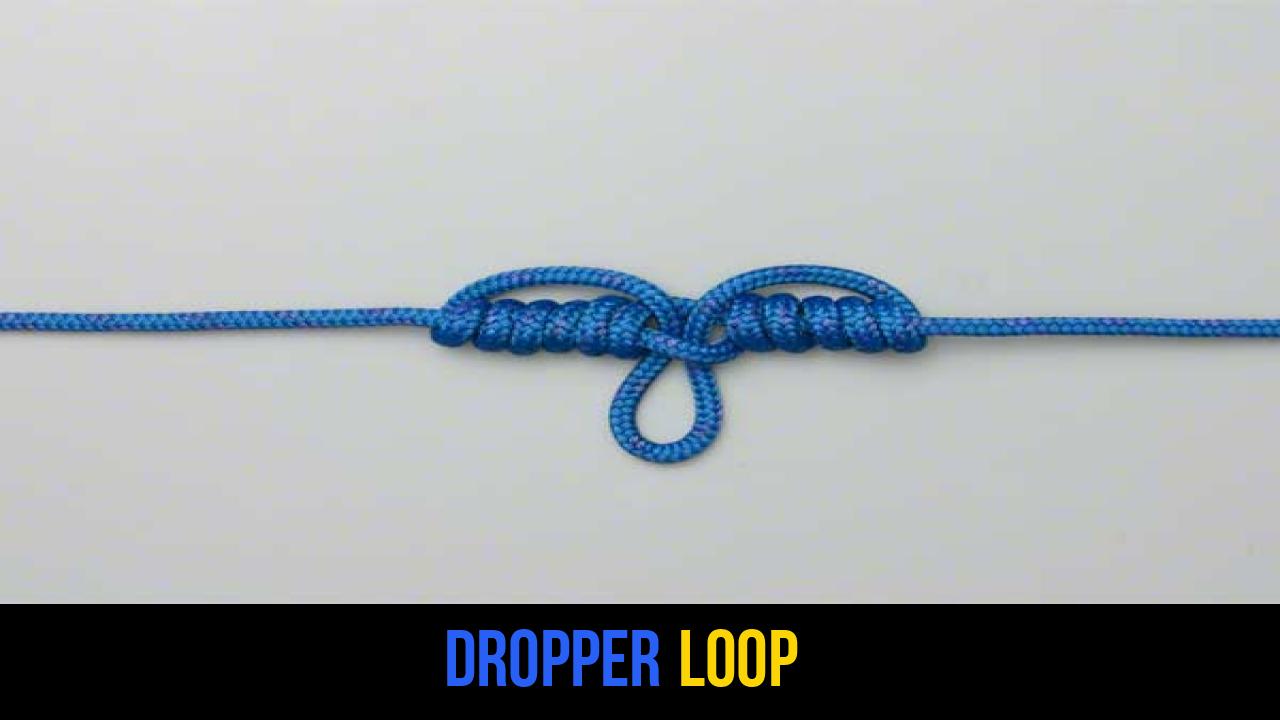
In the world of outdoor rope techniques, few knots offer the specific utility and structural integrity of the Dropper Loop. Whether you are an offshore angler rigging a multi-hook deep-sea setup or a survivalist needing an attachment point in the center of a ridgeline, the ability to create a secure, standing loop in the middle of a line is a fundamental skill.
The Dropper Loop knot is prized for its ability to stand out at a 90-degree angle from the main line, reducing tangles and allowing for a clean presentation of lures, hooks, or gear. Unlike many other rope knots that can slip or slide along the standing part of the rope, a properly seated Dropper Loop remains fixed, even under significant tension.
Throughout this guide, we will explore the nuances of this knot, the materials best suited for its construction, and the precise methodology required to ensure it holds fast when it matters most.
Alternative names for this knot include: Blood Loop, Swivel Loop, Stand-off Loop, and the Middleman’s Loop.
What Is a Dropper Loop?
The Dropper Loop is a specialized knot used to form a fixed loop in the bight (middle) of a line. Its primary characteristic is that the resulting loop projects perpendicularly from the main line. This "stand-off" capability is why it is ubiquitous in the fishing industry, particularly for bottom-fishing rigs where multiple hooks need to be spaced out along a single leader without tangling.
Beyond the water, the Dropper Loop knot finds its place in various outdoor rope techniques. It can be used in camping to create fixed hanging points on a clothesline or gear hoist, or in light-duty rigging where a non-sliding loop is required. Because the knot is formed by twisting the line around itself and pulling a portion through the center, it creates a symmetrical "barrel" of wraps that distribute stress relatively evenly, although it does have specific reactions to certain materials like nylon.
Practical Applications
- Multi-Hook Rigs: Ideal for "high-low" rigs where two or more baits are presented at different depths.
- Gear Organization: Creating multiple attachment points on a single cord for hanging lanterns, bags, or tools.
- Teaser Rigs: In surf casting, it allows a small teaser lure to be placed ahead of a heavier plug.
- Emergency Splicing: While not a true splice, it can provide a temporary attachment point if a terminal end is damaged.
Materials and Tools Needed
To tie a successful Dropper Loop, the choice of material is paramount. The physics of the knot rely on friction and the "memory" of the line.
Recommended Lines
- Monofilament (Nylon): The most common material. It is supple and easy to wrap, but as we will discuss in the instructions, it is susceptible to structural changes under the heat of friction.
- Fluorocarbon: Often used in fishing for its invisibility. It is stiffer than nylon, requiring careful lubrication to prevent the knot from "burning" itself during the tightening process.
- Utility Cordage (Paracord): While the Dropper Loop is traditionally a fishing knot, it can be tied in 550 paracord or smaller accessory cords for camping. However, the "six wraps" rule may need adjustment for very thick diameters.
Necessary Tools
- Sharp Cutting Tool: A pair of line nippers or a sharp knife to trim any excess if you are converting the loop into a dropper leg.
- Lubricant: Water, saliva, or vegetable oil (for industrial rope) is essential.
- Tension Source: Often, your own teeth (for light fishing line) or a fixed hook/post is used to pull the loop tight while the hands pull the standing ends.
How to Tie a Dropper Loop?
The following instructions provide the standard professional method for securing this knot. Accuracy in the number of wraps and the tightening process is critical for the knot’s rated strength.
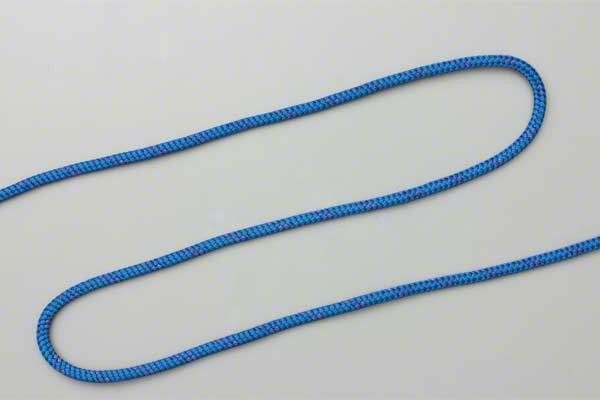
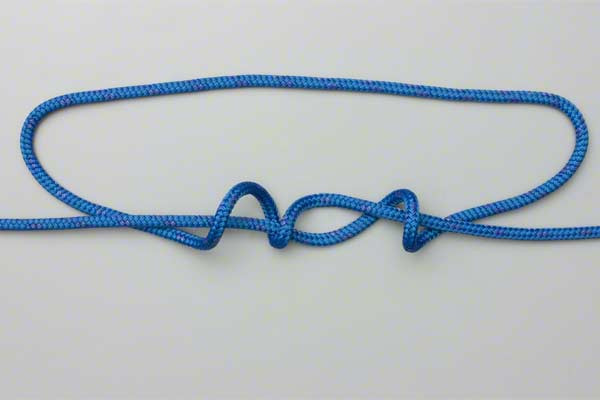
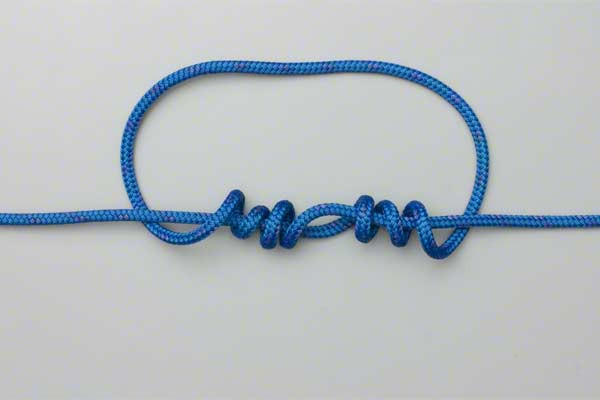
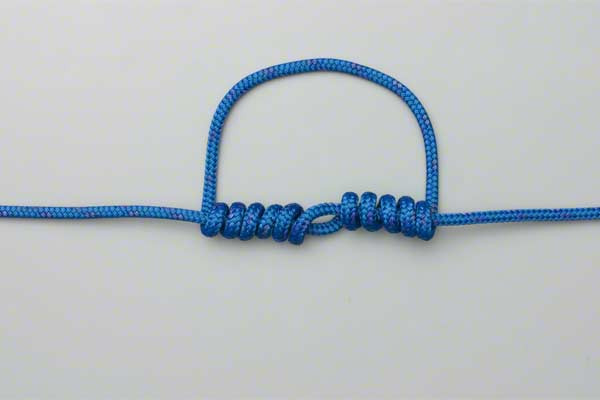
- Create a large loop in the middle of a line.
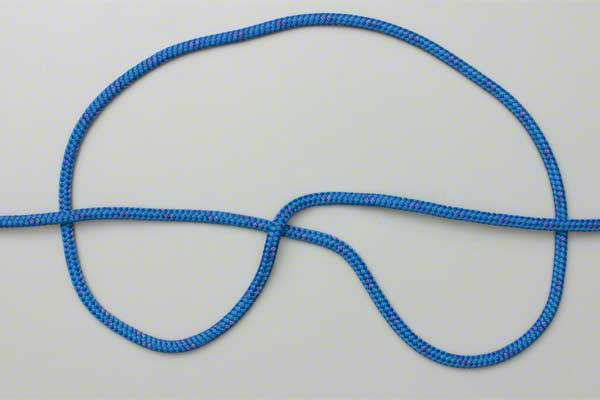
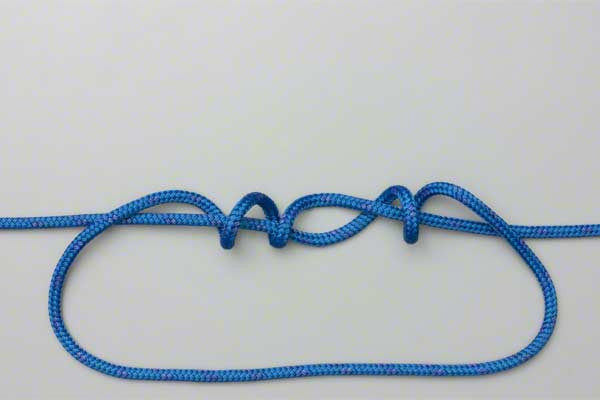
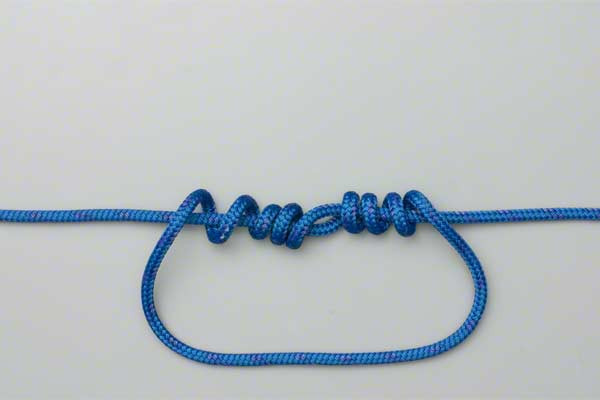
- Holding the center, wrap the loop around this crossover point about six times.
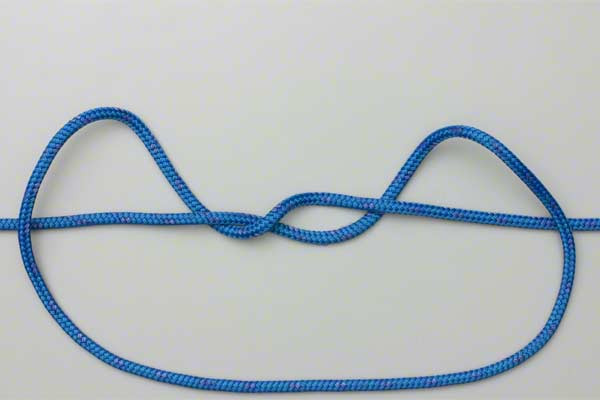
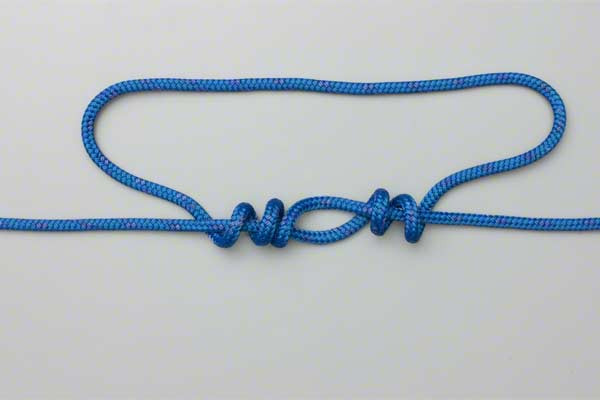
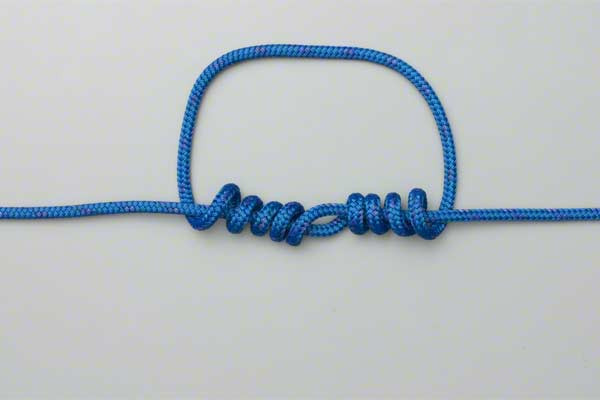
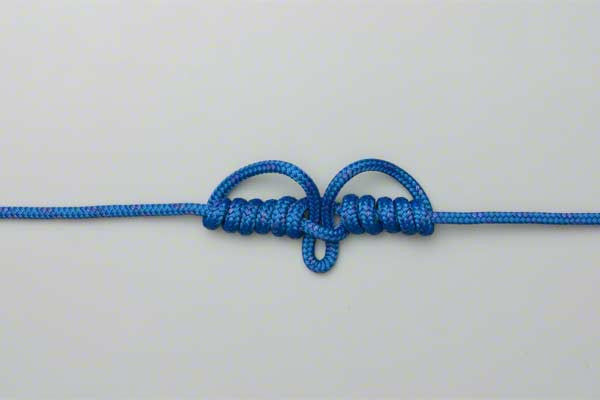
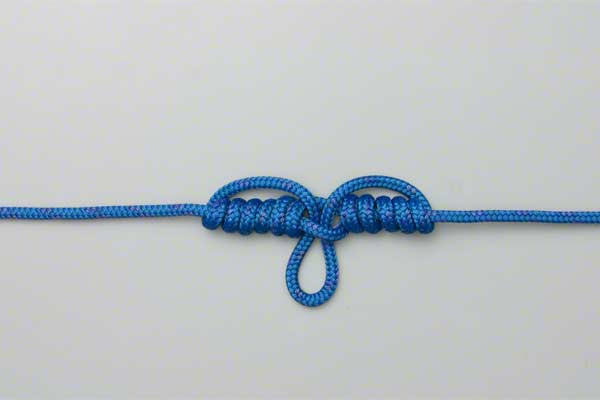
- Open a hole in the center and pass the loop through the hole.
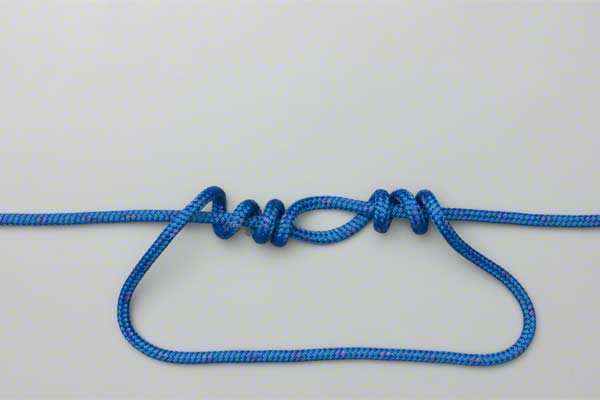
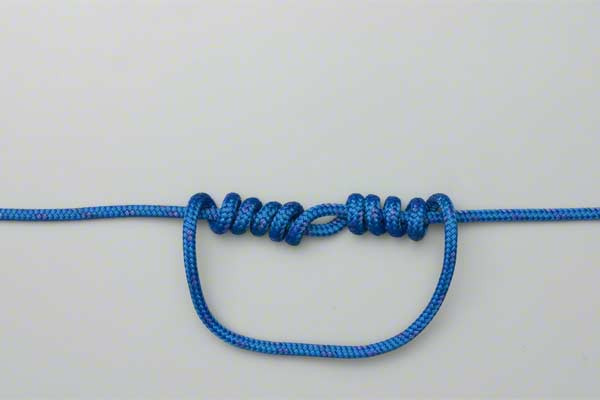
- Lubricate, hold the loop with your teeth, and pull the knot tight.
Note: in nylon tightening this knot alters the structure.


Common Mistakes to Avoid
Even seasoned experts can compromise the integrity of their rope knots if they rush the process. When tying the Dropper Loop, pay close attention to these common pitfalls:
1. Insufficient Lubrication
The most common cause of knot failure in synthetic lines is heat damage. As you pull the wraps tight, the friction generates significant heat. If the line is dry, this heat "scorches" the nylon or fluorocarbon, creating a weak point. Always ensure the knot is thoroughly wet before the final pull.
2. Uneven Wraps
The instruction calls for wrapping the loop around the crossover point six times. If these wraps overlap or are unevenly spaced before you pull the center loop through, the knot will not seat correctly. This results in a "lumpy" knot that can slip under a heavy load.
3. Over-Tightening with Teeth
While the instructions suggest holding the loop with your teeth, use caution. For heavy-duty fishing lines (50lb test and above), using your teeth can cause dental injury. Furthermore, jerking the knot tight rather than applying a smooth, steady pull can cause the "structural alteration" mentioned in the source to become a structural failure.
4. Ignoring Material Memory
As noted, in nylon, tightening this knot alters the structure. This refers to the way the plastic molecules realign under stress. Once a Dropper Loop knot is tightened in nylon, it is generally considered permanent. Attempting to untie it and reuse that section of line is dangerous, as the line will be significantly weakened and deformed.
Related Knots and Splicing
Understanding the Dropper Loop is often a gateway to mastering other complex outdoor rope techniques. Here are a few related knots you should know:
- The Palomar Knot: A remarkably strong and simple terminal knot used to attach hooks or swivels to the end of a line; it is often used in conjunction with dropper rigs.
- The Perfection Loop: A terminal loop knot that creates a perfectly inline loop at the end of a rope, known for being very slim and passing through guides easily.
- The Surgeon’s Loop: A quicker, bulkier alternative to the Dropper Loop created by tying a double overhand knot in a bight; it is easier to tie but lacks the 90-degree stand-off.
- The Blood Knot: Primarily used for joining two sections of line of similar diameter together, utilizing a similar wrapping technique to the Dropper Loop but without the protruding loop.
Final Words
The Dropper Loop is a cornerstone of technical rigging and angling. Its ability to provide a secure, perpendicular attachment point in the middle of a line makes it indispensable for complex rigs and organized outdoor setups. While the process of wrapping and pulling the loop through the center requires a steady hand and attention to detail—especially regarding the structural changes in nylon—the result is a reliable, professional-grade knot.
By mastering the Dropper Loop knot and integrating it into your repertoire of rope knots, you enhance your versatility in the field. Practice with various cordage types, remember to lubricate every knot, and always inspect your work for symmetry before putting it under load. Whether you are on the water or in the woods, these outdoor rope techniques are the silent partners of a successful adventure.
