
The art of rope work is a foundational skill for sailors, arborists, climbers, and outdoor enthusiasts alike. While many people rely on standard knots to secure their gear, the Eye Splice stands in a category of its own. Unlike a traditional knot, which can significantly reduce the breaking strength of a line, a properly executed splice maintains the integrity of the fibers, providing a permanent and incredibly strong loop at the end of a rope.
In the world of outdoor rope techniques, the Eye Splice is often considered the gold standard for creating a fixed loop. Whether you are rigging a dock line for a vessel or preparing a heavy-duty tow rope, understanding the mechanics of splicing is a hallmark of a true professional. This article will delve into the history, utility, and precise methodology required to master this technique.
Alternative Names: Spliced Eye, Fixed Eye, Three-Strand Splice, Marine Eye Splice.
What Is an Eye Splice?
The Eye Splice is a method of creating a permanent loop (an "eye") in the end of a multi-strand rope by weaving the loose strands back into the standing part of the rope. While a knot like the Bowline is excellent for temporary situations, it relies on sharp bends that can weaken rope fibers by up to 50%. In contrast, a splice uses friction and the "lay" of the rope to distribute tension evenly, retaining roughly 90% to 95% of the rope’s original tensile strength.
Practical Uses and Applications
The versatility of the Eye Splice makes it indispensable across various industries:
- Marine and Boating: It is the primary method for finishing dock lines, anchor rodes, and fender lines.
- Arboriculture: Tree surgeons use spliced eyes in climbing and rigging lines for maximum safety and durability.
- Industrial Rigging: Used for lifting slings and heavy-duty towing where failure is not an option.
- General Utility: From creating permanent handles on buckets to securing cargo in a truck bed, the splice offers a clean, snag-free finish that knots cannot match.
Materials and Tools Needed
Before you begin, you must ensure you have the correct type of rope and the necessary tools. Splicing is a tactile process that requires patience and the right equipment.
1. Rope Selection
The instructions provided here are specifically for three-strand twisted rope. This is commonly made from:
- Nylon: High stretch and strength, perfect for dock lines.
- Polyester (Dacron): Low stretch and high UV resistance.
- Polypropylene: Lightweight and floats, often used for pool lanes or light-duty water work.
- Natural Fibers (Manila or Cotton): Common in decorative work or traditional sailing.
2. Essential Tools
- Adhesive Tape: Masking tape or electrical tape is used to prevent the individual strands from unravelling during the process.
- Cutting Tool: A sharp knife or heavy-duty scissors to cut the rope and trim the ends.
- Fid or Marlinspike (Optional): While not strictly required for loose-laid rope, these tapered tools help open the "lay" of the standing part to allow strands to pass through easily.
- Heat Source: For synthetic ropes, a lighter or butane torch is used to fuse the ends of the strands to prevent fraying.
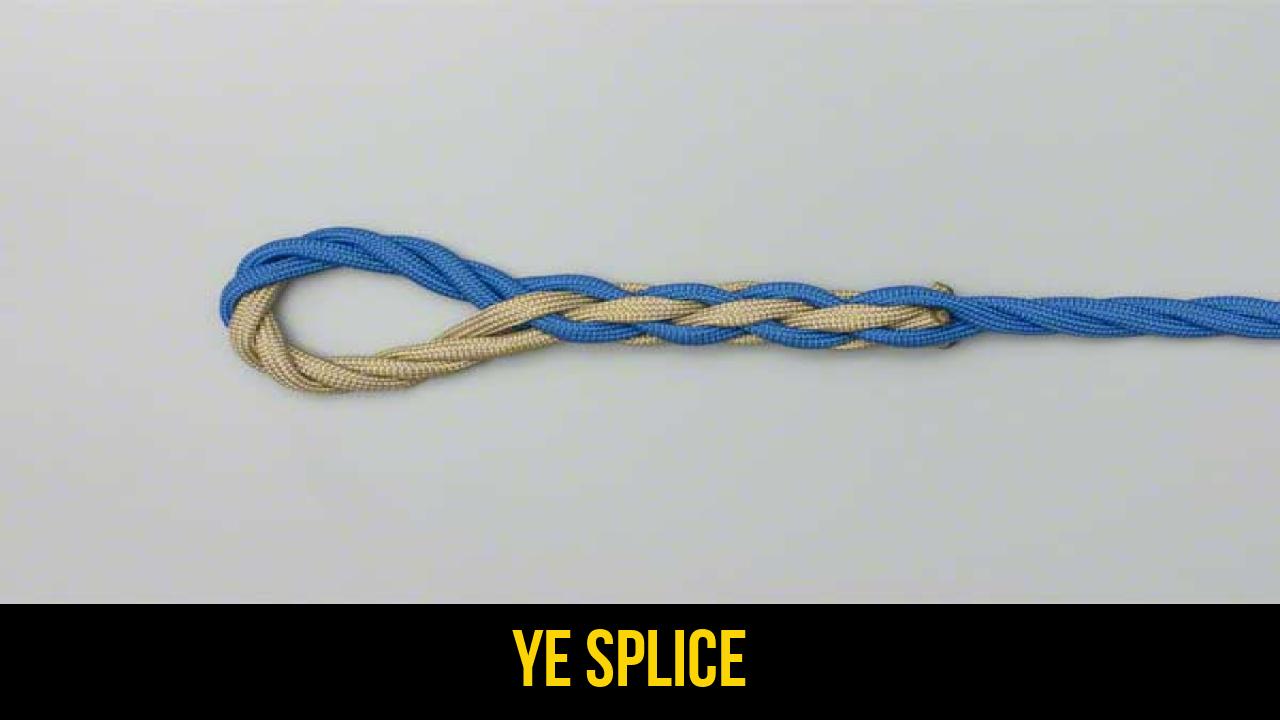
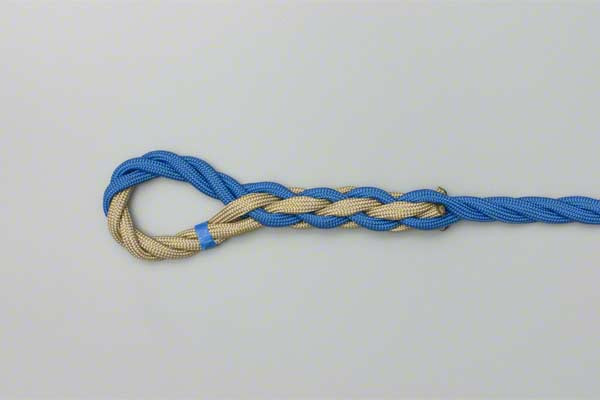
How to Tie Eye Splice?
To achieve a professional-grade finish, follow these steps precisely. This method focuses on the traditional three-strand weave, ensuring maximum friction and security.
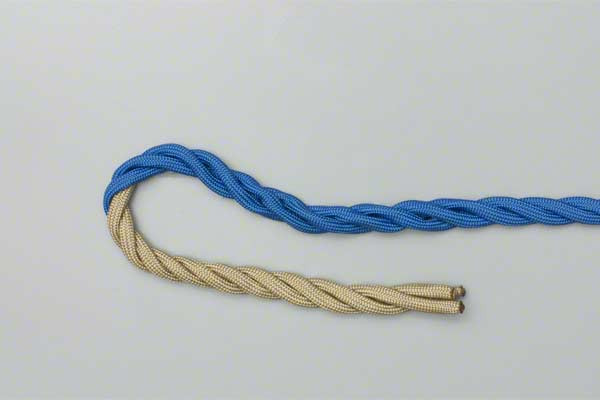
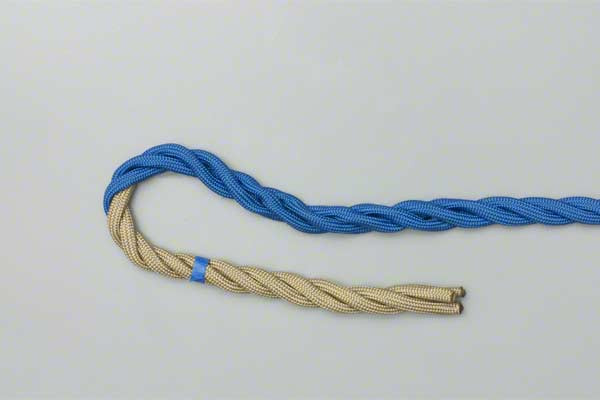
- Tape rope.
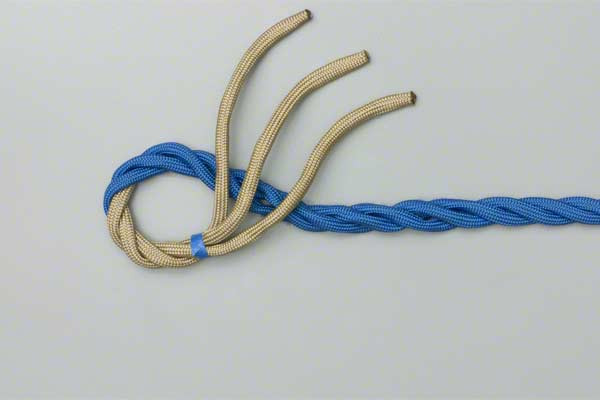
- Unravel enough for 5 tucks (4 shown here).
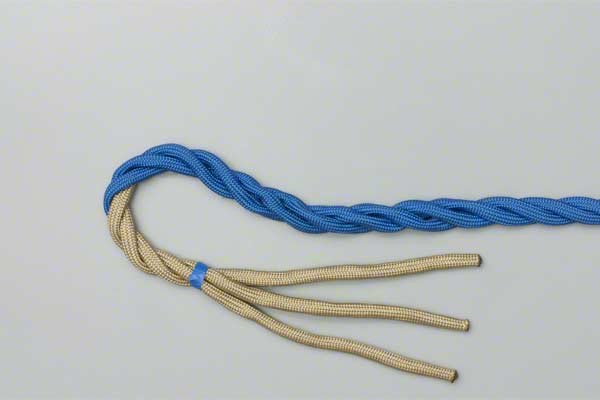
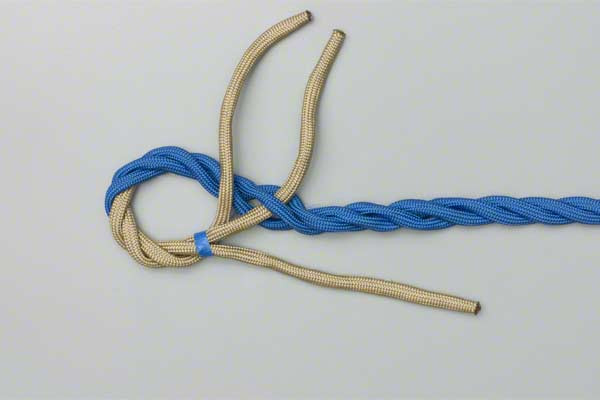
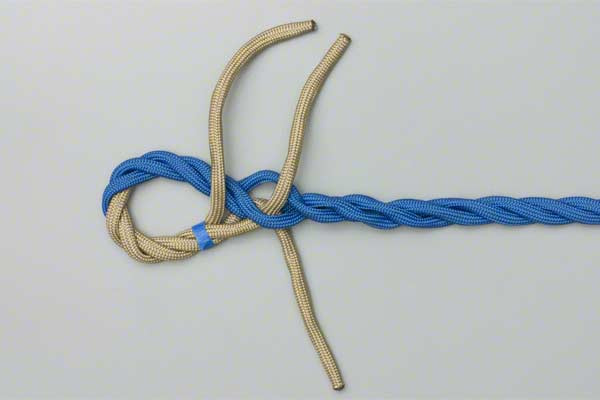
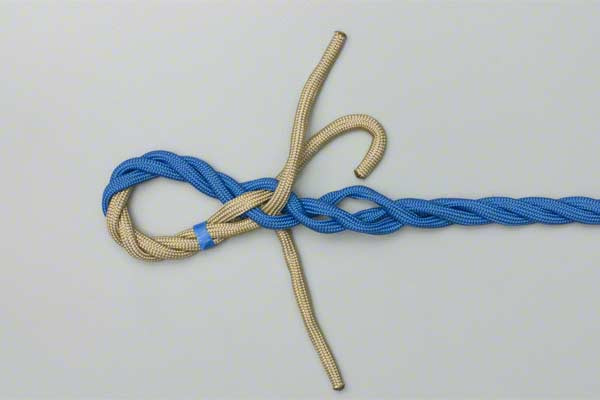
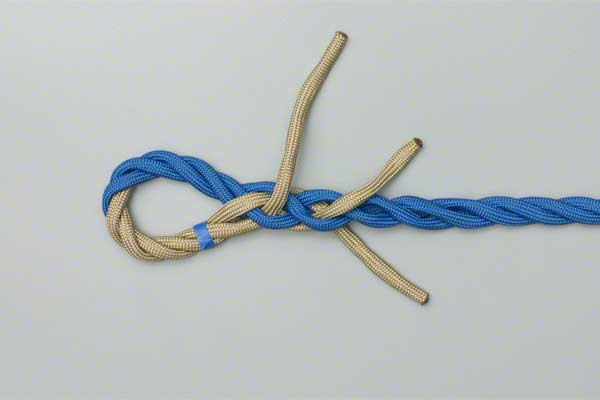
- Arrange strands.
- Pass center one under a standing strand.
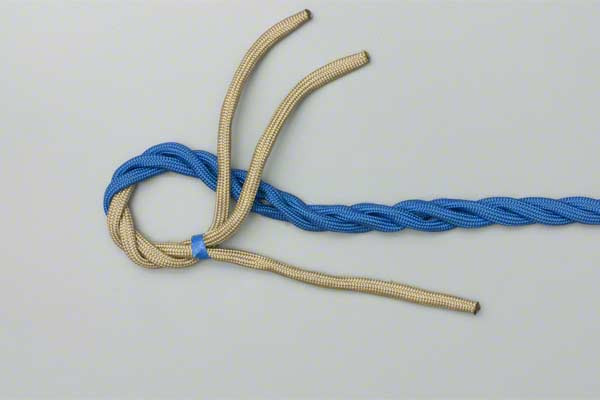
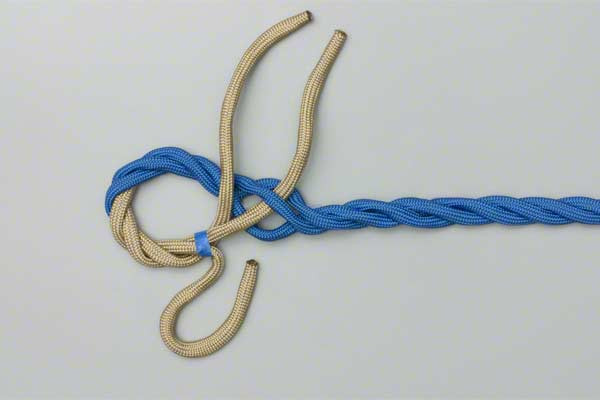
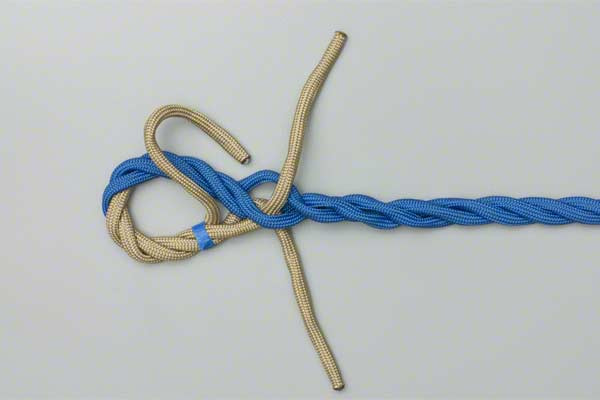
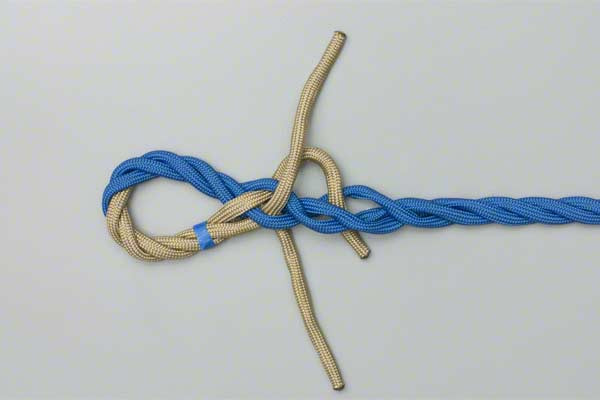
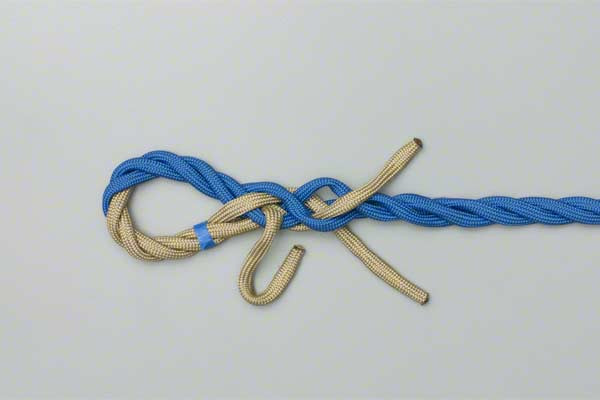
- Pass lower one under lower adjacent standing strand.
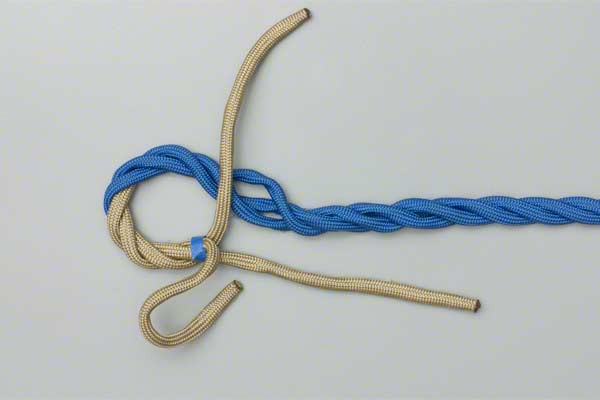
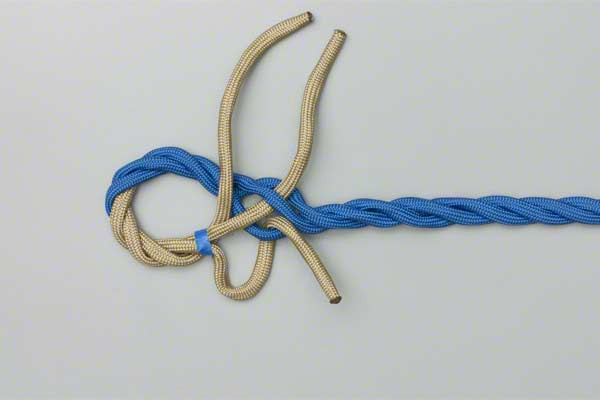
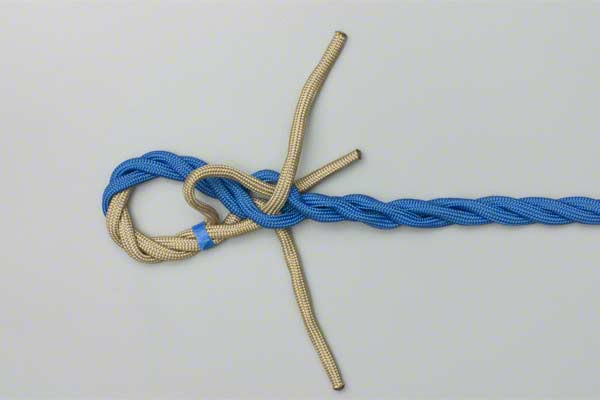
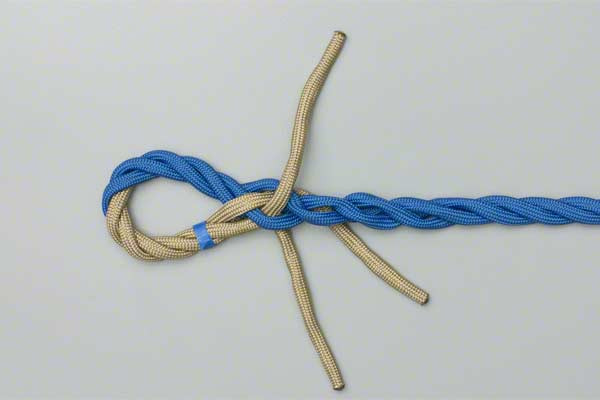
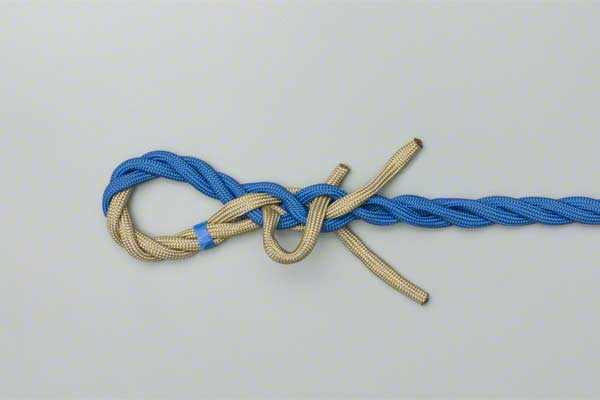
- Pass the upper strand under the upper adjacent standing strand.
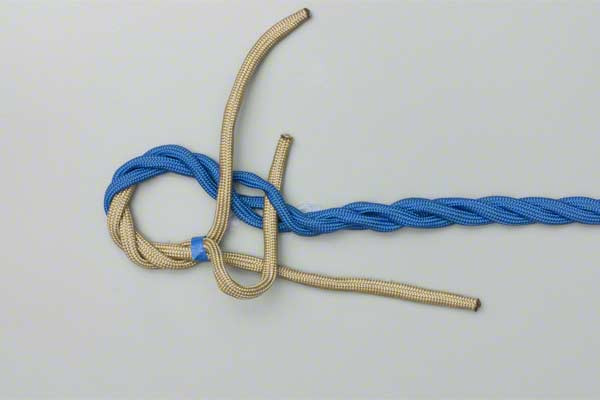
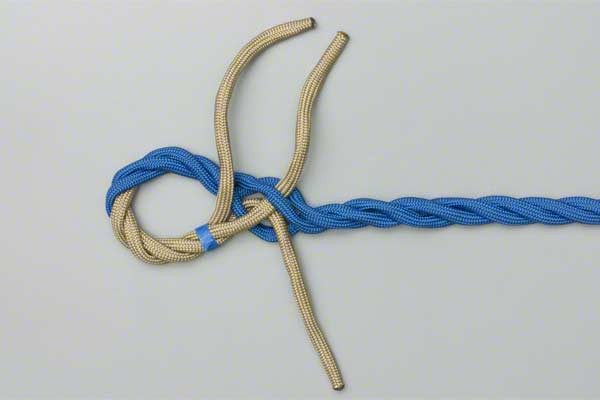
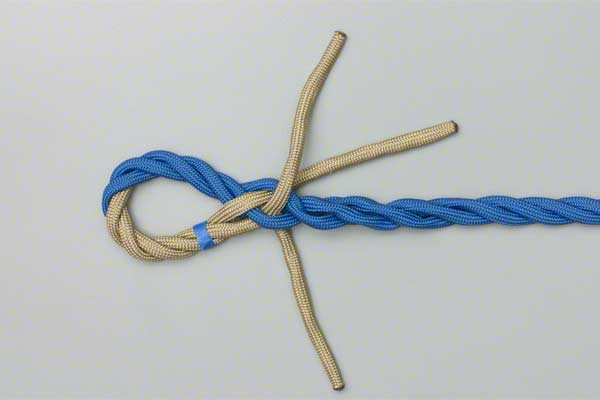
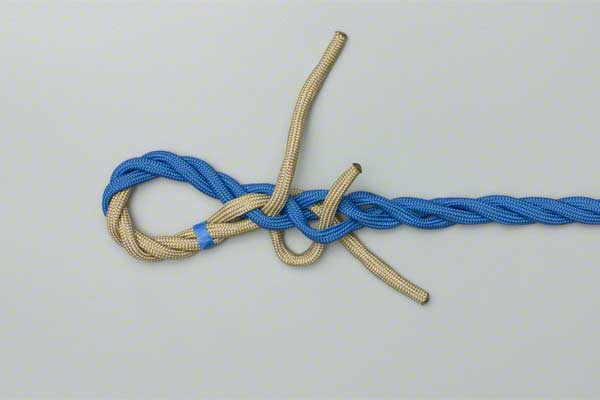
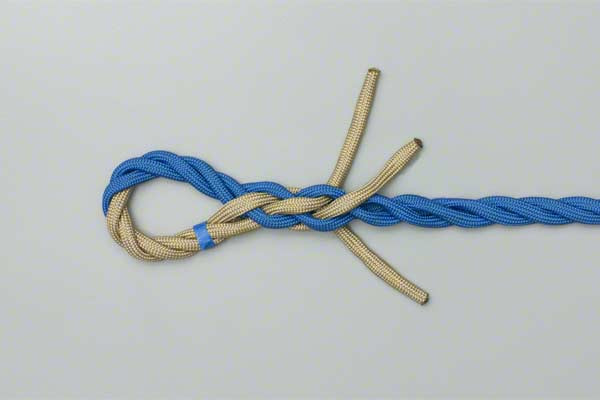
- Repeat the process for the remaining sets of tucks.
- Remove the tape.


Common Mistakes to Avoid
Even seasoned professionals can make errors when performing an Eye Splice knot. To ensure your splice is safe for load-bearing applications, watch out for these common pitfalls:
1. Insufficient Tucks
While the minimum requirement for many ropes is three tucks, synthetic ropes (like nylon or poly) are "slippery." For these materials, five tucks are generally recommended to prevent the splice from pulling out under extreme tension. Always err on the side of more tucks rather than fewer.
2. Crossing the "Lay" Incorrectly
The strands must be woven against the lay of the rope. If you accidentally tuck a strand with the lay, it will not create the necessary friction, and the splice will fail. Each tuck should go "over one and under one" in a consistent spiral pattern.
3. Uneven Tension
If one strand is pulled tighter than the others during the splicing process, the load will not be distributed evenly. This creates a "high strand," which can lead to premature wear and potential failure of the splice.
4. Forgetting to Taper
While not required for basic utility, a professional splice is often "tapered." This involves thinning out the fibers of the strands for the final two tucks. This creates a smooth transition from the splice to the standing part, preventing the rope from catching on blocks or cleats.
Related Knots and Splicing
Understanding the Eye Splice is often a gateway to other rope knots and splicing techniques. Here are a few related methods you should know:
- Short Splice: This technique is used to join two separate ropes together permanently. It involves weaving the strands of both ropes into each other, creating a strong but thickened section of rope.
- Back Splice: Used to finish the end of a rope to prevent fraying. Instead of forming a loop, the strands are woven back into the rope itself, creating a small "knob" at the end.
- Bowline Knot: Known as the "King of Knots," it creates a temporary loop. While faster to tie than a splice, it is significantly bulkier and reduces the rope’s overall strength.
- Long Splice: A more complex method of joining two ropes that does not increase the diameter of the line, allowing the rope to still pass through pulleys and sheaves.
Final Words
The Eye Splice is more than just a way to tie a loop; it is a vital outdoor rope technique that combines physics, craftsmanship, and safety. By mastering the five-tuck method, you ensure that your gear is secured with the highest possible efficiency and strength.
Whether you are securing a multi-million dollar yacht or simply organizing gear for a weekend camping trip, the ability to perform a clean, tight splice is a skill that will serve you for a lifetime. Practice with different rope diameters and materials to build your muscle memory, and always inspect your work before putting it under load. With patience and precision, your Eye Splice will remain a permanent, reliable fixture in your rigging toolkit.
