
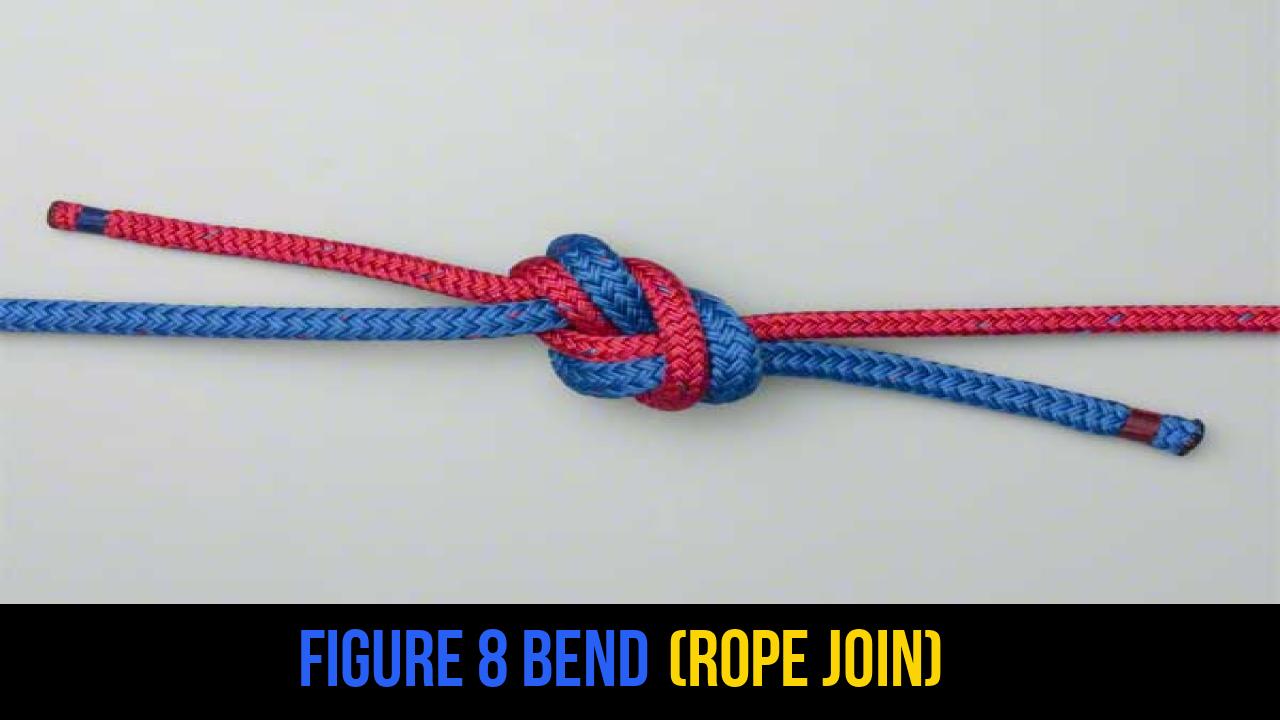
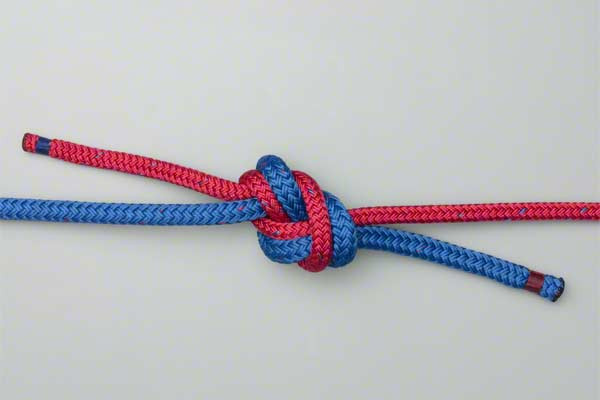
In the world of professional climbing, search and rescue, and technical maritime operations, the integrity of your equipment is only as good as the knots that hold it together. Among the vast library of rope knots, the Figure 8 Bend (Rope Join) stands out as one of the most reliable, recognizable, and high-strength methods for connecting two lines.
Whether you are a seasoned mountaineer preparing for a multi-pitch rappel or a scouting enthusiast learning the ropes of outdoor rope techniques, mastering this specific bend is a non-negotiable skill. Its primary advantage lies in its "follow-through" design, which allows for easy visual inspection—a critical safety feature when working in high-stakes environments.
Also known by several other names depending on the industry, this knot is the gold standard for joining two ropes of similar diameter. In the following sections, we will delve into the mechanics, applications, and precise methodology for tying this essential knot.
Alternative Names: Flemish Bend, Figure-Eight Join, Figure-Eight Follow-Through, Double Figure Eight Bend.
What Is a Figure 8 Bend (Rope Join)?
The Figure 8 Bend (Rope Join) is a "bend" category knot, which technically means it is designed specifically to join two ends of rope together to create a single, longer line. Unlike a loop or a hitch, the purpose of the Figure 8 Bend is to maintain the maximum possible tensile strength of the rope while ensuring the connection does not slip under heavy loads.
Practical Applications
- Rock Climbing and Mountaineering: It is frequently used to join two ropes for a long rappel. Because it is bulky, it is less likely to get jammed in cracks compared to some flatter knots, though it must be dressed properly to avoid snagging.
- Search and Rescue (SAR): Rescue technicians rely on the Flemish Bend because it is incredibly stable and can be easily verified by a second set of eyes even in low-light conditions.
- General Utility: From securing loads on a vehicle to extending a tow line, this knot provides a secure join that is relatively easy to untie even after being subjected to significant weight.
Why Choose the Figure 8 Bend?
The knot is favored because it is symmetrical. In safety-critical applications, symmetry allows for a quick "check" to ensure the knot is tied correctly. If the strands do not lay parallel to one another in a clean "8" shape, the knot is incorrect. Furthermore, it retains a high percentage of the rope’s original breaking strength, often rated between 70% and 80%.
Materials and Tools Needed
To practice or implement the Figure 8 Bend (Rope Join), you should consider the environment and the load the rope will carry. Not all ropes are created equal, and the performance of the knot can vary based on material.
Recommended Rope Types
- Static Kernmantle Rope: Ideal for rescue and hauling where you don’t want the rope to stretch.
- Dynamic Climbing Rope: Used in lead climbing; the Figure 8 Bend holds exceptionally well in nylon dynamic ropes.
- Nylon or Polyester Cords: Common in general outdoor use. Note that extremely slick materials (like some high-tech Dyneema or Spectra blends) may require additional safety "stopper knots" on the tails.
Tools and Considerations
- Two Ropes of Similar Diameter: The Figure 8 Bend is most secure when joining two ropes of the same thickness. If the ropes differ significantly in diameter, a Sheet Bend or a Double Fisherman’s might be more appropriate.
- Gloves: If you are practicing with heavy-duty utility ropes, gloves can prevent rope burn when "setting" (tightening) the knot.
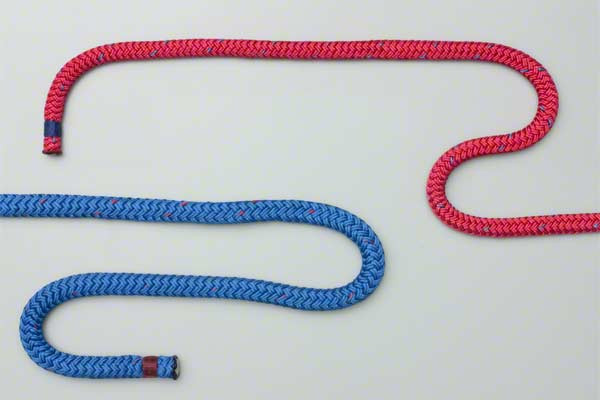
- Clear Workspace: Ensure your ropes are "flaked" (laid out without tangles) before you begin the joining process.
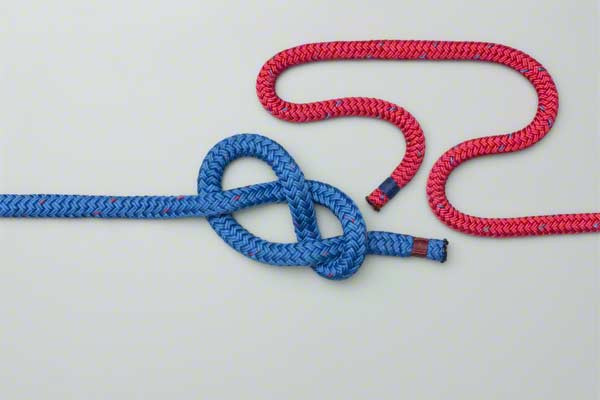
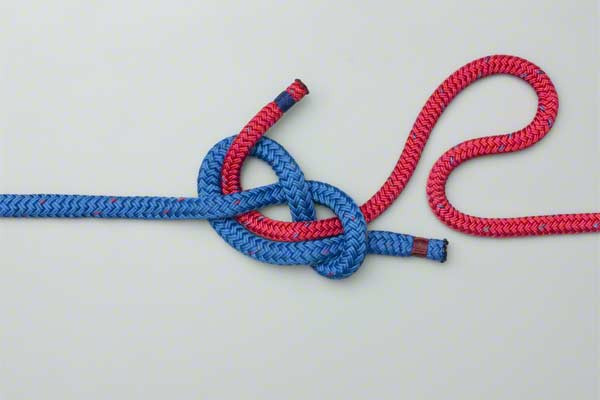
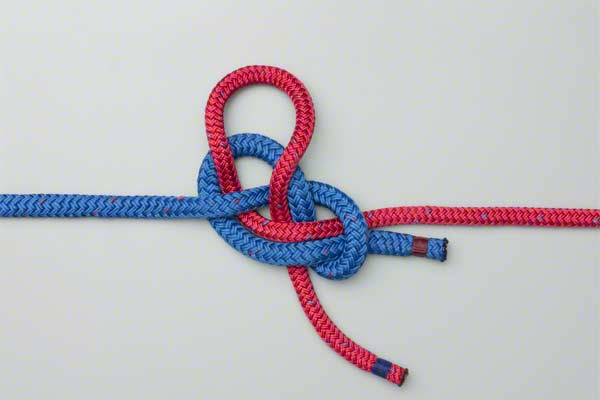
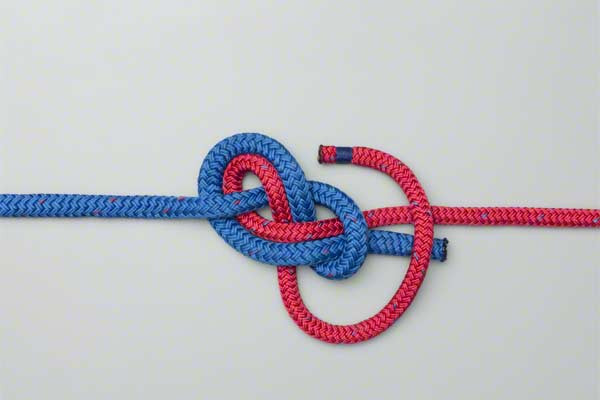
How to Tie Figure 8 Bend (Rope Join)?
To ensure the highest level of safety and reliability, follow these instructions precisely. The beauty of this knot is its simplicity once the initial "8" is formed.
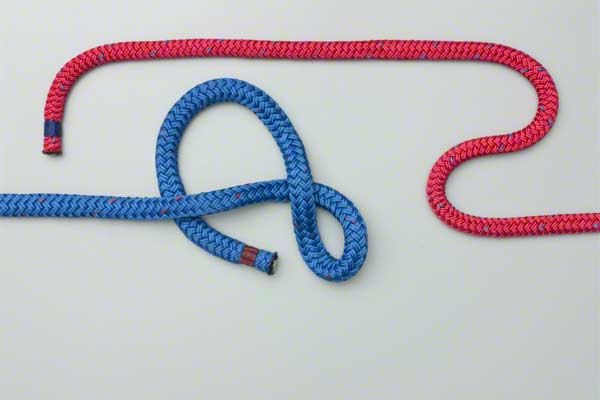
- Start by tying a loose Figure 8 knot in one of the ropes.
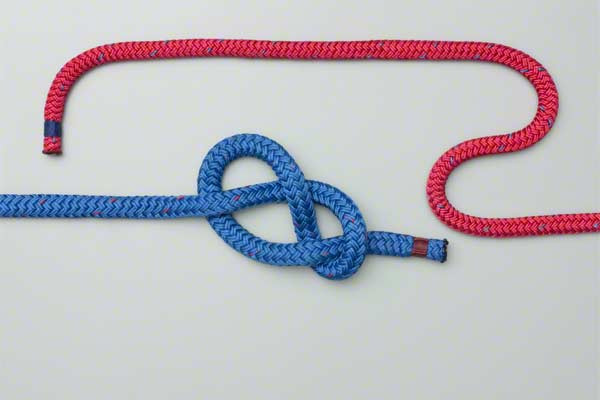
- Follow the same path in reverse with the other rope, starting beside the tail and exiting beside the standing end.
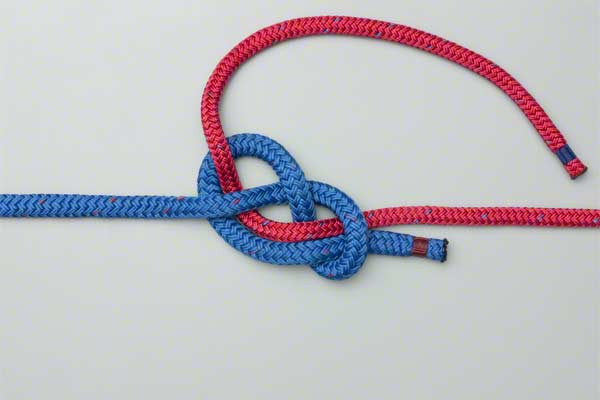
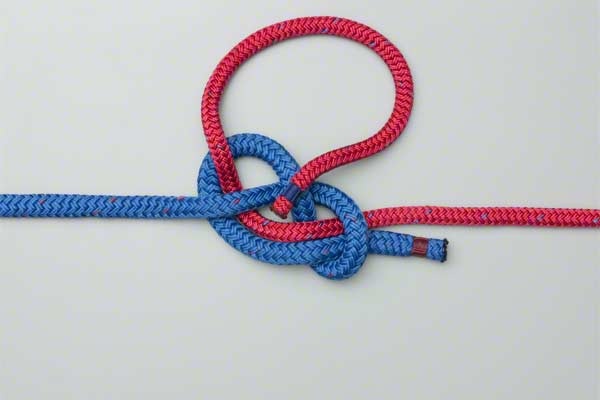
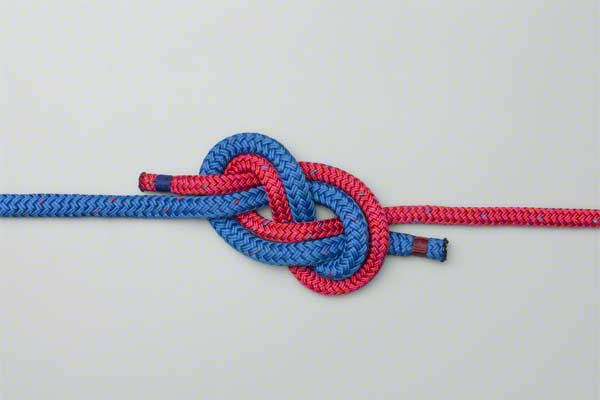
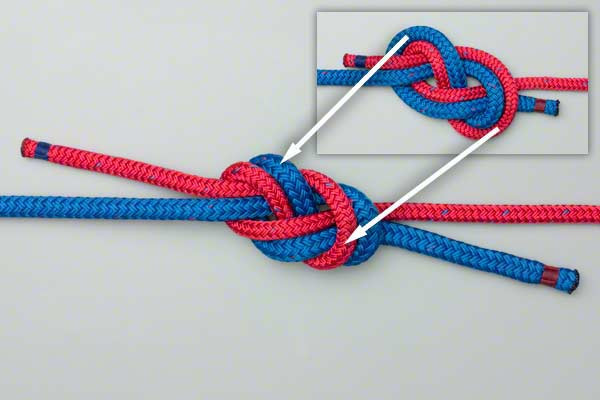
Technical Refinement (Dressing the Knot)
While the steps above complete the structure, a professional finish requires "dressing" and "setting":
- Dressing: Ensure the two ropes lie flat and parallel against each other without any internal crosses. This maximizes strength.
- Setting: Individually pull all four ends of the rope (the two standing ends and the two tails) to tighten the knot firmly.
- Tail Length: In safety applications, ensure you have at least 4 to 6 inches (10-15 cm) of tail protruding from the knot to account for any initial settling under load.
Common Mistakes to Avoid
Even though the Figure 8 Bend (Rope Join) knot is famous for its reliability, improper execution can lead to failure. Avoid these common pitfalls:
- Crossing the Strands: If the ropes cross over each other inside the knot, it creates "hot spots" where the rope can rub against itself, potentially weakening the fibers or making the knot nearly impossible to untie after it has been loaded.
- Insufficient Tail Length: This is the most dangerous mistake. Under extreme tension, knots can "creep" or settle. If the tail is too short, the end could be sucked back into the knot, causing it to fail entirely.
- Tying with Different Diameters: Using a very thick rope with a very thin rope can cause the thinner rope to "slip" through the loops of the thicker one. Always match your diameters when possible.
- Failure to "Set" the Knot: A loose Figure 8 Bend can deform when suddenly loaded. Always pull the knot tight manually before putting it into service.
- Inadequate Inspection: The primary benefit of this knot is its visual clarity. Never skip the step of looking at the knot to ensure the "double-tracked" path is perfect.
Related Knots and Splicing
Understanding the broader family of rope knots helps you choose the right tool for the job. Here are a few related techniques:
- Figure 8 Loop (Figure 8 on a Bight):
A terminal loop used primarily for tying into a climbing harness or creating a secure anchor point at the end of a line. - Double Fisherman’s Knot:
A highly secure bend used to join two ropes; it is more compact than the Figure 8 Bend but much harder to untie after being heavily loaded. - Zeppelin Bend:
A symmetrical and jam-proof bend that is incredibly stable and easy to untie, though slightly more complex to learn than the Figure 8. - Sheet Bend:
The go-to knot for joining two ropes of unequal diameter; it is simple and fast but less secure than the Figure 8 Bend for life-safety. - Water Knot (Tape Knot):
Specifically used for joining flat nylon webbing rather than round rope, utilizing a similar "re-threaded" logic.
Final Words
The Figure 8 Bend (Rope Join) is a cornerstone of outdoor rope techniques. Its balance of high strength, ease of inspection, and relative ease of untying makes it an indispensable tool for anyone working with cordage. While it may be slightly bulkier than other bends, the safety margins it provides are well worth the extra volume.
Remember that knot-tying is a perishable skill. To ensure you can tie the Figure 8 Bend under pressure—such as in rain, cold, or darkness—practice is essential. Use different types of ropes, ensure your "dressing" is impeccable, and always prioritize safety by double-checking your work and that of your partners. With the Figure 8 Bend in your repertoire, you are one step closer to mastering the technical demands of the great outdoors.
Safety Disclaimer: Rope-based activities like climbing and rescue are inherently dangerous. Seek professional instruction and always inspect your gear and knots before use.[/content]
