
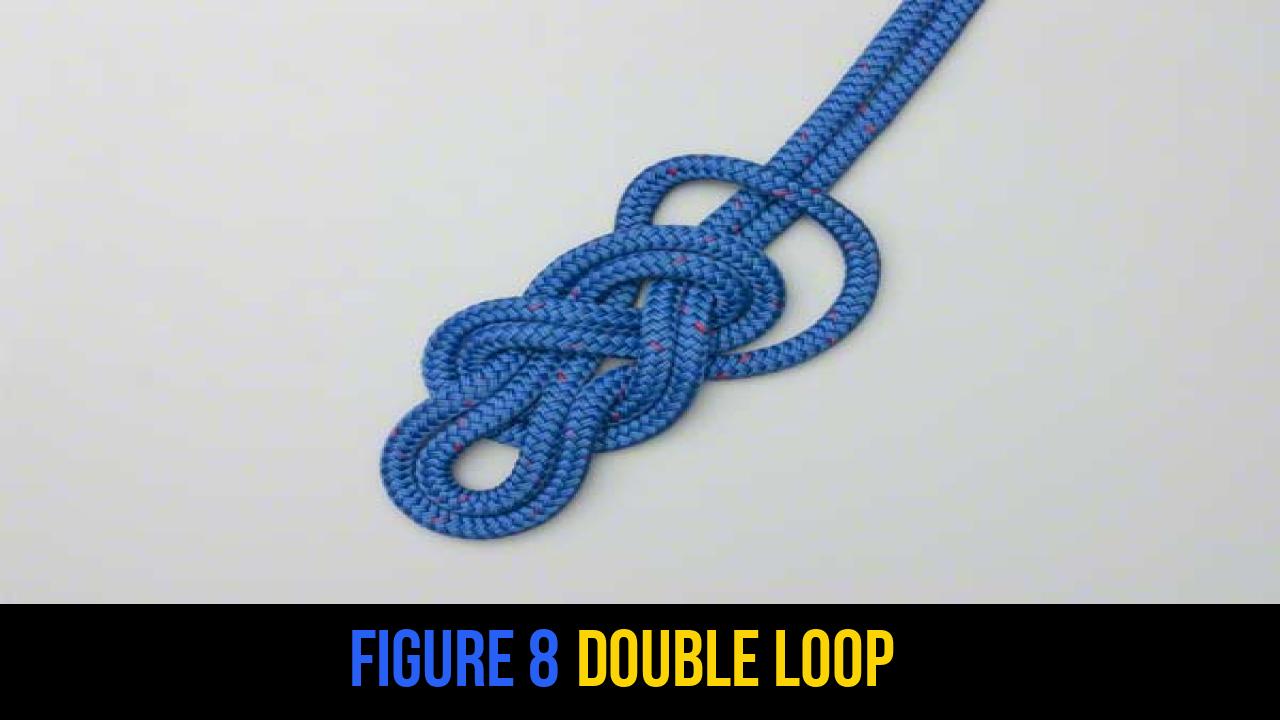
In the world of rope knots and outdoor rope techniques, few families of knots are as respected and widely utilized as the Figure 8 family. Among these, the Figure 8 Double Loop stands out as a specialized, high-strength variation designed for critical applications. Often favored by arborists, search and rescue teams, and technical climbers, this knot provides two independent loops that can be used for equalization or as a redundant attachment point.
Understanding how to secure your gear or yourself with reliable knots is the foundation of outdoor safety. Whether you are setting up a complex hauling system or a multi-point anchor, the Figure 8 Double Loop offers the security of the standard Figure 8 with the added versatility of dual loops. This guide will walk you through the history, mechanics, and precise execution of this essential knot.
Alternative Names: Bunny Ears Knot, Figure-Eight on a Bight with Two Loops, Double Loop Figure Eight, Dog-Eared Figure Eight.
What Is a Figure 8 Double Loop?
The Figure 8 Double Loop is a variation of the standard Figure 8 on a bight. While a standard Figure 8 produces a single loop at the end of a rope, the "Double Loop" version results in two adjustable loops. These "ears" are independent of one another, meaning you can adjust the size of one loop without significantly affecting the other until the knot is fully dressed and weighted.
Practical Uses and Advantages
The primary advantage of the Figure 8 Double Loop is its ability to distribute a load across two separate anchor points. This is known as equalization. In rescue scenarios, this knot is often used to connect a litter (stretcher) to a main line, providing redundancy—if one loop were to fail or the anchor point it’s attached to were to break, the second loop remains secure.
Key benefits include:
- High Strength: Like all Figure 8 knots, it retains a high percentage of the rope’s original tensile strength.
- Visual Inspection: It is easy to see if the knot is tied correctly, which is vital for safety checks.
- Ease of Untying: Even after being subjected to heavy loads, the Figure 8 structure remains relatively easy to untie compared to knots like the Bowline on a Bight.
- Redundancy: Two loops provide an extra margin of safety in high-stakes environments.
Materials and Tools Needed
To practice tying the Figure 8 Double Loop, you should use high-quality cordage that reflects the type of work you intend to do.
Rope Types
- Static Kernmantle Rope: Preferred for rescue and hauling because it has low stretch.
- Dynamic Climbing Rope: Ideal if you are practicing for lead climbing or mountaineering applications.
- Accessory Cord: A 6mm or 7mm cord is excellent for practice and for creating prusik loops or small anchors.
Considerations
- Rope Diameter: Thicker ropes (10mm and above) make the knot bulkier but easier to inspect. Thinner cords require more precision in dressing the knot to ensure the loops don’t cross awkwardly.
- Pliability: A very stiff, new rope might be difficult to "lock" during the final stage of tying. Ensure your rope is supple enough to follow the contours of the Figure 8.
- Friction: Synthetic fibers like nylon or polyester are standard. Be cautious with extremely slick materials like Dyneema or Spectra, as they may require extra tail length to prevent slippage.
How to Tie Figure 8 Double Loop?
Tying this knot requires attention to detail to ensure the "lock" is properly seated. Follow these steps exactly as provided to achieve a secure Figure 8 Double Loop:
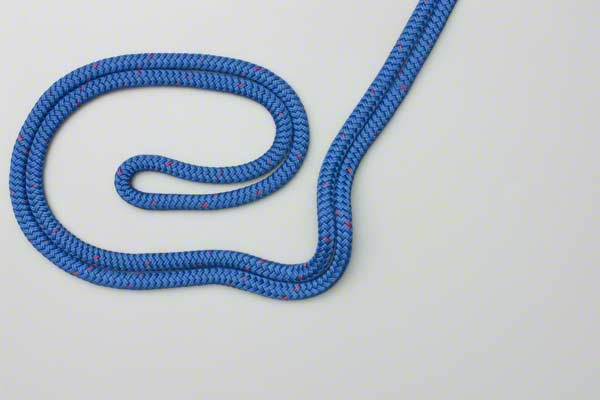
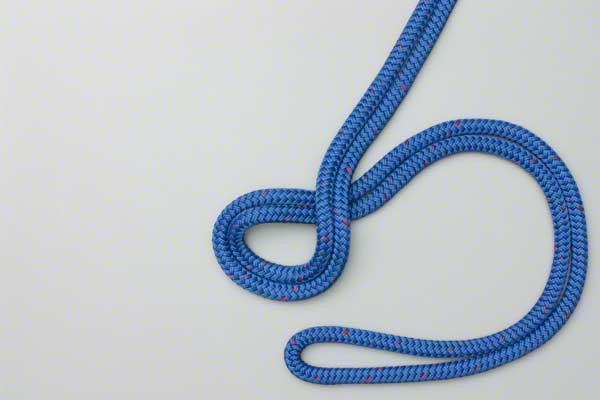
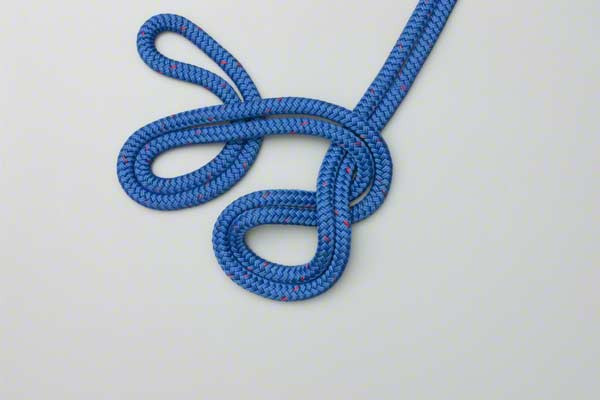
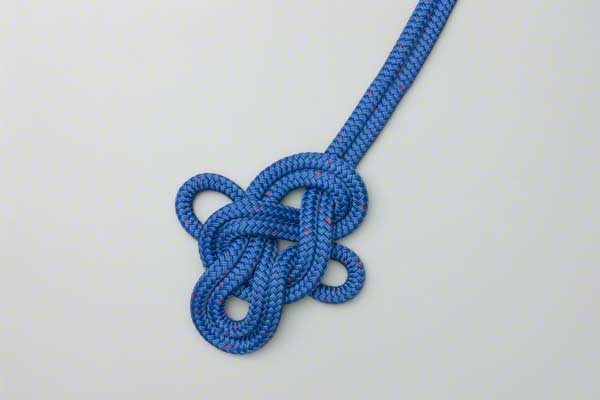
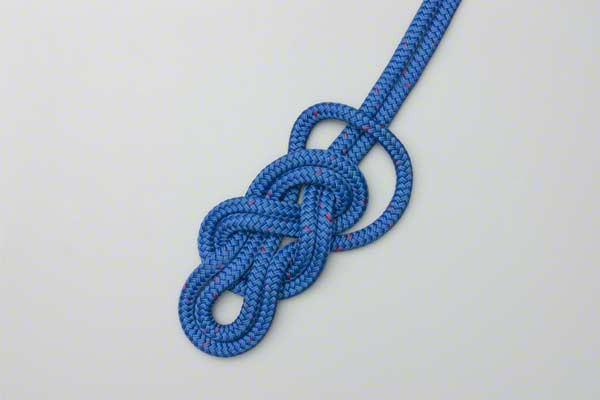
- With a long bight in the rope use two double loops to tie a Figure 8 knot.
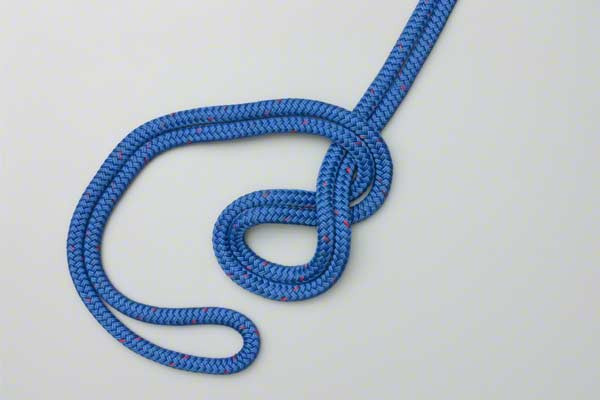
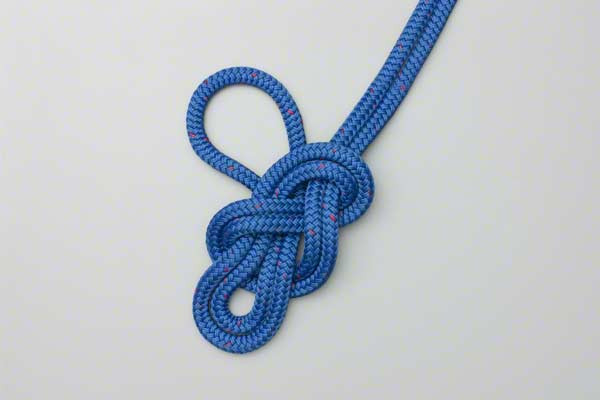
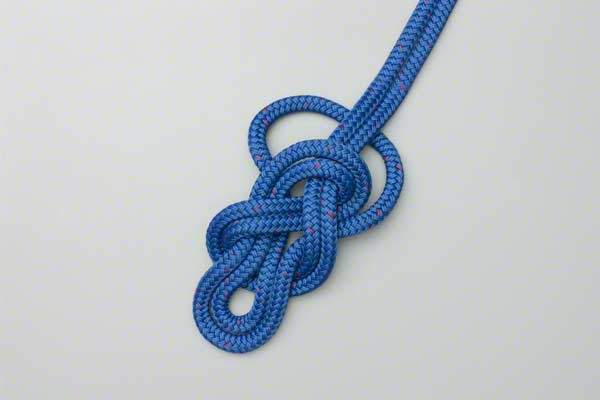
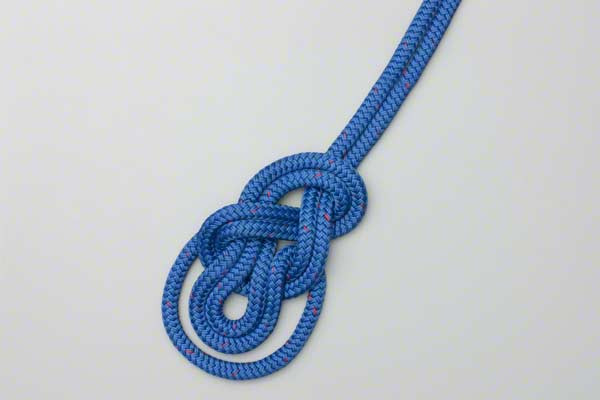
- Then pass the end of the original bight under, up, and over the whole knot.
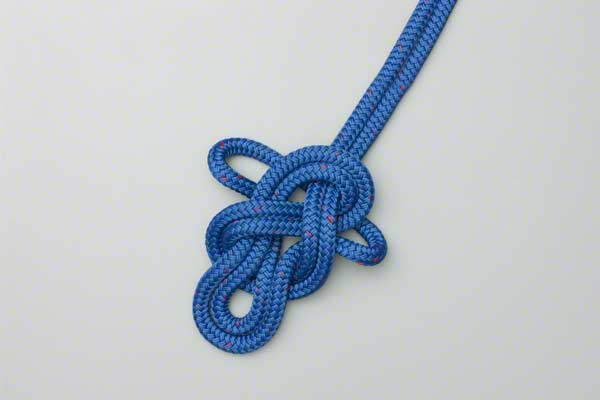
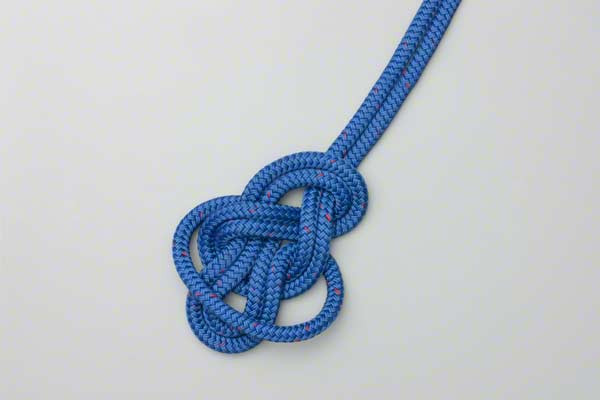
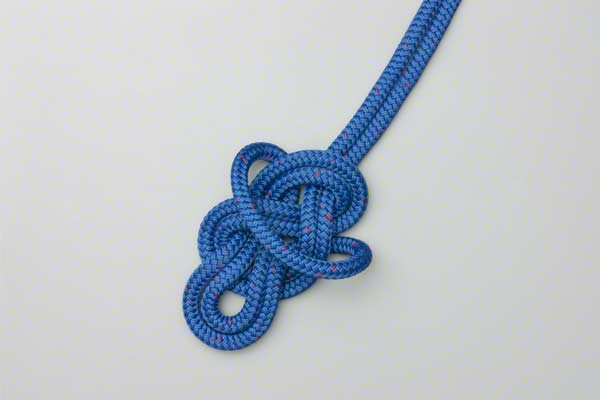
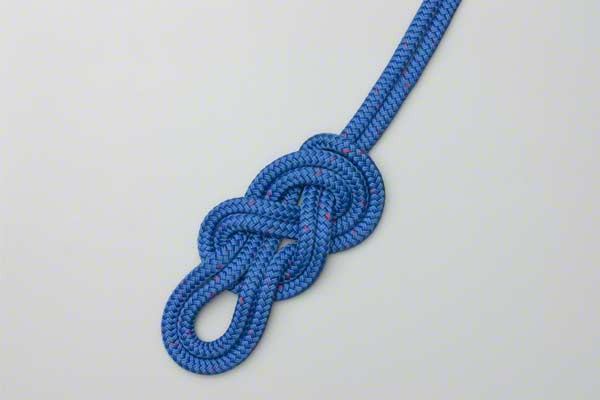
- Pull it tight to lock the two loops.
Expert Tip: When performing Step 2, ensure the bight passes completely around the structure of the knot. This "caps" the knot, preventing the loops from slipping back through the Figure 8 turns.

Common Mistakes to Avoid
Even seasoned professionals can make errors when tying complex rope knots. To ensure the Figure 8 Double Loop performs as expected, watch out for these common pitfalls:
1. Insufficient Tail Length
Always ensure you have at least 4–6 inches of "tail" (the remaining rope end) protruding from the knot. In high-load situations, knots can "settle," and a short tail might get sucked into the knot, leading to failure.
2. Failure to Dress the Knot
"Dressing" refers to smoothing out the strands of the rope so they lie flat and parallel. If the strands are crossed inside the Figure 8 Double Loop, it creates internal friction and stress points, which can reduce the overall strength of the rope and make the knot much harder to untie after use.
3. Misplacing the Final "Cap"
In the instructions, passing the bight "over the whole knot" is crucial. If you only pass it over one of the loops or fail to bring it all the way to the base of the knot, the loops will not be "locked." This could result in the loops sliding or the knot collapsing into a different, less secure form.
4. Overloading a Single Loop
While the loops are independent, the knot is designed to share the load. Avoid placing the entire weight on just one "ear" if possible, as this can cause the knot to deform under extreme tension.
Related Knots and Splicing
Expanding your knowledge of outdoor rope techniques involves learning how different knots relate to one another. Here are a few knots closely related to the Figure 8 Double Loop:
- Figure 8 on a Bight: The foundational version of this knot; it creates a single, secure loop at the end of a rope for clipping into anchors.
- Alpine Butterfly Knot: A superior knot for creating a fixed loop in the middle of a rope that can handle multi-directional loading.
- Bowline on a Bight: An alternative double-loop knot that is often easier to adjust but can be more difficult for beginners to master and inspect.
- Figure 8 Follow-Through: The standard knot used by climbers to tie their harness directly into the rope using a single strand.
Final Words
The Figure 8 Double Loop is a powerhouse in the world of technical rigging. Its ability to provide two secure, redundant attachment points makes it an indispensable tool for anyone serious about climbing, rescue work, or advanced outdoor rope techniques.
While the instructions are straightforward, the key to mastery is repetition. Practice tying the Figure 8 Double Loop with different rope diameters and in various conditions—such as while wearing gloves or in low-light settings—to ensure that when you need it in the field, your muscle memory takes over. Remember, a knot is only as safe as the person tying it. Always perform a visual and physical check of your knots before trusting them with a load.
By adding the Figure 8 Double Loop to your repertoire, you are enhancing your safety and efficiency in any vertical or high-tension environment. Stay safe, keep practicing, and always respect the limits of your gear.[/content]
