
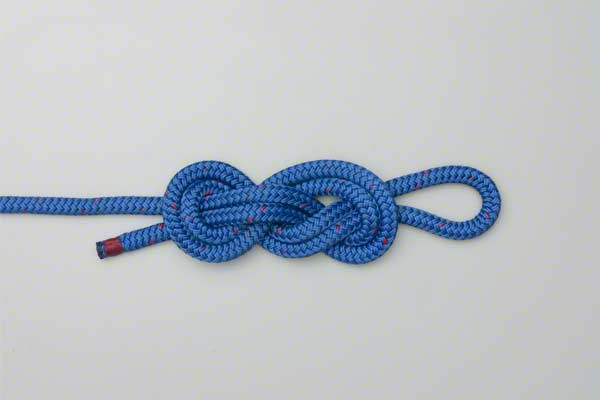
In the world of outdoor rope techniques, few things are as critical as the reliability of your terminal loops. While the Figure 8 Loop is often the "gold standard" for climbers and rescue technicians, there are specific scenarios where an even more robust, bulkier alternative is required. Enter the Figure 9 Loop. This knot is essentially a "beefed-up" version of the Figure 8, incorporating an extra half-turn that provides unique mechanical advantages, particularly when dealing with high-modulus synthetic fibers or extreme loads.
The Figure 9 Loop is renowned among arborists, search and rescue (SAR) teams, and industrial riggers for its stability. Because of the extra internal friction provided by the additional wrap, it is significantly less prone to "jamming" or "welding" after being subjected to a heavy haul. For anyone serious about mastering rope knots, understanding the transition from the Figure 8 to the Figure 9 is a milestone in technical proficiency.
Alternative Names: Figure-of-nine loop, Nine knot, Heavy-duty loop knot.
What Is a Figure 9 Loop?
The Figure 9 Loop is a fixed loop tied at the end of a rope. It belongs to the family of "figure-of-eight" based knots, which are characterized by their symmetry and strength. The "9" in its name refers to the visual appearance of the knot before it is fully tightened, which resembles the numeral nine more closely than the numeral eight.
Practical Uses and Applications
The primary reason to choose a Figure 9 over a Figure 8 is ease of untying. When a rope is subjected to thousands of pounds of force, the internal turns of a knot can compress so tightly that they become nearly impossible to undo by hand. The Figure 9 Loop adds more bulk to the knot structure, which absorbs the compression over a larger surface area, making it much easier to break the knot apart after a heavy load has been released.
- Arboriculture: Used for heavy rigging where branches or logs are lowered using high-tension lines.
- Search and Rescue: Utilized in hauling systems where multiple people or heavy litters are being moved.
- Industrial Rigging: Ideal for permanent or semi-permanent loops in thick synthetic ropes that must withstand constant tension.
- Caving: Sometimes preferred in European caving techniques for anchors that will see repeated, heavy use.
Materials and Tools Needed
To tie a secure Figure 9 Loop, the choice of material is just as important as the technique itself. Because this knot is bulkier than most, it requires a slightly longer "tail" and works best with specific types of cordage.
Rope Types
- Static Kernmantle Rope: This is the most common rope used with the Figure 9. Its low-stretch properties make it ideal for the rigging and hauling scenarios where this knot excels.
- Dynamic Rope: While it can be tied in climbing ropes, the bulkiness of the Figure 9 may be overkill for standard lead climbing, where a Figure 8 is usually sufficient.
- High-Modulus Polyethylene (HMPE): For ropes like AmSteel or Dyneema, the extra wrap of a Figure 9 can help provide better "bite" on these slippery fibers.
Tools and Considerations
- Gloves: When dressing and tightening a knot of this size, heavy-duty work gloves protect your hands from rope burn.
- Marlin Spike (Optional): While the Figure 9 is easier to untie than the Figure 8, a marlin spike can assist if the knot has been "welded" by extreme mechanical force.
- Rope Length: Always ensure you have enough rope to form a generous bight. The Figure 9 consumes more material than a standard loop due to the extra wrap.
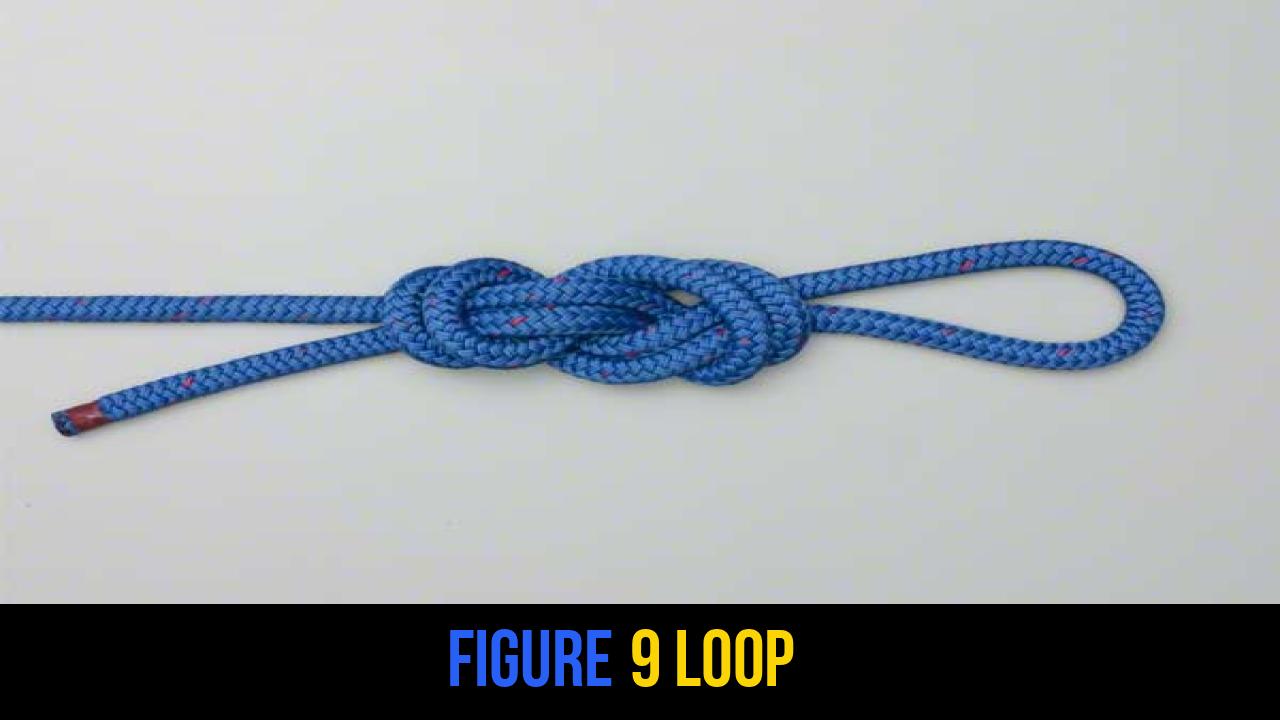
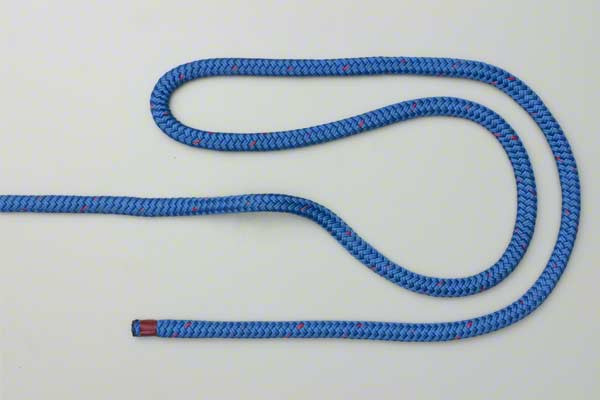
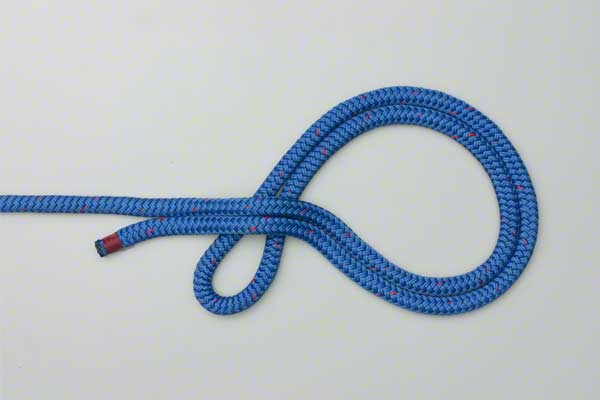
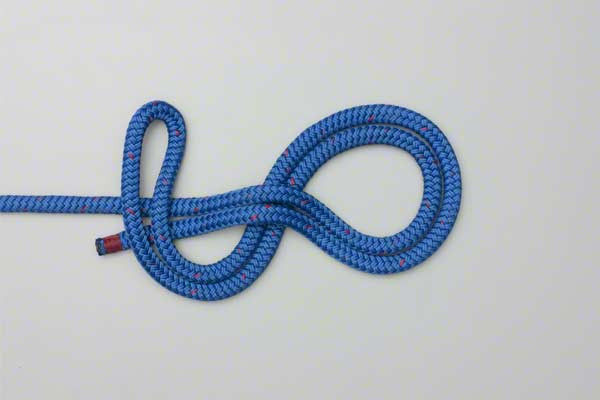
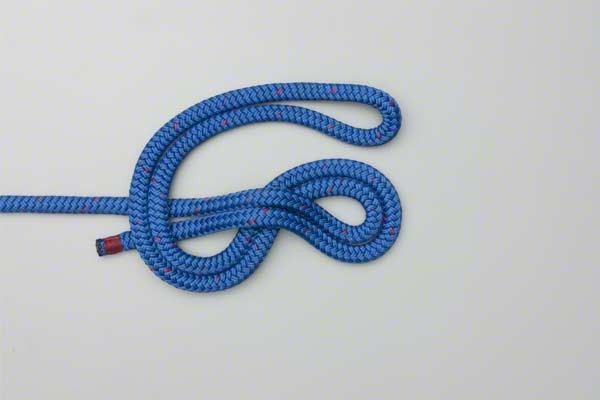
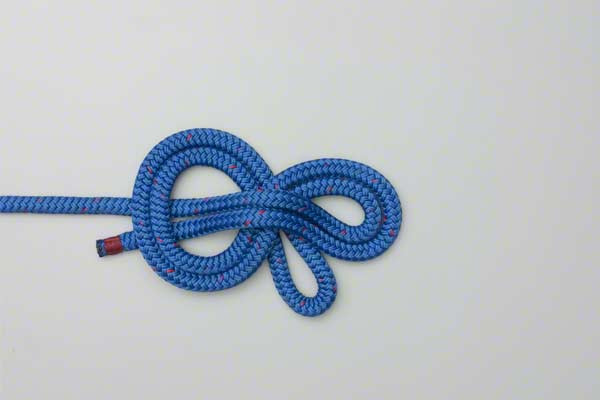
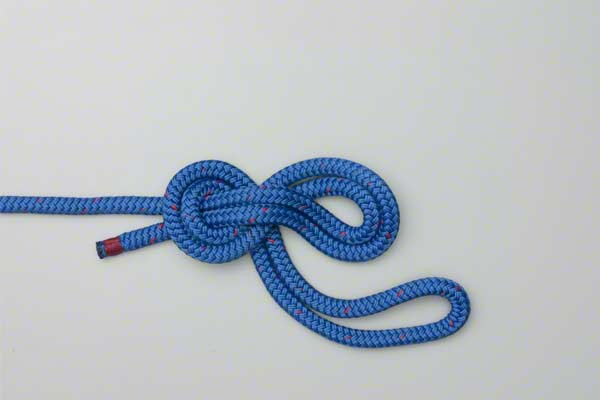
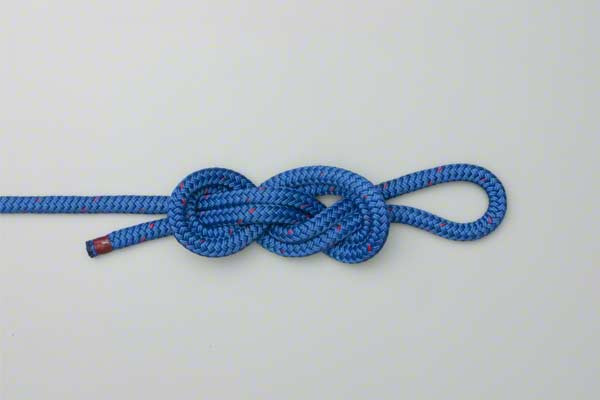
How to Tie Figure 9 Loop?
To ensure safety and structural integrity, follow these steps precisely. The Figure 9 Loop requires careful attention to the number of wraps to differentiate it from its smaller cousin, the Figure 8.
- Form a bight.
- Wrap the bight around both ends to form a loop.
- Instead of coming up through the loop to make a Figure 8 Loop, pass the bight around again and then down through the loop to make the Figure 9 Loop.
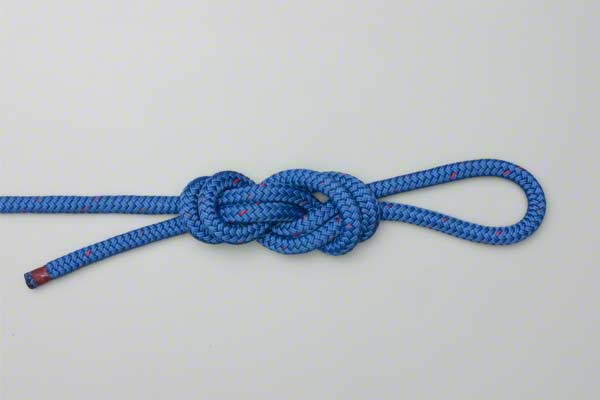
- To dress the knot, bring the outer turns in and tighten them.

Common Mistakes to Avoid
Even for those experienced in outdoor rope techniques, the Figure 9 can occasionally lead to errors due to its similarity to other knots. Safety is paramount when rigging overhead loads or life-safety lines.
1. Insufficient Dressing
"Dressing" a knot refers to the process of arranging the strands so they lie flat and parallel without crossing over each other unnecessarily. Because the Figure 9 Loop has more wraps, it is easy for the strands to become twisted inside the knot. A poorly dressed Figure 9 is significantly weaker and harder to inspect visually. Always bring the outer turns in as instructed to ensure a compact, strong finish.
2. Confusing the "9" with the "8"
The most common mistake is stopping one half-turn too early. If you do not pass the bight around again, you will end up with a Figure 8. While the Figure 8 is a safe knot, it may not provide the "anti-jamming" benefits you were seeking by choosing the Figure 9.
3. Short Tail Ends
The "tail" is the loose end of the rope that exits the knot. For a heavy-duty loop like this, the tail should be at least six to ten times the diameter of the rope. A tail that is too short can potentially pull back into the knot under extreme cyclic loading.
4. Failure to Pre-Tighten
A bulky knot like the Figure 9 needs to be "set." This means pulling on all four ends of the rope (the loop, the standing part, and the tail) to ensure the internal structure is snug before a real load is applied.
Related Knots and Splicing
Understanding how the Figure 9 Loop fits into the wider ecosystem of rope knots will help you choose the right tool for the job.
- Figure 8 Loop: The foundation of the figure-eight family; it is faster to tie and uses less rope but is more prone to jamming under extreme tension.
- Figure 10 Loop: An even bulkier variation with another additional wrap, used almost exclusively in specialized industrial contexts to prevent jamming in extremely thin, high-tension lines.
- Bowline Knot: A classic loop knot that is easy to untie after loading but can be less stable than the "Figure" family when used with modern, slick synthetic ropes.
- Alpine Butterfly Loop: A mid-line loop that can handle tension from three directions, unlike the Figure 9, which is primarily a terminal (end-of-rope) loop.
- Double Fisherman’s Loop: A very secure loop made by tying a double fisherman’s knot around the standing part; it is extremely strong but nearly impossible to untie after loading.
Final Words
The Figure 9 Loop is a specialized tool in the arsenal of any rope professional or outdoor enthusiast. By adding a simple extra wrap to the familiar Figure 8, you create a knot that is not only incredibly strong but also remarkably resilient against the "welding" effects of high-tension loads. Whether you are rigging a complex hauling system in a rescue scenario or lowering heavy timber in a backyard, the Figure 9 provides a level of security and post-load ease-of-use that few other knots can match.
Mastering outdoor rope techniques requires a commitment to practice and a deep understanding of knot mechanics. We recommend practicing the Figure 9 Loop with different rope diameters and textures until the motion becomes second nature. Remember: a knot is only as good as the person tying it—always dress your knots, check your tails, and prioritize safety in every rigging endeavor. Through consistent application and respect for the physics of cordage, the Figure 9 Loop will become one of the most reliable tools in your technical kit.
