
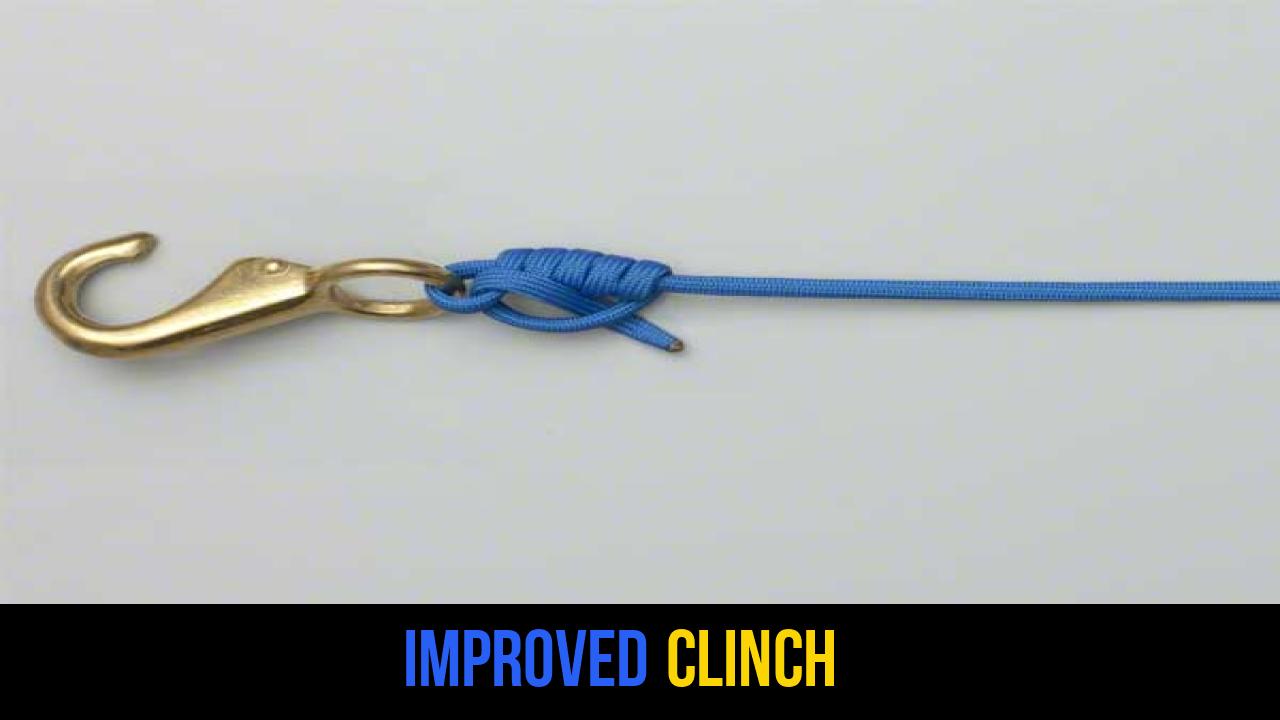
In the world of angling and outdoor rope techniques, few connections are as foundational as the Improved Clinch. Whether you are a novice casting your first line into a local pond or a seasoned professional navigating the complexities of offshore fly fishing, the integrity of your knot is the single most important factor between a successful catch and a story about "the one that got away."
The Improved Clinch knot is a variation of the original Clinch knot, designed specifically to address the slipping issues that occurred with earlier, slicker synthetic lines. Over decades, it has earned its reputation as the "gold standard" for terminal tackle. Its popularity stems from its incredible simplicity and its high breaking strength. In this comprehensive guide, we will explore the mechanics of this essential knot, the materials required to execute it perfectly, and a step-by-step breakdown of the tying process.
Alternative names: Fisherman’s Knot, Salmon Knot, Clinch Knot (Improved).
What Is an Improved Clinch?
The Improved Clinch is a terminal tackle knot used primarily to secure a fishing line to a hook, lure, swivel, or artificial fly. It is classified as a "hitch" style knot because it relies on the friction created by wrapping the line around itself.
What sets the "Improved" version apart from the standard Clinch is the final tuck through the outer loop. This additional step creates a secondary locking mechanism that prevents the line from unravelling under heavy tension. While the standard Clinch knot is prone to slipping—especially when using modern, low-friction monofilament or fluorocarbon—the Improved Clinch knot remains steadfast.
Practical Uses and Efficiency
In outdoor rope techniques, efficiency is often measured by how much of the line’s original breaking strength remains after the knot is tied. The Improved Clinch typically retains about 85% to 95% of the line’s rated strength. This makes it ideal for:
- Freshwater Fishing: Attaching small hooks and lures for bass, trout, and panfish.
- Light Saltwater Use: Securing leaders to swivels for inshore species.
- Survival Scenarios: Utilizing thin cordage or emergency fishing kits where a secure, non-slip hitch is required.
While it is most famous in the fishing world, the principles of the Improved Clinch—wrapping a "working end" around a "standing part" to create friction—are fundamental to many rope knots used in lightweight rigging and crafting.
Materials and Tools Needed
To tie a perfect Improved Clinch, you need more than just the rope or line; you need an understanding of how different materials react to friction and heat.
1. Line Types
- Monofilament: This is the most common material for this knot. Its slight elasticity allows the knot to "seat" or "cinch" down tightly.
- Fluorocarbon: Because fluorocarbon is denser and stiffer, the Improved Clinch is highly recommended here, though it requires careful lubrication to avoid friction damage.
- Braided Line: Note that very slick braided lines may occasionally slip with an Improved Clinch. In these cases, increasing the number of wraps from five to seven is a common professional adjustment.
2. Tools
- Cutting Tool: A sharp pair of line nippers, scissors, or a multi-tool is essential for trimming the tag end.
- The Eye: A hook, lure, or swivel with a clean, smooth eyelet to prevent the line from fraying.
- Lubricant: In the outdoors, saliva is the most common lubricant used to reduce heat during the tightening process.
How to Tie Improved Clinch?
Follow these steps precisely to ensure your knot is secure and reliable. The Improved Clinch knot relies on the specific order of these movements to create its signature locking mechanism.
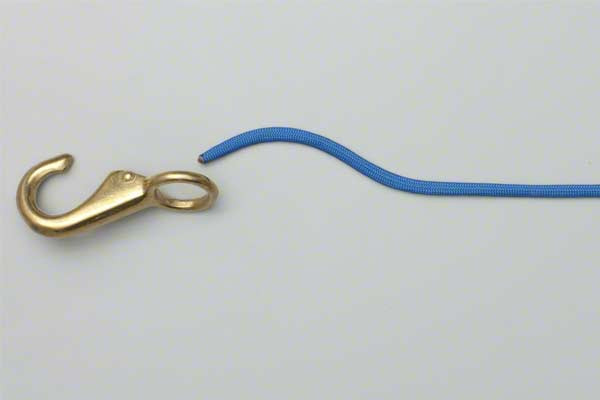
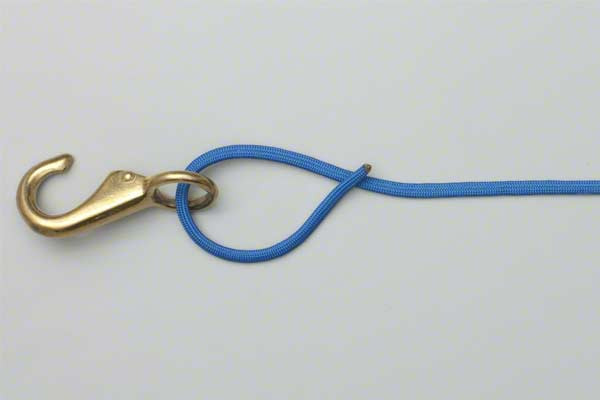
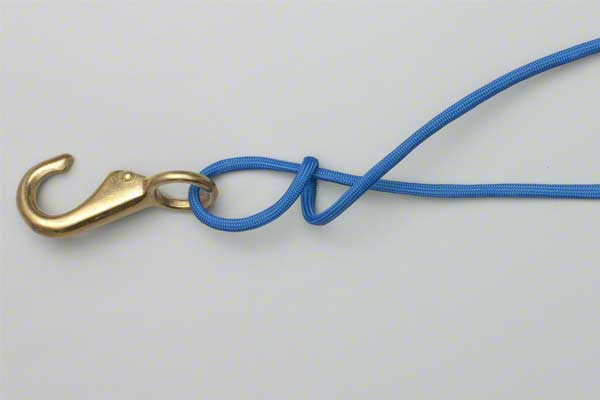
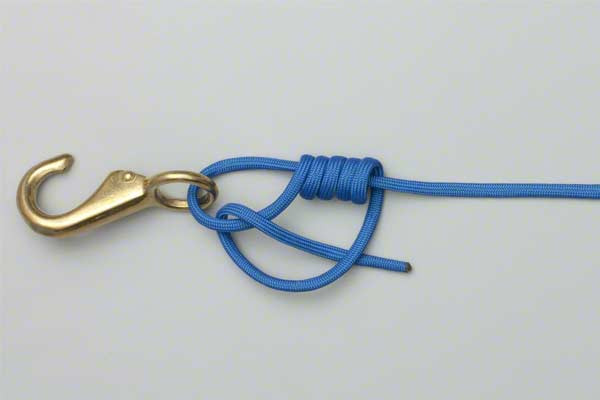
- Pass the end of the line through the eye.
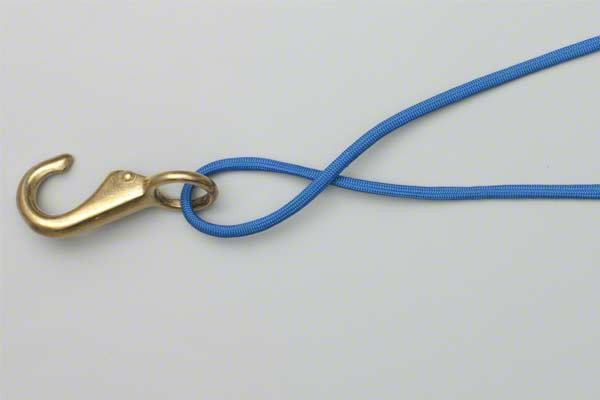
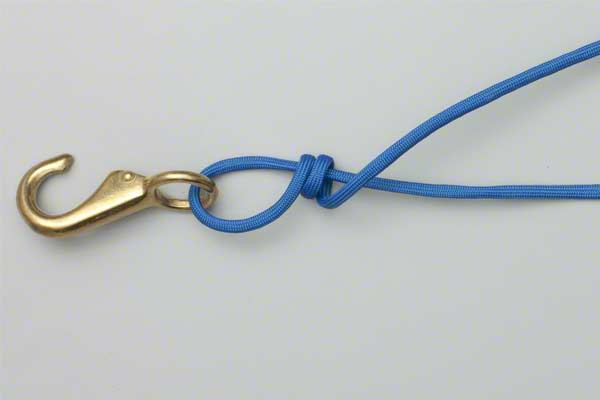
- Wrap it around the standing end about five complete turns.
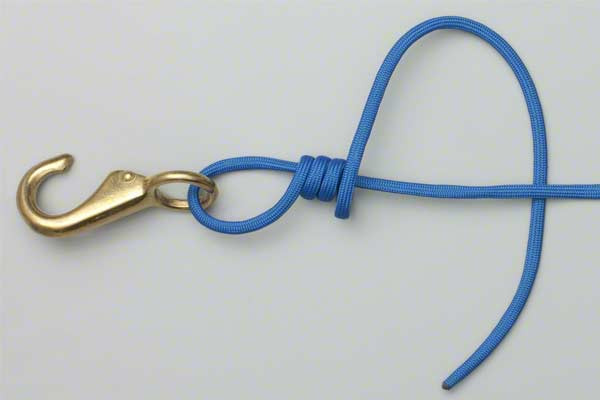
- Pass the end back through the loop beside the eye.
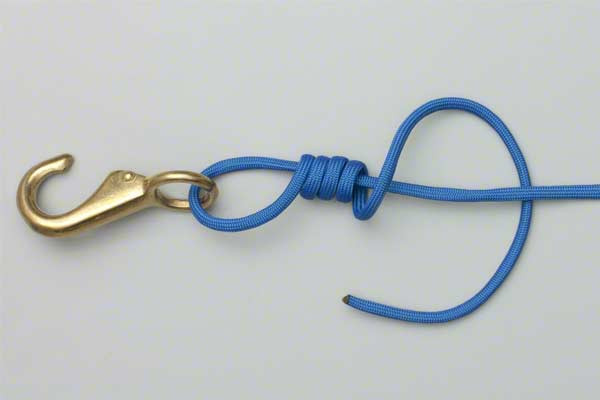
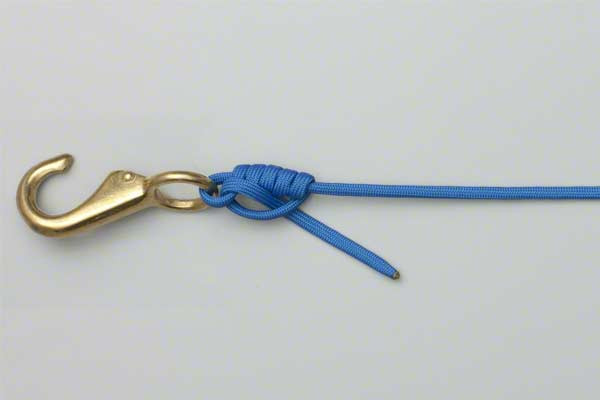
- Then pass the end under the final turn.
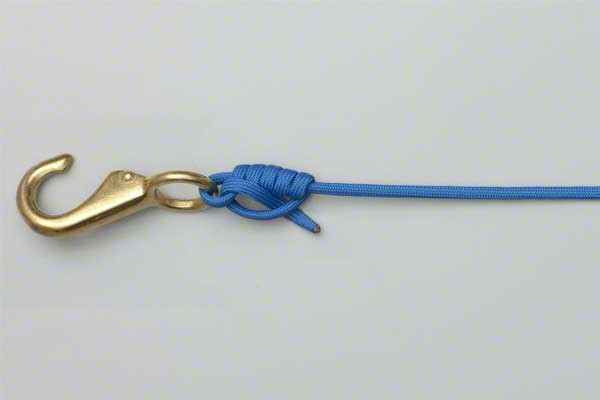
- Tighten the knot and trim the end.

Common Mistakes to Avoid
Even the most experienced outdoorsmen can fail at tying rope knots if they overlook the details. Here are the most common errors when tying the Improved Clinch:
Insufficient Wraps
The instructions specify "about five complete turns." If you are using very thin line (under 6lb test), you may actually need 6 or 7 turns. Conversely, using too many turns on very thick line (over 30lb test) can make the knot too bulky to seat correctly.
Lack of Lubrication
This is the most frequent cause of knot failure. When you tighten the knot, the friction between the layers of line generates heat. This heat can "burn" or weaken the plastic polymers in monofilament and fluorocarbon. Always moisten the knot with water or saliva before pulling it tight.
Overlapping Turns
When you wrap it around the standing end, the coils should sit neatly side-by-side, like a spring. If the coils overlap or cross each other haphazardly, the knot will create a "pinch point" that can snap the line under significantly less pressure than its rated strength.
Failure to "Seat" the Knot
The knot is not finished until it is firmly seated against the eye of the hook. If there is a gap between the knot and the eye, the sudden jerk of a fish can cause the knot to slam against the eye, causing an instant break.
Related Knots and Splicing
Understanding a variety of outdoor rope techniques allows you to adapt to different gear and environments. Here are a few knots related to the Improved Clinch:
- The Palomar Knot: Often considered the strongest alternative to the clinch; it involves doubling the line before passing it through the eye, making it excellent for braided lines.
- The Uni Knot: A versatile "universal" knot that is easier to tie in the dark or with cold hands, as the wraps are made inside a loop rather than around the standing line.
- The Trilene Knot: A variation that passes the line through the eye of the hook twice, providing a "cushion" that increases the knot’s resistance to sharp metal edges.
- The Blood Knot: Unlike terminal hitches, this is a splicing knot used to join two sections of line together, essential for building tapered leaders in fly fishing.
Final Words
The Improved Clinch remains a staple in the toolkit of anyone interested in rope knots and outdoor survival. Its balance of simplicity and security makes it the first knot many people learn, yet it remains sophisticated enough for professional use.
By mastering the five-step process—passing the line through the eye, wrapping five times, threading the loop, tucking under the final turn, and tightening—you ensure that your equipment is as resilient as possible. Remember that the quality of your knot reflects your attention to detail. Practice these outdoor rope techniques at home until they become muscle memory, and you will find much greater success in your outdoor adventures.
Whether you are securing a lure for a trophy catch or teaching a beginner the ropes, the Improved Clinch knot is a reliable partner in the field. Always inspect your knots after every few casts or after snagging an underwater obstacle, and don’t be afraid to re-tie if the line looks frayed. Safety and reliability are the hallmarks of a true outdoor expert.
