
The world of rope knots is vast, ranging from utilitarian hitches used in heavy construction to complex decorative weaves used in maritime traditions. Among these, the Lanyard Knot stands out as a quintessential blend of form and function. Often referred to by enthusiasts as the "Diamond Knot," this specific configuration is a staple for anyone involved in outdoor rope techniques, bushcraft, or Every Day Carry (EDC) customization.
Whether you are looking to add a functional pull-tab to a survival knife, create a decorative loop for a flashlight, or simply improve your cordage skills for scouting, the Lanyard Knot is an essential addition to your repertoire. It provides a secure, symmetrical, and aesthetically pleasing stopper that prevents cordage from slipping through holes or eyes. In this comprehensive guide, we will explore the technical nuances of this knot, the materials best suited for it, and a precise step-by-step breakdown of how to master it.
Alternative Names: Diamond Knot, Knife Lanyard Knot, Friendship Knot, Chinese Button Knot (variation), and Sailor’s Whistle Knot.
What Is a Lanyard Knot?
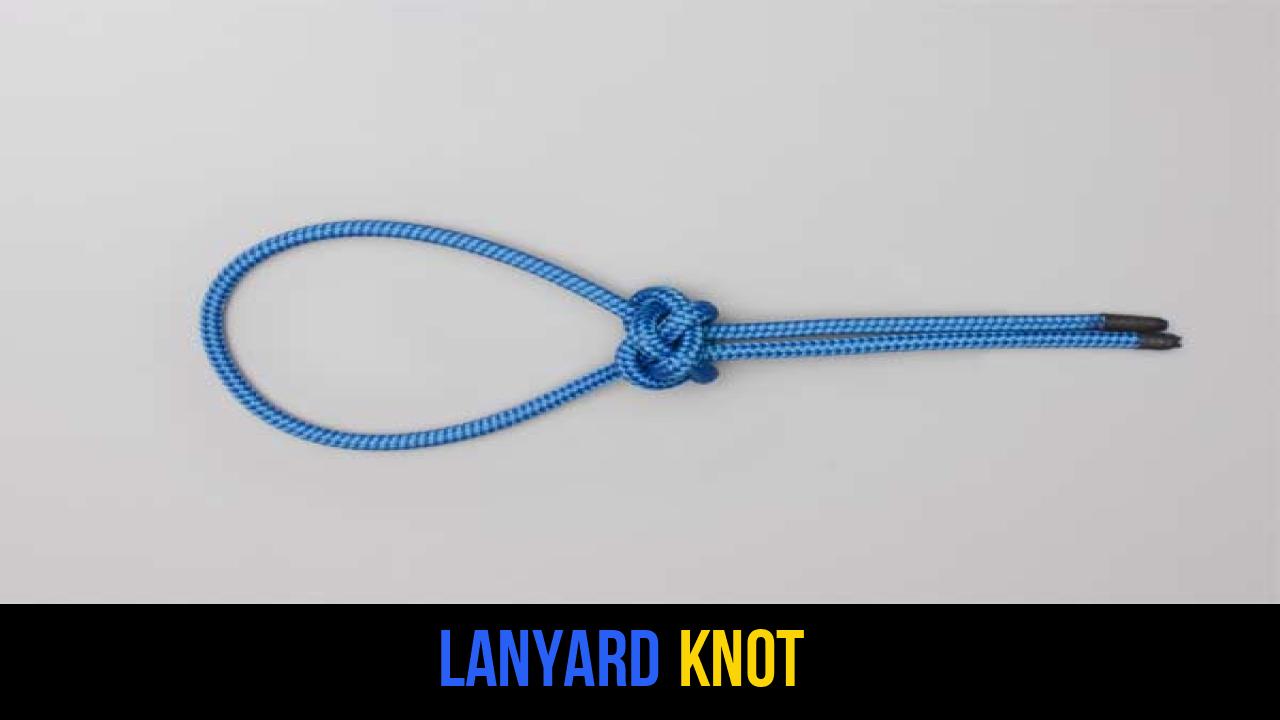
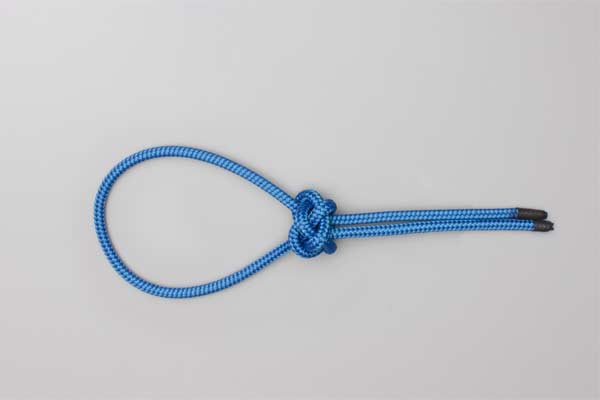
A Lanyard Knot is a decorative stopper knot usually tied in the middle of a loop of cord. Technically, it is a multi-strand terminal knot that creates a fixed loop at one end and a spherical, diamond-patterned "button" at the base. Unlike a simple Overhand Knot or a Figure-Eight, the Lanyard Knot is highly symmetrical and holds its shape exceptionally well under repeated handling.
Practical Applications
In the realm of outdoor rope techniques, the Lanyard Knot serves several vital purposes:
- EDC and Tool Retrieval: It is the standard knot for paracord lanyards on folding knives and fixed blades. The knot provides extra grip, allowing the user to pull a tool from a deep pocket or sheath quickly.
- Zipper Pulls: For winter gear or tactical backpacks, tying a Lanyard Knot onto a small loop of paracord creates an oversized toggle that is easy to operate even while wearing thick gloves.
- Marine and Nautical Use: Historically, sailors used this knot as a decorative finish on the ends of lines or as a "whistle knot" to secure a boatswain’s pipe.
- Scouting and Crafts: It is frequently used in macramé and decorative knotting to signify the end of a project or to create adjustable sliding loops.
Materials and Tools Needed
To achieve a clean, professional-looking Lanyard Knot, the choice of material is paramount. While you can tie this knot with almost any flexible line, certain types of rope highlight the diamond pattern better than others.
Recommended Ropes
- 550 Paracord: The industry standard for outdoor rope techniques. Its slightly elastic nature and internal strands provide the "bulk" necessary to make the knot look full and spherical.
- Leather Thonging: Popular for traditional bushcraft knives. Leather provides a rustic look, though it requires more effort to "dress" (tighten) correctly.
- Accessory Cord (2mm – 4mm): Used by climbers for non-load-bearing applications. This cord is stiffer than paracord, which can make the initial loops hold their shape better during the tying process.
Essential Tools
- Sharp Scissors or a Knife: For trimming the ends once the knot is set.
- A Lighter or Heat Source: Essential for synthetic ropes (like nylon or polyester) to singe the ends and prevent fraying.
- A Fid or Marlinspike (Optional): This tool helps in "dressing" the knot by allowing you to pull specific strands tight without distorting the overall shape.
- Work Surface: A flat table is highly recommended for beginners to keep the Carrick Bend foundation flat before the final tightening.
How to Tie a Lanyard Knot?
Tying the Lanyard Knot requires patience and attention to the path of the rope. The strength and beauty of this knot lie in its symmetry. Follow these instructions carefully to ensure the strands cross correctly.
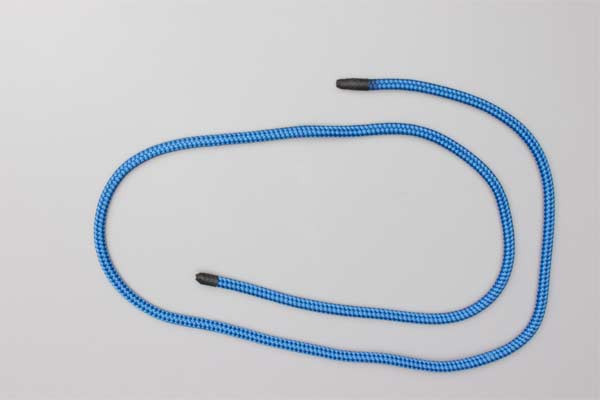
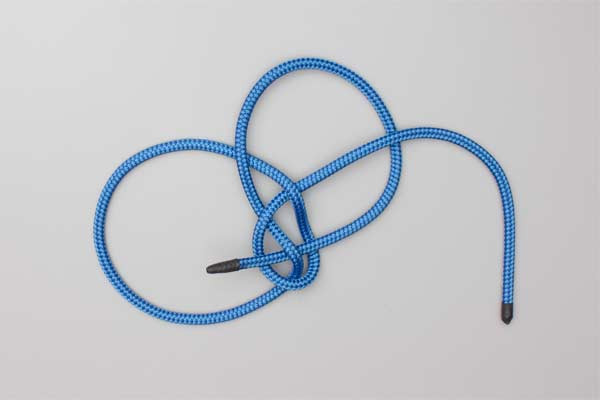
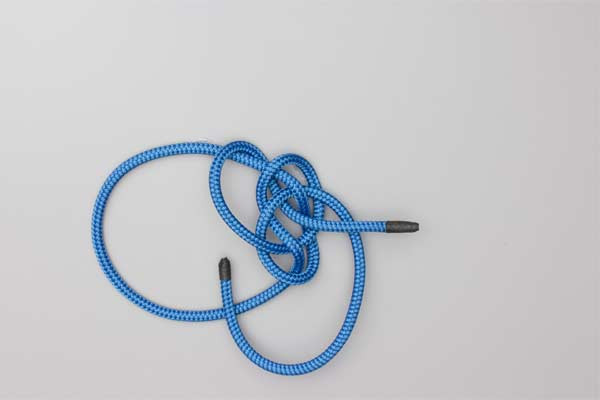
- Start with a bight in the rope.
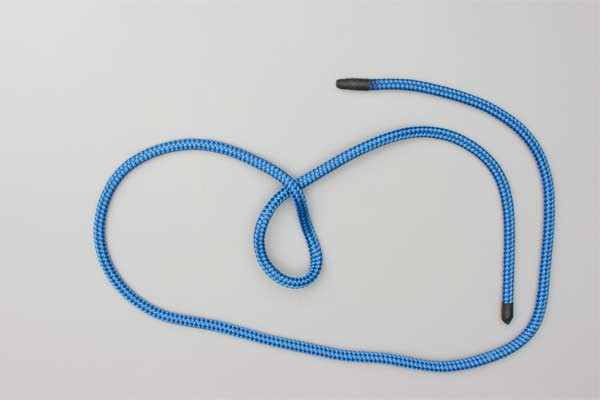
- In one end form a loop.
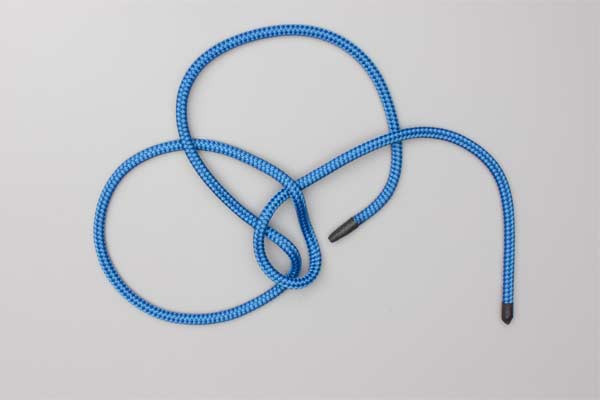
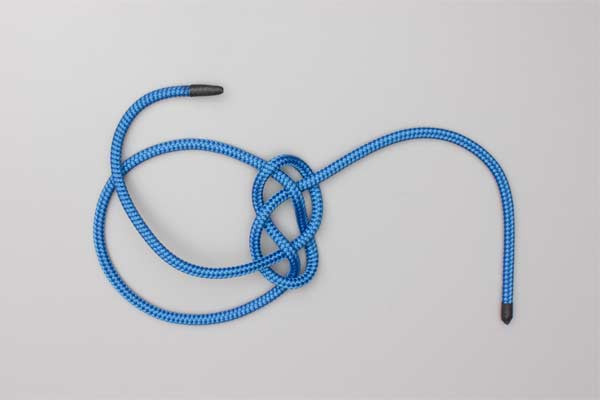
- Pass the other end under and around the loop to tie a Carrick Bend.
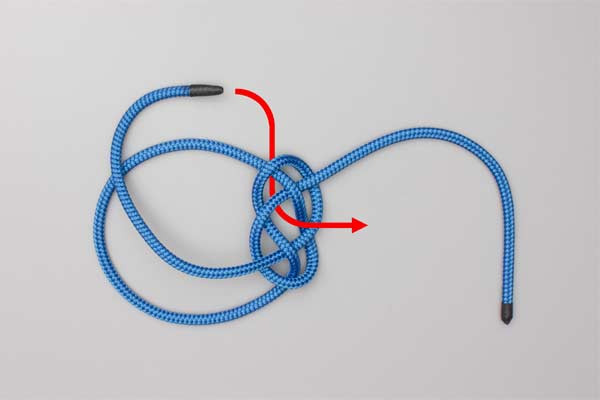
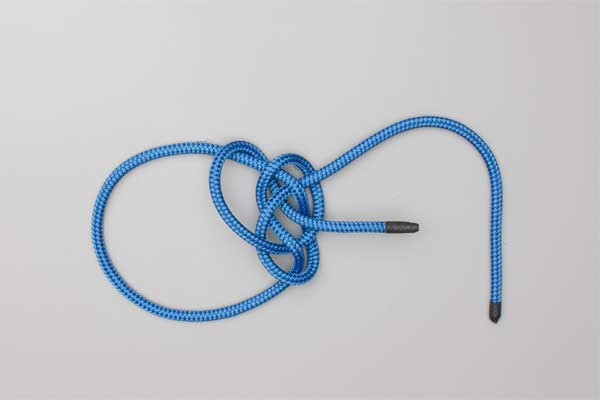
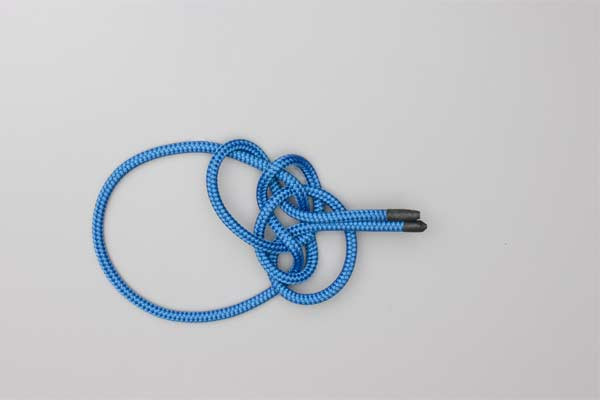
- Pass this end around outside the bight and up through the center of the Carrick Bend.
- Do the same with the other end and then tighten both ends to form the knot.

Common Mistakes to Avoid
Even experienced practitioners of rope knots can find the Lanyard Knot frustrating if they rush the process. Here are the most common pitfalls:
1. Losing the "Carrick Bend" Shape
The Carrick Bend is the skeletal structure of the Lanyard Knot. If the loops collapse or overlap before you pass the ends through the center (Step 4 and 5), the knot will turn into a tangled mess. Keep the knot flat on a table until you are ready for the final tightening.
2. Improper "Dressing"
"Dressing" a knot refers to the process of arranging the strands so they sit neatly against each other. For the Lanyard Knot, you must tighten the strands incrementally. Do not just pull the two ends as hard as you can; instead, trace each cord through the knot and pull the slack out bit by bit.
3. Using Too Little Cordage
This knot consumes more rope than you might expect. For a standard knife lanyard, start with at least 24 to 30 inches of cord. If the cord is too short, you will struggle to pass the ends through the center in the final steps.
4. Safety Considerations
While the Lanyard Knot is incredibly secure for decorative and utility purposes, it is not a life-safety knot. Never use it as a primary stopper in climbing or arboriculture where a failure could result in injury.
Related Knots and Splicing
Understanding the Lanyard Knot opens the door to other complex rope knots. Here are a few related techniques you might find useful:
- Carrick Bend: A foundation knot for joining two ropes, known for its symmetry and security under load.
- Monkey’s Fist: A heavy decorative knot used as a weight at the end of a line for throwing or as a toggle.
- Matthew Walker Knot: A complex multi-strand stopper knot traditionally used on ships to prevent rope ends from unlaying.
- Snake Knot: A popular paracord weave used for lanyards and bracelets, creating a round, textured aesthetic.
- Wall and Crown Knot: A basic terminal knot used in splicing to prevent a multi-strand rope from unraveling.
Final Words
The Lanyard Knot is a hallmark of a skilled outdoorsman and a meticulous crafter. While it may take several attempts to perfect the "flow" of the cord through the Carrick Bend and into the final spherical shape, the result is a professional-grade finish that enhances both the look and utility of your gear.
By mastering this knot, you aren’t just learning how to secure a piece of string; you are engaging with a centuries-old tradition of maritime and survival craft. Practice with different materials—from rugged paracord to elegant leather—to see how the character of the knot changes. Whether it’s hanging from your favorite pocket knife or securing a gear bag, the Lanyard Knot is a testament to the fact that in the world of outdoor rope techniques, the most beautiful solutions are often the most functional.
Remember: Tighten slowly, dress carefully, and always test your knots before heading into the field. Happy tying!
