
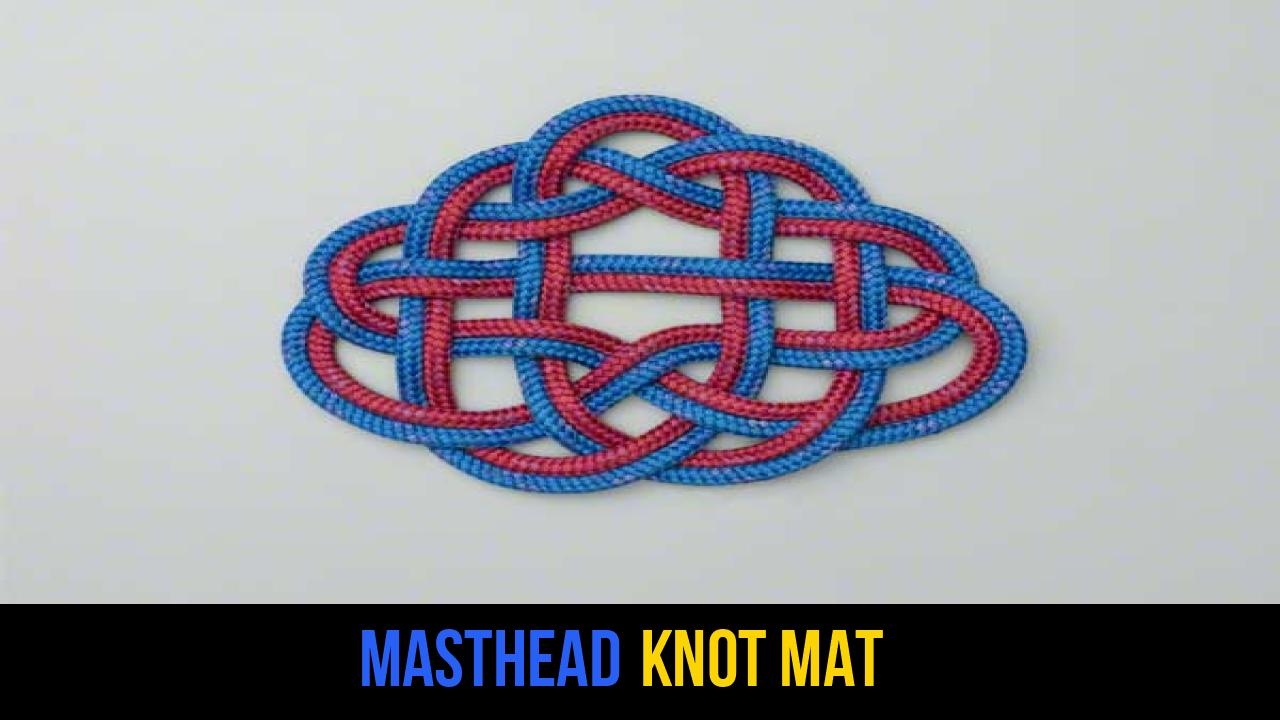
The art of decorative knotting is a bridge between functional maritime history and modern aesthetic craftsmanship. Among the many patterns used by sailors to pass the time and improve the durability of their gear, the Masthead Knot Mat stands out as a masterpiece of symmetry and structure. Whether you are a seasoned sailor, a scouting enthusiast, or a DIY crafter looking to master new outdoor rope techniques, understanding the nuances of this knot is essential.
Derived from the functional Jurymast Knot, the Masthead Knot Mat transforms a structural rigging tool into a beautiful, flat weave. This article provides an in-depth exploration of the mat’s origins, the best materials to use, and a strict step-by-step guide to mastering the weave yourself.
Alternative Names: Jurymast Mat, Shamrock Knot Mat, Three-Loop Decorative Mat, Sailor’s Coaster Knot.
What Is a Masthead Knot Mat?
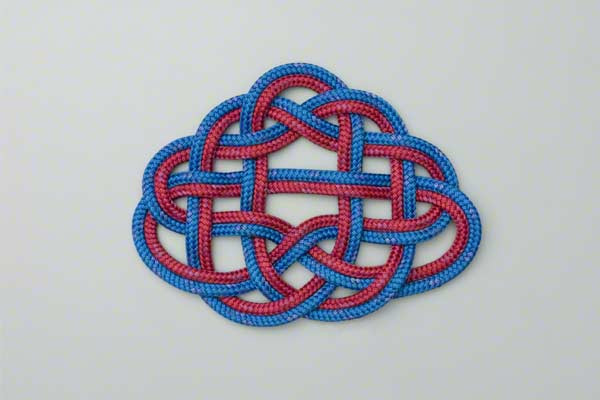
The Masthead Knot Mat is a flat, decorative rope weave traditionally used in nautical environments. It is a variation of the Masthead Knot (also known as the Jurymast Knot), which was historically used to provide attachment points for stays on a temporary or "jury-rigged" mast. When the central loops of this knot are flattened and interlaced into a mat, it creates a three-lobed, symmetrical pattern that is as sturdy as it is visually appealing.
Practical and Decorative Uses
While its origins are rooted in emergency ship repairs, the modern application of the Masthead Knot Mat is primarily decorative and protective.
- Nautical Decor: These mats serve as excellent coasters, trivets, or wall hangings, bringing a "salty" maritime feel to any home.
- Rope Management: In outdoor settings, weaving a mat is an effective way to store a length of rope flatly against a surface, preventing tangles while keeping the line accessible.
- Surface Protection: Because the mat can be "doubled" or "tripled" (following the lead around multiple times), it creates a thick cushion. This makes it ideal for protecting a wooden deck or table from heavy objects or heat.
- Skill Building: For practitioners of rope knots, the Masthead Knot Mat is a fantastic exercise in maintaining tension and understanding the "over-under" logic required for more complex weaving projects like the Ocean Plait or Turk’s Head.
Materials and Tools Needed
To achieve a professional-looking Masthead Knot Mat, the choice of material is just as important as the technique itself. The thickness and texture of your cordage will dictate the final size and "grip" of the mat.
Recommended Rope Types
- Cotton Cord: Best for indoor decor and coasters. It is soft on the hands, easy to tighten, and absorbs moisture well.
- Manila or Hemp: These natural fibers provide the most authentic, traditional look. They are stiff and provide excellent friction, which helps the mat hold its shape under pressure.
- Paracord (550): For a modern, tactical look or for smaller decorative fobs, 550 paracord is an excellent choice. It is durable and comes in a vast array of colors.
- Nylon or Polypropylene: These are great for outdoor rope techniques because they resist rot and UV damage, making them perfect for mats that will stay on a boat or patio.
Essential Tools
- A Flat Working Surface: Unlike some hitches that are tied in the air, a mat must be tied on a flat table to ensure the loops remain symmetrical.
- Masking Tape or Whipping Twine: Use this to secure the ends of the rope to prevent fraying while you work.
- A Fid or Marlinspike: If you are using thick, laid rope, a fid will help you open the strands to tuck the ends in neatly.
- Measuring Tape: For a standard coaster-sized mat using 1/4-inch rope, you will generally need about 6 to 8 feet of line.
How to Tie Masthead Knot Mat?
Follow these instructions precisely to create a stable and symmetrical Masthead Knot Mat. This sequence focuses on the structural weave and the "doubling" process that gives the mat its signature thickness.
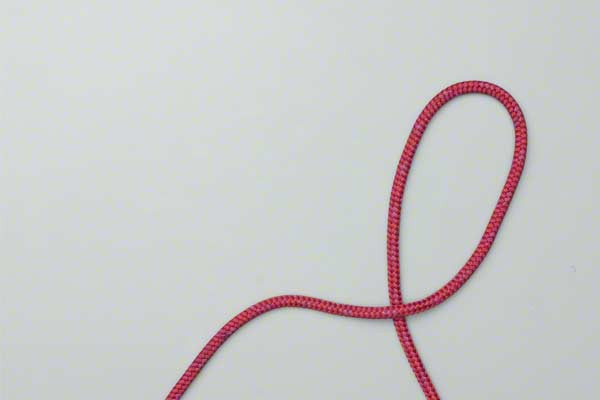
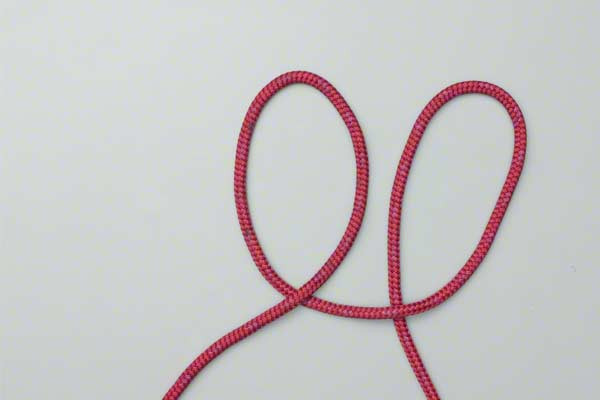
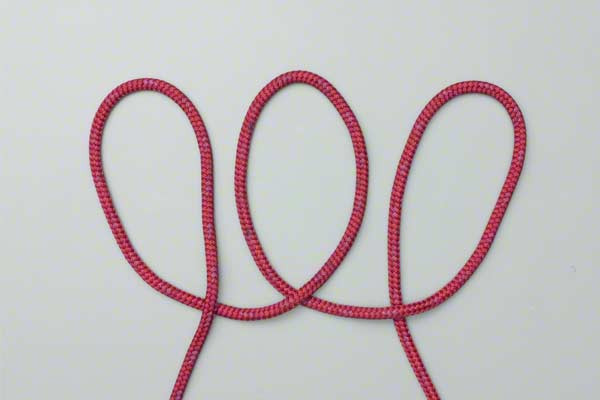
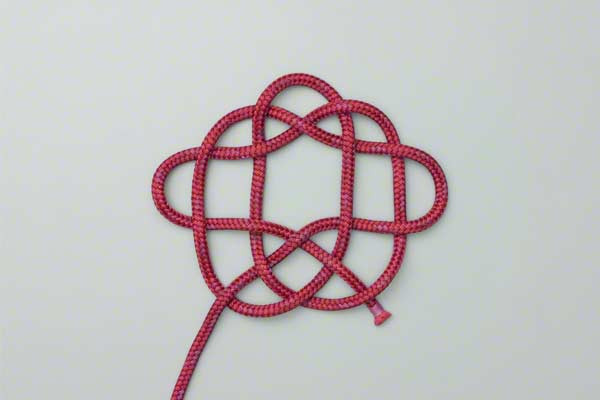
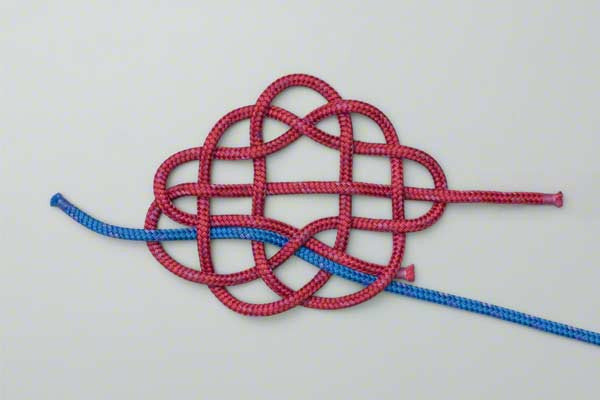
- Form three similar loops. Lay your rope on a flat surface and create three loops of equal size, side-by-side, ensuring they are slightly overlapping or touching.
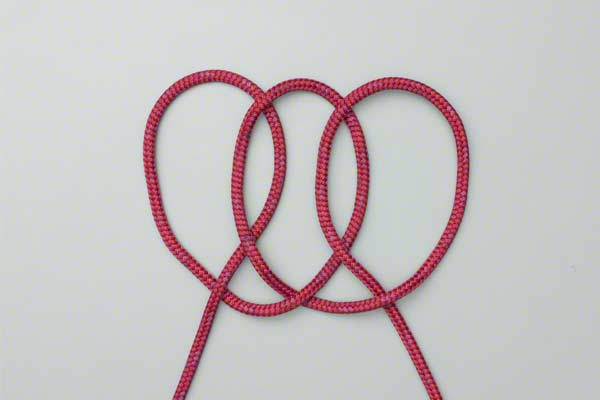
- Weave the two outer loops across the center using a strict over and under sequence. Take the outer edges of the left and right loops and bring them toward the middle, interlacing them through the center loop. It is vital to maintain the over-under pattern to ensure the knot remains locked.
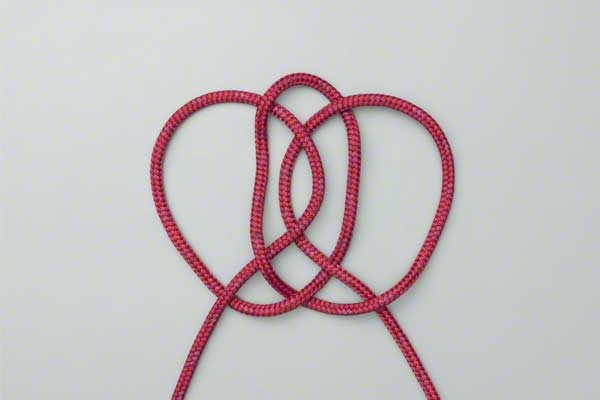
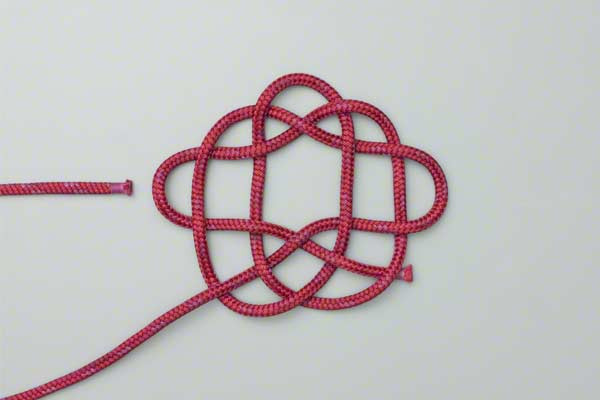
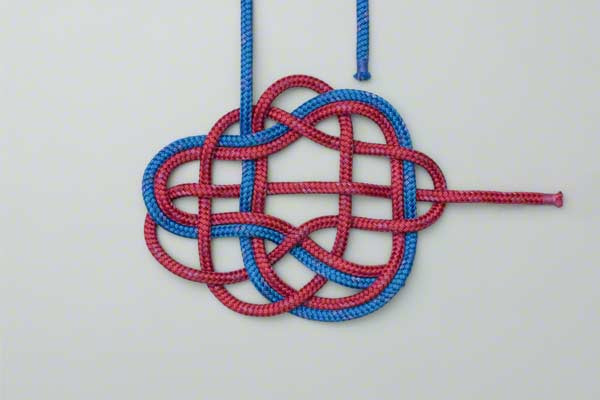
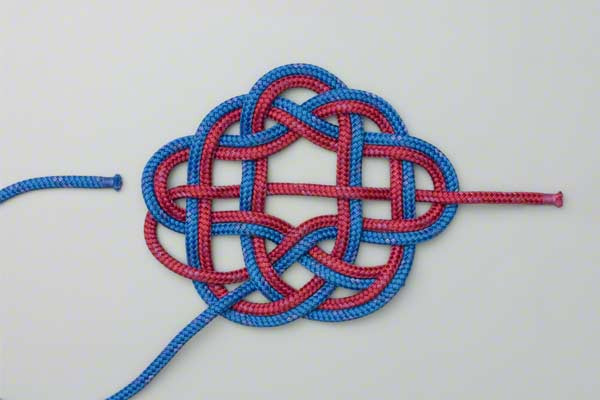
- Thread the end under and over across the middle to lock the structure. Take the working end of the rope and pass it through the center of the weave, following the existing logic of the pattern to secure the three loops together.
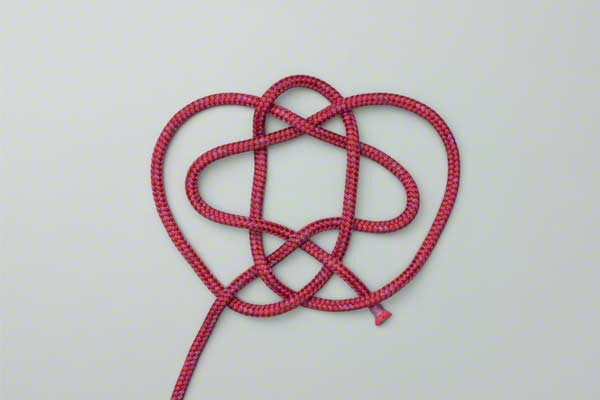
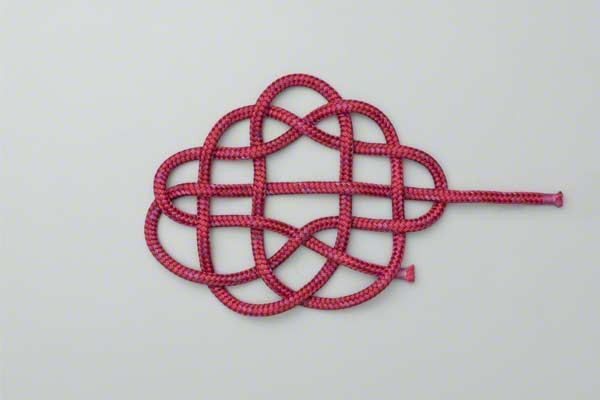
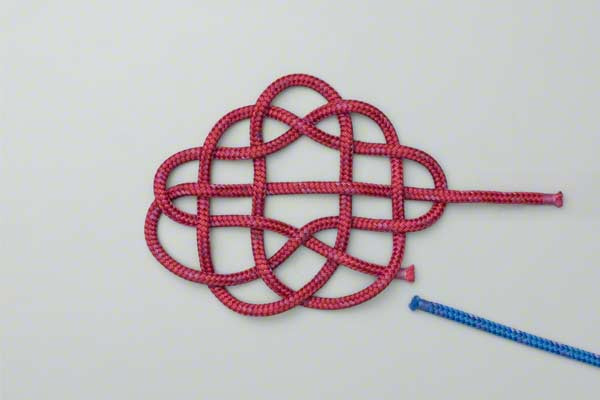
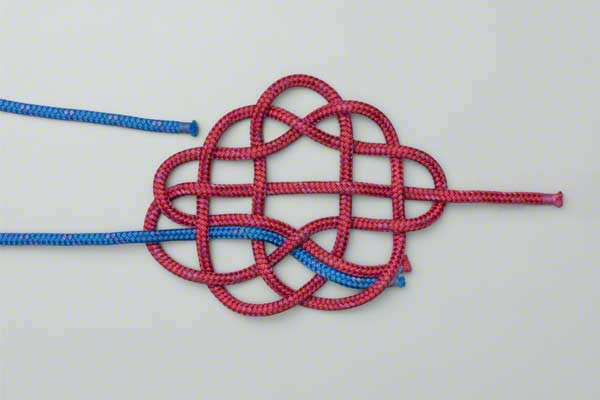
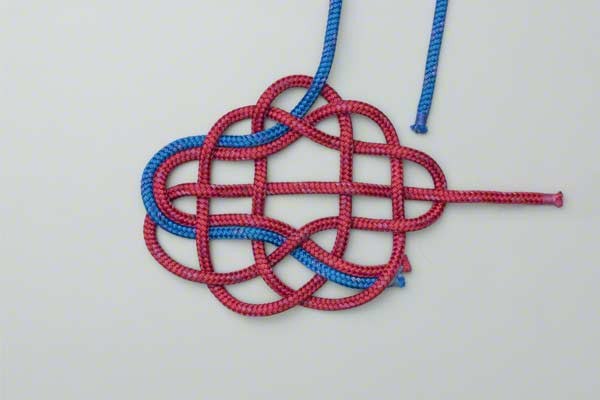
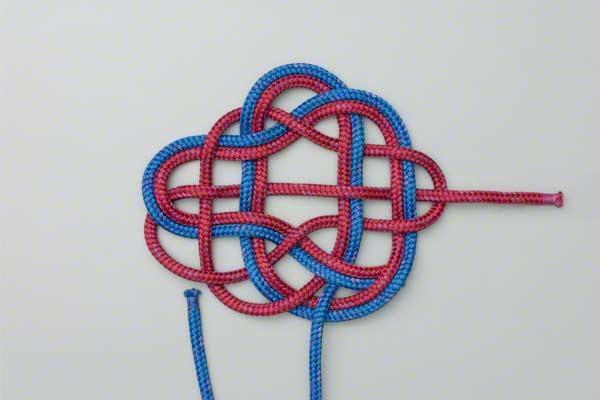
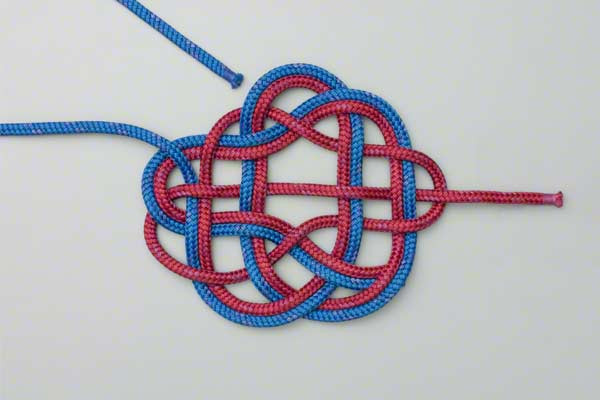
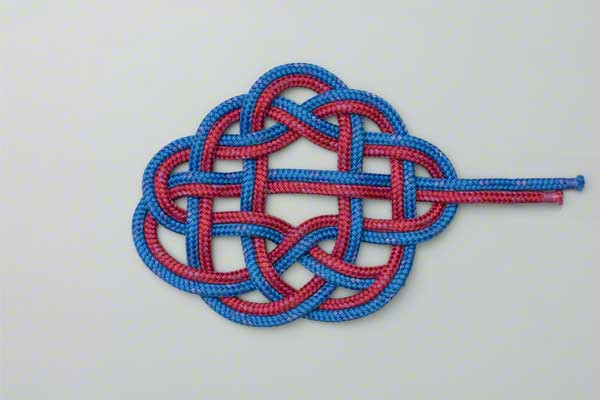
- Using the same end (for photography two ropes are used) follow the same path around a second time. This is known as "doubling the lead." By following the exact path of the first pass, you increase the surface area and strength of the mat.
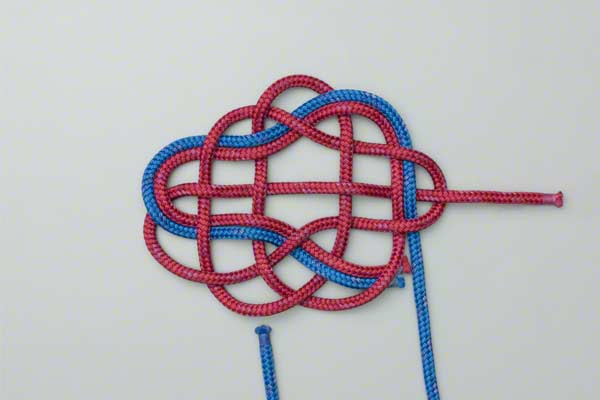
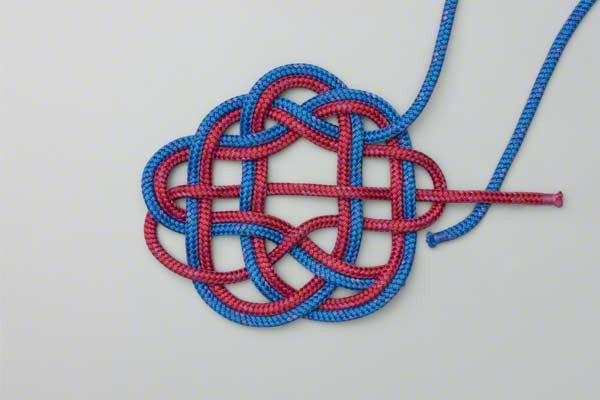
- Tuck in the end and secure it. Once the mat has reached the desired thickness, tuck the remaining tail underneath the structure. You can secure it by sewing it with twine or using a small amount of adhesive for a permanent finish.
Common Mistakes to Avoid
Even for those experienced in outdoor rope techniques, the Masthead Knot Mat can be tricky due to its symmetrical nature. Avoid these common pitfalls:
1. Inconsistent Loop Size
If your initial three loops are not identical in size, the mat will appear lopsided. Take the time in Step 1 to measure the loops or use a template (like three heavy glasses or pegs) to keep them uniform.
2. Breaking the Over-Under Sequence
The structural integrity of any mat depends on friction. If you accidentally go "over-over" or "under-under," the mat will lose its "lock" and may pull apart when moved. Always double-check each intersection before proceeding to the next step.
3. Tension Imbalance
Pulling the rope too tight during the first pass will make the second pass (Step 4) nearly impossible. Keep the first pass "relaxed." Once the entire mat is woven and doubled, you can go back and slowly "chase" the slack through the knot to tighten the whole structure uniformly.
4. Overlapping the Leads
When doubling the lead in Step 4, the second rope should sit neatly beside the first rope, not on top of it. If the ropes cross over each other within the same path, the mat will become bulky and uneven.
Related Knots and Splicing
Expanding your knowledge of rope knots allows you to combine techniques for more complex projects. Here are a few knots related to the Masthead Knot Mat:
- Jurymast Knot: The functional ancestor of this mat, used for emergency rigging on sailing vessels to secure mast stays.
- Ocean Plait Mat: A classic maritime rug weave that uses a more complex, elongated interlacing pattern for heavy-duty floor mats.
- Turk’s Head: A decorative knot that can be tied flat as a mat or cylindrically to cover a pole, known for its endless-loop appearance.
- Carrick Bend: A fundamental decorative and structural knot often used as the base for larger, more intricate flat-weave mats.
Final Words
The Masthead Knot Mat is a testament to the functional beauty of traditional maritime crafts. By mastering the three-loop weave and the disciplined over-under sequence, you create a piece of equipment that is both a practical tool for protecting surfaces and a sophisticated piece of art.
Whether you are practicing your outdoor rope techniques for survival or simply looking for a unique DIY project, the Masthead Knot Mat provides a rewarding challenge. Remember that patience is the key to a perfect mat—take your time with the tension, ensure your leads are parallel, and you will produce a knot that is as durable as those used on the high seas centuries ago.
Keep practicing, experiment with different colors of paracord or natural fibers, and soon you’ll be able to tie this classic knot with your eyes closed. Happy knotting!
