
In the world of rope knots and seafaring traditions, few things are as indispensable as a reliable hitch. Whether you are a seasoned sailor, an expert camper, or an outdoor enthusiast exploring various outdoor rope techniques, understanding how to secure a line quickly—and release it even faster—is a foundational skill. Among the vast library of hitches, the Mooring Hitch stands out as a premier example of a "slipped" hitch, designed specifically for temporary fastening.
The Mooring Hitch is prized for its balance of security under tension and its near-instantaneous release mechanism. Unlike fixed loops or permanent bends, this knot is meant for moments where time is of the essence. Imagine needing to dock a small craft briefly to grab supplies or tethering a pack while navigating a steep incline; the Mooring Hitch provides the utility required for these dynamic environments.
Often categorized within the family of quick-release knots, the Mooring Hitch is a favorite for those who value efficiency. It allows the user to maintain control over the "standing end" (the part of the rope carrying the load) while keeping the "tail" (the working end) ready for a swift getaway.
Alternative Names: The Mooring Hitch is sometimes referred to as a Slipped Hitch, a variation of the Launch Knot, or occasionally confused with the Highwayman’s Hitch (though their structures differ slightly).
What Is a Mooring Hitch?
At its core, the Mooring Hitch is a temporary fastening used to secure a rope to a post, pole, or piling. It is defined by its "slipped" nature, meaning that the final tuck of the rope is a loop (a bight) rather than the end of the rope itself. This allows the knot to be untied simply by pulling on the free end, causing the entire structure to collapse and fall away from the object it was tied to.
Definition and Mechanics
The Mooring Hitch works on the principle of friction and directional tension. When the standing end of the rope is under load, the pressure of the rope crossing over itself binds the bight in place. As long as the load is steady and the rope has sufficient "bite" or friction against the pole, the hitch remains secure. However, because it is not a "locked" knot, it is exclusively intended for temporary use.
Practical Uses
- Boating and Sailing: Its primary use, as the name suggests, is for mooring a boat to a dock or piling for short durations. It is ideal for "touch-and-go" landings where the vessel needs to be released at a moment’s notice.
- Camping and Bushcraft: Use it to hang gear from a horizontal branch or to secure a temporary clothesline that needs to be packed away quickly in the morning.
- Livestock Management: Historically, similar hitches were used to tether horses to hitching posts, allowing a rider to mount and release the animal with a single tug.
- Utility Tasks: It is excellent for lowering light equipment from a height where the person at the bottom needs to release the rope without climbing back up.
Materials and Tools Needed
To successfully execute the Mooring Hitch knot, you must consider the relationship between the rope material and the surface of the pole. Because this is a friction-based knot, the "hand" (the feel and grip) of the rope is critical.
Rope Types
- Nylon Rope: Excellent for its elasticity and strength. However, because nylon can be slippery, users must ensure the hitch is tightened firmly to prevent the bight from sliding out under low tension.
- Polyester (Dacron): A preferred choice for maritime use. It has less stretch than nylon and offers great UV resistance, making it ideal for outdoor rope techniques.
- Natural Fibers (Manila or Cotton): These ropes provide exceptional grip due to their rough texture. A Mooring Hitch tied in manila is very unlikely to slip, but these ropes are prone to rot if not dried properly.
- Static vs. Dynamic: For most hitching applications, a static rope (low stretch) is preferred to ensure the knot remains tight against the post.
Tools and Considerations
- The Pole/Piling: The diameter of the pole should be proportionate to the thickness of the rope. A rope that is too thick for a small peg may not create enough internal friction to hold the bight securely.
- Gloves: When working with heavy loads or rough natural fibers, wearing leather work gloves can prevent rope burn during the tightening process.
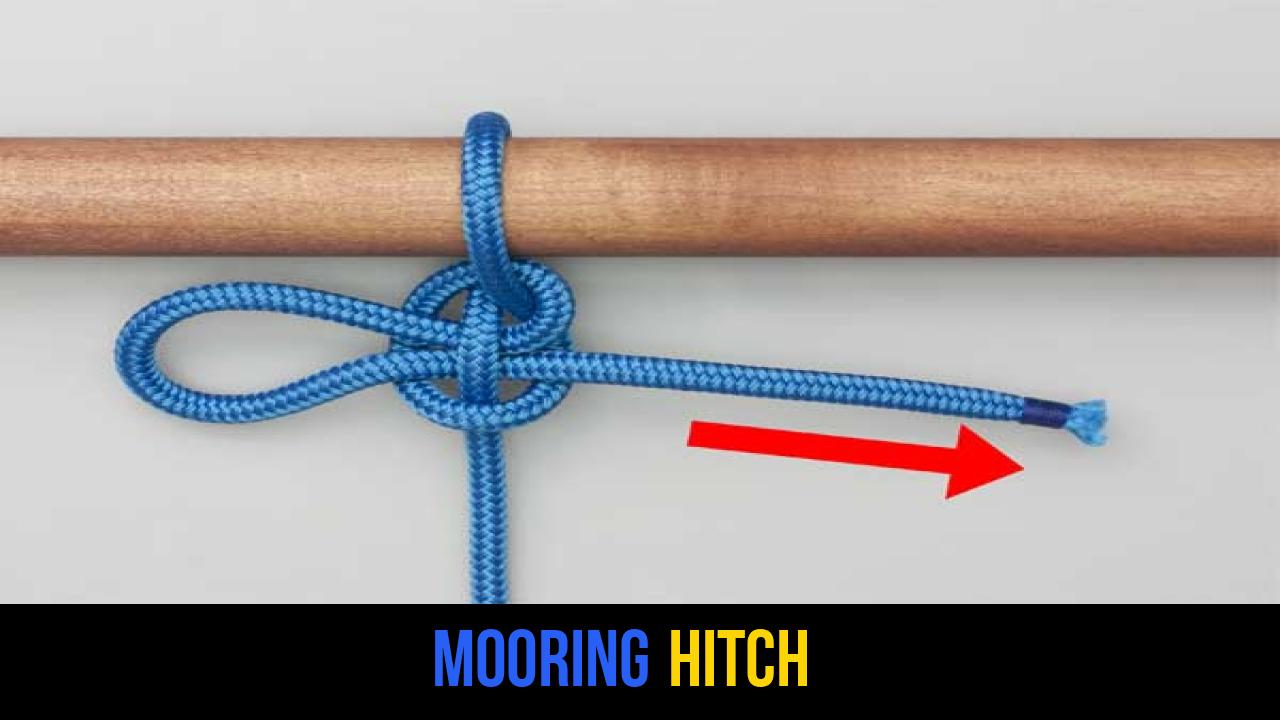
How to Tie Mooring Hitch?
Follow these steps precisely to ensure a secure and functional Mooring Hitch. Consistency in the order of operations is vital for the quick-release mechanism to work correctly.
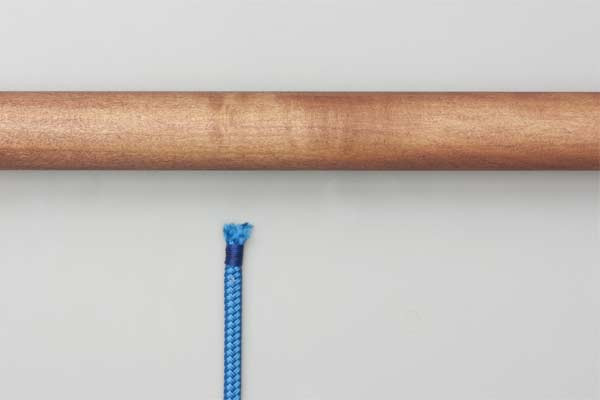
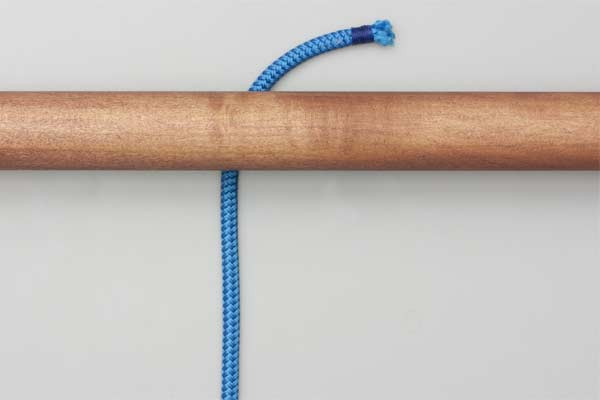
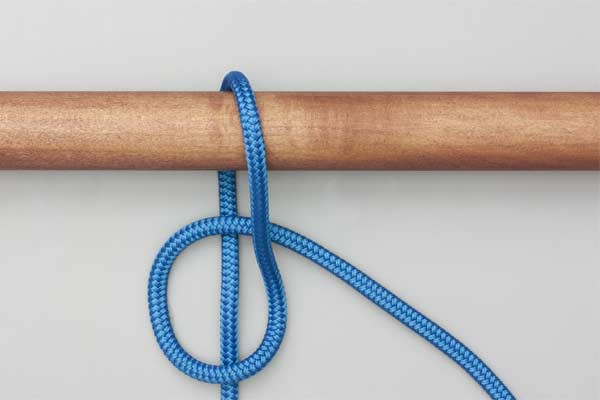
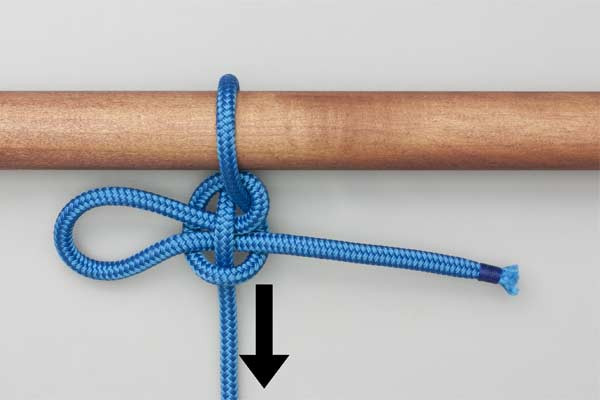
- Pass the rope behind and over the pole.
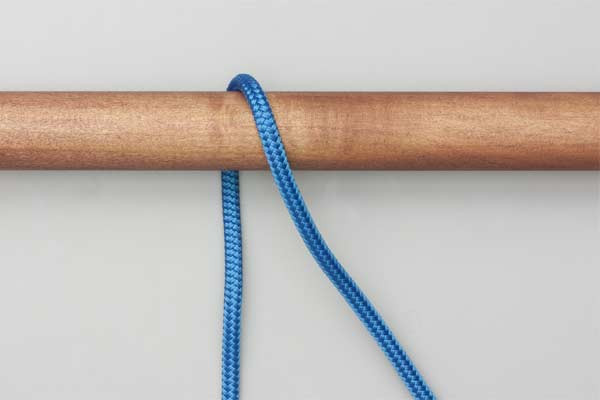
- With the tail, form a loop so that the tail touches the standing end.
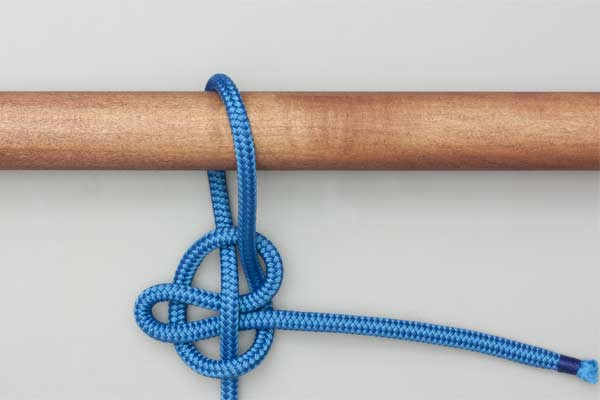
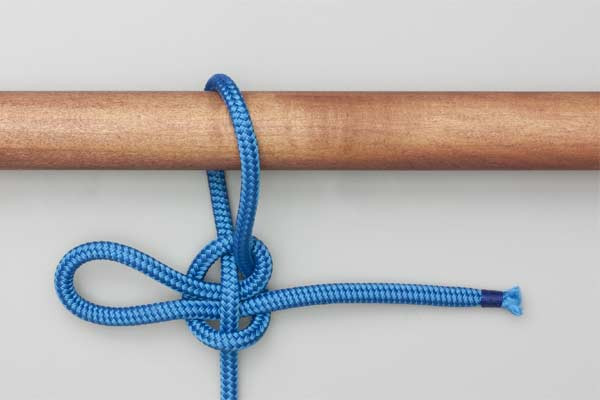
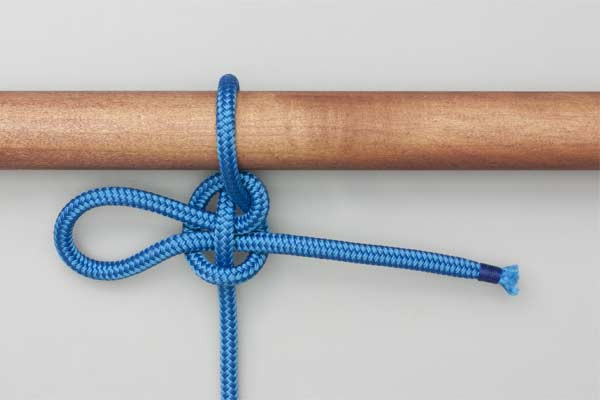
- Pass a bight of the tail across the loop and under the standing end and tighten to take the load.
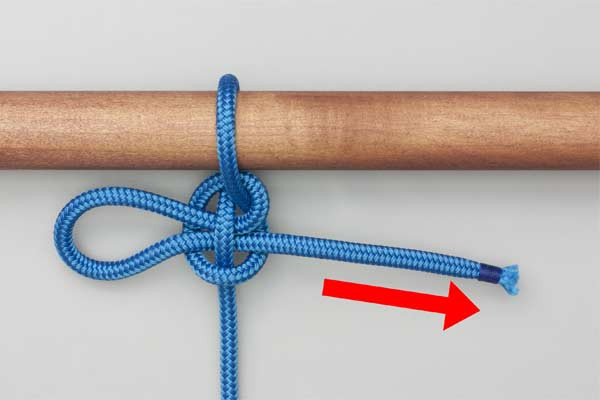
- Pull the tail to release.

Common Mistakes to Avoid
Even for those experienced in rope knots, the Mooring Hitch can fail if small details are overlooked. Safety is paramount when using quick-release hitches.
1. Loading the Tail Instead of the Standing End
One of the most dangerous mistakes is applying the weight or tension to the "tail" (the release end) instead of the "standing end." If the load is applied to the release side, the knot will immediately disintegrate, potentially leading to lost gear or injury. Always double-check which side of the rope is connected to the load.
2. Insufficient "Dressing" of the Knot
"Dressing" a knot refers to the process of tidying it up and ensuring all parts are snug before applying a heavy load. If the Mooring Hitch is left loose, the bight can slip through the loop prematurely. Always tighten to take the load as specified in the instructions.
3. Using Slippery Synthetic Ropes for High Loads
Polypropylene or high-tech HMPE (like Dyneema) ropes are incredibly slick. In these materials, a simple Mooring Hitch may not have enough friction to hold. For these ropes, consider adding an extra turn around the pole before forming the hitch.
4. Leaving the Tail Too Short
If the tail (the free end) is too short, accidental vibrations or the "working" of the rope against a dock can cause the tail to wiggle through the knot, triggering an unwanted release. Always leave at least 6–12 inches of tail for safety.
Related Knots and Splicing
Expanding your knowledge of outdoor rope techniques involves understanding how the Mooring Hitch relates to other essential knots.
- The Bowline: Known as the "King of Knots," it creates a fixed loop at the end of a rope. Unlike the Mooring Hitch, it is not a quick-release knot but offers maximum security.
- The Clove Hitch: A classic binding knot used to secure a rope to a post. It is more permanent than the Mooring Hitch but can jam under heavy tension.
- The Highwayman’s Hitch: A complex quick-release hitch often used in equestrian circles. It offers a more secure "locked" release mechanism than the standard Mooring Hitch.
- The Siberian Hitch (Evenk Knot): A quick-release hitch used frequently in cold climates because it can be tied easily while wearing heavy gloves or mittens.
- The Slip Knot: The simplest form of a slipped loop. While it shares the "pull to release" feature, it lacks the structural integrity of a proper Mooring Hitch when wrapped around an object.
Final Words
The Mooring Hitch is a masterclass in functional simplicity. By mastering this knot, you add a versatile tool to your repertoire of rope knots, ensuring you can secure vessels, gear, or livestock with confidence and release them with a single, fluid motion.
While its ease of use is its greatest strength, remember that the Mooring Hitch is a temporary solution. For long-term storage or high-stakes safety applications, always opt for a non-slipped, locking knot. However, for the daily tasks of the adventurous soul—whether on the water or in the woods—the Mooring Hitch remains an essential skill in the art of outdoor rope techniques. Practice regularly with different rope types to develop the muscle memory required to tie this hitch flawlessly every time.
