
In the world of vertical exploration, search and rescue, and arboriculture, few tools are as fundamentally important as the Prusik Loop. Often referred to as the "king of friction hitches," this elegant yet powerful knot has saved countless lives and simplified complex hauling systems for decades. Whether you are a novice climber or a seasoned search-and-rescue professional, understanding the mechanics, applications, and proper execution of the Prusik Loop knot is a non-negotiable skill.
The beauty of the Prusik lies in its simplicity and its "autoblock" nature. It is a friction hitch that slides easily along a static rope when unweighted but grips firmly when tension is applied. This binary behavior makes it an indispensable part of any outdoor rope techniques toolkit. In this guide, we will dive deep into the history, the science of friction, and the specific steps required to tie this essential knot perfectly every time.
Alternative names: Prusik hitch, Prussic knot, Triple Sliding Hitch, 3-wrap Prusik.
What Is a Prusik Loop?
The Prusik Loop is a friction hitch (or slide-and-grip knot) used to attach a loop of cord around a main standing rope. It was popularized by Dr. Karl Prusik, an Austrian mountaineer, in the early 1930s. Its primary function is to provide a secure attachment point that can be moved manually but will lock automatically under a load.
Practical Uses in the Field
The versatility of the Prusik Loop knot is unmatched. Some of the most common applications include:
- Ascending a Fixed Rope: If a climber falls into a crevasse or needs to climb a rope, a pair of Prusik loops can be used as makeshift foot and waist ascenders.
- Rappel Backup: Often used as a "third hand," the Prusik acts as a safety backup during a rappel, stopping the descent if the climber loses control of the brake line.
- Progress Capture: In hauling systems (like a 3:1 Z-drag), the Prusik holds the weight of the load while the haulers reset their position.
- Tensioning Lines: Used in setting up high-tension lines like Tyrolean traverses or even sophisticated backyard slacklines.
Materials and Tools Needed
To tie a functional Prusik Loop, you need more than just any piece of string. The effectiveness of the knot depends heavily on the relationship between the cord and the main rope.
1. The Main Rope
The Prusik Loop is typically tied around a dynamic or static kernmantle rope. These are standard in climbing and rescue operations.
2. The Prusik Cord
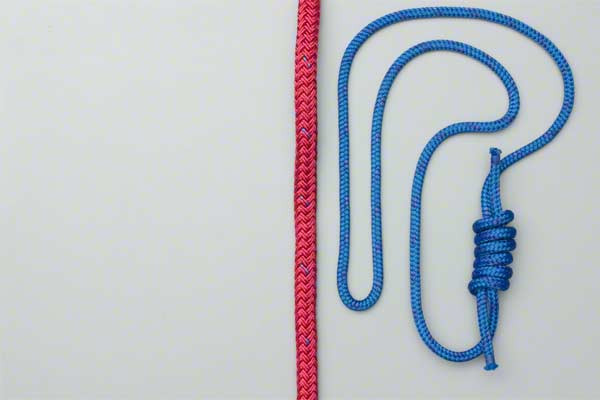
You will need a length of accessory cord formed into a loop, usually joined by a Double Fisherman’s Knot.
- Diameter Matters: For the knot to "bite" effectively, the cord diameter should be significantly smaller than the main rope. A common rule of thumb is a 2:3 ratio. For example, a 5mm to 7mm cord is typically used on a 10mm to 11mm main rope.
- Material: Nylon is the standard due to its high melting point and flexibility. High-tech fibers like Technora or Dyneema are sometimes used for their strength, but they can be "slicker" and may require more wraps to grip.
3. Tools
- Harness and Carabiners: If using the loop for climbing or safety, ensure you have UIAA-certified hardware.
- Gloves: When practicing high-tension outdoor rope techniques, gloves protect your hands from rope burn.
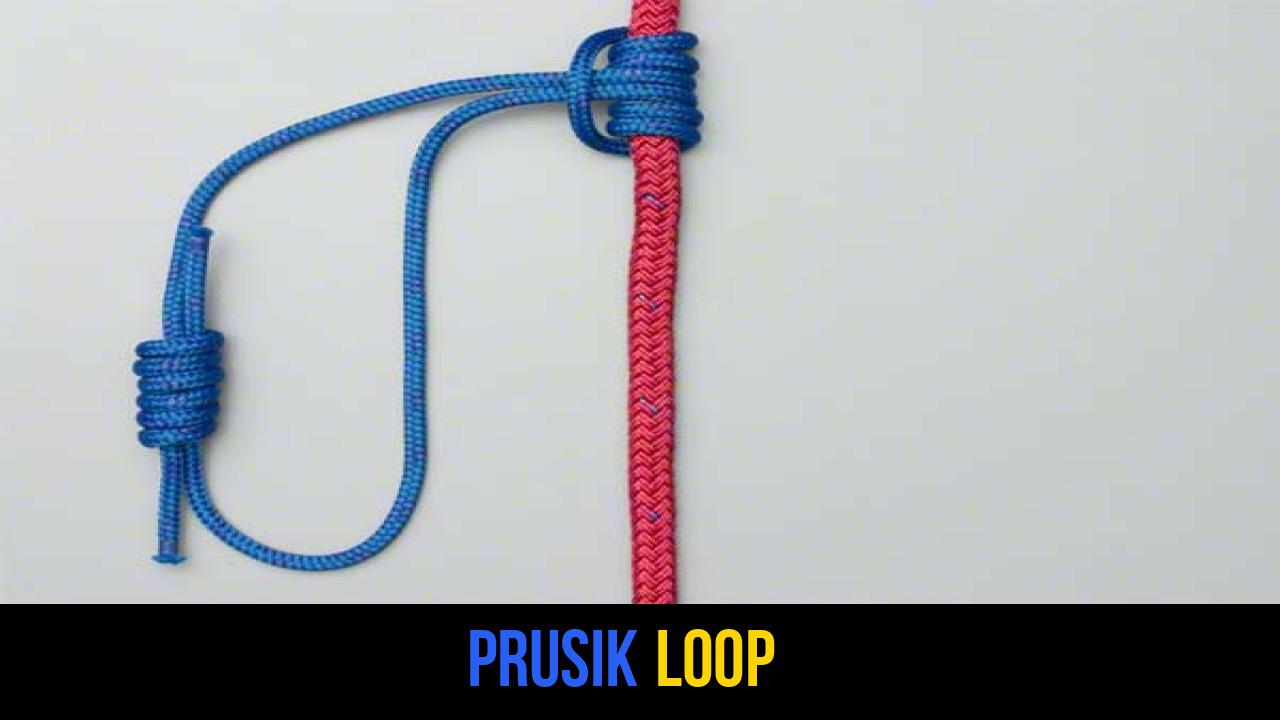
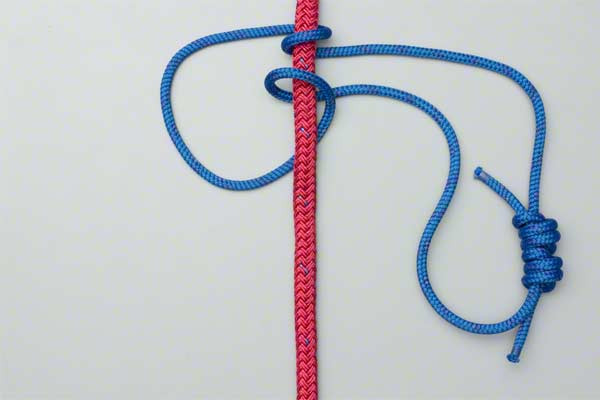
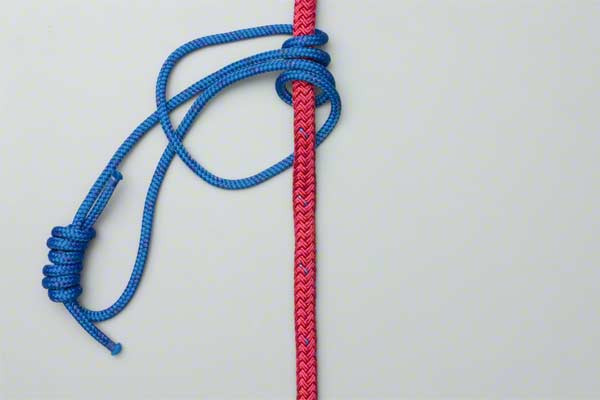
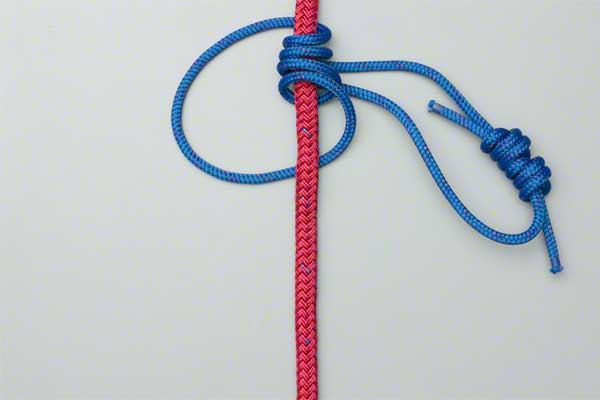
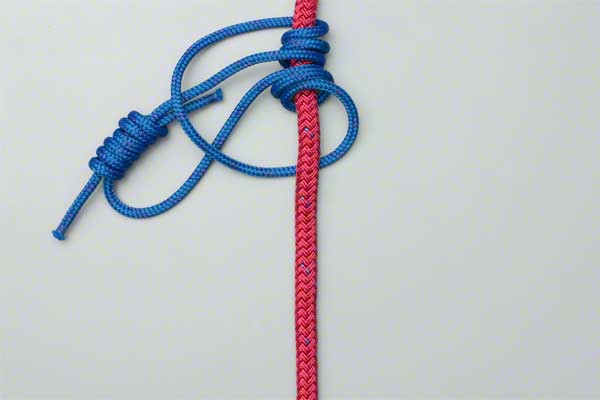
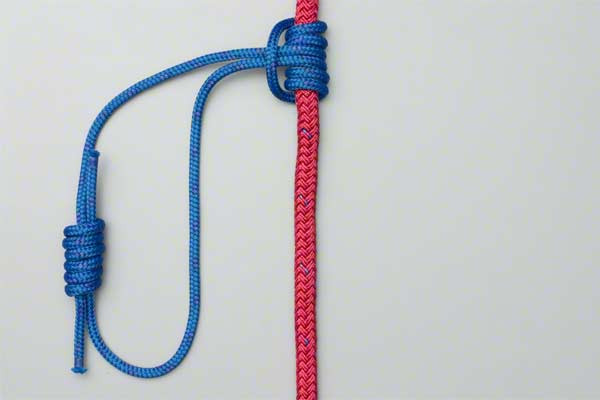
How to Tie Prusik Loop?
Tying the Prusik Loop requires precision to ensure the knot "bites" the rope correctly. Follow these instructions exactly as provided to ensure a secure hitch.
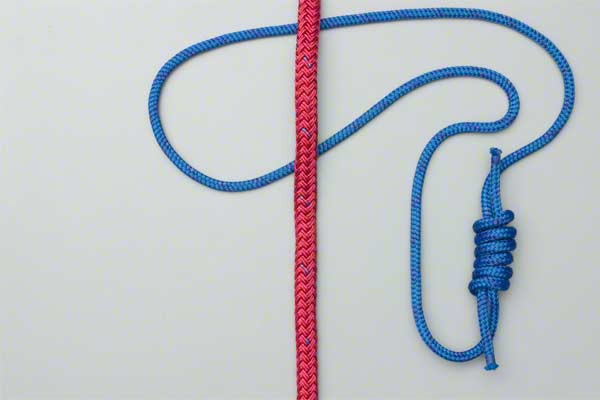
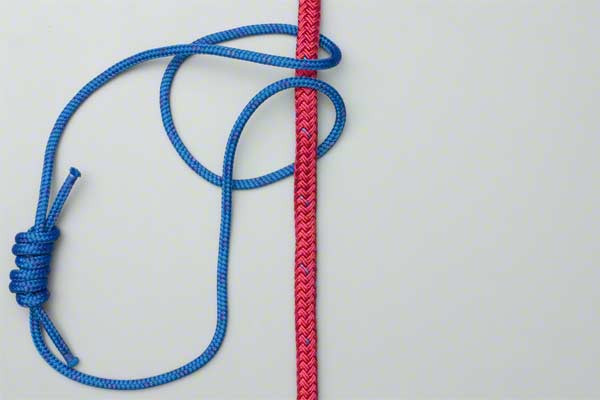
- Use a piece of cord formed into a loop.
- Pass the knot around the rope three times inside the loop.
- Make sure the turns lie neatly beside each other and pull the knot tight.
Note: In step 2, the "knot" being passed refers to the end of the loop (the bight) or the joined section of the cord. "Dressing" the knot (Step 3) is the most critical part of the process to ensure even friction.
Common Mistakes to Avoid
Even though the Prusik Loop knot is simple, errors in tying or application can lead to catastrophic failure. Safety is paramount when dealing with rope knots.
1. Poor Diameter Ratio
If the cord is too thick (e.g., using a 9mm cord on a 10mm rope), the hitch will not create enough friction to lock. It will simply slide down the rope, even under load. Always ensure your accessory cord is noticeably thinner than your main line.
2. Crossing the Turns
When following the instruction to "make sure the turns lie neatly beside each other," take it seriously. If the coils of the cord cross over one another inside the hitch, the friction will be uneven. This can cause the knot to slip or, worse, make it nearly impossible to slide once the load is removed.
3. Failure to "Dress and Set"
A "loose" Prusik is a dangerous Prusik. After tying, you must pull the knot tight and manually "set" it by tugging on the load-bearing strand. This ensures the coils are gripping the main rope before you trust it with your weight.
4. Ignoring Condition and Environment
Wet, icy, or muddy ropes significantly reduce friction. In these conditions, a standard 3-wrap Prusik might slip. You may need to add an extra wrap, but always test the "bite" in a safe, low-to-the-ground environment first.
Related Knots and Splicing
The Prusik Loop is part of a larger family of friction hitches. Depending on your specific needs, you might encounter these variations:
- Klemheist Knot: A friction hitch that is easier to slide than a Prusik but generally only grips in one direction.
- Autoblock (French Prusik): A simple wrap-around hitch often used as a rappel backup because it can be released while still under a slight load.
- Bachmann Hitch: This variation incorporates a carabiner into the knot, providing a functional "handle" to make sliding the hitch easier during ascents.
- Blake’s Hitch: A preferred hitch for arborists; unlike the Prusik, it is typically tied with the end of a rope rather than a closed loop.
The Science of Friction: Why the Prusik Works
Understanding the physics of outdoor rope techniques enhances your safety. The Prusik works based on the Capstan Equation. As the cord wraps around the main rope, each turn increases the frictional force exponentially.
When you pass the knot around the rope three times, you are creating six total segments of cord in contact with the main rope. When weight is applied to the "tail" of the loop, it pulls the coils tight, constricting the main rope. This "constrictor effect" is what allows a small cord to hold the weight of a full-grown adult or a heavy rescue litter.
Maintenance and Care for Your Prusik Cord
Since the Prusik Loop knot relies on friction, the cord is subject to heat and abrasion.
- Check for Glazing: If a Prusik slips rapidly, the friction creates heat that can "glaze" or melt the nylon fibers. If the cord feels stiff or looks shiny, discard it immediately.
- Retire Early: Accessory cords are inexpensive. If the sheath shows signs of fuzzing or if you can feel soft spots in the core, replace the loop.
- Keep it Clean: Dirt and grit act like sandpaper inside the knot, wearing down both the cord and your expensive main rope.
Final Words
The Prusik Loop is a cornerstone of outdoor rope techniques. Its ability to transform a simple piece of cord into a powerful mechanical brake makes it an essential skill for anyone venturing into the vertical world. By mastering the art of the Prusik Loop knot, you gain a versatile tool for ascending, self-rescue, and hauling.
Remember, while this guide provides the technical steps to tie the knot, nothing replaces hands-on training from a certified instructor. Practice tying the Prusik Loop in a controlled environment until you can do it with your eyes closed—because in a real-world rescue situation, you just might have to.
Whether you are exploring alpine peaks or managing complex rigging systems, the Prusik remains the most reliable, "low-tech" solution to high-stakes problems. Keep your turns neat, your cord sized correctly, and always double-check your hitch before loading.
