
In the world of rope knots and outdoor rope techniques, few patterns are as recognizable or as historically significant as the Reef Knot. Known for its simplicity and symmetry, this knot has served as a fundamental skill for sailors, climbers, scouts, and survivalists for millennia. Whether you are securing a bundle of firewood, finishing a bandage in a first-aid scenario, or reefing a sail in high winds, understanding the mechanics of this knot is essential for any outdoor enthusiast.
The Reef Knot is categorized as a "binding knot." Its primary purpose is to secure a rope or line around an object. While it is often one of the first knots a beginner learns, its simplicity can be deceptive. Professional technical gear specialists emphasize that while the knot is easy to tie, its application is specific. It is designed to join two ropes of equal thickness that are not under extreme tension. As we dive into this guide, you will learn the precise method for tying this classic knot, the materials best suited for it, and the critical safety considerations every user must know.
Alternative names for the Reef Knot include: Square Knot, Hercules Knot, and Brotherhood Knot.
What Is a Reef Knot?
The Reef Knot is a simple binding knot used to secure a rope or line around an object. Historically, its name originates from its use on sailing vessels. When the wind became too strong, sailors would "reef" the sails—meaning they would reduce the sail area by folding or rolling part of the sail and tying it down. The Reef Knot was the preferred choice because it remained secure under the compression of the sailcloth but could be easily untied (or "spilled") when it was time to shake the reef out.
Practical Uses in the Modern World
Today, the Reef Knot is a staple in various fields:
- First Aid: It is the standard knot for securing triangular bandages because it lies flat against the body, minimizing discomfort for the patient.
- Camping and Hiking: It is frequently used for tying up sleeping bags, securing gear bundles, or finishing off a decorative lashing.
- General Utility: It is perfect for tying parcels, gift boxes, or shoelaces (though the "bow" version is more common for shoes).
- Sailing: It remains a primary tool for reefing sails and securing non-critical lines on deck.
It is important to note that the Reef Knot should never be used to join two ropes that will be under heavy load or used for life-critical applications (such as climbing or hauling). In those instances, specialized bends like the Double Fisherman’s Knot or the Figure-Eight Join are required.
Materials and Tools Needed
To practice tying the Reef Knot, you don’t need expensive equipment, but choosing the right materials will help you understand how the knot behaves under different conditions.
1. Ropes of Equal Diameter
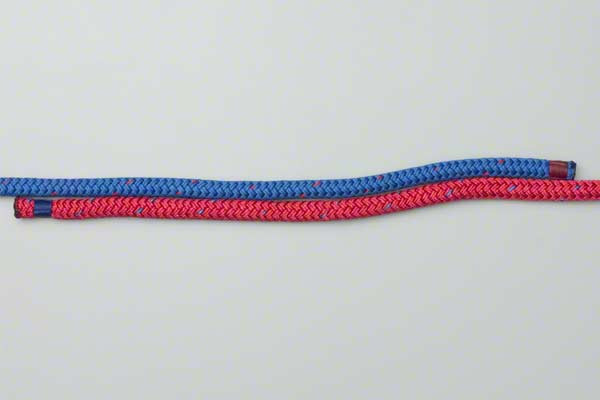
The most critical rule for a successful Reef Knot is using two ropes (or two ends of the same rope) that have the same diameter and texture. If one rope is significantly thicker or more slippery than the other, the knot will fail or "capsize."
2. Rope Types
- Paracord (550 Cord): Excellent for practice due to its flexibility.
- Natural Fiber Rope (Hemp or Cotton): These offer high friction, which helps the knot stay "set."
- Synthetic Braided Rope: Common in modern outdoor gear, though some very slick synthetics (like Dyneema) may require extra caution.
3. Contrasting Colors
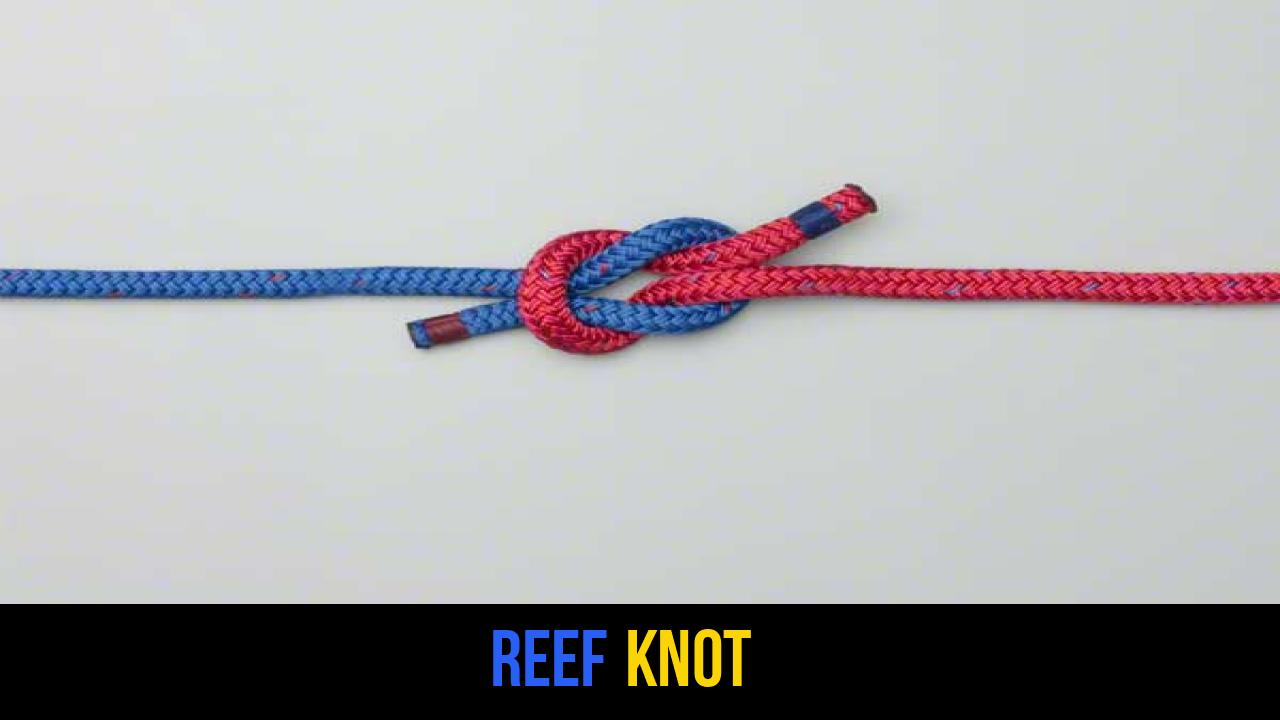
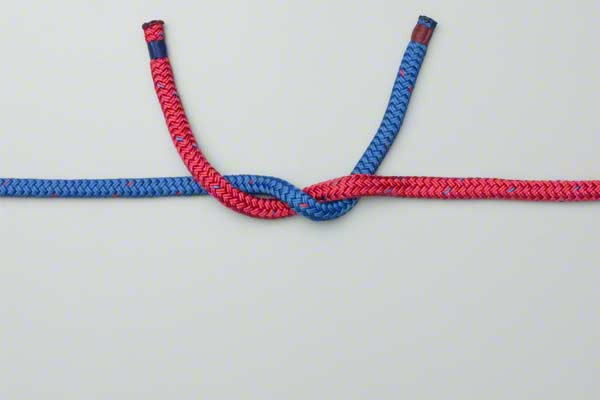
For beginners, using a "red" rope and a "blue" rope (as mentioned in the instructions) is highly recommended. This allows you to visually track which end is crossing over the other, ensuring you don’t accidentally create a "Granny Knot."
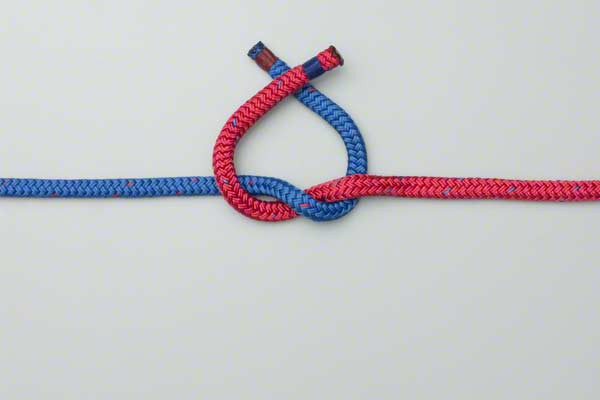
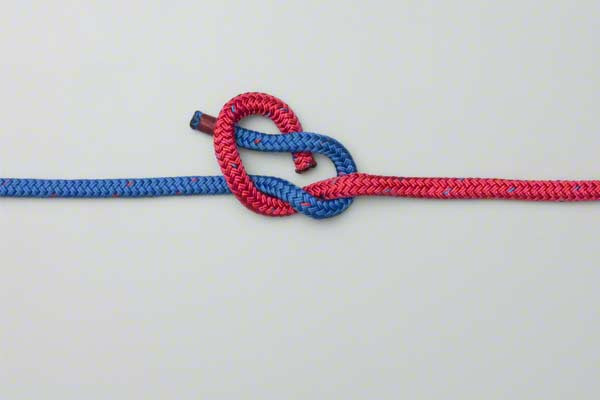
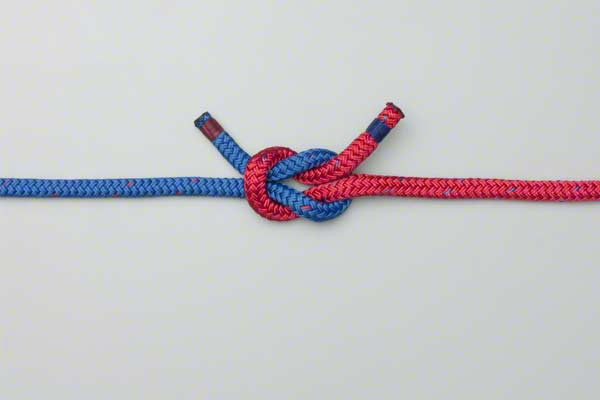
How to Tie a Reef Knot?
To ensure the highest level of accuracy, follow these steps exactly as they are presented in the technical instruction source. Mastering the Reef Knot requires focus on the "over-and-under" movement of the rope ends.
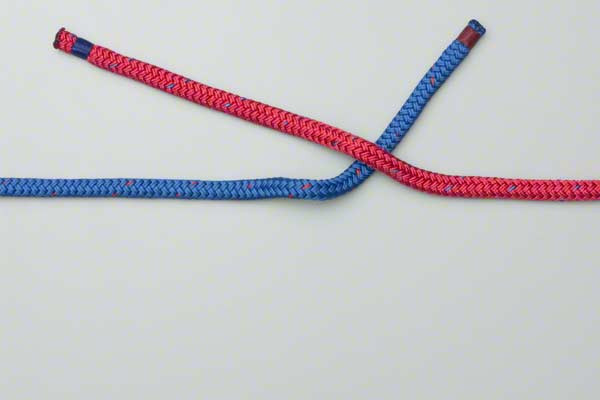
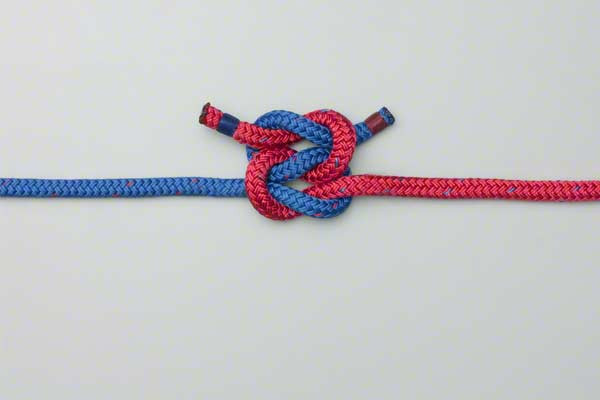
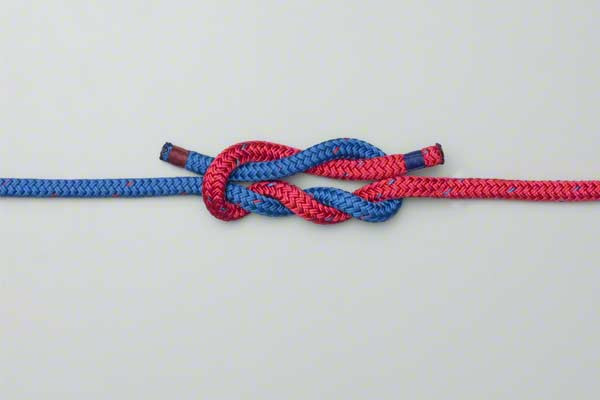
- Take two ropes and cross them (red over blue) to form a half knot.
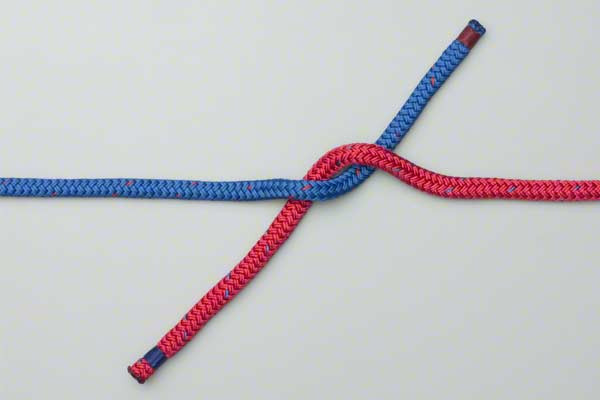
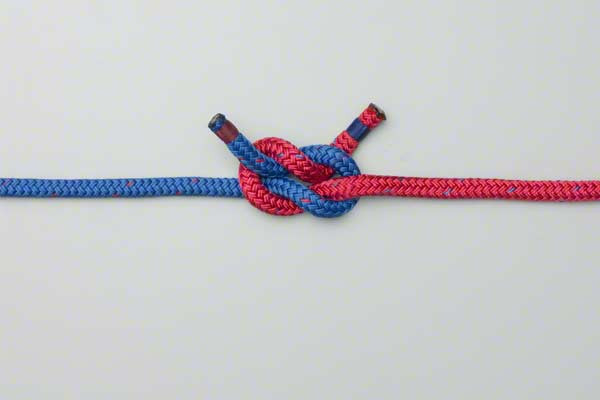
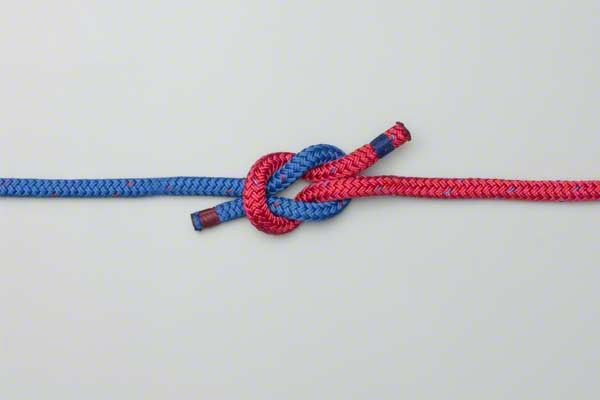
- Cross them a second time (red over blue again) and pull the ends tight to form the Square Knot.
Note: When performed correctly, the two ends of the same rope will emerge from the knot side-by-side, creating a perfectly symmetrical shape that lies flat.
Common Mistakes to Avoid
Even though the Reef Knot is simple, errors are frequent. As a technical specialist, I often see beginners struggle with the following:
1. The Granny Knot
The most common mistake is the "Granny Knot." This happens if you reverse the direction of the second cross. A true Reef Knot is symmetrical. If your knot looks twisted or doesn’t lie flat, it is likely a Granny Knot, which is significantly weaker and prone to slipping under the slightest tension.
2. Using Ropes of Unequal Size
If you attempt to join a thick rope to a thin rope using this method, the thinner rope will often slide through the loops of the thicker one. For joining ropes of different diameters, always use a Sheet Bend instead.
3. Life-Critical Loading
Safety Warning: The Reef Knot is not a "bend" (a knot that joins two ropes for load-bearing). It is a "binding knot." Under heavy tension, especially with modern synthetic ropes, the knot can "capsize" (turn inside out) and fail completely. Never use this knot for climbing, rappelling, or overhead lifting.
4. Not Leaving Enough "Tail"
Always ensure you leave at least 2-3 inches of "tail" (the loose ends) after tightening the knot. If the rope stretches or shifts, the tails provide a safety margin to prevent the knot from undoing itself.
Related Knots and Splicing
Expanding your knowledge of rope knots involves understanding how the Reef Knot relates to other techniques. Here are a few related knots every outdoorsman should know:
- The Sheet Bend: A superior alternative to the Reef Knot when you need to join two ropes of different diameters or materials.
- The Bowline: Known as the "King of Knots," it creates a fixed loop at the end of a rope that will not slip or bind under load.
- The Clove Hitch: A quick-release hitch used to secure a rope to a post or spar; often used as a starting point for lashings.
- The Figure-Eight Knot: A fundamental stopper knot used in climbing and sailing to prevent a rope from slipping through a pulley or grommet.
- The Surgeon’s Knot: An evolution of the Reef Knot that adds an extra twist in the first half-knot for increased friction in slippery materials.
Final Words
The Reef Knot remains a cornerstone of outdoor rope techniques. Its utility in medical emergencies, sailing, and general organization makes it an indispensable skill. By following the precise "red over blue" method, you ensure a clean, symmetrical, and effective bind every time.
However, the mark of a true expert is knowing the right tool for the job. While the Reef Knot is perfect for bundles and bandages, always remember its limitations regarding load-bearing. Practice with different materials, teach the technique to your fellow adventurers, and integrate this classic knot into your survival toolkit. With consistent practice, tying the Square Knot will become second nature, providing you with a reliable solution for a multitude of tasks in the great outdoors.
