
In the world of pioneering, scouting, and wilderness survival, the ability to join two pieces of timber securely is a foundational skill. Among the various outdoor rope techniques, the Round Lashing stands out as one of the most straightforward yet structurally vital methods for extending the length of a pole or reinforcing a joint. Whether you are building a temporary flagpole, constructing a signal tower, or repairing a broken tool handle, understanding the mechanics of the Round Lashing knot is essential.
This guide provides an in-depth look at the Round Lashing, its practical applications, the materials required for success, and a strict step-by-step tutorial on how to execute it perfectly every time.
What Is a Round Lashing?
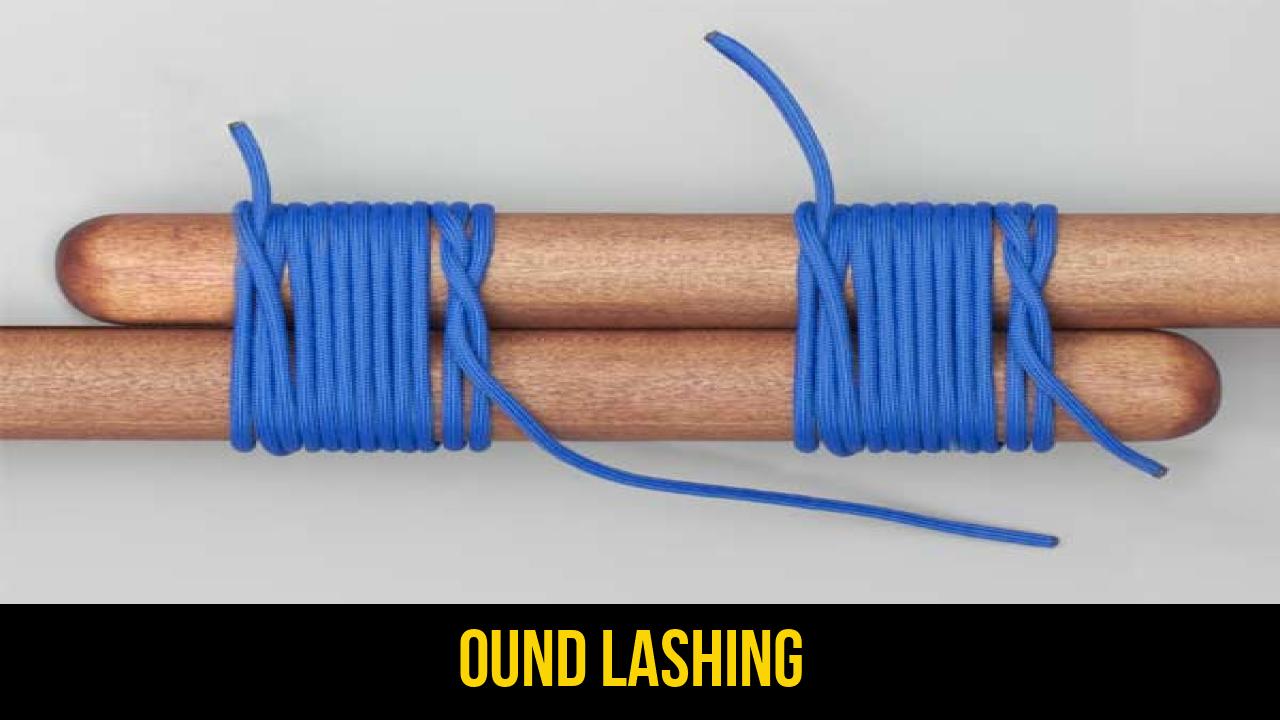
A Round Lashing is a specific type of lashing used to join two poles together in a parallel fashion. Unlike a Square Lashing, which joins poles at right angles, or a Diagonal Lashing, which secures poles that cross at varying angles, the Round Lashing is designed to keep two spars running in the same direction.
Practical Uses in the Great Outdoors
The primary utility of this lashing is to increase the height or length of a spar. By overlapping two poles and applying two separate Round Lashings, you create a rigid, extended pole that can withstand significant vertical pressure.
Common applications include:
- Flagpoles: Extending a shorter pole to reach impressive heights.
- Ladder Construction: Attaching side rails together to reach higher elevations.
- Shelter Building: Joining saplings to create long ridge poles for a lean-to or A-frame.
- Emergency Repairs: Splinting a fractured or weakened structural pole in a campsite.
Alternative Names
Depending on your region or the specific manual you are using, the Round Lashing may also be referred to as:
- Parallel Lashing
- Pole Lashing
- Scout Lashing
Materials and Tools Needed
To achieve a secure and professional-grade Round Lashing, you must select the right materials. The integrity of your structure depends entirely on the friction between the rope and the wood.
1. Rope Selection
When practicing rope knots, the material of the cordage matters:
- Natural Fiber Rope: Manilla or sisal are preferred for lashings because they have a "bite." The natural fibers grip the wood, reducing the likelihood of the poles sliding.
- Synthetic Rope: While stronger, nylon or polyester ropes are often slicker. If using synthetic cordage, you may need to add extra turns to maintain the same level of security.
- Diameter: For most pioneering projects, a rope diameter of 1/4 inch (6mm) to 3/8 inch (10mm) is ideal.
2. The Poles (Spars)
Ensure your poles are relatively dry. Green or wet wood can shrink as it dries, which will cause the lashing to loosen over time. If you are joining two poles to make a longer one, ensure an overlap of at least 2 to 3 feet (0.6 to 1 meter) for maximum stability.
How to Tie Round Lashing?
Following the specific technical requirements for this knot, here are the instructions to secure your poles. Accuracy in the starting and finishing hitches is paramount for safety.
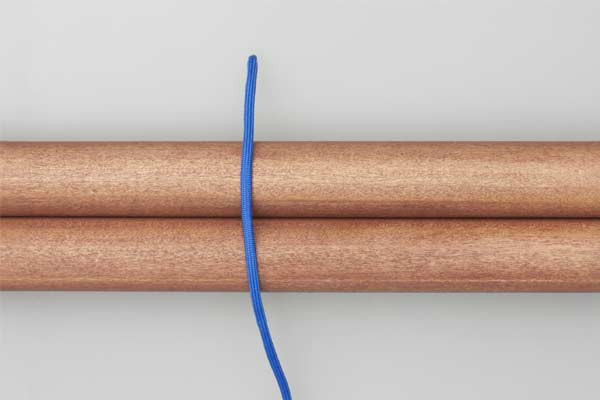
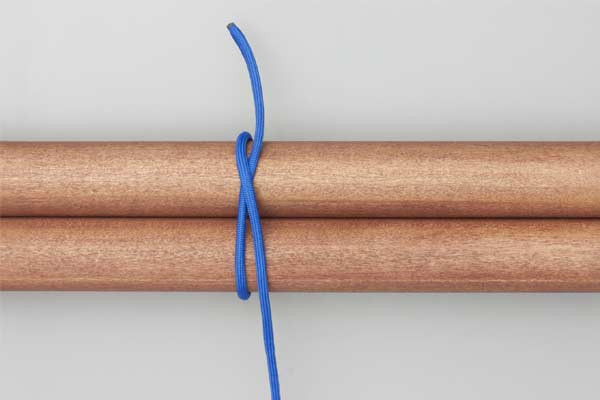
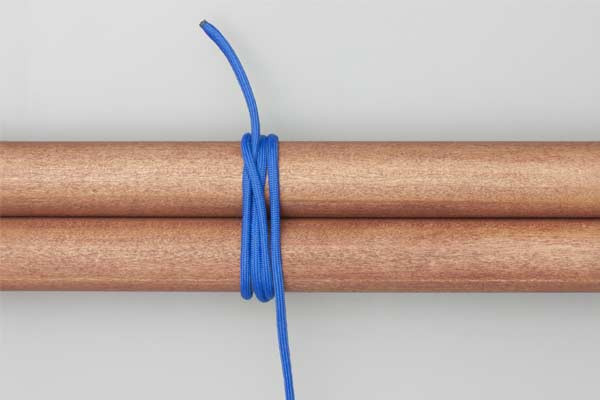
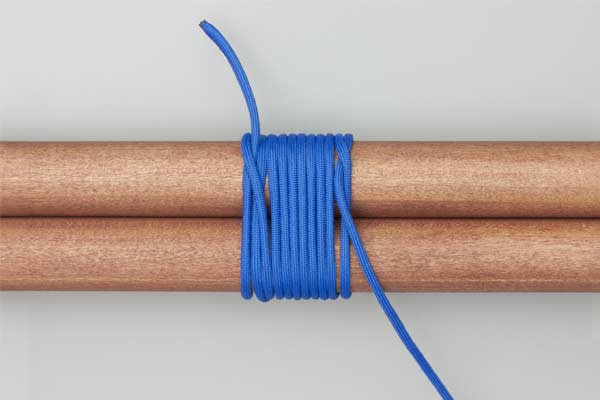
- Start with a Clove Hitch around both poles. Ensure that the hitch is tied tightly at one end of the overlap.
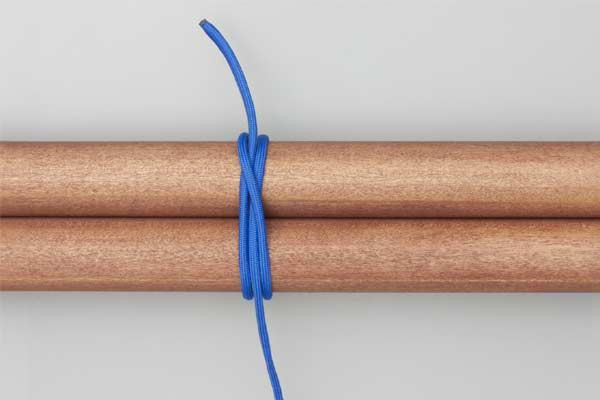
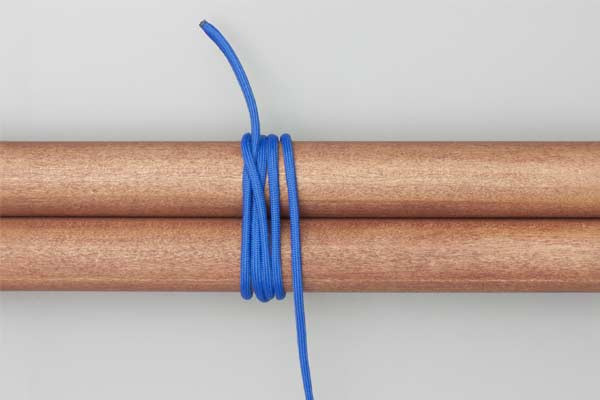
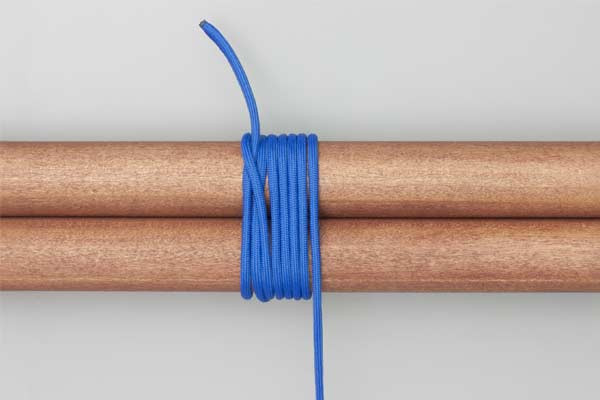
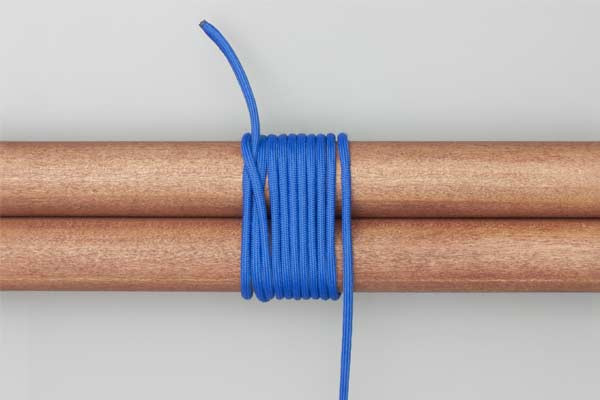
- Wrap six or eight turns around the two poles. These turns should be laid neatly side-by-side, rather than overlapping each other, to maximize the surface area of the rope against the wood. Pull each turn tight as you go.
- Finish with another Clove Hitch. This second hitch secures the wraps and prevents the rope from unraveling under tension.
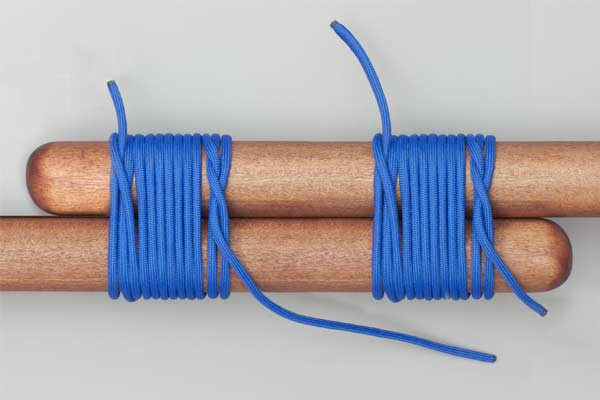
Note: Two Round Lashings can be used to make a longer pole. When extending a pole, place one lashing near each end of the overlap for maximum structural integrity.
The Physics of a Secure Lashing
Why do we use six or eight turns? In outdoor rope techniques, the strength of a lashing is derived from friction. Every turn increases the surface contact between the rope and the poles. If you use too few turns, the poles may slide. If you use too many, the lashing becomes bulky and difficult to tighten effectively.
Unlike other lashings, the Round Lashing does not typically use "frapping turns" (turns that go between the poles). This is because the goal is to squeeze the two poles together as tightly as possible, creating a single, unified unit.

Common Mistakes to Avoid
Even experienced outdoorsmen can make errors when applying a Round Lashing knot. Keep these tips in mind to ensure your structure remains safe:
- Loose Wraps: If the rope is not kept under constant tension during the wrapping phase, the poles will eventually wobble. Always keep a firm "pull" on the rope.
- Overlapping Rope: When the turns overlap each other (crossing over), it creates a "point load" that can cause the rope to snap or the lashing to shift. Keep your turns parallel and neat.
- Insufficient Overlap: If you are joining two poles to make a longer one, the overlap must be significant. A short overlap creates a "hinge point" that will likely fail under wind or weight.
- Skipping the Second Lashing: Using only one Round Lashing to join two poles is a safety hazard. Always use two lashings—one at the top of the overlap and one at the bottom—to prevent the poles from pivoting.
Related Knots and Splicing
To become a master of rope knots, you should be familiar with the surrounding techniques that complement the Round Lashing.
- Square Lashing: This knot is used to join two poles that cross at right angles, forming the basis for most campsite furniture and structures.
- Diagonal Lashing: Used to secure poles that cross at an angle other than 90 degrees, often used for cross-bracing in towers.
- Shear Lashing: Similar to the round lashing, but used when the poles need to be opened like a pair of scissors to form an "A" frame.
- Clove Hitch: The essential starting and finishing knot for almost all lashings, providing a secure grip on a cylindrical object.
- Timber Hitch: Often used as an alternative starting knot for lashings, especially when the rope needs to be pulled under heavy tension immediately.
Final Words on the Round Lashing
The Round Lashing is a testament to the efficiency of traditional outdoor rope techniques. By mastering this simple sequence of a Clove Hitch, several neat wraps, and a finishing hitch, you gain the ability to manipulate timber and cordage into complex, functional structures.
Whether you are a seasoned scout leader teaching the next generation or an outdoor enthusiast building a basecamp, the Round Lashing knot is a tool that belongs in your mental utility belt. Remember: neatness leads to tightness, and tightness leads to safety. Always inspect your lashings regularly, especially if they are exposed to the elements, to ensure your structures remain sound and secure.
Happy building, and may your knots always hold firm!
