
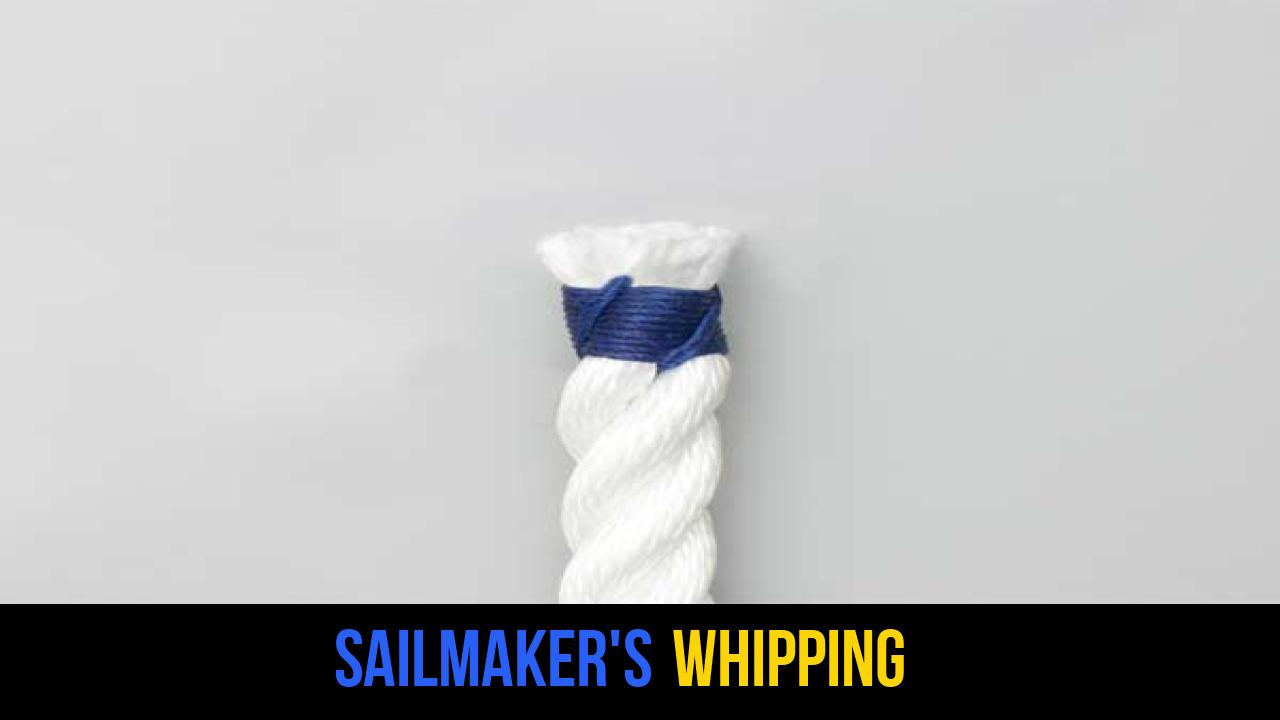
In the world of maritime tradition and modern outdoor utility, few techniques are as respected as the Sailmaker’s Whipping. For anyone who works with rope—whether you are a sailor, a scout, or an outdoor enthusiast—maintaining the integrity of your equipment is paramount. A rope is only as good as its ends; once a rope begins to "unlay" or fray, its structural integrity is compromised, and it becomes difficult to thread through blocks, eyes, or cleats.
The Sailmaker’s Whipping is widely considered the "gold standard" of all whipping knots. Unlike the Common Whipping, which relies purely on friction and can occasionally slide off the end of a synthetic or slippery rope, the Sailmaker’s version is physically woven into the structure of the rope itself. By following the "lay" or the grooves of a three-strand rope, this whipping becomes an integral part of the line, making it virtually impossible to displace.
This technique is a cornerstone of outdoor rope techniques and is essential for anyone looking to master rope knots and long-term gear maintenance.
Alternative Names: Palm and Needle Whipping, Seaman’s Whipping, Threaded Whipping.
What Is a Sailmaker’s Whipping?
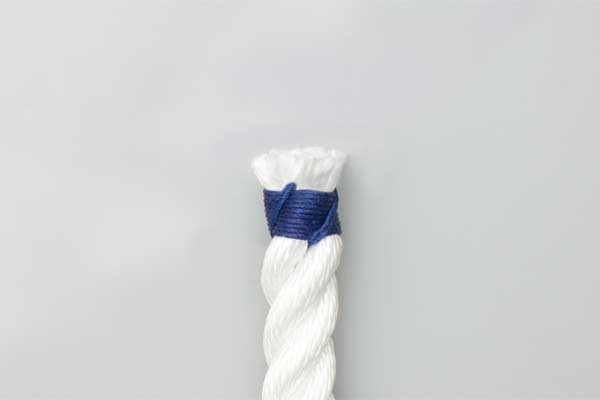
A Sailmaker’s Whipping is a method of binding the end of a stranded rope using twine to prevent it from unraveling. It is specifically designed for three-strand laid rope (such as manila, nylon, or polyester). The defining characteristic of this whipping is that the twine passes under the strands of the rope and follows the helical grooves (the "lay") between the strands.
Practical Uses and Benefits
- Permanent Protection: Because the twine is threaded through the rope, it cannot be pulled off. This makes it ideal for ropes that undergo heavy use or are frequently pulled through pulleys.
- Aesthetic Professionalism: A well-executed Sailmaker’s Whipping is a mark of a true craftsman. It looks neat, intentional, and traditional.
- Safety: In critical outdoor scenarios, a frayed rope end can snag or fail to hold a knot. This whipping ensures the rope remains functional under tension.
- Versatility: While it originated in the age of sail, it is equally useful for decorative rope work, architectural rigging, and heavy-duty climbing utility lines.
Materials and Tools Needed
To achieve a professional-grade Sailmaker’s Whipping, you need the right materials. Using the wrong twine or a dull tool can make the process frustrating and the result insecure.
1. The Rope
This technique is designed for three-strand laid rope. While it can be adapted for some braided ropes, its primary mechanical advantage is found in the grooves of twisted cordage.
2. Whipping Twine
- Waxed Polyester Twine: This is the preferred choice for modern ropes. The wax helps the twine "bite" into the rope and protects it from UV degradation and moisture.
- Natural Fiber Twine: For manila or hemp ropes, a tarred marline or natural twine provides a classic look and excellent grip.
3. Essential Tools
- A Sharp Knife or Scissors: Essential for a clean cut at the rope’s end.
- A Sailmaker’s Needle (Optional but Recommended): While the instructions below can be performed by hand by opening the strands, a large, blunt needle makes threading the twine significantly easier.
- A Lighter (for synthetic ropes): Used to lightly heat-seal the very tip of the rope before or after whipping.
How to Tie Sailmaker’s Whipping?
To ensure the highest level of security, follow these steps precisely. This method ensures the twine is anchored within the rope’s structure.
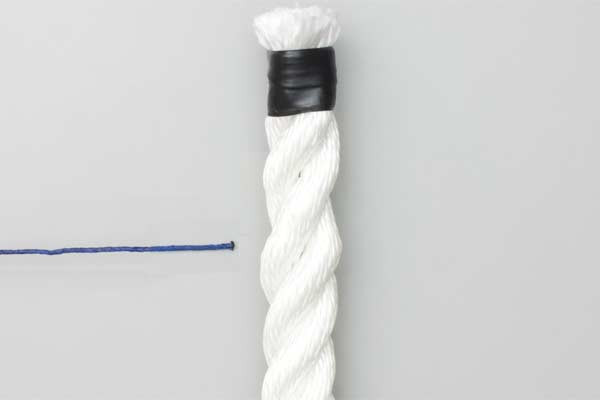
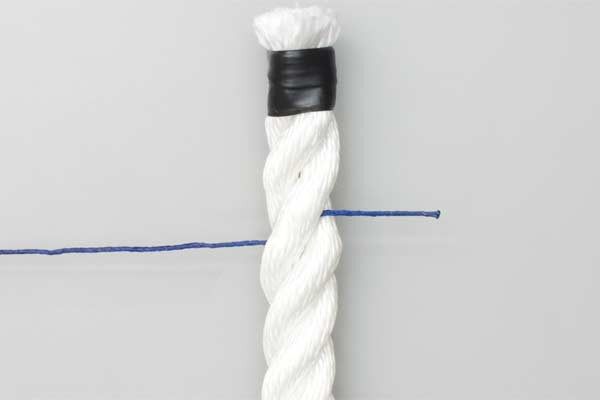
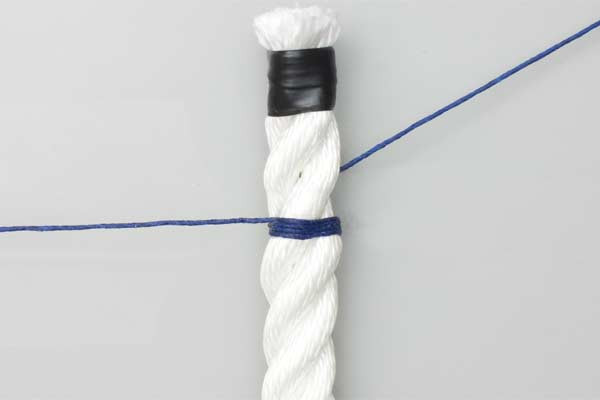
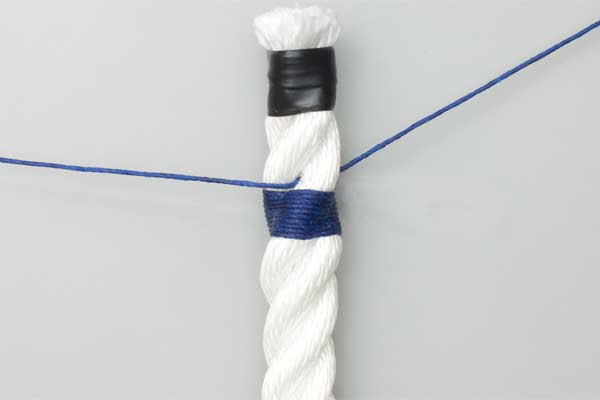
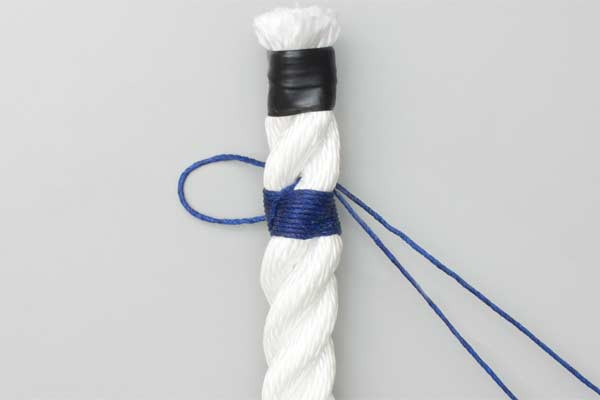
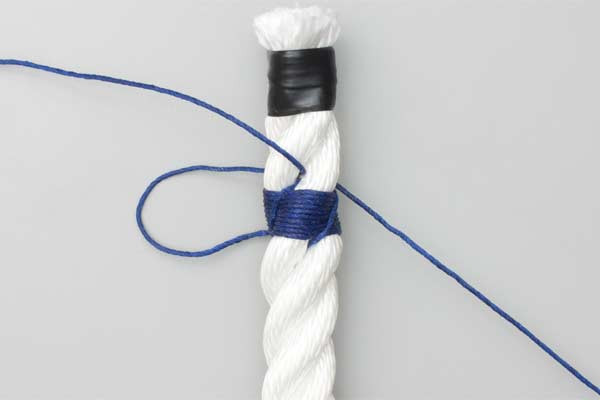
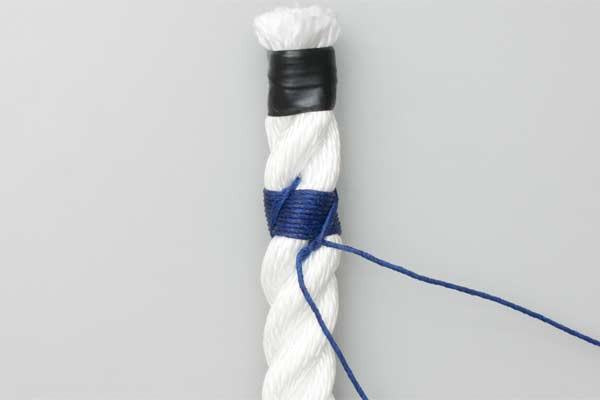
- Thread the twine between the strands.
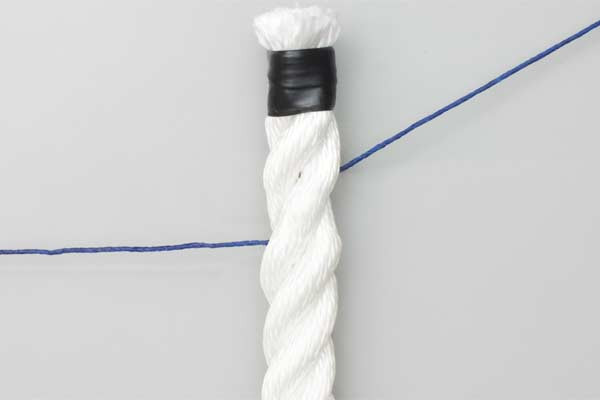
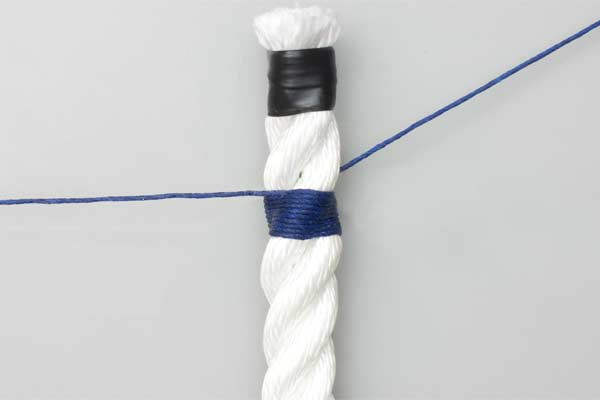
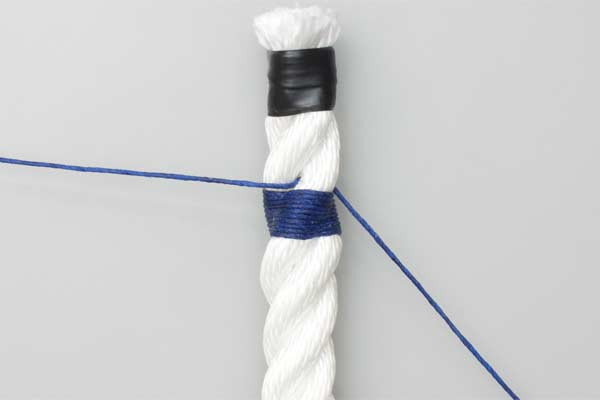
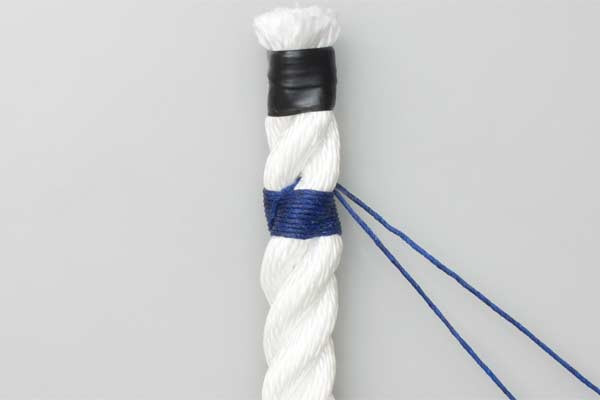
- Wrap the long end around the rope.
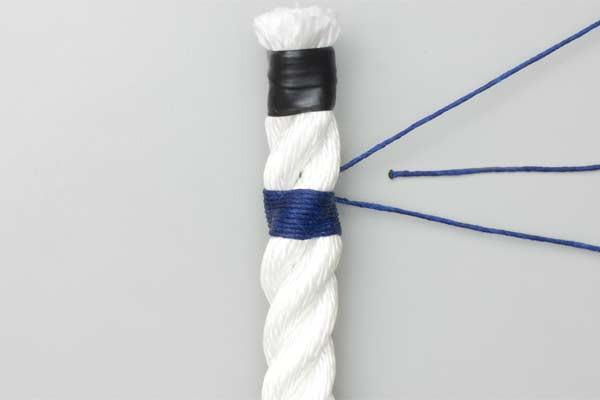
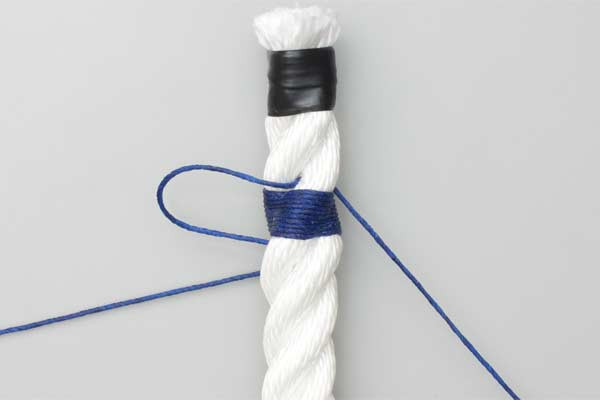
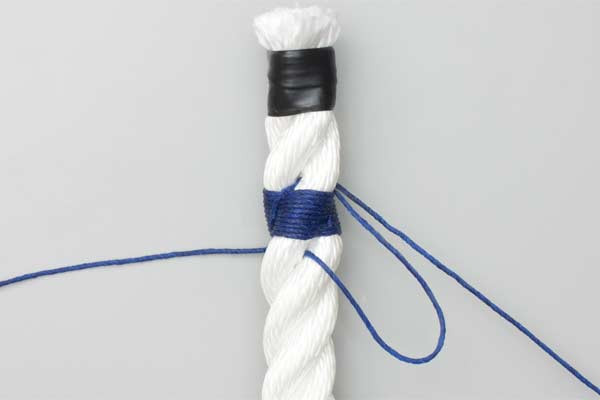
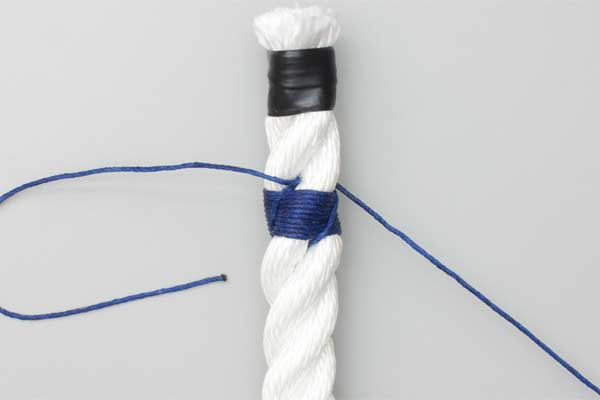
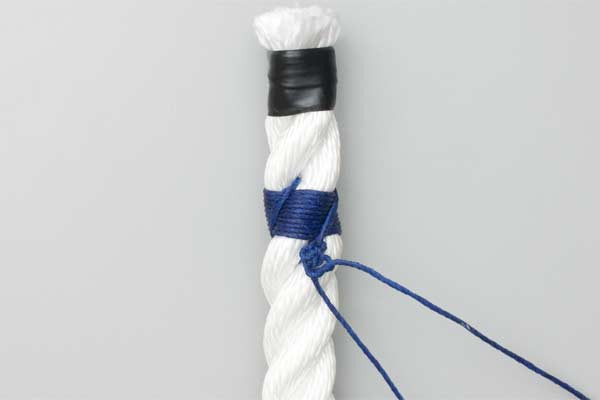
- Pass it under a strand, down a groove and under a strand, up a groove and under a strand.
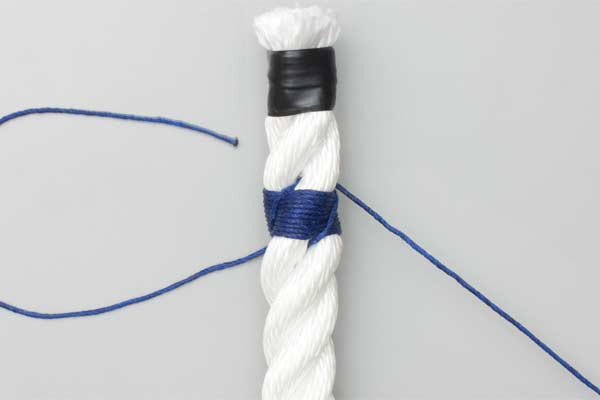
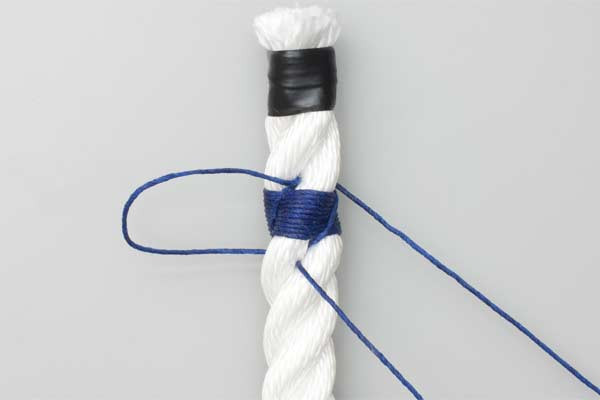
- Similarly, pass the short end down, under, up, under, down and under.
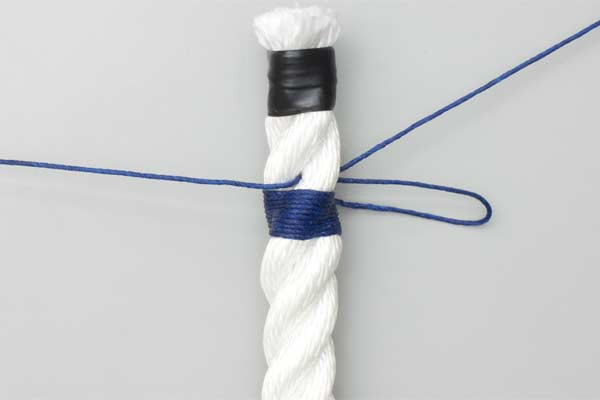
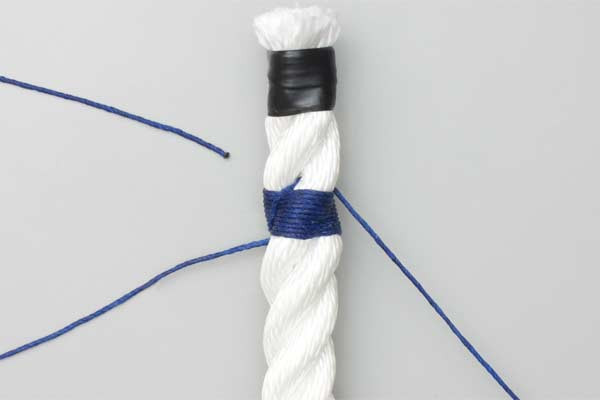
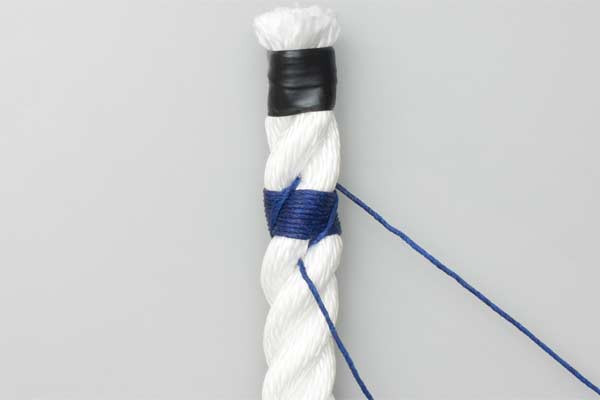
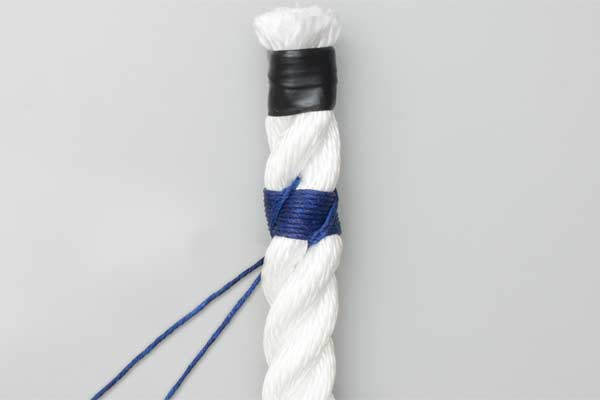
- Tie the ends with Square (Reef) knots.
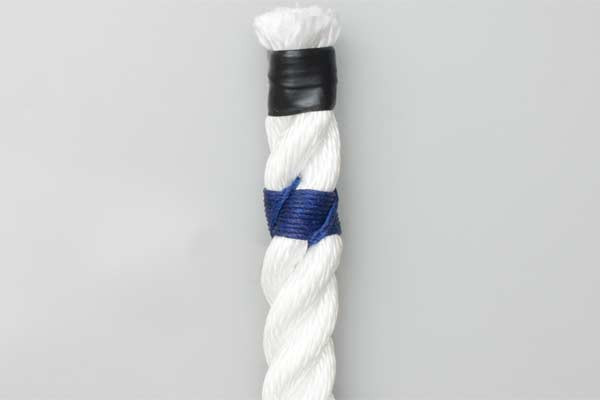
- Pull them through, cut short, and trim.


Common Mistakes to Avoid
Even for experienced outdoorsmen, the Sailmaker’s Whipping knot requires precision. Avoid these common pitfalls to ensure your rope remains secure:
- Loose Wrapping: If the initial wraps are not tight, the entire whipping will eventually shift. Use a "pull" after every turn to maintain high tension.
- Misaligning the Grooves: The beauty and strength of this whipping come from the twine lying perfectly in the "cants" or grooves of the rope. If you cross over a strand incorrectly, the whipping will look messy and lose its mechanical advantage.
- Wrong Twine Diameter: If the twine is too thick, the whipping becomes bulky and may snag. If it is too thin, it may cut into the rope strands under high tension.
- Ignoring the "Bitter End": Always ensure you leave enough rope beyond the whipping (usually about half the rope’s diameter) so the whipping doesn’t slip off before the square knot is secured.
Related Knots and Splicing
Understanding the Sailmaker’s Whipping is often a gateway into the broader world of outdoor rope techniques. Here are a few related methods used to finish or join ropes:
Common Whipping
The Common Whipping is the simplest form of rope finishing. It involves wrapping twine tightly around the end of a rope and tucking the ends under the wraps. While quick to execute, it lacks the internal anchoring of the Sailmaker’s version, making it prone to sliding off on modern synthetic fibers like polypropylene or nylon. It is best used for temporary fixes or on natural fibers with a rougher texture.
West Country Whipping
The West Country Whipping uses a series of overhand knots on alternating sides of the rope to create a very secure and "bumpy" finish. It is exceptionally effective because each turn is essentially a knot, meaning that even if the twine breaks in one spot, the rest of the whipping remains intact. It is highly recommended for high-friction environments where the rope end might be dragged across rough surfaces.
Eye Splice
An Eye Splice is a permanent loop formed at the end of a stranded rope by weaving the strands back into the standing part. Unlike a loop knot (like the Bowline), a splice retains nearly 95% of the rope’s original breaking strength. Mastering the Sailmaker’s Whipping is often the first step in learning to finish an eye splice professionally, as whippings are used to prevent the individual strands from unravelling during the splicing process.
Back Splice
The Back Splice is an alternative to whipping for finishing a rope end. Instead of using external twine, the strands of the rope are unlaid and woven back into the rope itself. This creates a thick, bulbous end that won’t fray. While very secure, the downside is that it doubles the diameter of the rope, meaning it cannot pass through blocks or pulleys, whereas a Sailmaker’s Whipping keeps the rope’s profile slim.
Final Words
The Sailmaker’s Whipping is more than just a functional tool; it is a testament to the longevity and care of your gear. In an era of disposable equipment, taking the time to properly whip a rope end using traditional outdoor rope techniques demonstrates a high level of proficiency and respect for the craft.
By following the structured steps of threading through the strands, following the grooves, and securing the finish with a Square (Reef) knot, you ensure that your lines are prepared for the harshest conditions—be it high-seas sailing, heavy-duty farm work, or wilderness survival. Remember that practice is key; the more you work with the lay of the rope, the more intuitive and "clean" your whippings will become.
Whether you are securing a new dock line or preparing a climbing utility cord, the Sailmaker’s Whipping knot remains the most reliable and professional choice for any serious rope user. Keep your twine waxed, your knife sharp, and your wraps tight.
