
In the world of outdoor rope techniques, few knots hold as much legendary status as the Siberian Hitch. Often referred to by seasoned woodsmen and survivalists as the "Evenk Knot," this hitch is a cornerstone of efficient camp setup. Whether you are battling the freezing winds of the taiga or setting up a simple tarp in your local woodland, understanding how to secure your line quickly and reliably is a skill that separates the novices from the experts.
The beauty of the Siberian Hitch lies in its simplicity and its functional design. It is a quick-release hitch, meaning it can be untied in a split second even when the rope is frozen or your fingers are numb from the cold. As an expert SEO content writer and technical outdoor gear specialist, I have seen many knots come and go in popularity, but the Siberian Hitch remains a permanent fixture in the kit of anyone serious about bushcraft.
In this comprehensive guide, we will explore the history, utility, and the precise method for tying this indispensable knot.
Alternative names for the Siberian Hitch include: The Evenk Hitch, the Evenk Knot, and the Siberian Knot.
What Is a Siberian Hitch?
The Siberian Hitch is a "slipped" hitch used to fasten a rope to a stationary object, most commonly a tree. Its origins are traced back to the Evenk people of Northern Asia—indigenous hunters and reindeer herders who required a knot that could be tied while wearing heavy mittens in sub-zero temperatures.
Practical Uses in the Wilderness
The primary application of the Siberian Hitch is in the creation of a ridgeline for a tarp or shelter. Because it can be tied one-handed and tightened under tension, it is the perfect "starting knot" for a line.
Beyond shelters, it is frequently used for:
- Securing Gear: Lashing equipment to a tree to keep it off the damp ground.
- Animal Tethering: Historically used for reindeer, it provides a secure hold that can be released instantly.
- Emergency Dragging: Creating a quick loop to pull logs or heavy bundles of firewood.
- Laundry Lines: Quickly establishing a line to dry wet clothes near a campfire.
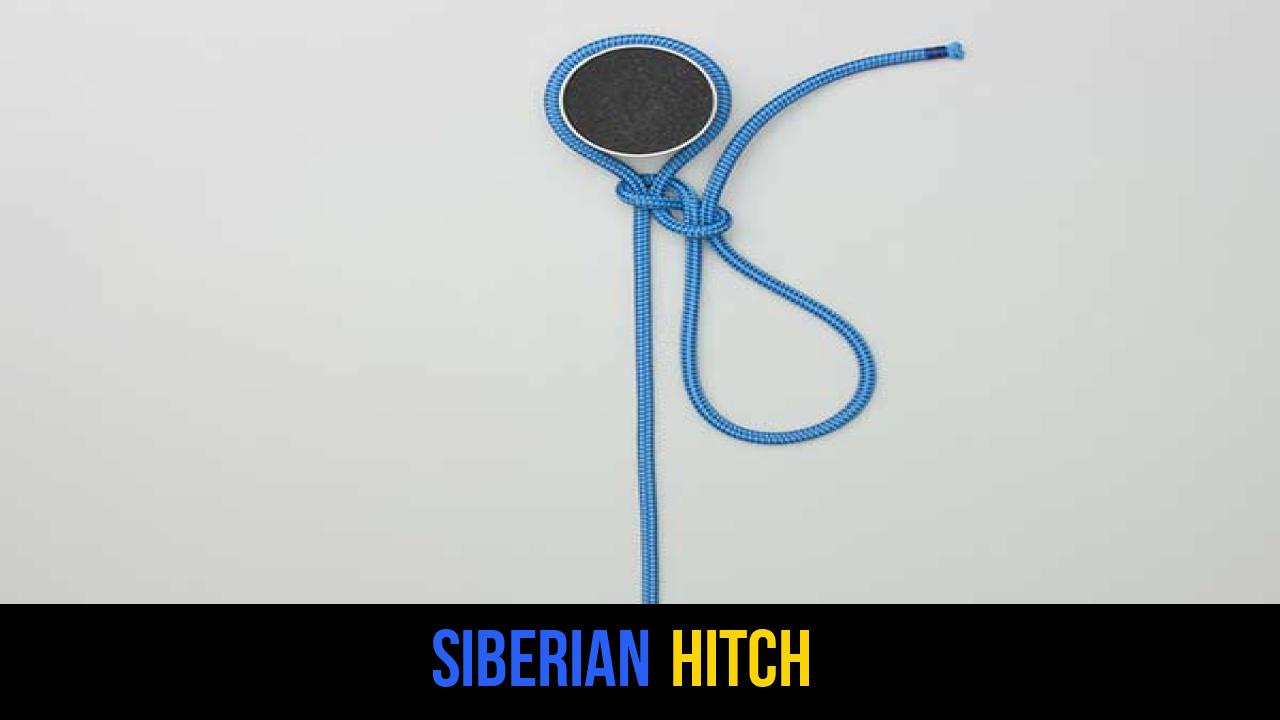
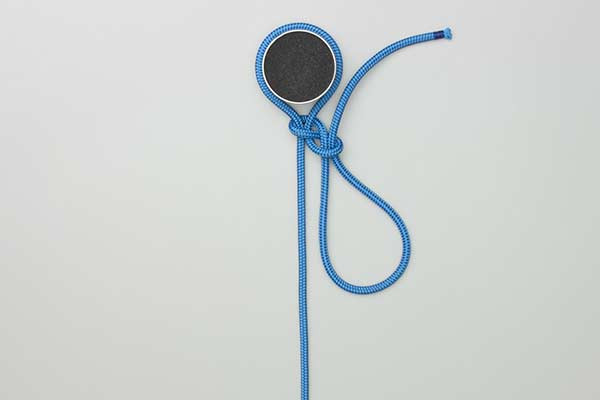
The defining characteristic of this knot is that it results in a slipped figure 8 configuration. This ensures that while the knot remains secure under load, a simple tug on the working end collapses the entire structure instantly.
Materials and Tools Needed
To practice and master rope knots, you must choose the right cordage. The performance of the Siberian Hitch can vary based on the material’s diameter and texture.
Recommended Ropes
- Paracord (550 Cord): The gold standard for bushcraft. Its nylon sheath provides enough friction to hold the hitch while remaining easy to release.
- Bank Line (Tarred Twine): Excellent for permanent or semi-permanent setups. The tar provides exceptional grip on tree bark.
- Static Climbing Cord: If you are using the hitch for heavier utility loads (not life-safety), a 5mm or 6mm static accessory cord works well.
- Natural Fibers (Jute or Sisal): These offer a traditional feel and great "bite" on the wood, though they are less durable than synthetics.
Considerations
- Diameter: A rope between 3mm and 7mm is ideal for this knot. Thicker ropes may become bulky when forming the slipped figure 8.
- Surface Texture: Very "slick" ropes (like some Dyneema blends) may require an extra wrap around the tree to prevent slipping under extreme tension.
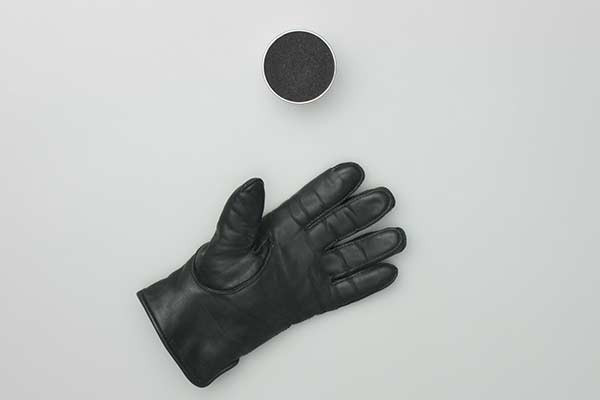
- Gloves: One of the greatest advantages of the Siberian Hitch is that it can be tied with gloves on. Practice both with bare hands and with winter gloves to build true proficiency.
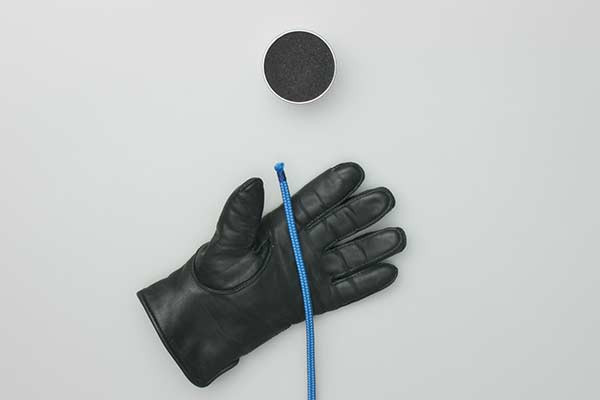
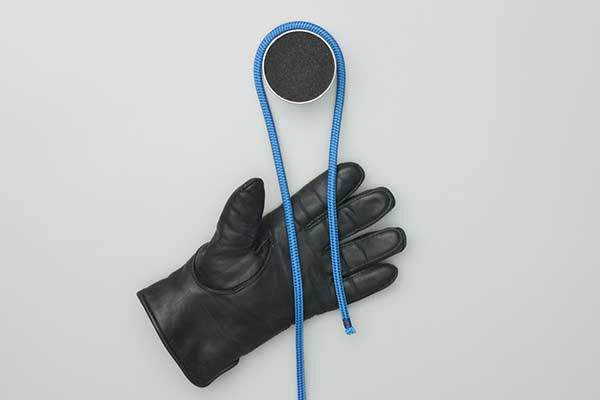
How to Tie a Siberian Hitch?
To master this knot, follow these specific steps carefully. This method is designed for efficiency and speed, even in adverse weather conditions.
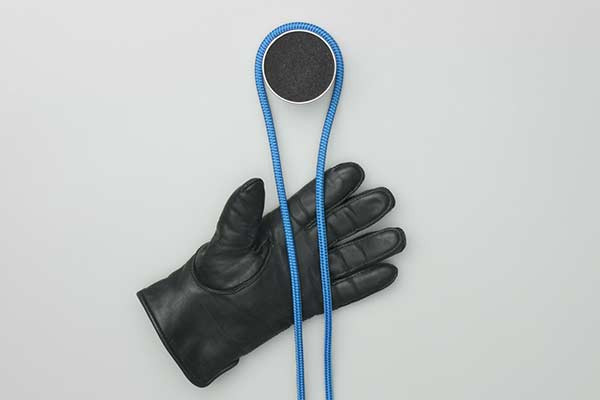
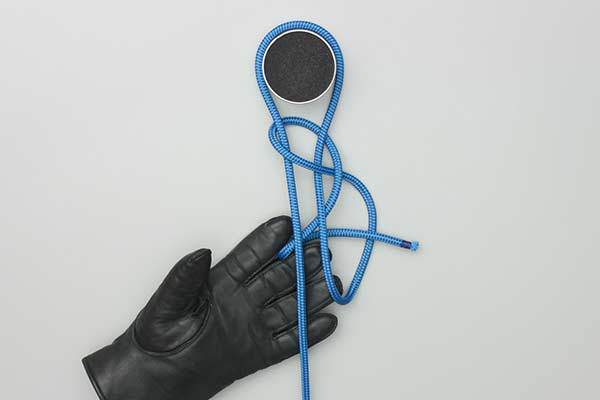
- Pass the rope over your hand, around the tree and back across your hand.
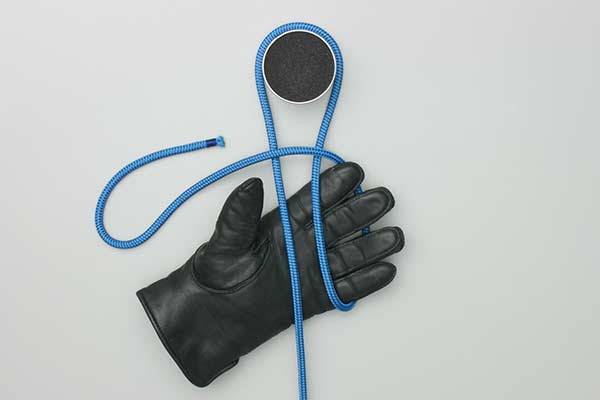
- Then pass the rope under your hand, over both ropes, and back under both ropes.
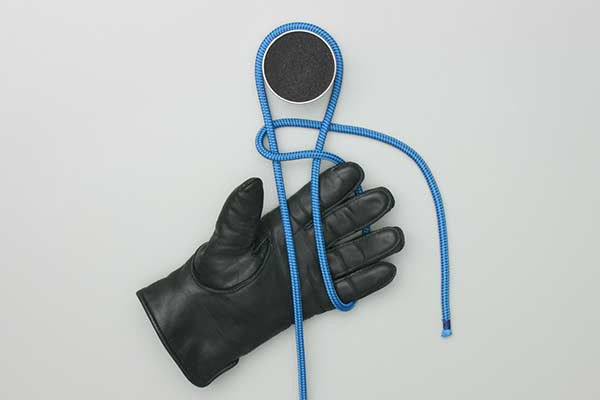
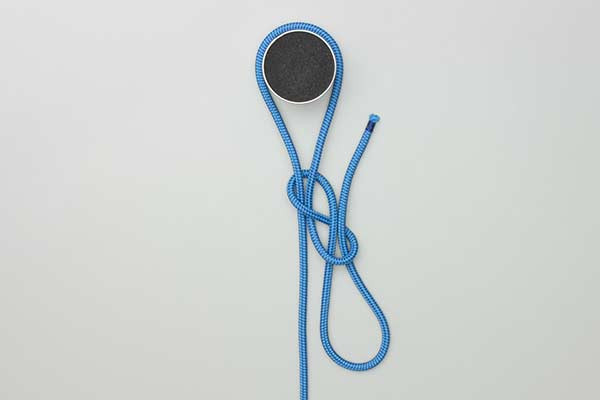
- Tuck a bight between your fingers and pull this bight through the loop.
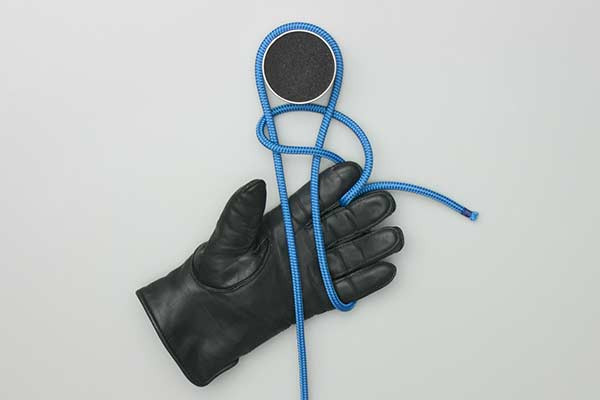
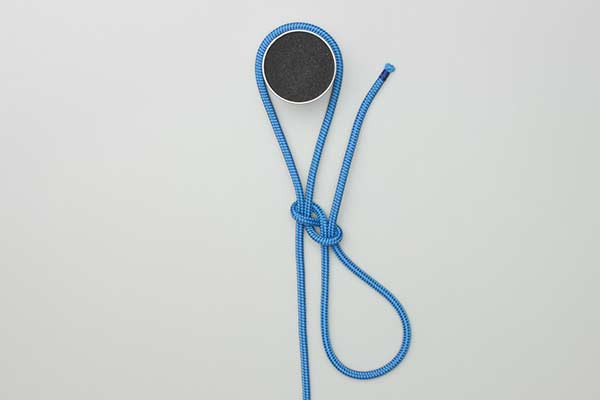
- Tighten the resulting slipped figure 8.
- Finally pull the knot tight against the tree.

Common Mistakes to Avoid
Even with a knot as reliable as the Siberian Hitch, errors in execution can lead to failure. Pay close attention to these common pitfalls:
1. Insufficient Tail Length
Always ensure you have enough of a "tail" (working end) left after the bight is pulled through. If the tail is too short, the weight of the rope itself or a sudden gust of wind on your tarp could accidentally pull the slip-release, causing the knot to vanish.
2. Confusing the Over/Under Sequence
The Siberian Hitch relies on the specific "over-under" geometry to create the figure-8 structure. If you pass the rope over when you should have gone under, the knot may turn into a simple slip knot that jams under heavy tension, defeating the purpose of a quick-release hitch.
3. Tying on Smooth Bark
If you are tying to a very smooth-barked tree (like a young Birch or Beech), the knot may slide down the trunk. To avoid this, ensure the initial wrap around the tree is snug, or use a "round turn" (wrap twice) before beginning the hand-looping process.
4. Safety Warning
While the Siberian Hitch is incredibly strong for camp tasks, it is not a life-safety knot. Never use this hitch for climbing, rappelling, or any scenario where a failure could result in injury. It is a utility knot designed for shelter and gear.
Related Knots and Splicing
Expanding your repertoire of outdoor rope techniques involves learning knots that complement the Siberian Hitch. Here are a few essential companions:
- Bowline: Often called the "King of Knots," the Bowline creates a fixed loop at the end of a rope that will not slip or bind under load.
- Taut-Line Hitch: An adjustable friction hitch used on lines under tension; it is the perfect partner for the Siberian Hitch when tensioning the opposite end of a ridgeline.
- Trucker’s Hitch: A compound knot that provides a 3:1 mechanical advantage, allowing you to pull a rope incredibly tight before securing it.
- Prusik Knot: A friction hitch used to attach a smaller loop of cord to a main ridgeline, allowing for adjustable attachment points for tarps or lanterns.
- Clove Hitch: A simple binding knot used to secure a rope to a post or spar; while quick, it is less secure than the Siberian Hitch for heavy tension.
Final Words
The Siberian Hitch is more than just a way to tie a rope to a tree; it is a testament to the ingenuity of indigenous cultures who mastered their environment through simple, effective tools. For the modern hiker, camper, or bushcraft enthusiast, mastering this knot provides a significant advantage in camp efficiency.
By practicing the steps—passing the rope over the hand, creating the loop, and pulling through the bight—you develop the muscle memory required to perform under pressure. Whether you are setting up a survival shelter in a downpour or simply hanging a hammock for a summer afternoon, the Siberian Hitch will remain one of the most valuable rope knots in your tactical arsenal.
Keep your ropes dry, your knots tight, and always test your anchors before trusting them with your gear. Happy adventuring!
