

In the world of professional rigging, maritime operations, and high-end outdoor exploration, the strength of your connection is only as good as the technique used to secure it. While standard rope knots serve a multitude of purposes, certain applications require a more sophisticated approach. Enter the Sliding Splice, a specialized method that bridges the gap between a traditional knot and a permanent splice.
Whether you are a seasoned arborist, a maritime professional, or a dedicated outdoor enthusiast looking to expand your repertoire of outdoor rope techniques, understanding the mechanics of the Sliding Splice knot is invaluable. This technique offers a unique combination of adjustability and mechanical security that few other knots can replicate.
Alternative Names: The Rod-Assisted Splice, Adjustable Loop Splice, Sliding Eye Splice, and The Mandrel Splice.
What Is a Sliding Splice?
The Sliding Splice is a mechanical rope-joining method that utilizes internal friction and strand manipulation to create a secure, often adjustable loop or connection. Unlike a standard "knot" that relies on external bends and hitches, a splice involves the interweaving of rope strands into the standing part of the rope.
Practical Uses and Applications
The Sliding Splice is particularly favored in scenarios where a traditional eye splice might be too permanent, but a bowline or figure-eight loop might be too bulky or prone to slipping under specific mechanical loads.
- Marine Rigging: Used for creating adjustable leads where the rope needs to maintain a high percentage of its original tensile strength.
- Industrial Lifting: Often employed when using synthetic fibers that require a distributed load across the strands rather than a single pinch point.
- Advanced Camping and Bushcraft: Ideal for heavy-duty tensioning systems where a sliding mechanism is required to tighten a structural line.
- Arborist Work: Utilized in friction hitch systems and specialized climbing lines where smooth transitions through hardware are necessary.
The primary advantage of the Sliding Splice knot is its ability to distribute tension evenly across the rope’s fibers, significantly reducing the risk of "knot failure" caused by sharp bends.
Materials and Tools Needed
To execute a Sliding Splice correctly, you cannot rely on your hands alone. This technique requires specific tools to manipulate the lay of the rope without damaging the fibers.
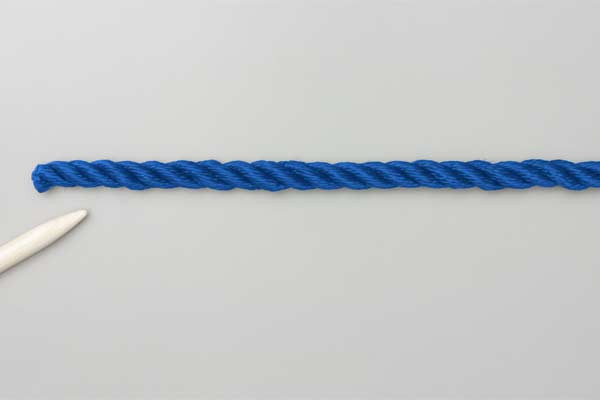
- The Primary Rope: Typically, a three-strand twisted rope (nylon, polyester, or polypropylene) is best for beginners. Advanced users may use 12-strand hollow-braid ropes.
- A Tapered Rod (Fid): This is a pointed tool used to open the strands of the rope. In professional settings, this is often called a "fid" or a "marlinspike."
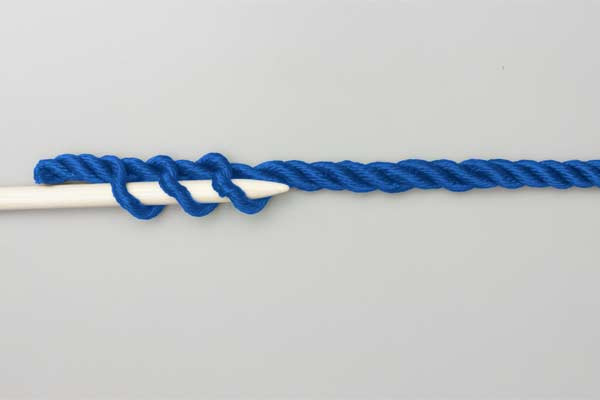
- Six Separate Rods (Mandrels): These smaller rods are used as placeholders to maintain the opening in the strands and to facilitate the "sliding" action of the splice.
- Marking Pen: Essential for marking the entry and exit points of the strands to ensure symmetry.
- Gloves: High-quality leather or synthetic work gloves are recommended to protect your hands from rope burn and to provide a better grip on the rods.
- Tape or Heat Sealer: To prevent the "bitter end" of the rope from fraying during the process.
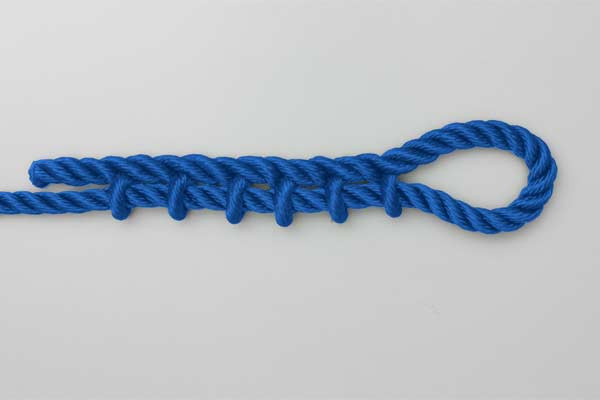
How to Tie Sliding Splice?
Tying the Sliding Splice requires precision and a steady hand. Follow these instructions exactly as outlined to ensure a secure and functional result.
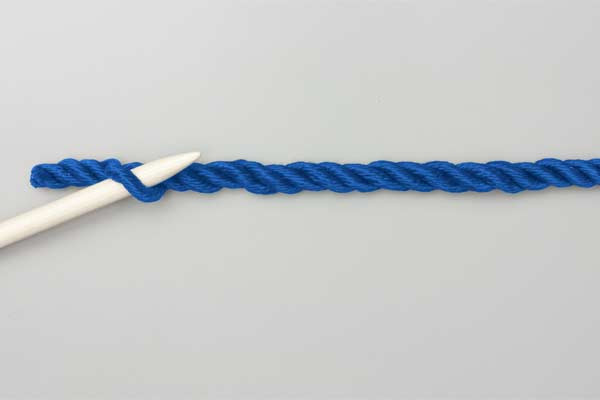
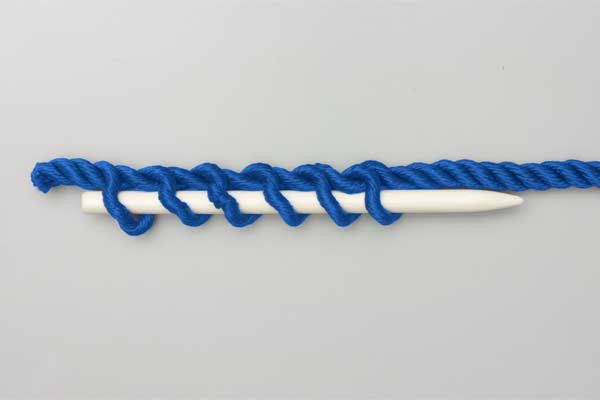
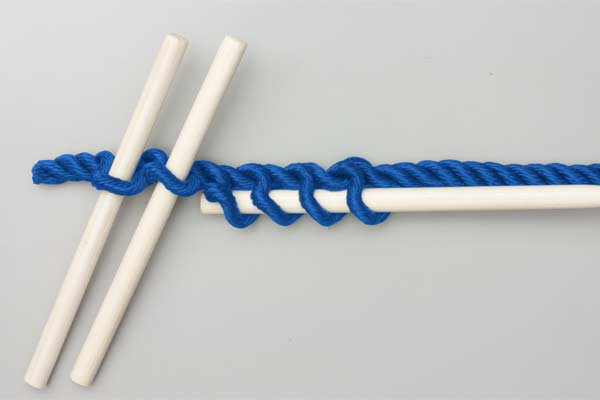
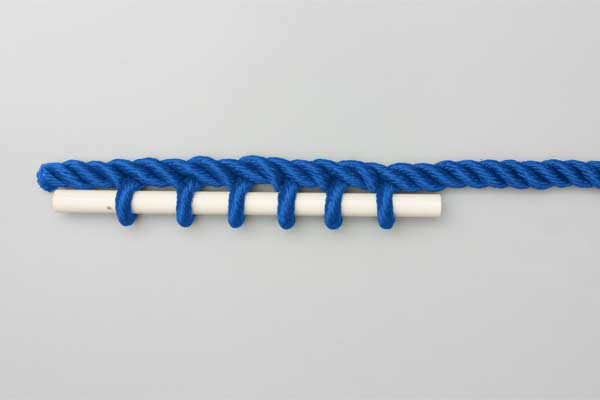
- Use a rod with a tapered end to open up alternate strands.
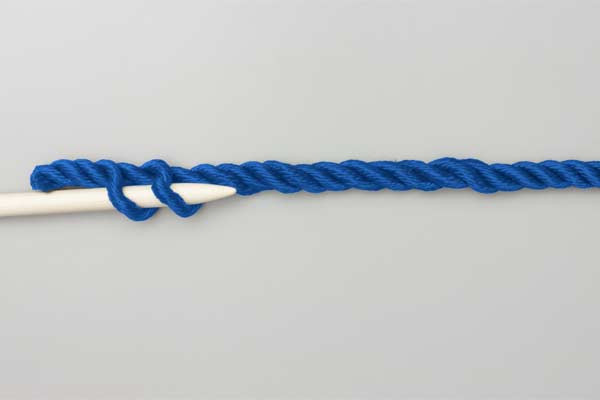
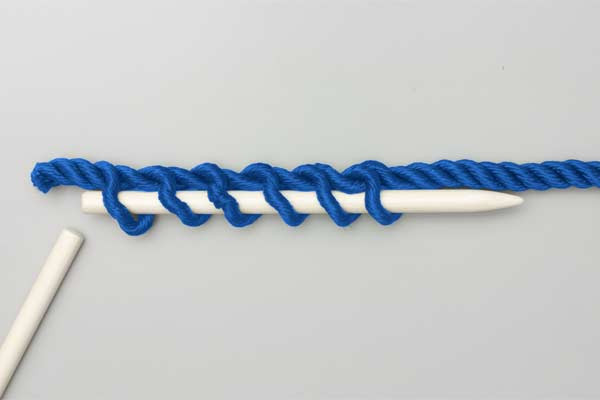
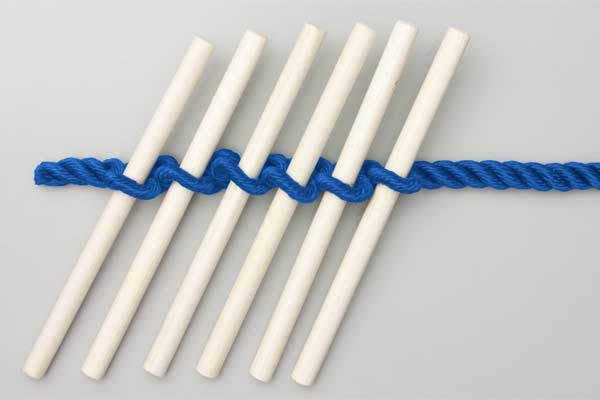
- Replace this rod with six separate rods.
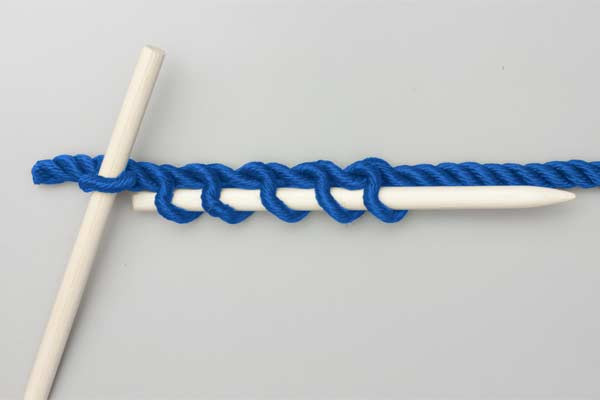
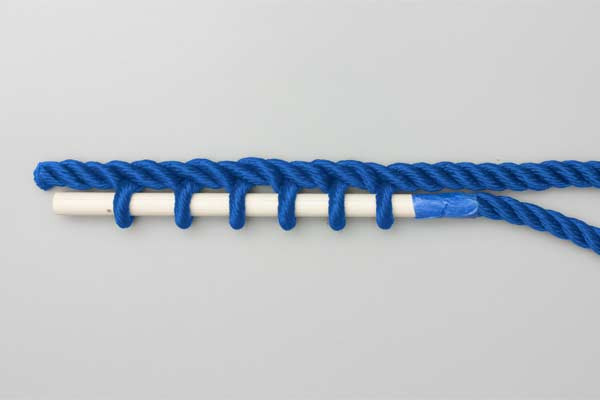
- Rotate each rod to make a larger twisted loop.
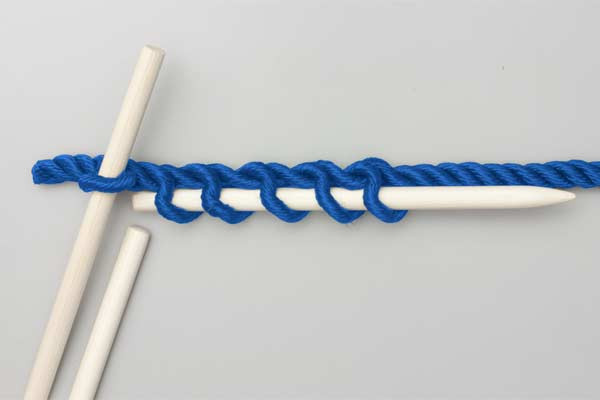
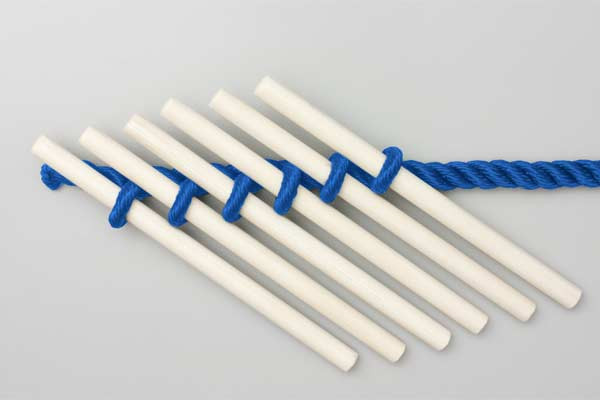
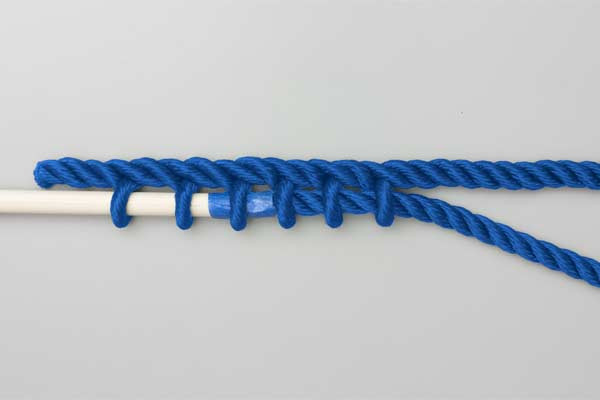
- Pass the rod from one end through all the loops.
- Attach the other end of the rope to this rod.
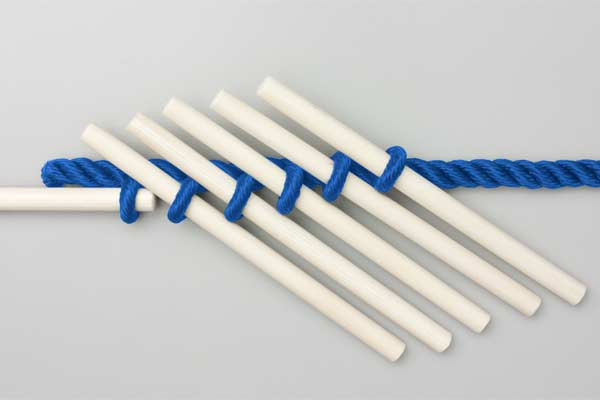
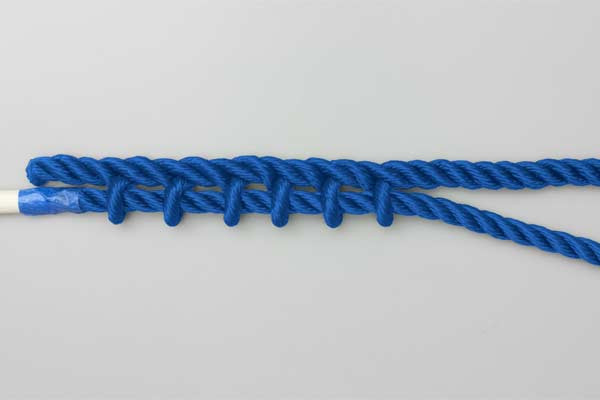
- Pull the rope through the loops to complete the knot.


Common Mistakes to Avoid
Even for experts, the Sliding Splice knot can be tricky. Precision is the difference between a secure line and a dangerous failure.
1. Improper Tapering
If the initial tapered rod is not inserted correctly, you may pierce the individual fibers of the strands rather than passing between them. This weakens the rope’s structural integrity. Always ensure you are opening the "lay" of the rope, not the fiber itself.
2. Inconsistent Loop Size
When you rotate each rod to create the twisted loops, ensure that each rotation is uniform. If one loop is tighter than the others, the tension will be unevenly distributed, which can cause the splice to "bunch" or slip under heavy loads.
3. Forgetting the "Bitter End" Preparation
Always tape or whip the end of the rope before attempting to pull it through the loops. If the strands begin to unravel mid-pull, the splice will become jammed, and you will likely have to cut the rope and start over.
4. Safety Considerations
Never use a Sliding Splice for critical life-safety applications (such as rock climbing or professional arboriculture) unless you have been formally trained by a certified instructor. While the technique is robust, the margin for error in manual splicing is higher than in factory-terminated lines.
Related Knots and Splicing
Expanding your knowledge of rope knots and splicing will make you more versatile in the field. Here are a few techniques related to the Sliding Splice:
- The Eye Splice: A permanent loop formed at the end of a rope by tucking the strands back into the standing part. It is the strongest way to create a permanent loop.
- The Short Splice: Used to join two ropes of the same diameter together. It creates a slight bulge in the rope but maintains nearly 100% of the rope’s breaking strength.
- The Back Splice: A method of finishing the end of a rope to prevent fraying by tucking the strands back into themselves, creating a thick, finished handle.
- The Flemish Eye: Often used in wire rope but applicable to some synthetics, this involves "unlaying" the rope and re-weaving it to form a high-strength loop.
- The Bowline Knot: While not a splice, it is the standard "king of knots" for creating a fixed loop quickly. It is less strong than a splice but much faster to tie.
Final Words
The Sliding Splice is a testament to the sophistication of traditional outdoor rope techniques. By moving beyond simple knots and into the realm of splicing, you gain a deeper understanding of how rope fibers interact under tension. This technique is not just about utility; it is about the "mechanical advantage" and the elegance of high-friction security.
Whether you are securing gear on a maritime vessel, setting up a complex rigging system for a backcountry expedition, or simply honing your skills as a craftsman, the Sliding Splice knot is a powerful tool in your arsenal. Remember that practice is key—perform this splice several times with scrap rope before relying on it for high-stakes applications.
By mastering the use of the tapered rod and the six separate rods, you ensure that your connections are not just knots, but engineered solutions for the challenges of the great outdoors. Keep your lines clean, your rods straight, and your splices tight.
