
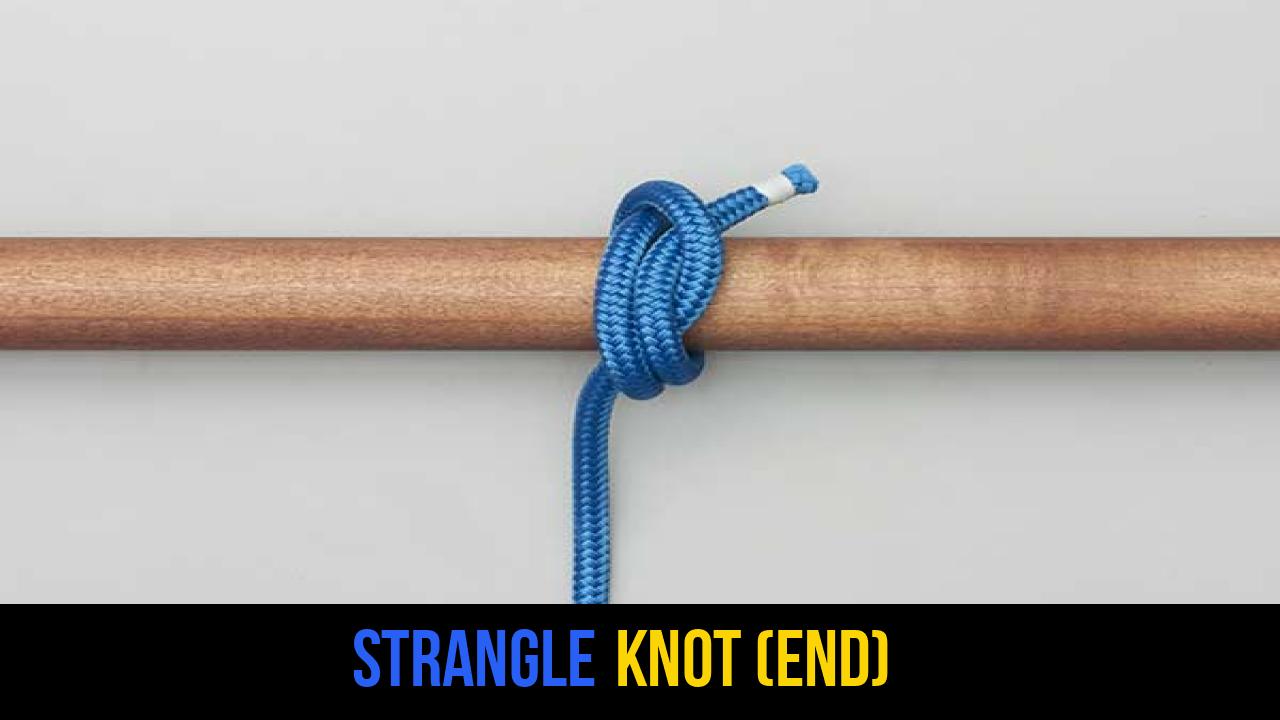
In the world of rope knots, few categories are as essential yet overlooked as binding knots. Whether you are a seasoned sailor, a bushcraft enthusiast, or a technical outdoor specialist, understanding how to secure an object firmly is a foundational skill. Among the most effective tools in your repertoire is the Strangle Knot (End).
Known for its incredible gripping power and simplicity, the Strangle Knot is a variation of the double overhand knot, but instead of being tied in the air as a stopper, it is tied around an object. It is a "permanent" or "semi-permanent" binding knot, meaning that once it is pulled tight, it can be notoriously difficult to untie. This characteristic makes it a favorite for tasks where security is the absolute priority.
Throughout this guide, we will explore the mechanical advantages of this knot, the best materials to use, and a precise step-by-step tutorial on how to master it.
Alternative Names: Double Overhand Binding Knot, Bull Knot (in some regions), Stranglehold Knot.
What Is a Strangle Knot?
The Strangle Knot (End) is a specialized binding knot designed to exert high pressure on a cylindrical object. Unlike a hitch, which is meant to secure a rope to a post for hauling or tethering, a binding knot is meant to constrict.
Practical Uses and Applications
The utility of the Strangle Knot spans across multiple disciplines:
- Whipping Rope Ends: In a pinch, the Strangle Knot can be used to prevent the ends of a natural fiber rope from fraying.
- Securing Sacks: It is one of the most reliable ways to tie off the neck of a heavy bag (such as grain or sand).
- Emergency Hose Repair: Because of its high constriction, it can be used to bind a piece of rubber over a leak in a low-pressure hose.
- Lashing Frameworks: In bushcraft and survival scenarios, it is used to start or finish lashings for shelters and tools.
- Bundling: Ideal for securing rolls of sleeping mats, firewood, or loose cables that need to stay tight during transport.
The primary advantage of the Strangle Knot over its close cousin, the Constrictor Knot, is that it is slightly easier to tie in certain configurations, though it lacks the "locking" bridge of the Constrictor. However, for most outdoor rope techniques, the Strangle Knot provides more than enough security.
Materials and Tools Needed
To achieve the best results with the Strangle Knot, you must consider the relationship between the rope material and the object being bound.
Recommended Rope Types
- Paracord (550 Cord): Excellent for small-scale binding. The nylon sheath provides enough friction to hold the knot, though the elasticity may require an extra tug.
- Bank Line (Tarred Twine): Perhaps the best material for this knot. The tar adds "bite," making the Strangle Knot nearly impossible to slip.
- Natural Fibers (Manila/Hemp): These offer great surface friction. The Strangle Knot performs exceptionally well on natural wood surfaces when using these ropes.
- Static Kernmantle: For heavy-duty applications, a 6mm or 8mm accessory cord works well, though the knot will be bulky.
Tools and Considerations
- The "Bar" or Object: This knot requires a solid, preferably cylindrical, anchor point. It does not work on flat surfaces.
- Marlinspike or Fid: Since this knot is designed to be tight, you may need a tool to help dress the knot or untie it if you change your mind.
- Gloves: When pulling the knot tight to its maximum capacity, gloves prevent "rope burn" on your palms.
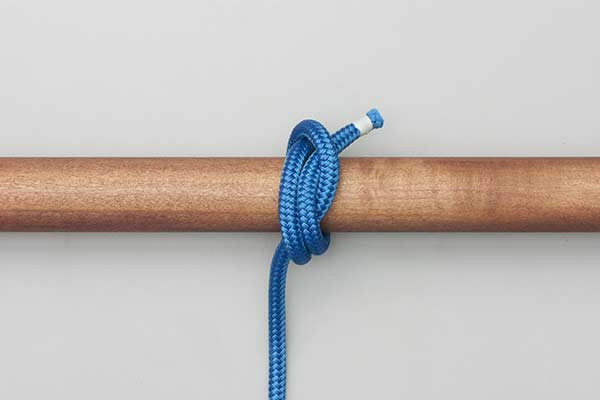
How to Tie Strangle Knot (End)?
To ensure the highest level of security, follow these instructions precisely. The structural integrity of the knot depends on the correct overlap of the turns.
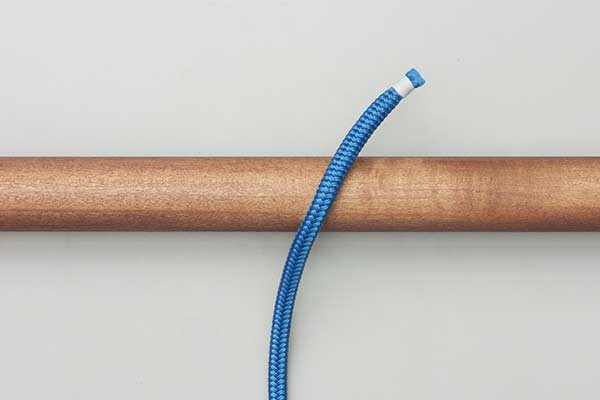
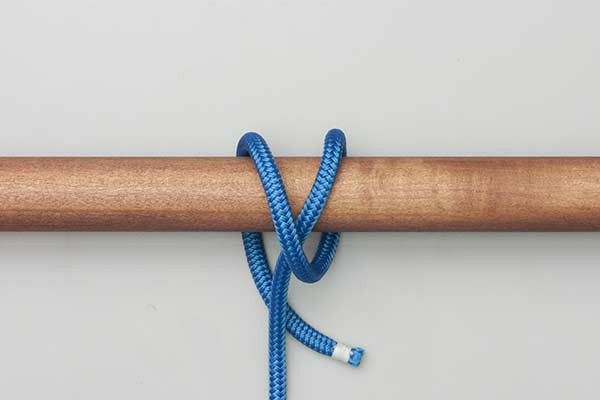
- Pass the rope around the bar and then across the first turn.
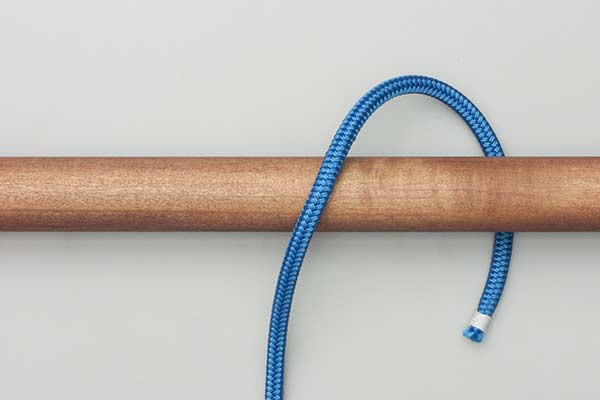
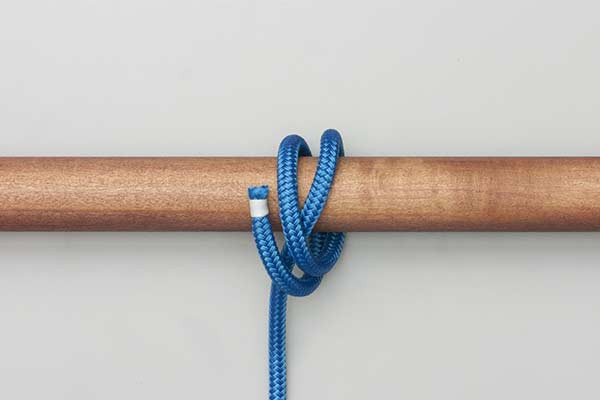
- Pass the rope around a second time following the same path.
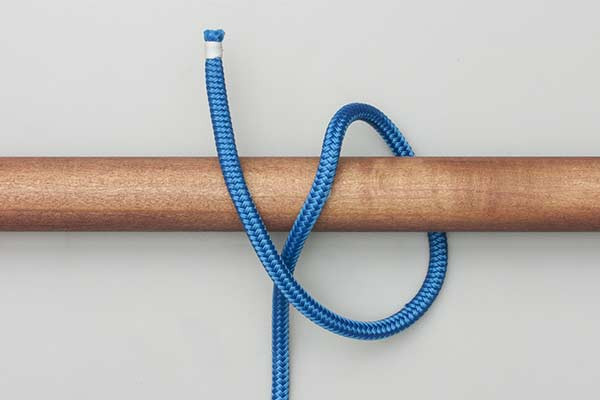
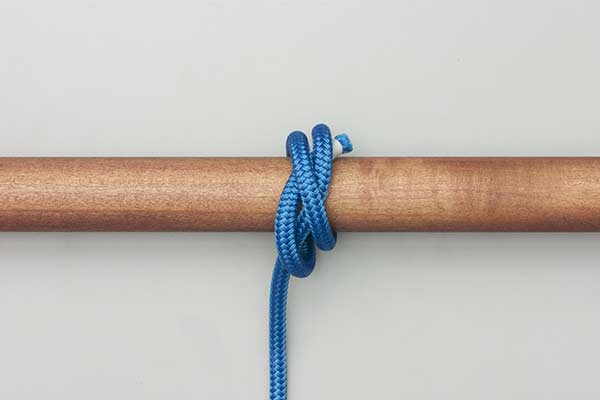
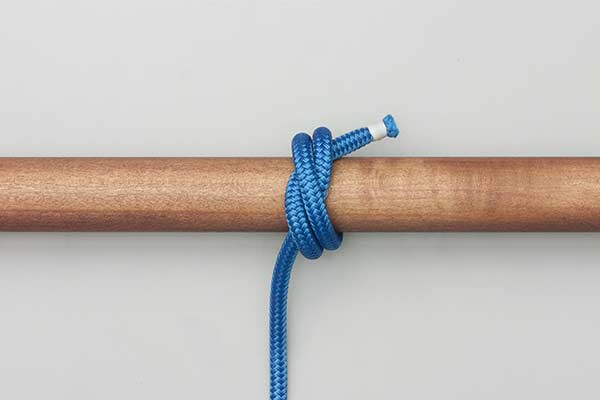
- Then tuck the rope under both of the first turns and pull tight.
Note: If the knot is laid incorrectly, the knot becomes a less secure half knot beside the two loops.
Common Mistakes to Avoid
Even expert knot-tiers can occasionally miss the nuances of the Strangle Knot. To ensure your outdoor rope techniques remain safe and effective, watch out for these common errors:
1. The "Half Knot" Misplacement
As noted in the instructions, if the working end does not tuck properly under both of the initial turns, the knot collapses into a simple half knot sitting next to two loops. This configuration has zero binding power and will slide off the bar under the slightest tension. Always visually inspect that the working end is trapped beneath the "X" or the parallel turns.
2. Lack of Dressing
"Dressing" a knot refers to straightening the strands so they lie neatly against each other. If the turns of the Strangle Knot overlap randomly, the friction is distributed unevenly. This can lead to the knot loosening over time as the rope fibers settle.
3. Using Braid-on-Braid Synthetic Ropes
Some high-performance yachting ropes are designed to be extremely "slick." On these materials, the Strangle Knot may struggle to bite. If you must use a slick synthetic rope, ensure you leave a long enough tail (working end) to prevent it from being sucked back through the knot.
4. Safety Warning: Permanent Binding
Never tie a Strangle Knot around a living thing (animal or human) or around a limb. Because the knot is designed to tighten under tension and is difficult to remove, it can quickly cut off circulation or cause injury. In emergency rescue scenarios, always use knots that can be easily released or cut if necessary.
Related Knots and Splicing
Understanding the Strangle Knot is a gateway to learning other high-friction binding knots. Here are a few related techniques:
- Constrictor Knot: A more powerful version of the Strangle Knot that includes an extra "twist" to lock the ends in place permanently.
- Clove Hitch: A fundamental hitch that is easier to tie and untie, but can slip if the rope is stiff or the load is inconsistent.
- Double Overhand Knot: The base structure of the Strangle Knot, used primarily as a stopper knot at the end of a rope.
- Miller’s Knot: A variation used specifically for tying sacks, offering a slightly different crossing pattern for easier tightening on fabric.
- Boas Knot: An even more complex binding knot that provides massive surface area contact for heavy-duty cylinders.
Final Words
The Strangle Knot (End) is a testament to the efficiency of simple geometry. By simply wrapping a rope and tucking it under its own turns, you create a mechanical clamp that can withstand significant force. Whether you are securing gear to a roof rack, bundling kindling for a campfire, or performing emergency repairs in the wilderness, the Strangle Knot is a reliable partner.
Mastering this knot is about more than just memorizing steps; it is about understanding how friction and tension work together to create security. Practice with different rope diameters and materials to see how the knot reacts, and soon it will become a permanent part of your technical skill set. Remember: a knot is only as good as the person tying it—so practice until you can tie the Strangle Knot perfectly, even in the dark.
