

In the world of outdoor rope techniques, few connections are as revered and versatile as the Uni Knot. Known for its incredible strength-to-diameter ratio and its ability to maintain integrity under extreme tension, this knot is a fundamental skill for anyone from weekend campers to professional anglers and maritime specialists. Whether you are securing a shelter, rigging a line, or connecting terminal tackle, the Uni Knot offers a level of reliability that few other rope knots can match.
The beauty of this knot lies in its "universal" nature. It is not just a single-purpose hitch; it is a mechanical system that can be adapted for joining two lines together (the Uni-to-Uni splice) or creating a loop that can be cinched down tight or left open. For those who prioritize safety and efficiency in the wilderness, mastering this technique is non-negotiable.
Commonly known by several names depending on the region and specific application, the Uni Knot is also frequently referred to as:
- The Duncan Knot (after its popularizer, Norman Duncan)
- The Grinner Knot
- The Universal Knot
What Is a Uni Knot?
The Uni Knot is a multi-purpose hitch used primarily for attaching a line to an object, such as a ring, an eyelet, or a post. Unlike the Improved Clinch Knot, which can sometimes fail with modern synthetic materials, the Uni Knot is uniquely suited for a wide variety of line types, including monofilament, fluorocarbon, and even some braided ropes.
Technically, it is a "sliding" knot. When tension is applied to the standing part of the line, the internal wraps of the knot tighten against each other, creating a "strangle" effect on the main line. This internal friction is what gives the knot its legendary status in outdoor rope techniques. It typically retains about 90% to 95% of the line’s original breaking strength, making it one of the strongest connections available to the modern outdoorsman.
Practical Uses in the Field
- Fishing and Marine: Its most common use is securing a line to a hook or lure. Its ability to remain secure even when the line is subjected to sudden shocks makes it ideal for heavy-duty marine use.
- Camping and Survival: The Uni Knot can be used to secure guy-lines for tents or tarps. Because it can be tied as a "sliding" loop, it allows for easy tensioning.
- General Utility: From bundling firewood to securing gear to a backpack, the Uni Knot provides a secure, non-slip hold that is relatively easy to untie when the tension is released, provided the line material is not too thin.
Materials and Tools Needed
To practice and perfect the Uni Knot, you will need a few basic materials. While the knot is often associated with thin fishing lines, practicing with larger cords can help you visualize the internal "spirals" that make the knot so effective.
Recommended Lines
- Monofilament or Fluorocarbon: These are the standard for terminal tackle. Their slightly "stretchy" nature allows the knot to seat perfectly.
- Paracord (550 Cord): For beginners, using paracord is an excellent way to learn rope knots. The thickness allows you to see the wraps clearly.
- Utility Rope: Any braided or twisted utility rope used in outdoor rope techniques will work, provided it is flexible enough to form small loops.
Essential Tools
- A "Post" or Eyelet: To tie the knot correctly, you need an anchor point. This could be a metal ring, a carabiner, or a sturdy branch.
- Cutting Tool: A sharp knife, multi-tool, or specialized line nippers to trim the tag end once the knot is set.
- Lubrication: This is a critical "tool" for synthetic lines. Water or saliva is used to reduce friction heat during the tightening process.
How to Tie Uni Knot?
Follow these steps precisely to ensure a secure and professional-grade connection. This sequence is designed to maximize the mechanical advantage of the knot’s internal wraps.
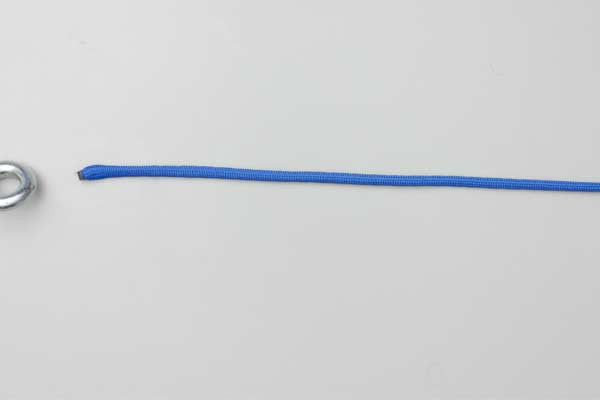
- Pass the end through the eye. Ensure you have enough "tag end" (the working end of the rope) to work with comfortably—usually about 6 to 10 inches.
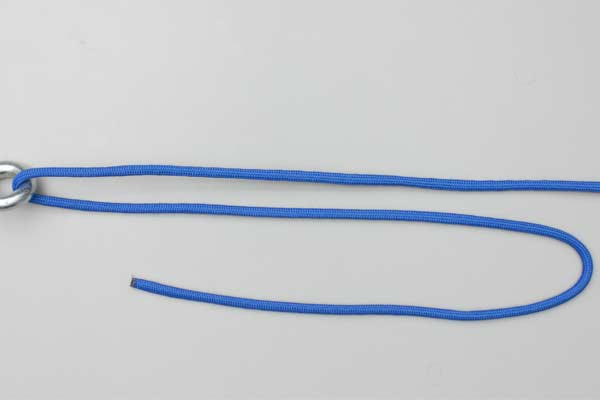
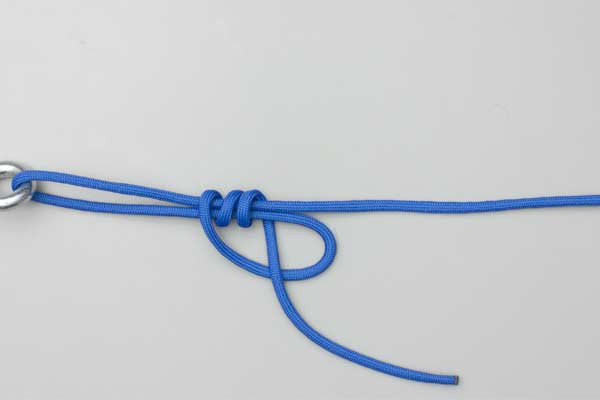
- Form a complete loop alongside the standing line. This loop should be large enough to allow you to pass the tag end through it multiple times.
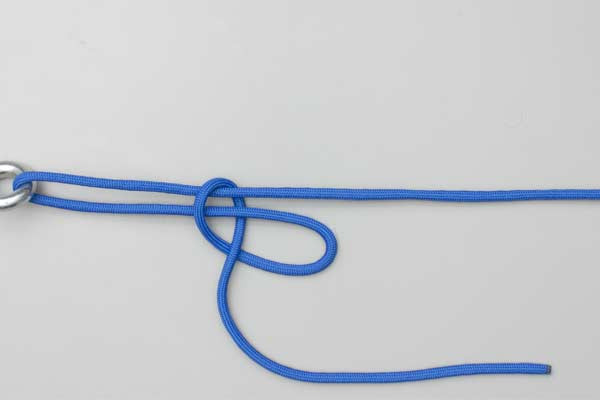
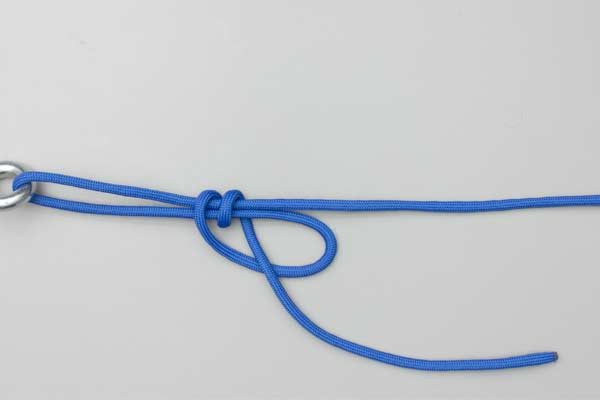
- Working inside the loop, wrap the end around both lines five times. These wraps should be neat and sequential, ensuring they do not overlap haphazardly.
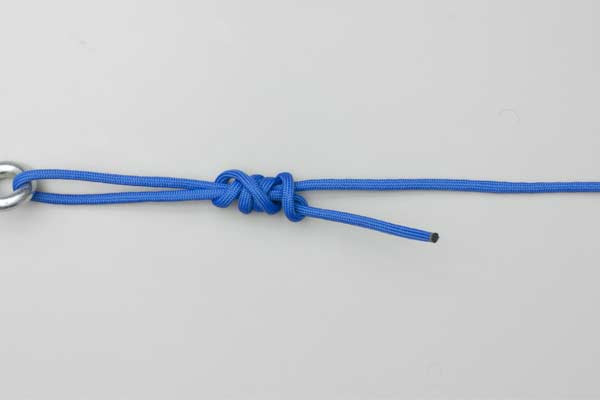
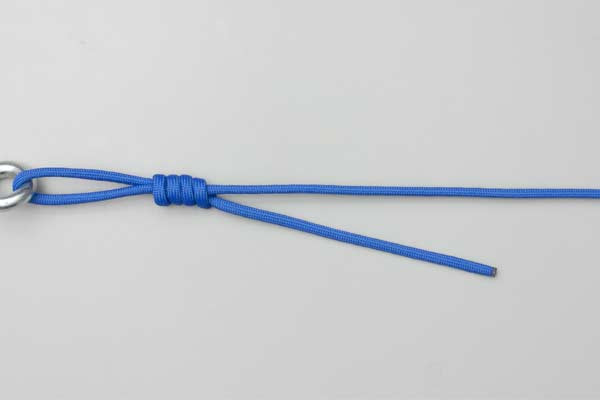
- Lubricate, tighten so the loop spirals, and slide the knot to the desired loop size. Adding moisture prevents friction damage. As you pull, you will see the wraps form a neat, cylindrical spiral.
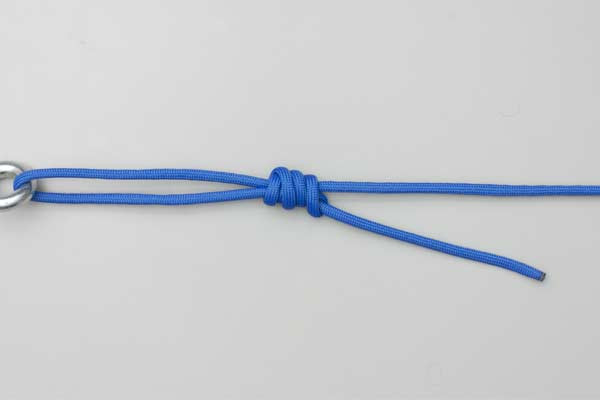
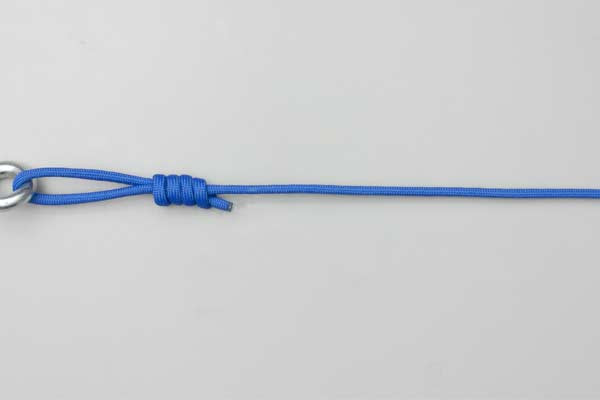
- With the loop on a post pull on the tag end and less hard on the standing line. This "seats" the knot firmly against the anchor point.
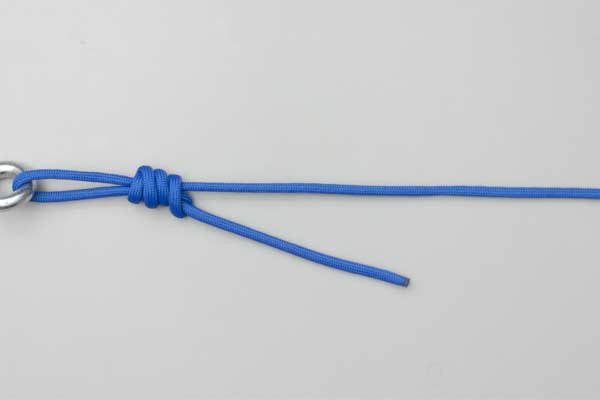
- Trim the end. Leave a small "tail" (about 1/8th of an inch) to allow for any minor settling under extreme load.


Common Mistakes to Avoid
Even experienced practitioners of outdoor rope techniques can make errors that compromise the integrity of the Uni Knot. Awareness of these pitfalls is essential for safety.
- Insufficient Wraps: While the instructions call for five wraps, very thin or slippery lines (like modern braids) may require seven or eight. Using fewer than five wraps can lead to the knot slipping out under heavy tension.
- Failure to Lubricate: This is the most common cause of knot failure. When a knot is pulled tight, the friction generates heat. In synthetic materials, this heat can actually melt or "burn" the line, significantly reducing its breaking strength. Always wet the knot before the final cinch.
- Overlapping Wraps: If the wraps cross over each other rather than sitting in a clean spiral, the line can cut into itself. This creates a weak point where the rope is likely to snap.
- Trimming Too Close: Cutting the tag end flush against the knot is a mistake. Under high stress, all rope knots settle slightly. If there is no "tail," the end might pull back into the knot, causing it to unravel.
Related Knots and Splicing
Understanding how the Uni Knot relates to other rope knots can help you choose the right tool for the job.
- Improved Clinch Knot: A classic terminal tackle knot, favored for its simplicity but often considered less reliable than the Uni Knot in heavy lines.
- Palomar Knot: Renowned for its incredible strength and ease of tying, making it a favorite for braided lines and terminal tackle.
- Blood Knot: The gold standard for joining two lines of similar diameter, creating a slim, symmetrical profile that glides through guides.
- Surgeon’s Knot: A quick and easy way to join lines of unequal diameters, utilizing a double overhand technique for added security.
Final Words
The Uni Knot stands as a testament to the efficiency of modern outdoor rope techniques. Its ability to adapt to various materials and its incredible holding power make it an essential addition to any gear specialist’s repertoire. By following the precise steps of forming the loop, wrapping internally, and lubricating before the final spiral, you ensure a connection that is as close to "fail-proof" as a knot can be.
Whether you are preparing for a deep-sea expedition, setting up a complex campsite, or simply practicing your rope knots at home, the Uni Knot provides the security and confidence needed for any outdoor adventure. Remember: a knot is only as good as the person who ties it. Practice until the motion becomes second nature, and you will have a reliable skill that lasts a lifetime.
