
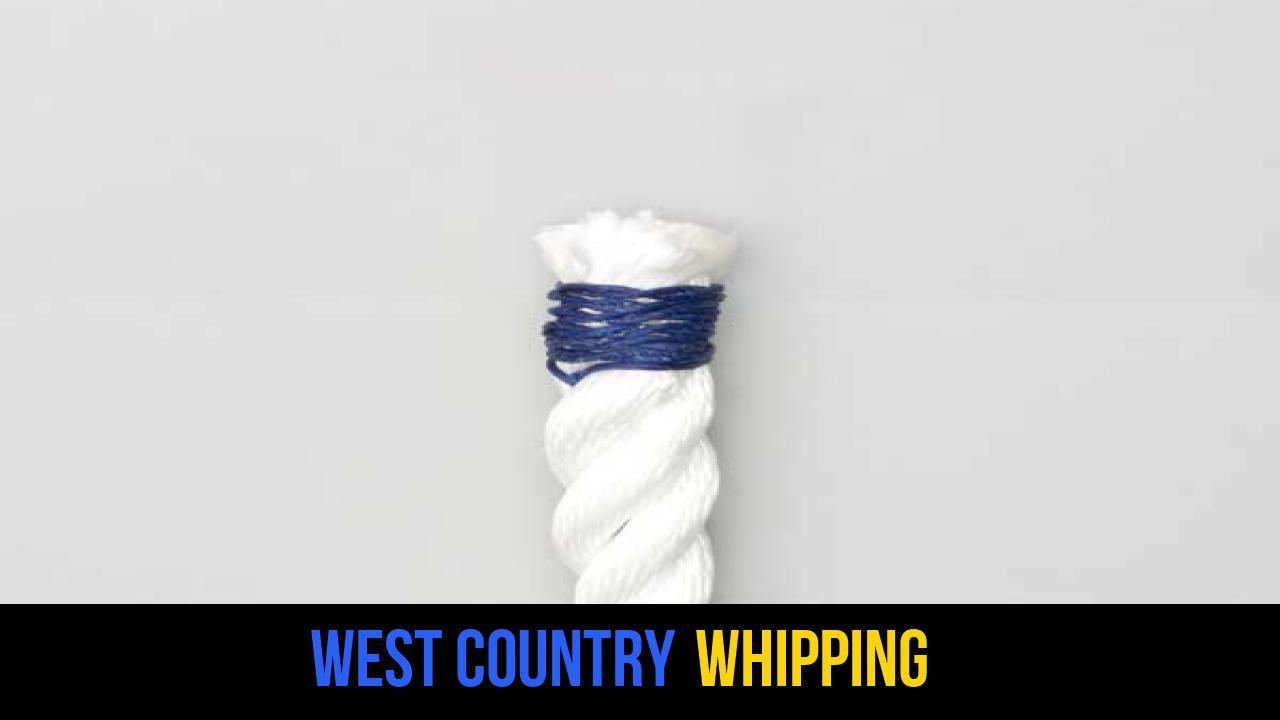
In the world of seamanship, arboriculture, and general outdoor exploration, the integrity of your equipment is paramount. One of the most common issues faced by professionals and hobbyists alike is the unraveling or “fraying” of rope ends. To combat this, several outdoor rope techniques have been developed over centuries, collectively known as “whippings.” Among these, the West Country Whipping stands out as a reliable, symmetrical, and exceptionally secure method for finishing a rope’s end.
Unlike simpler whippings that rely solely on friction and the tension of a single continuous wrap, the West Country Whipping knot utilizes a series of interlocking knots. This mechanical advantage ensures that even if one part of the twine is nicked or worn through, the entire whipping is less likely to fail immediately. It is a favorite among traditionalists and modern gear specialists because it is easy to inspect and performs admirably on both natural fiber and synthetic ropes.
Whether you are preparing gear for a sailing expedition, setting up a campsite, or simply maintaining your workshop tools, mastering the West Country Whipping is a fundamental skill that demonstrates a high level of craftsmanship and attention to detail.
Alternative Names: West Country Whipping, Two-Sided Whipping, Knotted Whipping.
What Is a West Country Whipping?
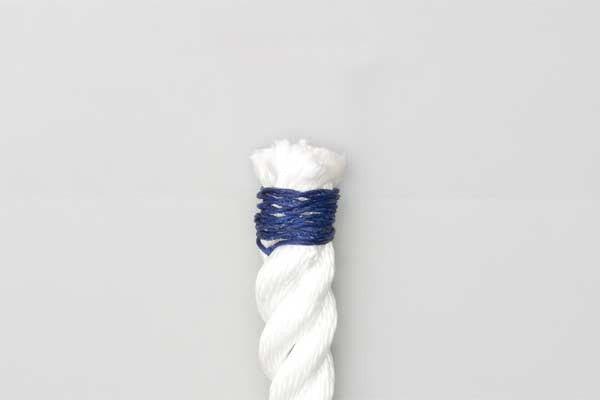
The West Country Whipping is a method of binding the end of a rope using a series of half knots tied on alternating sides of the rope. This creates a staggered, robust “sleeve” of twine that prevents the rope’s strands from unlaying.
Practical Uses
While there are many rope knots designed to finish an end (such as the Common Whipping or the Sailmaker’s Whipping), the West Country version is preferred in specific scenarios:
- High-Vibration Environments: Because each turn is knotted, it resists loosening due to constant movement or vibration.
- Emergency Repairs: It can be tied quickly without the need for a sailmaker’s needle, making it an essential outdoor rope technique when tools are limited.
- Aesthetic Appeal: The alternating knots create a distinct, textured look that is often used in decorative rope work or “fancy work.”
- Slippery Synthetic Ropes: On modern ropes made of polypropylene or nylon, friction-only whippings can sometimes slide off. The West Country Whipping’s series of knots provides extra “bite” into the rope’s surface.
Materials and Tools Needed
To achieve a professional-grade result, you must select the right materials. The quality of your whipping is directly tied to the compatibility of your twine and your rope.
1. The Twine
The most common material for whipping is waxed polyester twine. The wax helps the knots “set” and provides a layer of protection against UV rays and moisture. For a traditional look on natural fiber ropes (like manila or hemp), you might use tarred marline or waxed linen thread. As a general rule, the diameter of the twine should be proportional to the rope—usually about 1mm to 1.5mm for standard 10mm-14mm ropes.
2. The Rope
The West Country Whipping works on almost any rope construction, including:
- Three-Strand Laid Rope: The knots nestle perfectly into the “lays” (the grooves between strands).
- Braided Rope: While there are no lays to sit in, the compression of the knots provides excellent grip.
3. Essential Tools
- Sharp Knife or Heavy-Duty Shears: To trim the rope and twine ends.
- Lighter or Heat Source: Essential for sealing the ends of synthetic ropes to prevent initial fraying before you apply the whipping.
- Small Pliers (Optional): Helpful for pulling the final knots tight if you are using heavy twine.
How to Tie West Country Whipping?
Following the traditional methods preserved in maritime history, here are the exact steps to successfully apply a West Country Whipping to your rope.
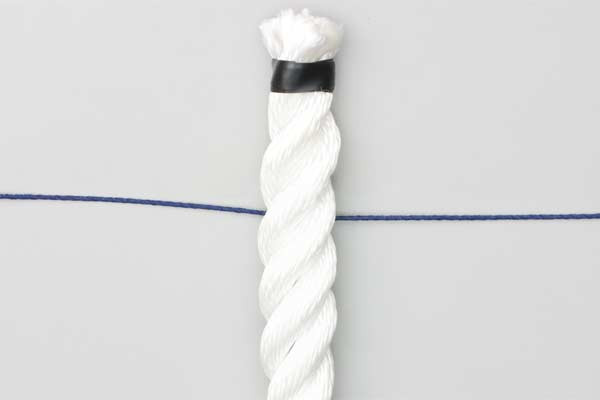
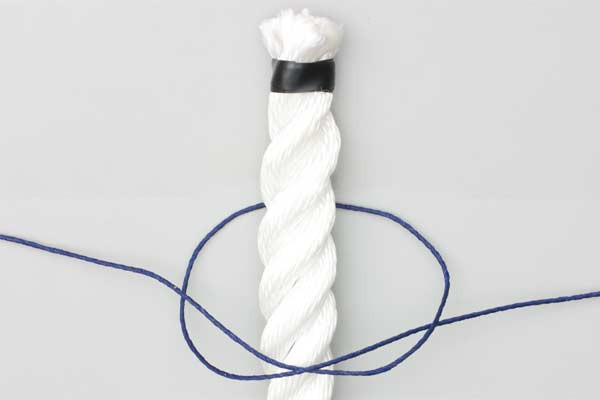
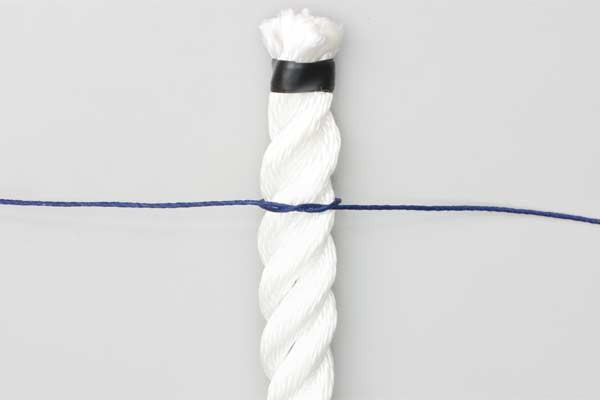
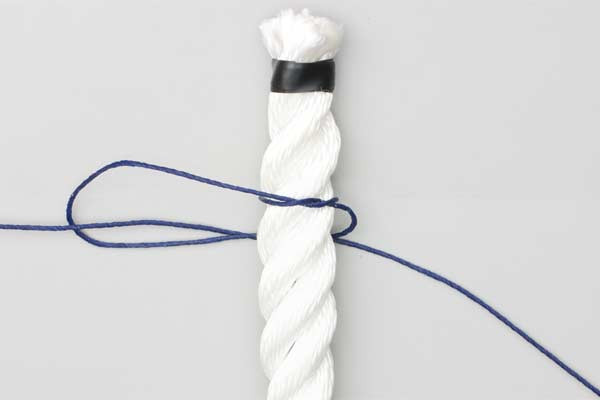
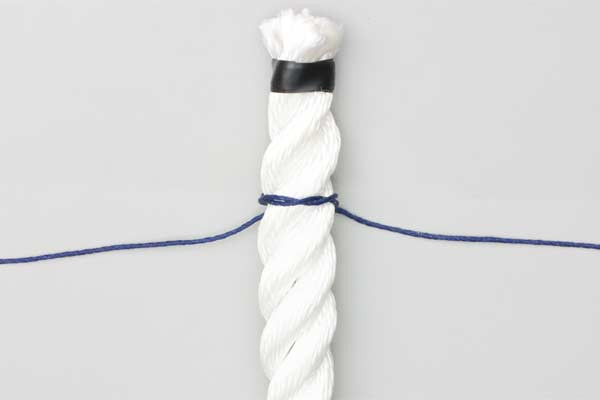
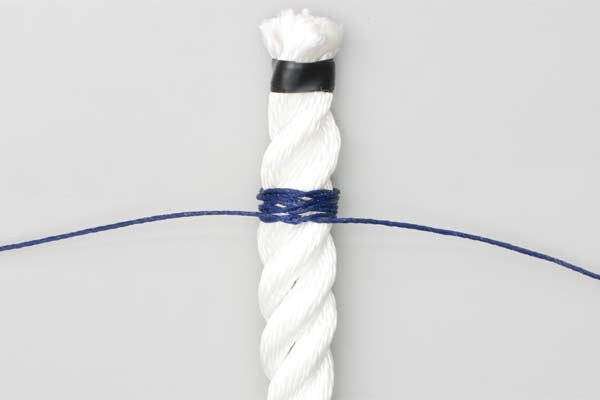
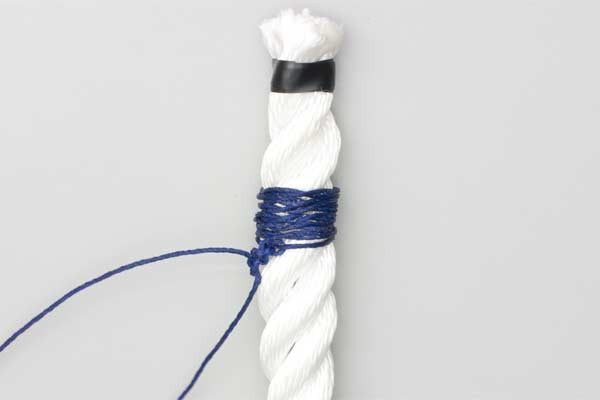
- Pass the twine round the rope and tie a Half Knot.
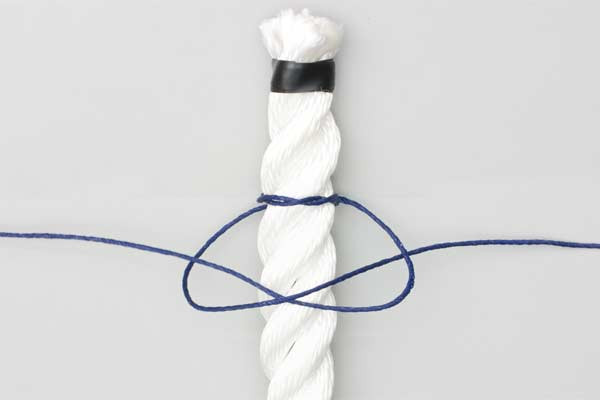
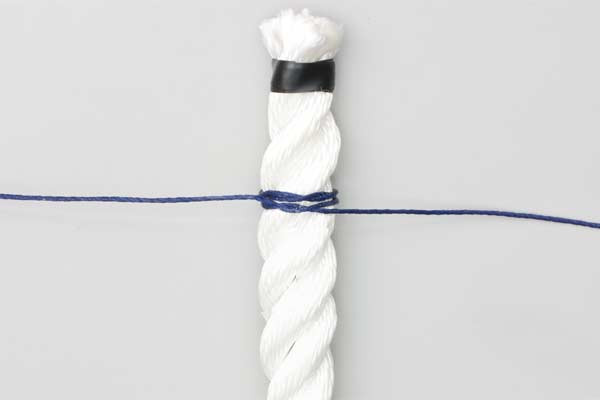
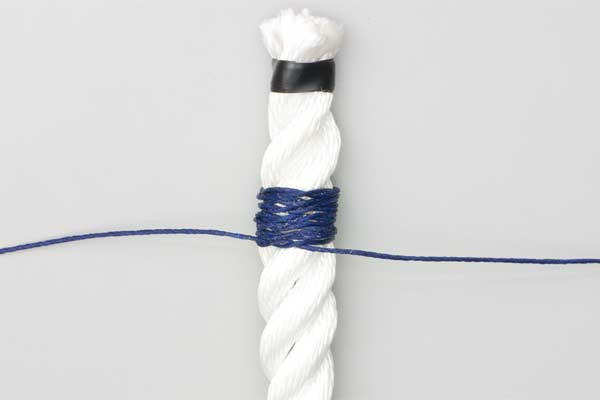
- Repeat behind the rope and tie another.
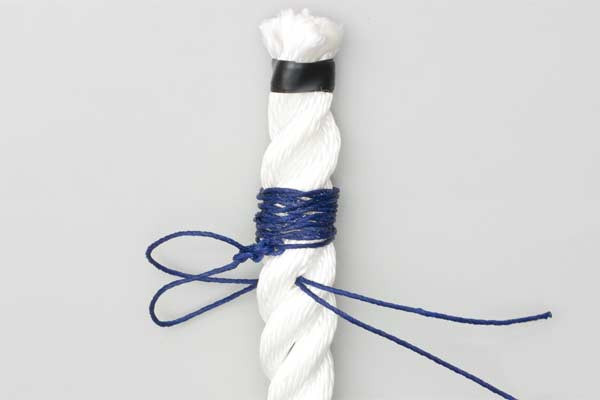
- Continue making Half Knots in front and behind until the length of the whipping equals about the diameter of the rope.
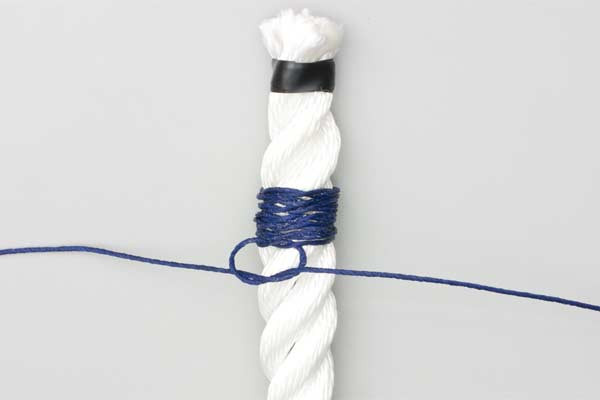
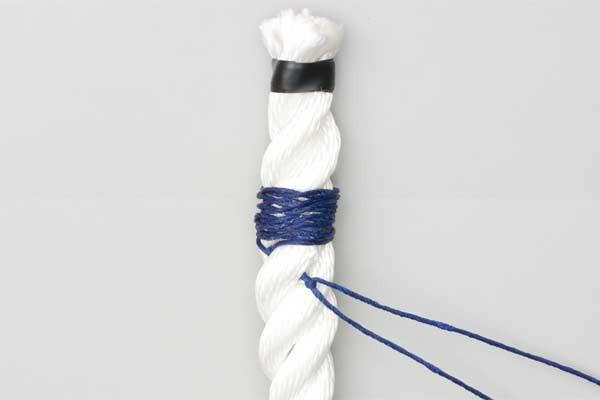
- Finish with several Square (Reef) knots.
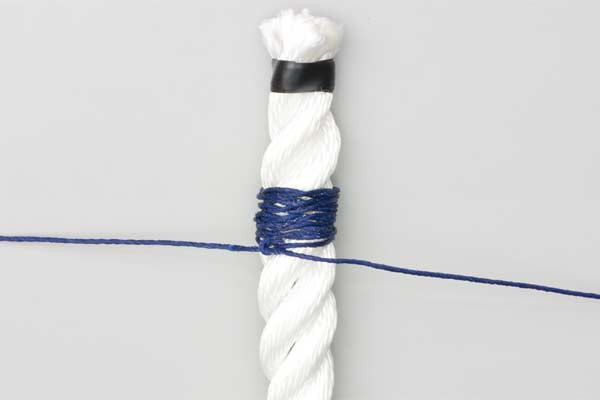
- Pull them through the rope and trim the ends.
Common Mistakes to Avoid
Even seasoned outdoor enthusiasts can run into trouble with the West Country Whipping knot if they rush the process. Here are the most common pitfalls:
Insufficient Tension
Each Half Knot must be pulled very tight. If the knots are loose, the whipping will eventually slide down the rope, especially as the rope shrinks or expands with temperature and moisture changes. Use a steady, firm pull on every turn.
Incorrect Length
A common mistake is making the whipping too short. For maximum security, the length of the whipping should be approximately 1 to 1.5 times the diameter of the rope. If it is too short, it won’t have enough surface area to grip the rope effectively.
Overlapping Knots
Ensure that each Half Knot sits snugly against the previous one. If you allow the twine to overlap randomly, the whipping will become bulky and unsightly, and it may snag on pulleys or hardware.
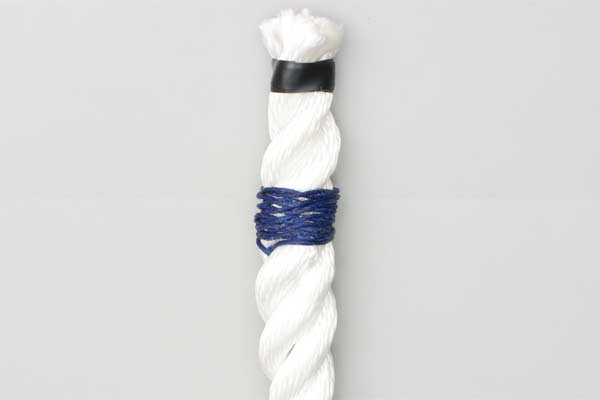
Forgetting the Final Trim
While the instructions state to “trim the ends,” ensure you don’t trim them too close to the Square (Reef) knots initially. Leave a tiny bit of “tail” that can settle into the rope’s fibers over time, or if using synthetic twine, lightly singe the ends with a lighter to create a small “mushroom” head that prevents the knot from pulling through.
Related Knots and Splicing
Expanding your knowledge of outdoor rope techniques involves understanding how different knots compare. Here are a few related methods for rope maintenance:
- Common Whipping: A classic method where twine is wrapped tightly around the rope, with the ends tucked underneath the wraps using a loop. It is faster than the West Country Whipping but can unravel if the twine breaks.
- Sailmaker’s Whipping: Considered the “gold standard” of whippings, this method involves sewing the twine through the strands of the rope. It is virtually impossible to slide off but requires a needle and more time.
- French Whipping: A decorative variant where a series of half-hitches are tied in a spiral. It is often used for grip on handles or rails rather than just finishing a rope end.
- Back Splice: Instead of using twine, the strands of the rope itself are unlaid and woven back into the main body of the rope. This creates a permanent, bulky end that will never fray but cannot pass through small blocks.
Final Words
The West Country Whipping is a testament to the elegance of functional design. By utilizing the simple Half Knot in a repetitive, alternating pattern, it creates a bond that is both aesthetically pleasing and technically superior for many outdoor applications.
Mastering this technique ensures that your gear remains in top condition, whether you are facing the high winds of a mountain peak or the corrosive salt spray of the open ocean. By following the structured steps—starting with the initial Half Knot, maintaining consistent tension through the body, and securing the finish with Square (Reef) knots—you join a long tradition of scouts, sailors, and explorers who understand that the safety of the journey often depends on the quality of the knots.
As you practice your rope knots, remember that consistency is key. A well-executed West Country Whipping should look like a solid, uniform cylinder of twine. With a bit of patience and the right materials, you can significantly extend the lifespan of your ropes and ensure your equipment is always ready for the next adventure.
