
In the world of technical ropework, climbing, and search and rescue (SAR), the efficiency and profile of a knot can be just as important as its raw breaking strength. While most beginners start with basic rope knots, advanced practitioners eventually encounter the necessity of joining tubular webbing to create permanent or semi-permanent loops. Among the most streamlined and secure methods to achieve this is the Beer Knot.
Unlike traditional knots that sit bulkily on the outside of the material, the Beer Knot utilizes the hollow nature of tubular webbing to create an internal splice. This results in a "cleaner" finish that is less likely to snag on rock edges, carabiners, or gear. For outdoor enthusiasts who demand high performance and low-profile solutions, mastering this technique is a rite of passage.
Alternative Names: The Beer Knot is also known as the Internal Webbing Splice or the Tubular Webbing Joiner.
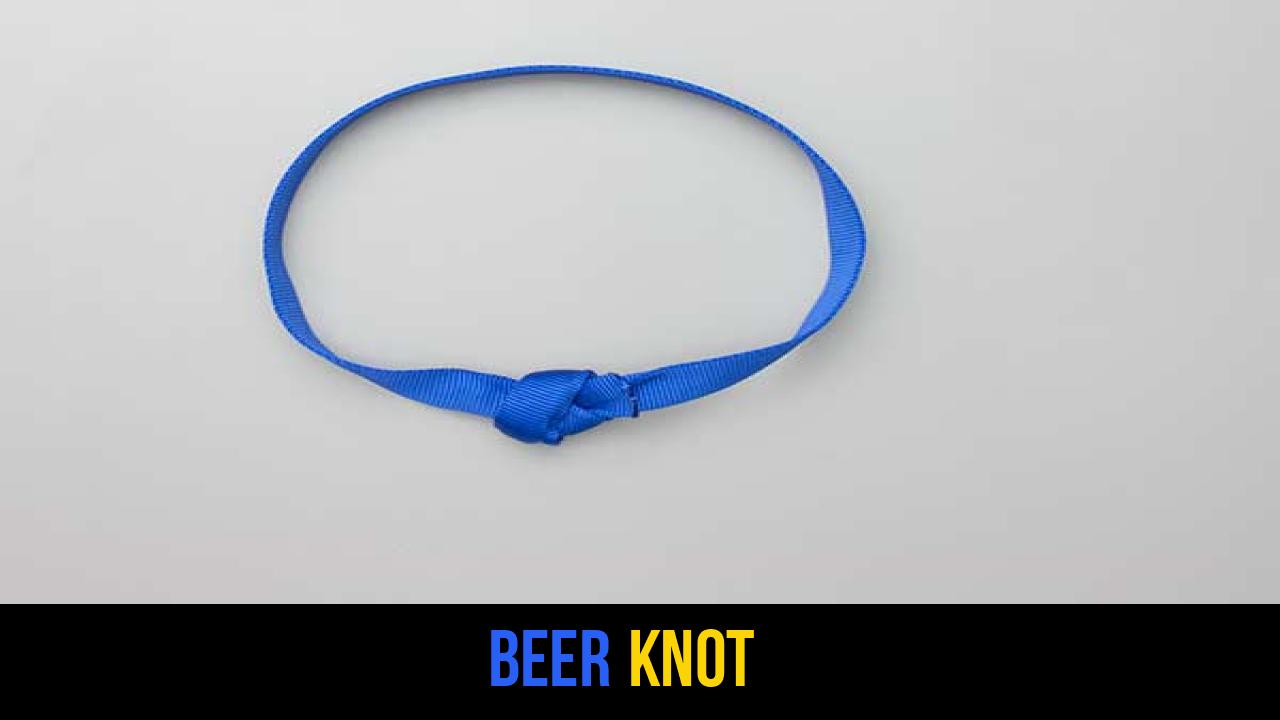
What Is a Beer Knot?
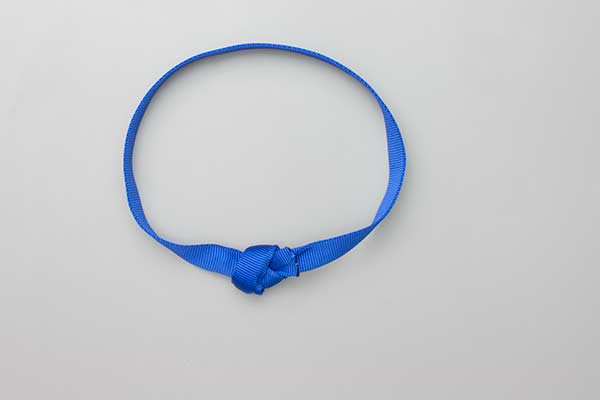
The Beer Knot is a specialized method used primarily to join two ends of tubular webbing to form a continuous loop, often called a "sling" or "runner." It is unique because it involves tucking one end of the webbing inside the other, creating a double-layered section that is then secured with a simple overhand knot.
Practical Uses and Advantages
- Climbing Slings: It is frequently used by climbers to create custom-length runners.
- Low Profile: Because a significant portion of the connection is internal, it has a much smaller footprint than the standard Water Knot (Tape Knot).
- Reduced Snagging: The lack of large "tails" protruding from the knot makes it ideal for use in tight chimneys or over sharp edges where a traditional knot might catch.
- Strength Retention: When tied correctly, the Beer Knot is exceptionally strong, as the internal friction of the double-layered webbing adds to the security of the overhand knot.
Materials and Tools Needed
Before you begin, it is important to understand that the Beer Knot is specifically designed for tubular webbing. Attempting this with flat webbing or standard kernmantle rope is impossible due to the internal insertion requirement.
Essential Components:
- Tubular Webbing: Usually 1-inch (25mm) nylon webbing is the standard. Ensure the webbing is clean and free of abrasions.
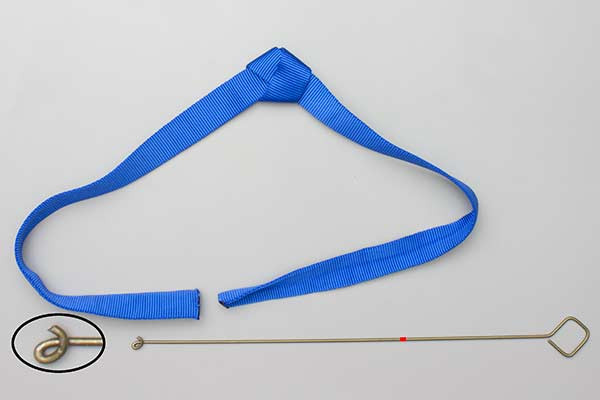
- The Pusher Rod: This is a crucial tool for the Beer Knot. It can be a specialized commercial tool, a piece of stiff wire, or even a repurposed wire coat hanger with a small hook bent into the end.
- Marking Tool: A felt-tip marker to indicate the depth of the insertion.
- Cutting Tool and Heat Source: A sharp knife or shears and a lighter (to sear the ends of the webbing to prevent fraying).
Material Considerations
When choosing your webbing, remember that nylon is the most common choice due to its elasticity and high melting point. However, high-modulus fibers like Dyneema or Spectra are much more difficult to tie with this method because they are extremely slippery and do not hold knots as well as nylon.
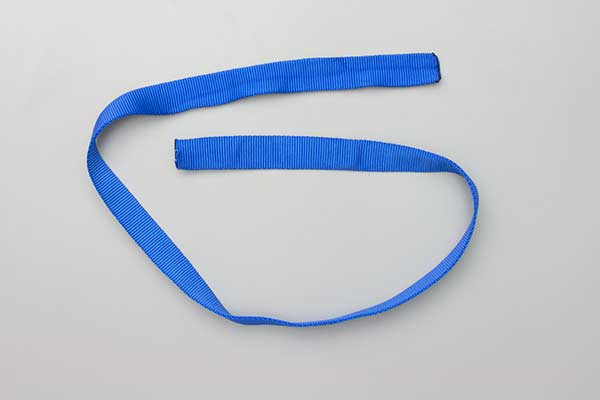
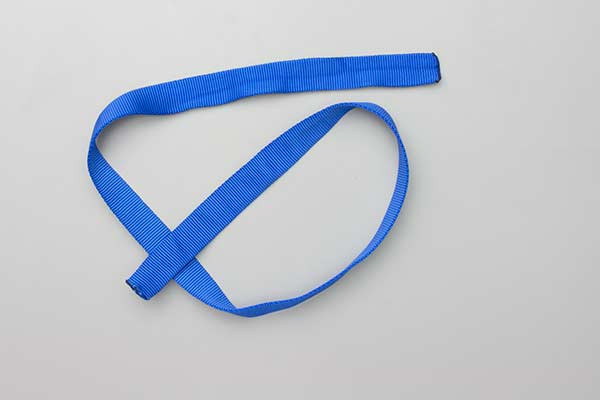
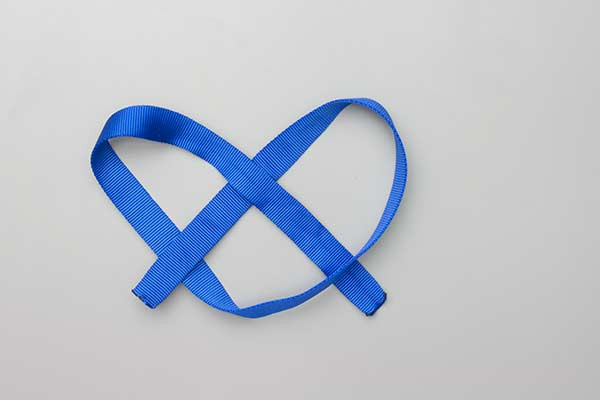
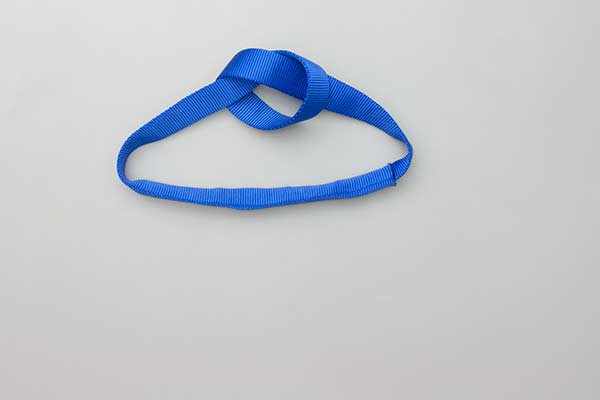
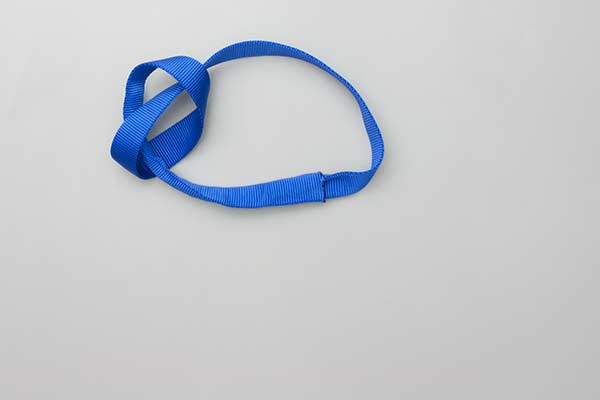
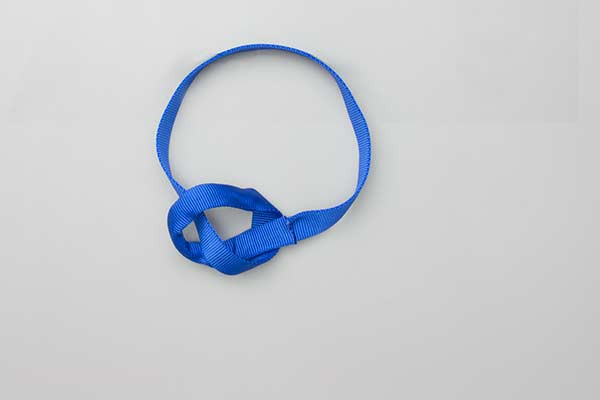
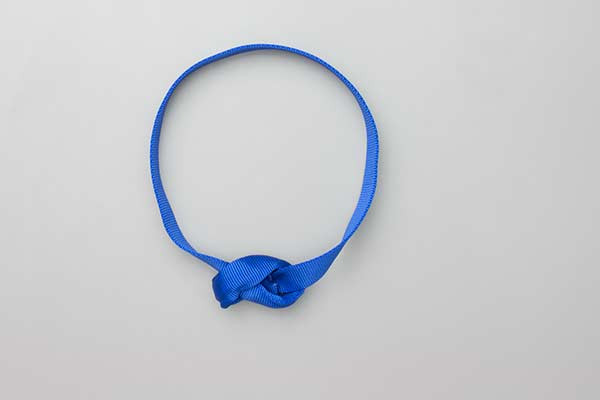
How to Tie Beer Knot?
To ensure the safety and integrity of the joint, follow these steps precisely. The Beer Knot requires patience and precision, particularly when using the pusher rod to navigate the internal channel of the webbing.
- Tie an Overhand Knot and prepare the ends and the pusher rod.
- Hook the rod into one end.
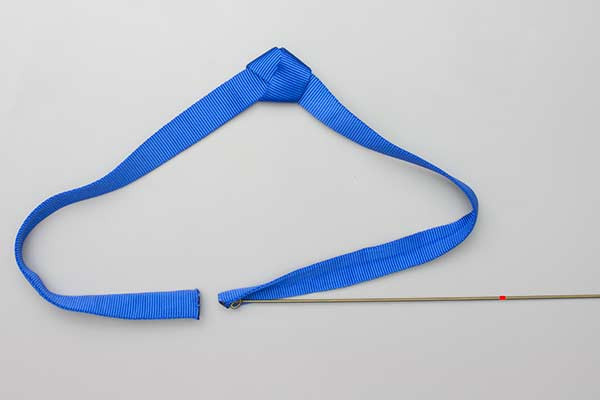
- Push it up inside the other as far as the mark to create the double layer.
- Withdraw the pusher rod.
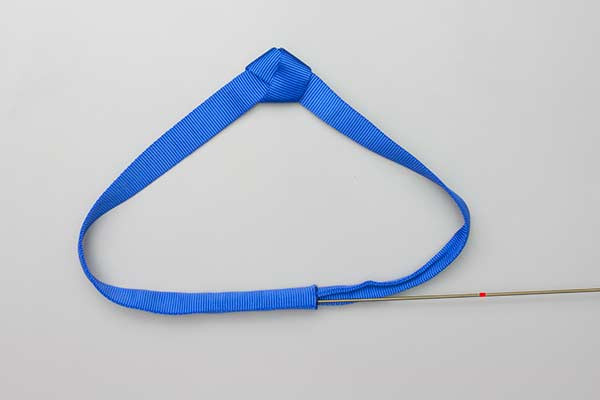
- Loosen the Overhand Knot.
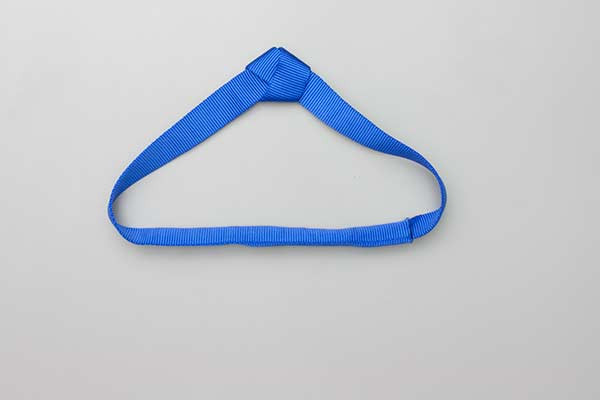
- Reposition the knot around to the double layer and tighten it.


Common Mistakes to Avoid
Even for those experienced in outdoor rope techniques, the Beer Knot can be tricky. Safety is paramount when your life or gear depends on a knot.
1. Insufficient Insertion Depth
The "mark" mentioned in the instructions is vital. Most experts recommend an internal overlap of at least 8 to 12 inches. If the inner tail is too short, it may slip out under cyclic loading (repeatedly weighting and unweighting the sling).
2. Not Seating the Overhand Knot
The overhand knot must be tightened directly over the section where the webbing is doubled. If the knot is tied on a single layer, the internal tail could potentially slide out, leading to catastrophic failure of the loop.
3. Using Worn or Dirty Webbing
Dirt and grit inside tubular webbing act like sandpaper. Since this knot relies on internal friction, ensure the inside of the webbing is clean. Furthermore, old webbing that has become stiff from UV exposure may be difficult to "scrunch" onto the pusher rod.
4. Forgetting to Dress the Knot
"Dressing" a knot means ensuring all layers lie flat and parallel without twists. A twisted Beer Knot will not only be weaker but will also be significantly harder to inspect visually.
Related Knots and Splicing
Understanding how the Beer Knot fits into the broader family of rope knots helps in choosing the right tool for the job.
- Water Knot (Tape Knot): The most common way to join webbing. It is essentially an overhand follow-through. While easier to tie, it is bulkier and the tails must be monitored for "creeping."
- Double Fisherman’s Knot: Used primarily for joining two ropes. It is incredibly secure but nearly impossible to tie effectively with flat or tubular webbing.
- Spliced Eye: A technique used in 3-strand or hollow-braid ropes where the rope is tucked back into itself. The Beer Knot is essentially a hybrid between a knot and a splice.
- Grapevine Knot: Another name for the Double Fisherman’s, it offers high security for cords but lacks the low profile of an internal webbing join.
Technical Maintenance and Safety Inspections
Once your Beer Knot is tied, it should be treated as a semi-permanent installation. Because the ends are hidden inside the webbing, visual inspection is more difficult than with a Water Knot.
The "Feel" Test
Since you cannot see the ends, you must periodically feel the webbing. You should be able to palpate the internal tail through the outer layer. If the tail feels like it has shifted closer to the overhand knot, the knot must be untied, inspected, and rebuilt.
UV Degradation and Retiring Gear
Webbing used in the outdoors is subject to UV damage. Because the Beer Knot is often used for "permanent" anchors or slings, it is easy to forget how old they are. Always mark your slings with the date of manufacture. Most manufacturers recommend retiring nylon soft goods after 5 to 10 years, even if they haven’t been used, and sooner if they show signs of fading or stiffness.
Final Words
The Beer Knot is a masterclass in efficiency and streamlined design. By utilizing the internal volume of tubular webbing, it provides a solution that is both aesthetically clean and functionally superior for snag-prone environments. Whether you are rigging a complex rescue system or simply preparing your rack for a weekend of climbing, the ability to tie a secure internal splice is an invaluable skill.
Always remember that while instructions provide the "how-to," practice and load-testing in a safe environment provide the "know-how." Treat every knot with the respect it deserves, ensure your outdoor rope techniques are up to date, and always double-check your work before leaving the ground. Summary: The Beer Knot is the professional’s choice for creating high-strength, low-profile webbing loops for demanding technical applications.
