
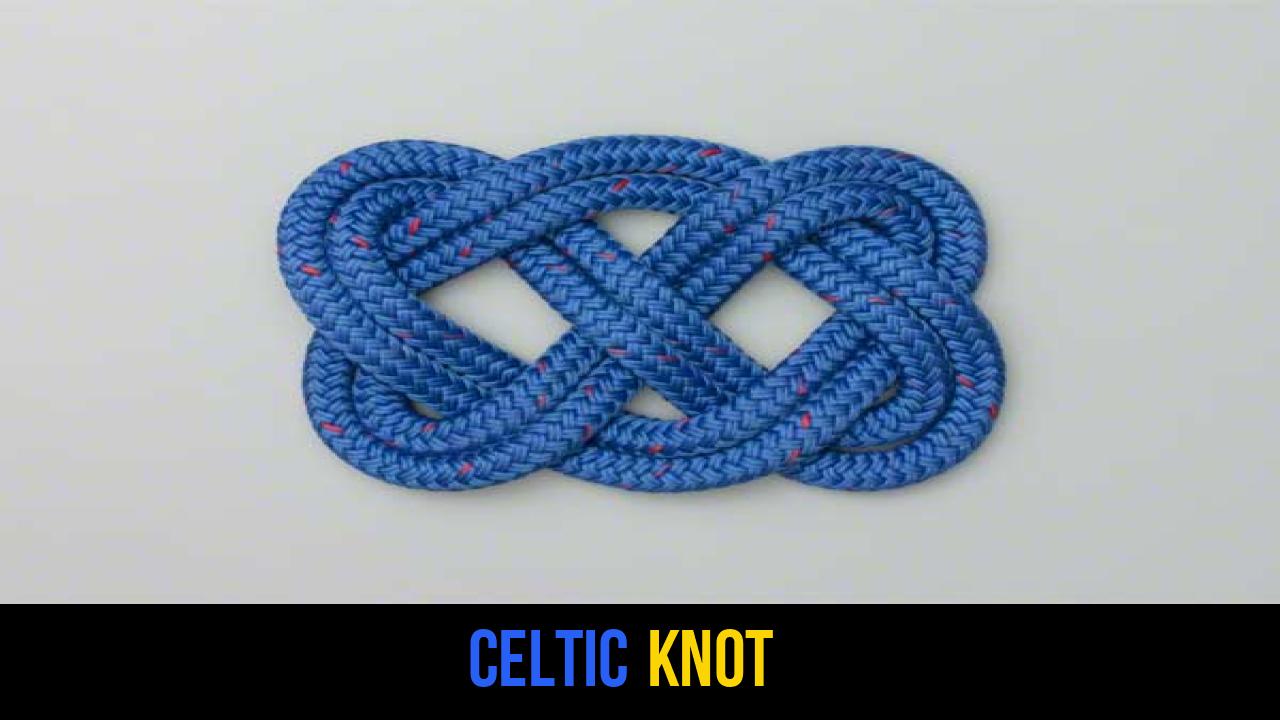
In the world of outdoor rope techniques, few patterns are as instantly recognizable or as aesthetically pleasing as the Celtic Knot. While many rope knots are designed purely for utility—securing a load, climbing a rock face, or anchoring a boat—the Celtic Knot knot represents a unique intersection of form and function. Historically steeped in symbolism and cultural heritage, this knot has transitioned from ancient stone carvings and illuminated manuscripts into the kits of modern bushcrafters, sailors, and survivalists.
As a technical outdoor gear specialist, I have found that mastering decorative knots is not merely about "flair." It is about understanding the flow of cordage, managing tension, and developing the muscle memory required for more complex splicing and lashing. The Celtic Knot is a foundational pattern that teaches a practitioner the importance of the "over-under" sequence, a principle that governs almost all secure ropework. Whether you are looking to create a decorative lanyard for a fixed-blade knife or want to add a traditional touch to your campsite aesthetics, this guide will provide the expertise needed to master this timeless design.
Alternative Names: Mystic Knot, Endless Knot, Interlace Knot, Trinity Knot (Triquetra variant), or Eternity Knot.
What Is a Celtic Knot?
A Celtic Knot is a stylized decorative knot characterized by its interlaced, continuous loops. Unlike a standard hitch or bend, which is designed to hold weight or join lines, the Celtic Knot is primarily used for its ornamental value and its ability to create a flat, symmetrical surface. In the context of rope knots, it is classified as a "flat knot" or a "mat knot."
Historical Context
The origins of these patterns date back to the late Roman Empire, but they reached their artistic peak in the hands of Celtic monks around the 7th century. Symbolically, the knots represent the interconnectedness of life and eternity, as many versions have no visible beginning or end.
Practical Applications in the Outdoors
While it may seem purely decorative, the Celtic Knot has several technical applications:
- Lanyard Holes: It provides a comfortable, wide grip for knife lanyards or flashlight pulls.
- Zipper Pulls: Its flat profile makes it an ideal tactile grip for cold-weather gear where gloves are worn.
- Horse Tack: Traditional saddlery often utilizes these knots for browbands and reins.
- Gear Identification: Using unique cordage colors, these knots help distinguish personal gear in a group setting.
- Soft Shackle Bases: The interlacing principles learned here are vital for constructing advanced soft shackles used in 4×4 recovery.
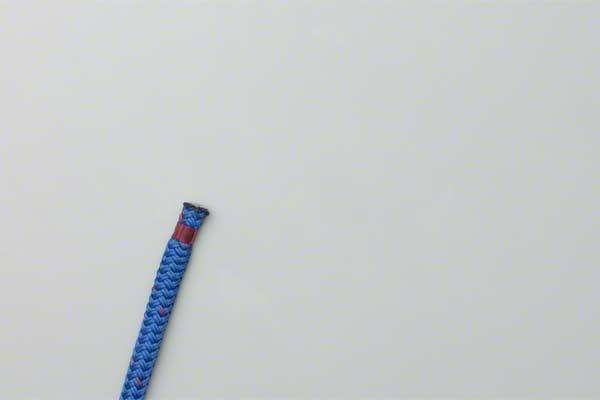
Materials and Tools Needed
To achieve a clean, professional-looking Celtic Knot, you must select the right materials. The knot’s beauty lies in its symmetry, which can be easily ruined by the wrong type of cordage.
Recommended Rope Types
- 550 Paracord: The gold standard for beginners. It is flexible, comes in various colors, and its nylon sheath allows for easy "dressing" of the knot.
- Natural Fiber (Hemp or Cotton): Best for a traditional, rustic look. However, these fibers have more friction, making it harder to slide the rope during the "following" phase.
- Accessory Cord (2mm – 4mm): Used by climbers and arborists, this stiff cordage holds the shape of the knot exceptionally well without collapsing.
Essential Tools
- A Flat Surface: Essential for beginners to keep the pattern flat as they work.
- Fid or Marlinspike: A pointed tool used to create space between strands for the second pass.
- Measuring Tape: You will typically need 3 to 5 feet of cordage depending on the desired thickness of the finished knot.
- Lighter/Heat Source: To cauterize the ends of synthetic ropes like paracord to prevent fraying.
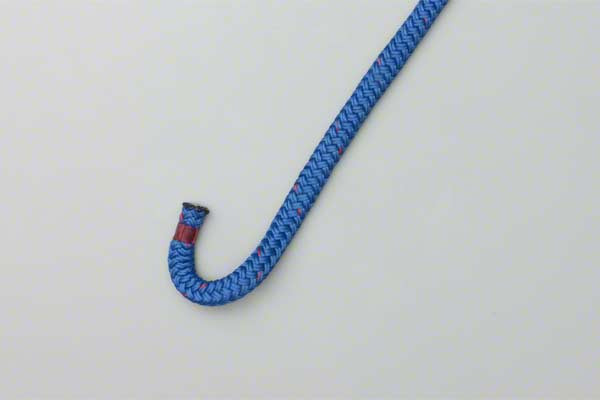
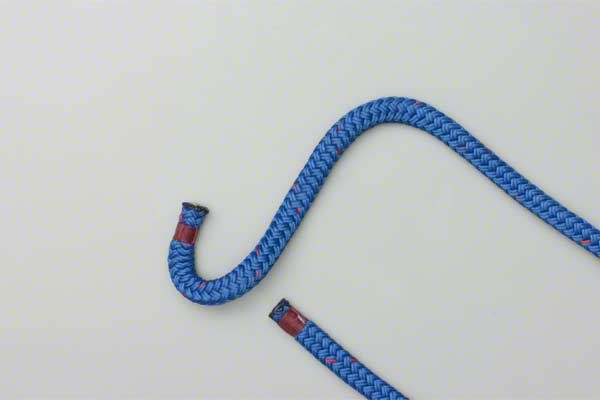
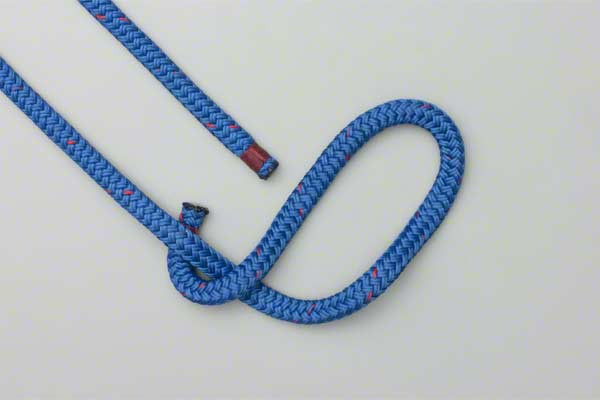
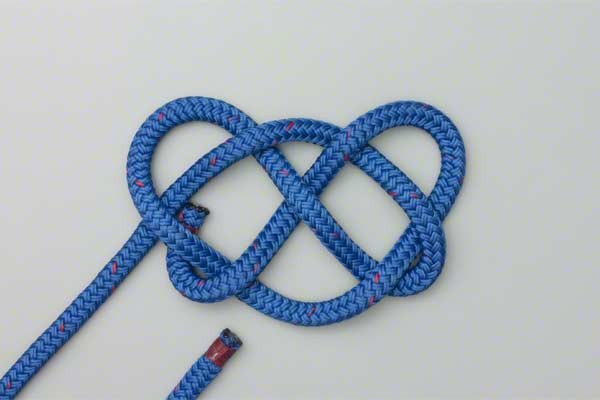
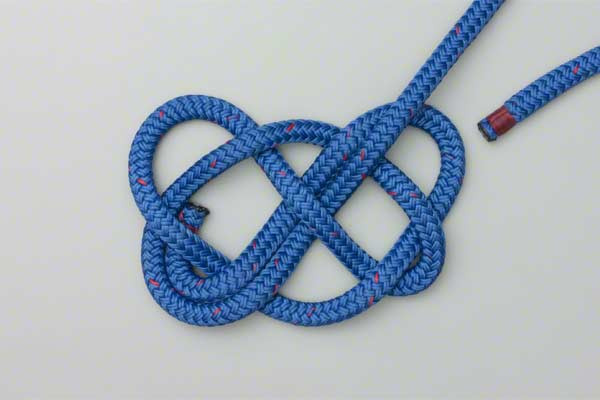
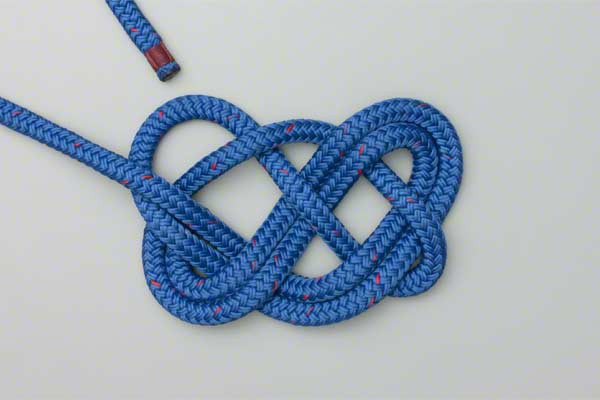
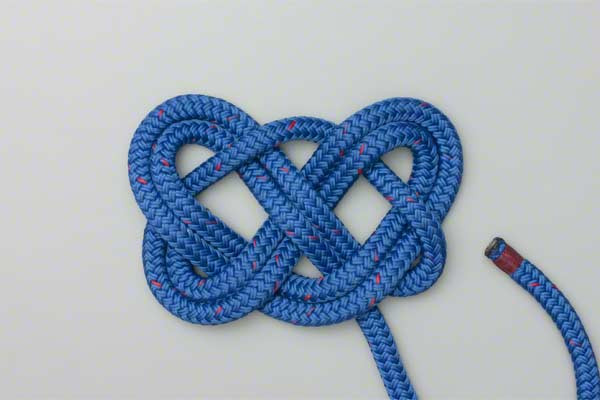
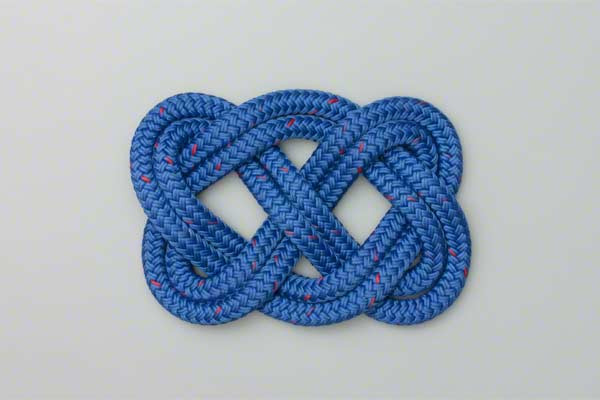
How to Tie Celtic Knot?
Tying this knot requires patience and a keen eye for the sequence of the strands. Follow these instructions precisely to ensure the structural integrity and aesthetic balance of the knot.
- Use a strict under and over sequence to tie a simple Celtic Knot.
- Then follow the first strand round the same path to finish at the original starting position.
Expert Tip: While performing step one, ensure the loops are loose enough to allow the second pass (step two) to fit comfortably alongside the original strand. Once both steps are complete, you will "dress" the knot by slowly pulling the slack out of each loop sequentially.


Common Mistakes to Avoid
Even experienced outdoorsmen can struggle with the Celtic Knot if they rush the process. Here are the most common pitfalls:
1. Breaking the Over-Under Sequence
The entire structural logic of a Celtic Knot knot relies on a perfect alternating pattern. If you go "over-over" or "under-under," the knot will lose its symmetry and may collapse when tensioned. Always double-check each crossing before proceeding to the second pass.
2. Uneven Tensioning
This is the most frequent error. If one loop is tighter than the others, the knot will look warped. Dressing the knot—the process of adjusting each part of the rope—should be done in small increments. Do not pull one end tight all at once; instead, "walk" the slack through the knot from one end to the other.
3. Using "Limp" Cordage
If your rope is too soft or worn out, the knot will not hold its shape and will look like a tangled mess rather than a geometric pattern. If using paracord, ensure it hasn’t been gutted (inner strands removed) unless you specifically want a very flat, ribbon-like appearance.
4. Safety Considerations
While the Celtic Knot is beautiful, it is not a load-bearing knot. Never use this pattern as a primary attachment point for climbing, rappelling, or overhead lifting. Its purpose is decorative and light-duty utility only.
Related Knots and Splicing
Understanding the Celtic Knot opens the door to a variety of other intricate rope knots. Here are a few related techniques:
- Turk’s Head Knot: A tubular decorative knot used to create grips on oars or railings, sharing the same interlacing logic as the Celtic pattern.
- Carrick Bend: A heavy-duty knot for joining two ropes; when laid flat, it forms the basis of many Celtic-style decorative mats.
- Monkey’s Fist: A spherical knot used as a weighted end for a heaving line, requiring similar precision in "following" the strand path.
- Chinese Crown Knot: A circular knot often used in succession to create "round" lanyards, serving as a 3D cousin to the flat Celtic Knot.
Final Words
The Celtic Knot is more than just a decorative flourish; it is a testament to the skill and precision of the person tying it. In the realm of outdoor rope techniques, being able to execute a clean, perfectly dressed Celtic Knot knot demonstrates a high level of cordage proficiency. It requires an understanding of rope memory, friction, and geometric flow.
Whether you are enhancing your survival gear with custom paracord pulls or simply practicing the meditative art of knot-tying by a campfire, the Celtic Knot remains a staple in the repertoire of any serious gear specialist. By following the strict "under and over" sequence and meticulously "following" the path, you create a piece of functional art that is as durable as it is beautiful. Practice with different materials and scales to truly master the versatility of this ancient pattern. Happy tying!
