
The connection between a vessel and its anchor is perhaps the most critical link in maritime safety. While there are many rope knots used in sailing and general utility, few are as specialized or as vital as the Chain Splice. Whether you are a weekend sailor or a professional rigger, understanding how to transition from a flexible three-strand line to a heavy-duty galvanized chain is an essential skill.
A proper splice ensures that the transition is smooth enough to pass through a bow roller and around a windlass without jamming, a feat that a standard knot simply cannot achieve. In this comprehensive guide, we will explore the technical nuances of the Chain Splice, the materials required to execute it perfectly, and a step-by-step breakdown of the process.
Alternative Names: Rope-to-Chain Splice, Anchor Rode Splice, Three-Strand Chain Splice, Back-Spliced Anchor Lead.
What Is a Chain Splice?
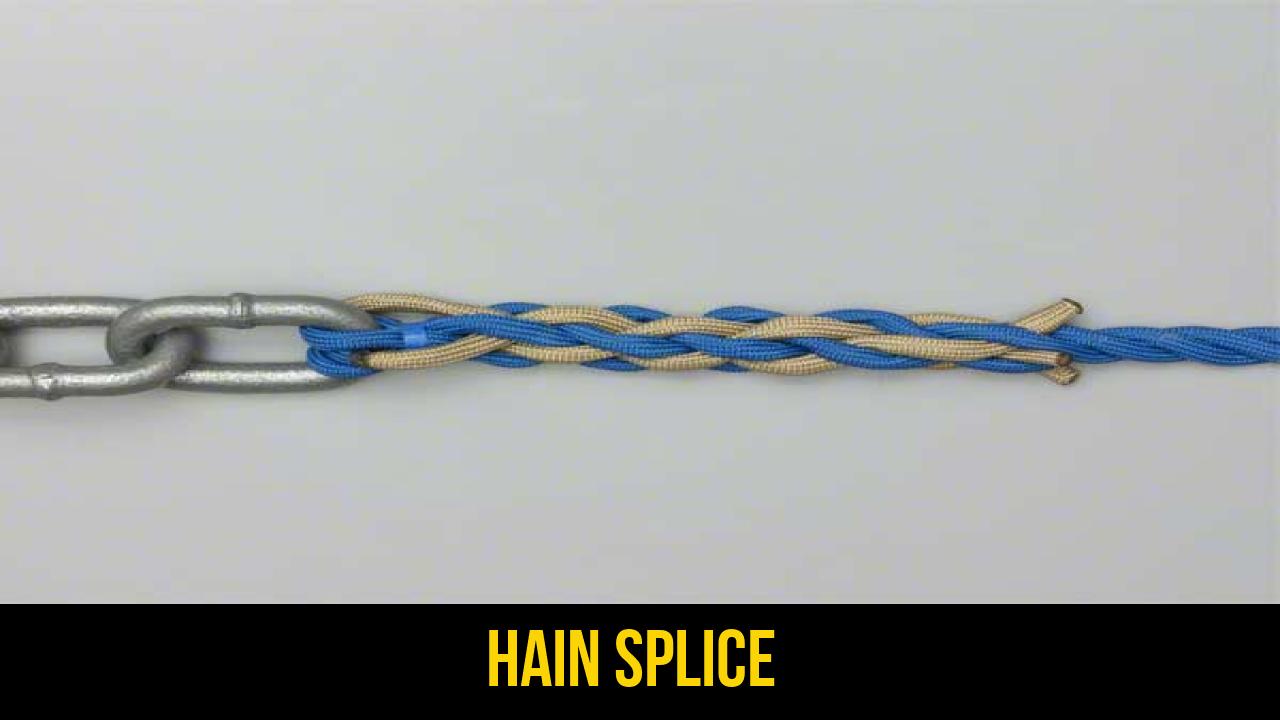
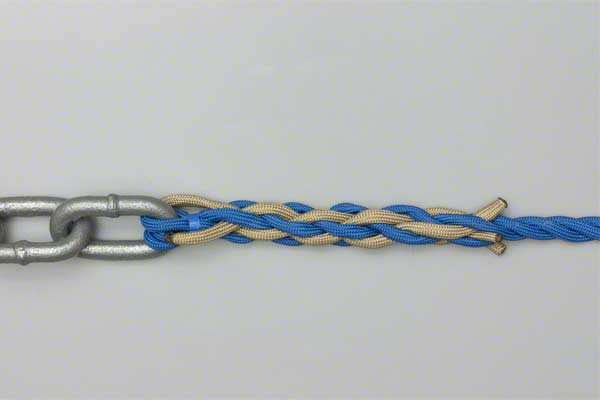
A Chain Splice is a specialized method of joining a three-strand rope directly to the end link of a chain. Unlike a hitch or a shackle-and-thimble setup, the Chain Splice integrates the fibers of the rope directly into the metal links. This creates a low-profile connection that maintains a high percentage of the rope’s original breaking strength.
Practical Applications
The primary use of the Chain Splice is in the construction of an anchor rode. Most modern boats use a combination of rope and chain to balance weight and shock absorption. The rope provides the necessary "stretch" to handle surge loads in a harbor, while the chain provides weight to keep the anchor fluke set and protects the line from abrasion on the seabed.
Because the Chain Splice does not have the bulk of a knot or a metal thimble, it is the preferred choice for boaters using an automatic windlass. The splice can travel over the gypsy (the wheel that pulls the chain) without snagging, allowing for a seamless transition from rope to chain during anchor retrieval.
Materials and Tools Needed
Before you begin, you must ensure you have the correct high-quality materials. Using the wrong rope type or a damaged chain can lead to catastrophic failure under load.
1. The Rope
For a Chain Splice, you should almost always use three-strand twisted nylon rope. Nylon is preferred because of its high elasticity, which acts as a shock absorber for your boat’s cleats and the anchor itself. Ensure the rope is clean and free of previous salt buildup, as stiff rope is significantly harder to splice.
2. The Chain
The chain should be a "short link" variety (such as G4 or BBB) if it is intended for a windlass. Ensure the end link is smooth and free of burrs that could cut the rope fibers during the splicing process.
3. Essential Tools
- Electrical Tape: Used to prevent the strands from unravelling during the process and to mark your lengths.
- Sharp Knife or Heavy-Duty Scissors: For trimming the ends of the strands.
- Fid or Marlinspike: A tapered tool used to open the lay of the rope to allow the strands to pass through.
- Butane Lighter or Heat Gun: To heat-seal the ends of the synthetic rope to prevent fraying.
- Gloves: Splicing can be hard on the hands, especially with larger diameter lines.
How to Tie Chain Splice?
To achieve a professional-grade result, follow these instructions precisely. The security of the splice depends on the number of tucks and the consistency of the tension.
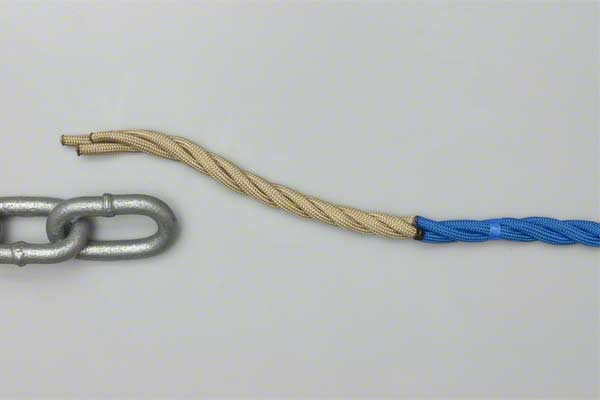
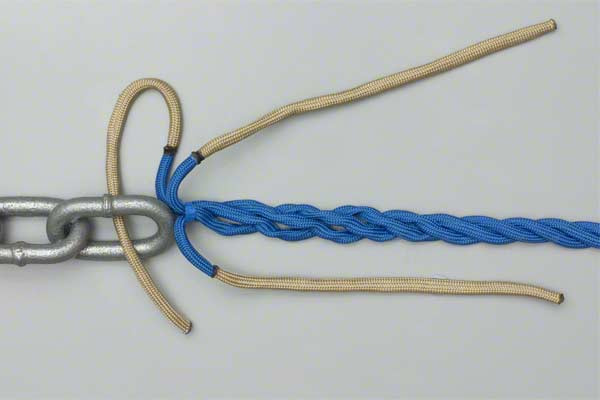
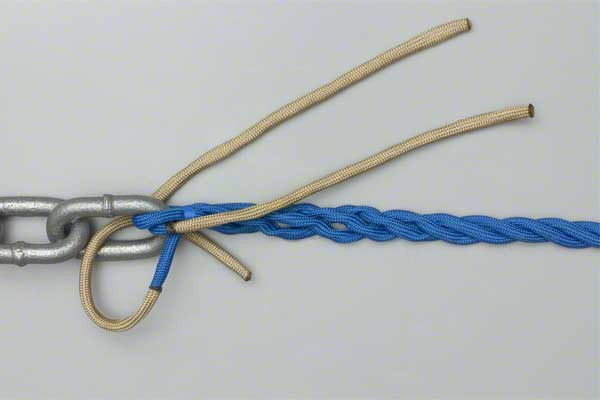
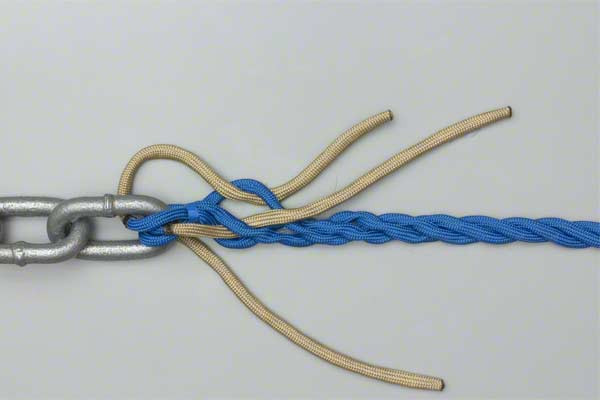
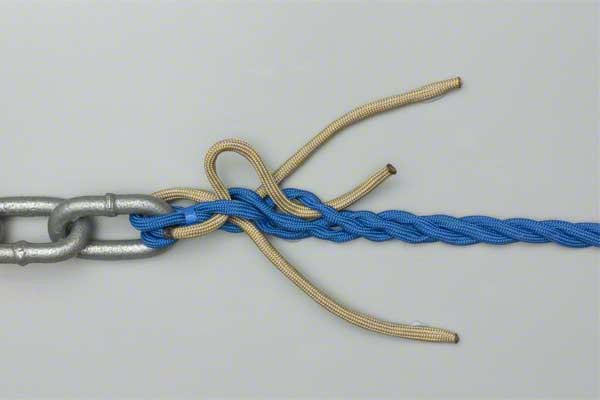
- Tape rope.
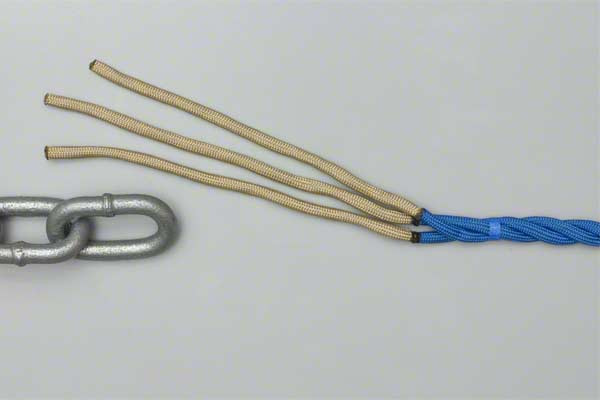
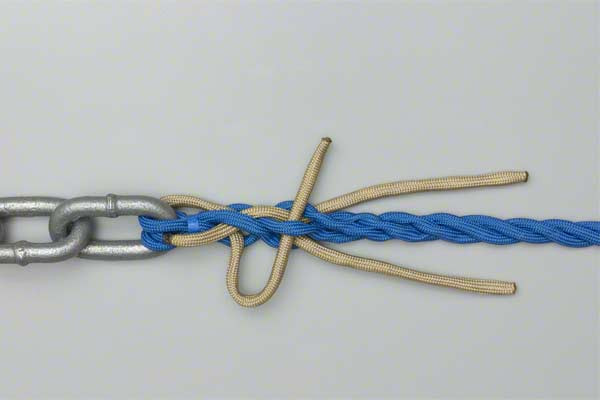
- Unravel enough for 5 – 7 tucks.
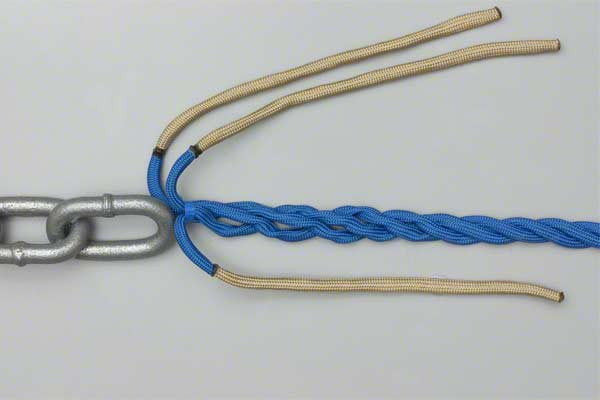
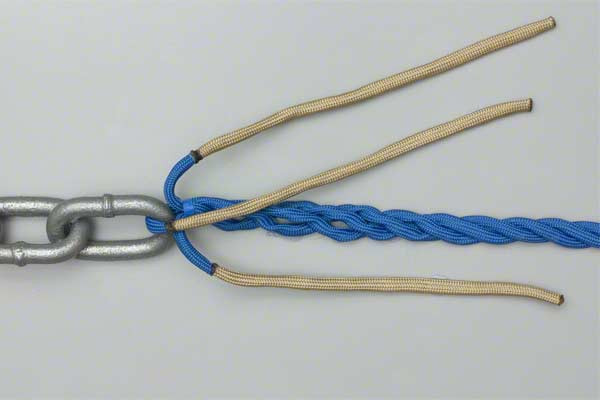
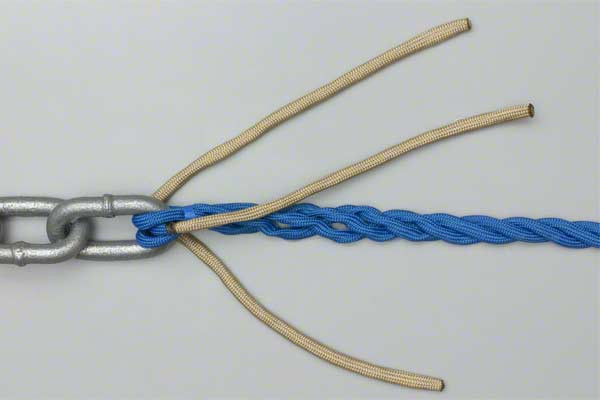
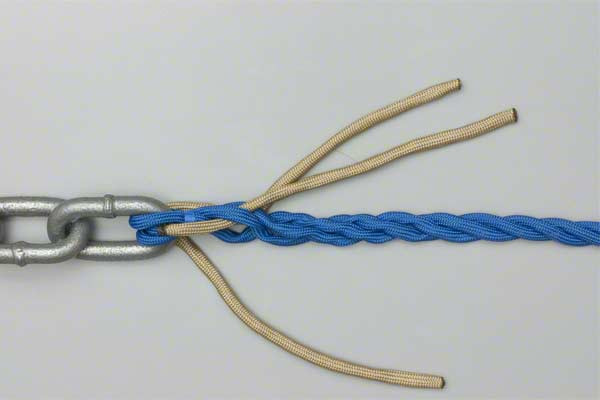
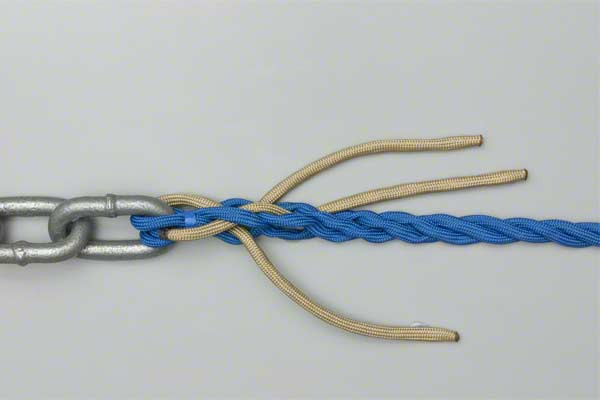
- Pass the strands into the chain – one strand one way through the chain and two strands the other way.
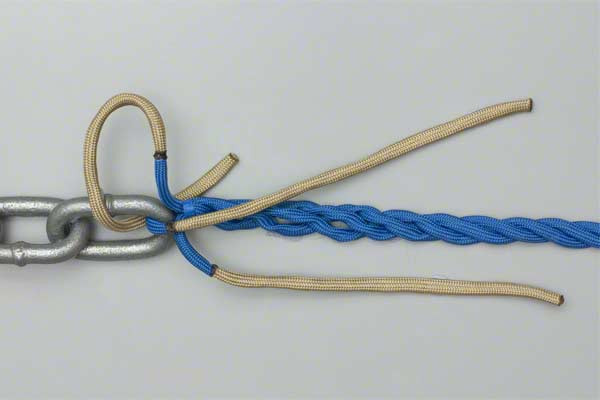
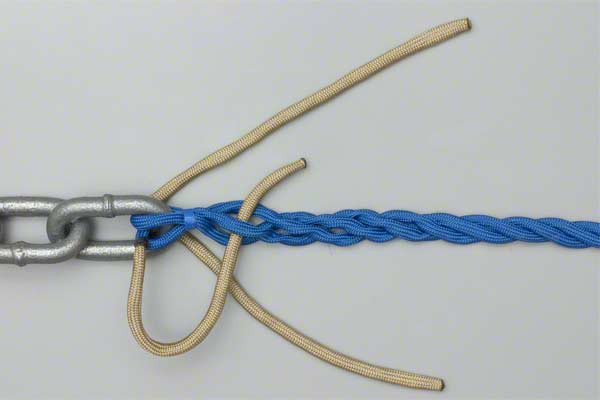
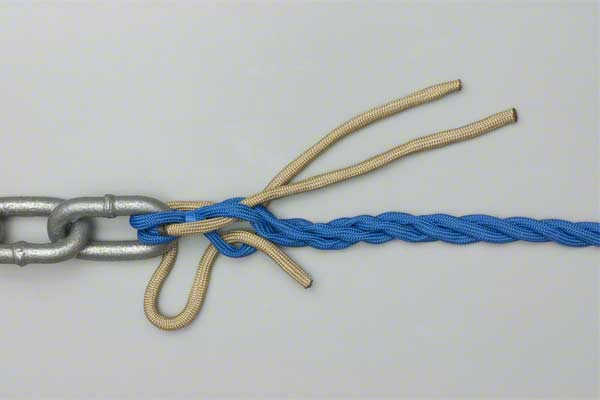
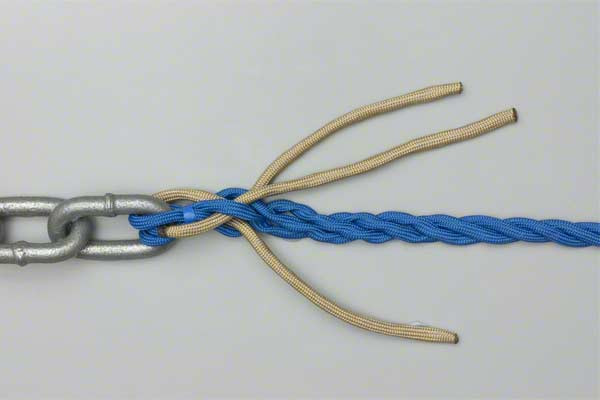
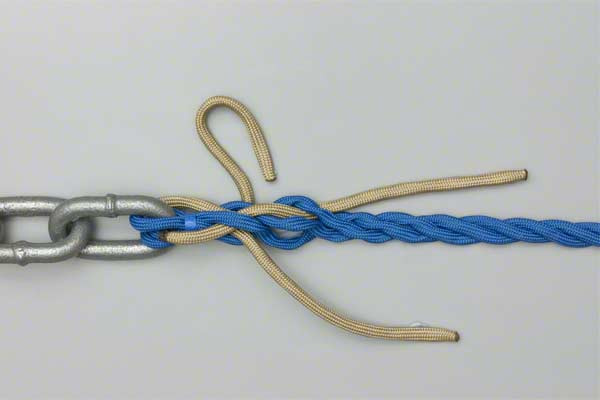
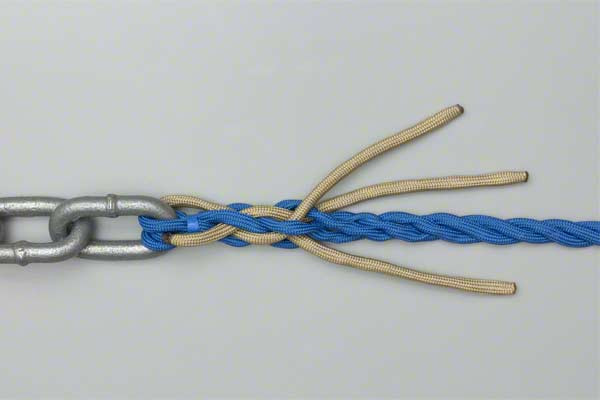
- Splice each strand back into the standing end of the rope.
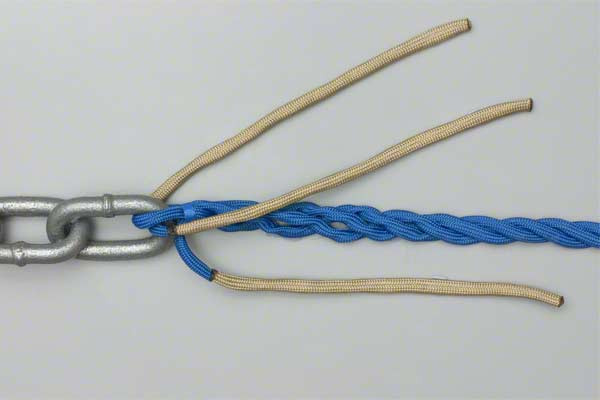
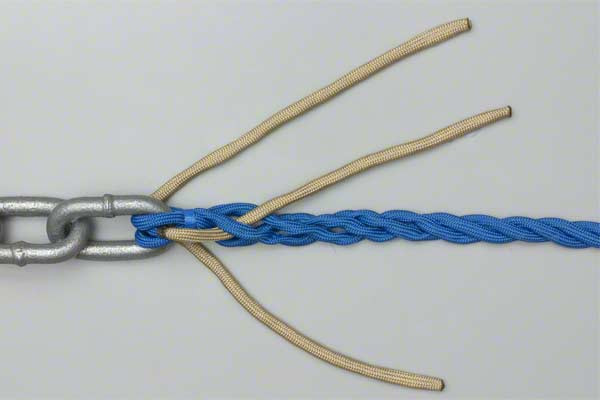
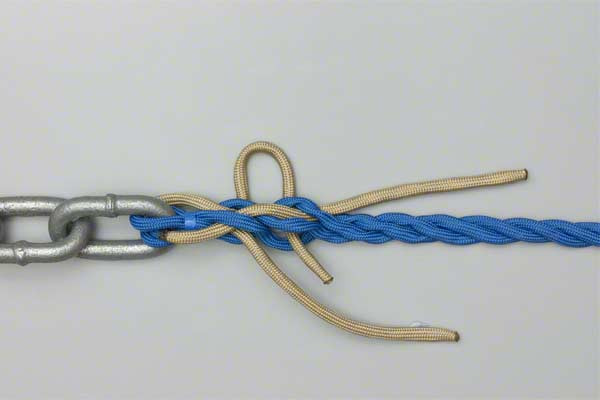
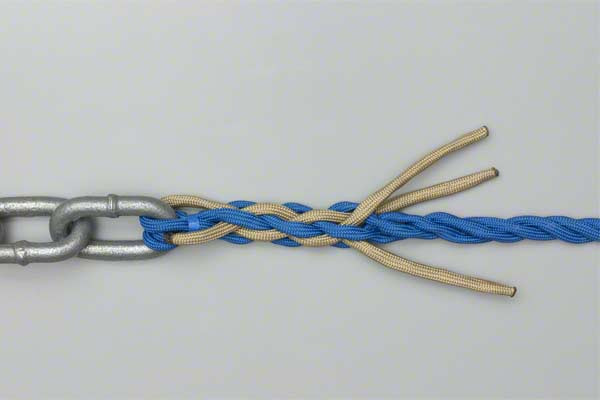
- Repeat for the second set of tucks, and the third and fourth.
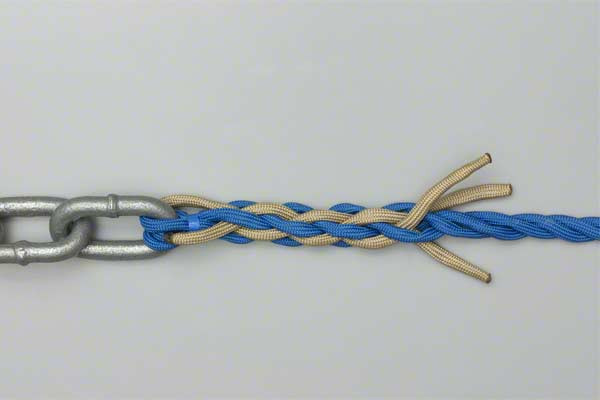
- Use five to seven sets of tucks for security.

Common Mistakes to Avoid
Even experienced mariners can make mistakes when performing a Chain Splice. To ensure your outdoor rope techniques remain top-tier, watch out for these common pitfalls:
Insufficient Tucks
The instruction source emphasizes using five to seven sets of tucks. A common mistake is stopping at three tucks, which is standard for some other splices. However, because the Chain Splice is subject to constant immersion and heavy cycling loads, the extra tucks provide the friction necessary to prevent the splice from pulling out under extreme tension.
Uneven Tension
When you splice each strand back into the standing end, ensure that each of the three strands is pulled with equal tension. If one strand is tighter than the others, it will carry the majority of the load, leading to premature wear and potential failure of that specific strand.
Ignoring Chafe
Where the rope passes through the chain link, it is subject to friction. While the Chain Splice is designed to minimize this, it is wise to inspect the "throat" of the splice regularly. Some professionals use a specialized dip or a plastic sleeve to provide an extra layer of protection against the metal link.
Using Old, Stiff Rope
If you are attempting to re-splice an old anchor rode, the rope may have become "crusty" due to salt crystals. This makes it nearly impossible to get a tight, secure tuck. Always soak old rope in fresh water and fabric softener, or better yet, start with a fresh length of line for critical safety applications.
Related Knots and Splicing
Understanding the Chain Splice knot is part of a broader set of skills involving rope knots. Here are a few related techniques that every outdoor enthusiast should know:
The Eye Splice
The Eye Splice is used to create a permanent loop at the end of a rope. Like the Chain Splice, it involves tucking the unraveled strands back into the standing part of the rope. It is significantly stronger than any loop knot, such as the Bowline, because it maintains the linear integrity of the fibers. It is commonly used for dock lines and permanent mooring setups where a high-strength loop is required.
The Back Splice
The Back Splice is a method used to finish the end of a rope to prevent it from fraying. Instead of using a plastic cap or a simple whipping, the strands are woven back into the rope itself, creating a slightly bulbous end. While it is very secure, it should not be used on lines that need to pass through blocks or pulleys, as the increased diameter will cause the rope to jam.
The Anchor Hitch
For those who do not want to commit to a permanent splice, the Anchor Hitch (or Fisherman’s Bend) is the go-to knot for securing a rope to a chain or anchor. It is a very secure knot that resists slipping even when subjected to the constant "tug and slack" of a boat at anchor. However, it is much bulkier than a Chain Splice and cannot be used with an automatic windlass.
The Short Splice
A Short Splice is used to join two separate pieces of three-strand rope together. This is useful for repairing a damaged line or extending a rope’s length. While it is incredibly strong, it nearly doubles the diameter of the rope at the join, meaning it won’t pass through most hardware. It is a fundamental skill in traditional rigging and general outdoor rope techniques.
Final Words
Mastering the Chain Splice is a hallmark of a prepared and self-sufficient mariner. By following the exact steps of taping the rope, unraveling for sufficient tucks, and meticulously weaving the strands back into the standing end, you create a connection that is both low-profile and incredibly strong.
This splice represents the perfect marriage of traditional craftsmanship and modern practical necessity. Whether you are preparing for a long-distance cruise or simply want the peace of mind that comes with a secure anchor rode, the Chain Splice is an indispensable tool in your repertoire of rope knots. Remember to inspect your work regularly, look for signs of chafe, and always prioritize security by completing the full five to seven sets of tucks. With practice, this technique will become second nature, ensuring your vessel stays exactly where you want it, regardless of the conditions.
