
In the world of technical rope work—whether you are an alpine climber, a blue-water sailor, or a search-and-rescue professional—the way you manage your line is just as important as the knots you tie. A tangled rope is more than just an inconvenience; in high-stakes environments, it can be a significant safety hazard. This is where the Figure 8 Flake becomes an indispensable tool in your kit.
Unlike traditional circular coiling, which can introduce "hockles" or kinks into the fibers, the Figure 8 Flake is designed for one primary purpose: rapid, snag-free deployment. By alternating the direction of the rope as it is laid down, you neutralize the natural tendency of the rope to twist, ensuring that when the moment comes to throw a line or rappel down a face, the rope follows your lead without hesitation.
In this comprehensive guide, we will explore the mechanics, applications, and professional techniques required to master the Figure 8 Flake.
Alternative names for this technique include: Faking a Line, Figure-of-Eight Flaking, and Eight-Flake Rope Storage.
What Is a Figure 8 Flake?
The Figure 8 Flake is not a "knot" in the traditional sense of a fixed loop or a hitch. Instead, it is a specialized method of rope management and storage. It involves laying the rope on a flat surface (or in a rope bag) in a specific pattern that mimics the shape of the number eight.
Practical Uses and Applications
The primary advantage of the Figure 8 Flake is its ability to allow a rope to run out at high speeds without the risk of tangling. This makes it the gold standard for several professional scenarios:
- Rock Climbing and Mountaineering: When preparing for a long rappel, climbers will "flake" the rope onto a ledge or a rope tarp. This ensures that as they descend, the rope feeds through their belay device smoothly.
- Sailing and Maritime Work: On a sailboat, sheets (lines used to control sails) must be ready to run through blocks and fairleads instantly during a maneuver like a tack or a jibe. A Figure 8 Flake on the cockpit floor is the most reliable way to prevent a "foul" line.
- Search and Rescue (SAR): When lowering a litter or an operative down a cliffside, SAR teams flake the rope into bags or onto the ground to ensure the descent is not interrupted by a "bird’s nest" of tangled cordage.
- Arboriculture: Tree surgeons often use this technique to manage long climbing lines while moving through the canopy, ensuring the rope stays organized on the ground.
Materials and Tools Needed
Before you begin practicing the Figure 8 Flake, it is essential to understand the materials you are working with. Different ropes react differently to being flaked.
Recommended Rope Types
- Dynamic Ropes: Used in climbing, these ropes have a high degree of stretch. They are prone to "remembering" coils, making the Figure 8 Flake essential for keeping them manageable.
- Static Ropes: Common in rappelling and rescue, these have less stretch. They flake very well and stay in place due to their slightly stiffer construction.
- Synthetic Fibers: Nylon and Polyester are the most common. They are smooth, which helps the flake run out, but they can also slide out of position if the flake is disturbed.
Essential Tools
- Rope Tarp or Bag: While you can flake a rope directly onto the ground, using a tarp protects the rope from dirt and abrasion.
- Flat Surface: To achieve a perfect Figure 8 Flake, a flat, unobstructed area is ideal.
How to Tie Figure 8 Flake?
Mastering the Figure 8 Flake requires a focus on the natural lay of the rope. Follow these steps exactly to ensure a tangle-free result:
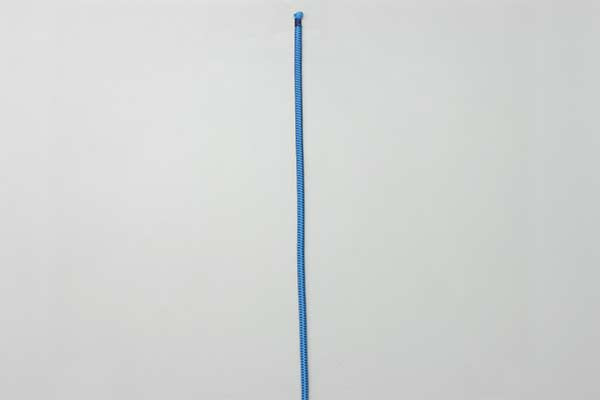
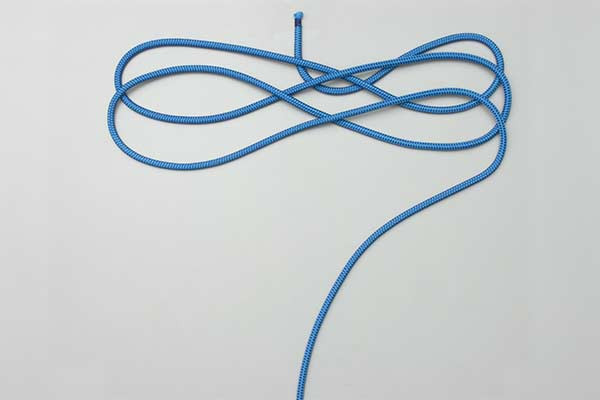
- First remove all twists from the rope.
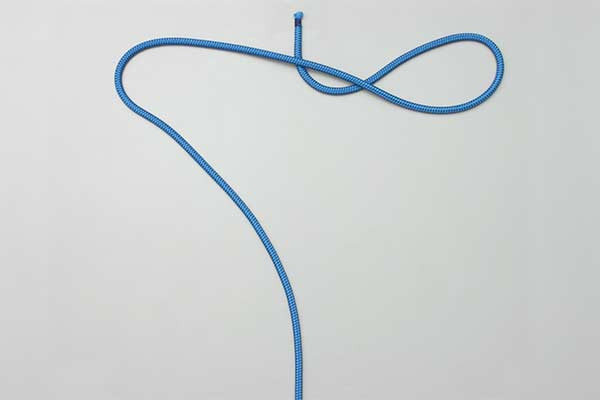
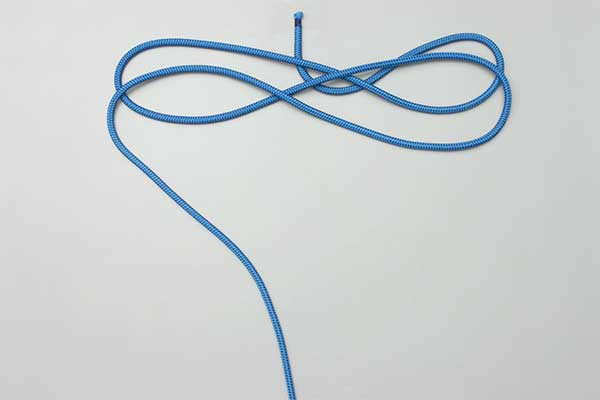
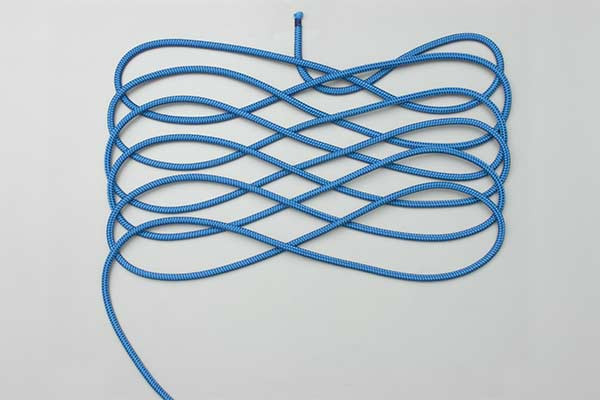
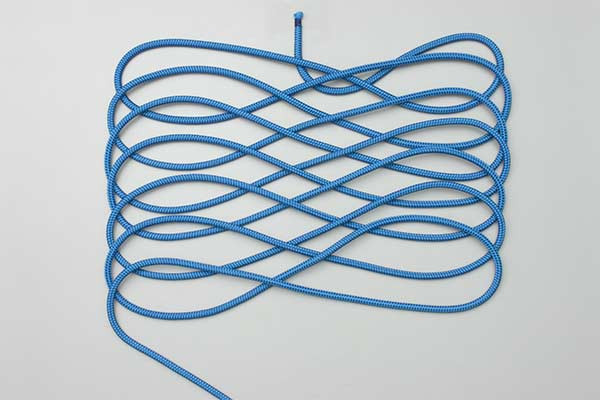
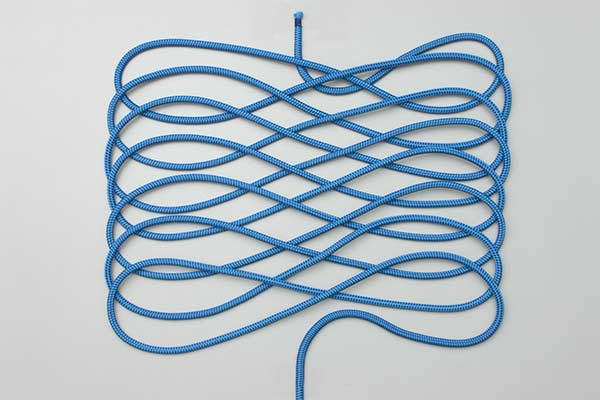
- Then start at the free end and lay the rope out alternately left and right in overlapping figure 8 layers so that when pulled it will run out freely without tangling.
Technical Deep Dive: Why the Figure 8 Works
To understand why the Figure 8 Flake is superior to standard coiling, we must look at the physics of rope torsion.
When you coil a rope in a simple circle, you are effectively "winding" the rope. Every loop adds 360 degrees of twist to the internal fibers. Over 60 meters of rope, this accumulated twist creates "pigtails" or hockles. When you try to pull that rope quickly, those twists bunch up against the first restriction they hit (like a carabiner or a pulley), causing a jam.
The Figure 8 Flake solves this by creating one half-loop in a clockwise direction and the next half-loop in a counter-clockwise direction. These opposite twists cancel each other out. The result is a "neutral" rope that lies flat and has zero torsional energy stored within its length.


Common Mistakes to Avoid
Even though the process is straightforward, beginners often make mistakes that can compromise the integrity of the flake.
1. Failing to Remove Initial Twists
As stated in the first step of the instructions, you must remove all twists before you begin. If the rope is already kinked from being stored in a tight coil, those kinks will remain in the flake and likely cause a tangle during deployment. Run the entire length of the rope through your hands once or twice to let the twists "fall out" of the end.
2. Overlapping Layers Incorrectly
The "figure 8" layers must be laid down in a consistent, overlapping fashion. If you place a new layer underneath a previous one, you have created a "trap." When the rope is pulled, the top layer will snag on the bottom layer. Always build the flake from the bottom up.
3. Making Loops Too Large or Too Small
If the loops of your "8" are too large, they are easily disturbed by wind or movement. If they are too small, the rope creates tighter bends that might retain some "memory," making it less fluid during deployment. Aim for loops roughly 1.5 to 2 feet in length.
4. Moving the Flake
A Figure 8 Flake is a temporary storage solution. It is designed to be used exactly where it is laid. If you pick up a flaked pile and toss it into a bag without care, the layers will shift, and the "tangle-free" benefit will be lost. If you must move the rope, consider a "Butterfly Coil" instead.
Related Knots and Outdoor Rope Techniques
Understanding the Figure 8 Flake is part of a broader set of rope knots and management skills. Here are a few related techniques that every outdoor enthusiast should know:
- The Alpine Butterfly Knot: A mid-line loop knot used to isolate damaged rope sections or provide a secure clipping point that doesn’t slip.
- The Figure 8 Follow-Through: The primary knot for tying a climber’s harness to the rope; it is exceptionally strong and easy to inspect visually.
- The Butterfly Coil: A method of coiling a rope over the neck or hand that, like the flake, helps prevent twists, but is designed for carrying.
- The Clove Hitch: A quick-to-tie binding knot used to secure a rope to a post or carabiner, often used in conjunction with rope management.
- The Bowline: Often called the "King of Knots," it creates a fixed loop at the end of a rope that is easy to untie even after being heavily loaded.
Final Words: Safety and Practical Excellence
The Figure 8 Flake is a fundamental skill that separates the amateur from the professional. Whether you are preparing for a vertical rescue or simply tidying up the deck of a sailboat, the ability to manage your rope effectively is a hallmark of safety and efficiency.
Remember that rope knots and management techniques are perishable skills. To ensure you can perform a perfect Figure 8 Flake under pressure—such as in failing light or during an emergency—you should practice in a controlled environment first.
By mastering the art of the flake, you ensure that your gear works with you, not against you. The next time you are at the crag or on the water, take the extra minute to remove all twists and lay your rope out in those rhythmic, overlapping figure-8s. Your future self, and your team, will thank you for the smooth, snag-free deployment that follows.
Stay safe, keep your lines clear, and happy adventuring!
