
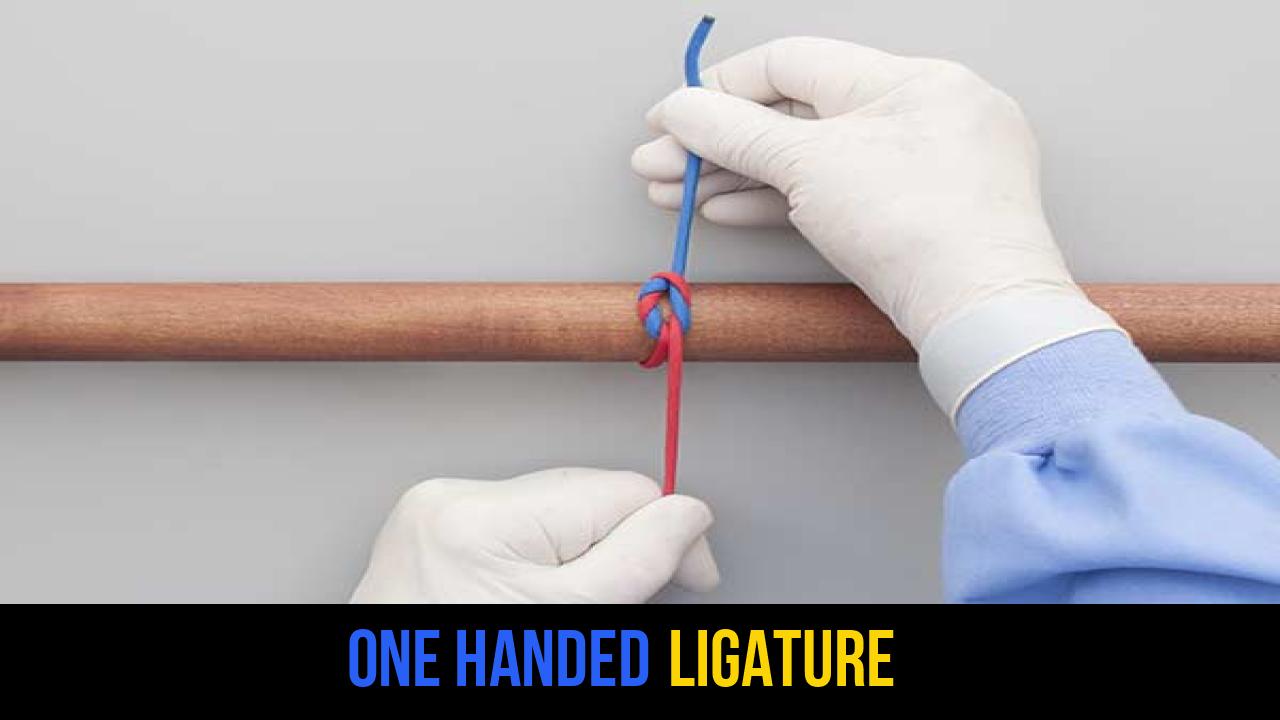
In the world of rope knots and outdoor rope techniques, speed and efficiency are often just as important as the strength of the knot itself. Whether you are securing gear in a high-wind environment, practicing traditional bushcraft, or engaging in advanced technical maneuvers, the ability to secure a line using only one hand is a hallmark of an expert. The One Handed Ligature is a specialized technique designed for exactly these scenarios.
Historically rooted in various technical fields where one hand must maintain tension on a line while the other secures it, this knot has become a favorite among scouts, sailors, and outdoor enthusiasts. Mastery of the One Handed Ligature knot demonstrates a high level of manual dexterity and a deep understanding of rope mechanics. By learning this technique, you ensure that you are never caught off guard when a situation requires a quick, secure bind under pressure.
Alternative Names: One-Handed Tie, Single-Handed Square Knot, Surgeon’s One-Handed Knot, Fast-Action Half-Knot.
What Is a One Handed Ligature?
A One Handed Ligature is essentially a method of tying a secure binding knot (often a variation of the Reef or Square Knot) using the fingers of a single hand. In technical terminology, a "ligature" refers to anything used to bind or tie something tightly. While the term is frequently used in historical medical texts or craft applications, in the context of outdoor rope techniques, it represents a high-speed utility knot.
Practical Uses
The primary advantage of the One Handed Ligature is its economy of motion. It is used in several practical scenarios:
- Securing Bundles: When you are holding a bundle of sticks or gear together with one hand and need to wrap and tie a cord with the other.
- Tensioning Lines: When one hand must maintain the "bite" or tension on a rope to prevent it from slipping while the knot is being formed.
- Craft and Utility: In leatherworking or traditional weaving where constant tension is required on the workpiece.
- Emergency Repairs: Quick fixes to gear or clothing where the user may have limited mobility.
The knot functions by creating a series of interlocking loops that, when tightened, form a reliable Half Knot followed by a secondary locking turn, ensuring the material remains bound under moderate stress.
Materials and Tools Needed
To practice and master the One Handed Ligature knot, choosing the right material is essential. Different ropes provide different levels of friction, which can significantly affect how the knot seats.
Recommended Rope Types
- 550 Paracord: The gold standard for practicing rope knots. Its smooth mantle allows the fingers to manipulate the loops easily, while the inner strands provide enough bulk to see the knot structure clearly.
- Natural Fiber Cordage: Jute or hemp twine is excellent for practicing ligatures because the high surface friction helps the Half Knot stay in place before the second throw is completed.
- Static Accessory Cord: For those looking for a professional outdoor application, a 2mm to 4mm static cord is ideal.
Considerations
- Length: You will need at least 24 inches of cord to allow for enough "tail" (the short end) to be manipulated by your fingers.
- Tension: This knot is best practiced by securing the "long end" to a fixed object or holding it firmly to simulate a load.
- Glove Use: While experts can tie this with gloves, it is highly recommended to practice with bare hands first to develop the necessary tactile "feel" for the finger hooks.
How to Tie One Handed Ligature?
To achieve a secure and professional result, follow these precise steps. This technique relies on the coordination between your index and middle fingers to "hook" and "feed" the line.
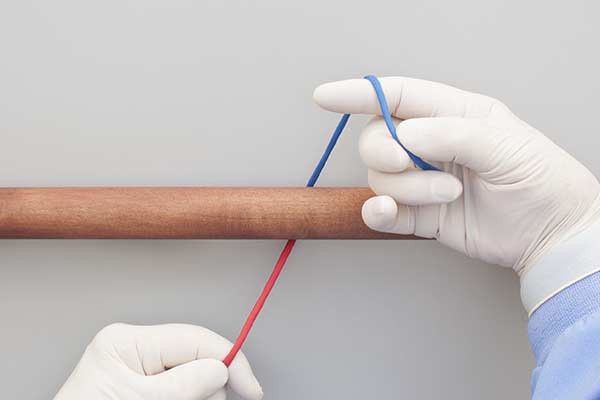
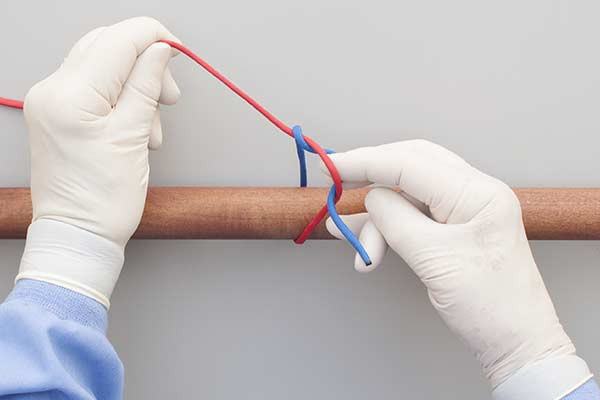
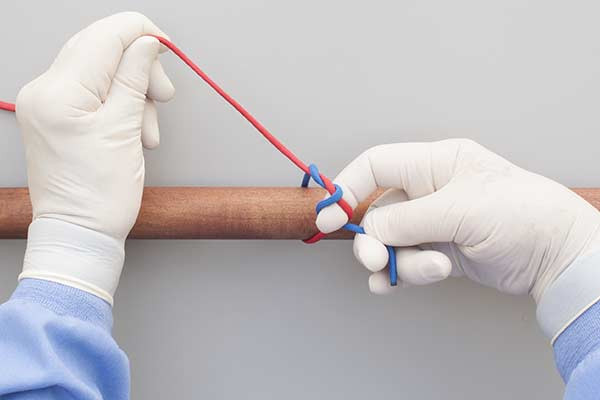
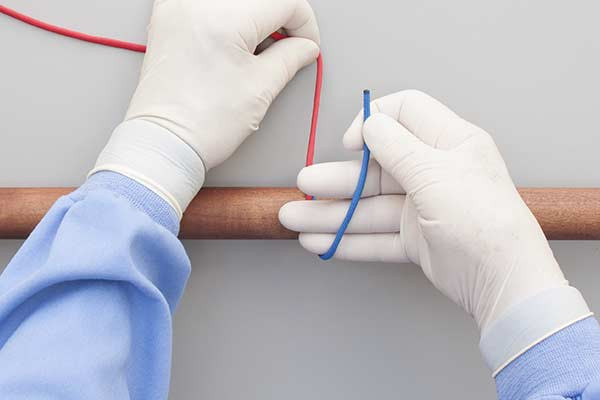
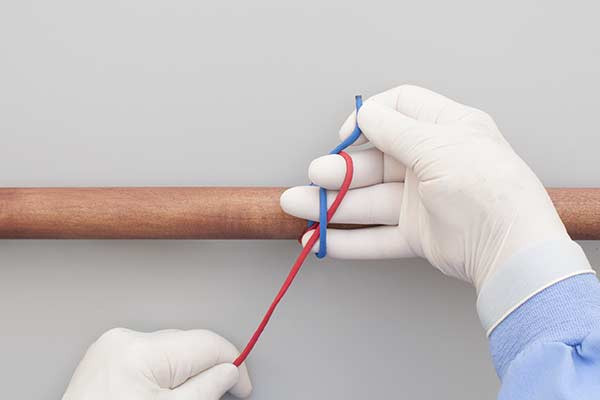
- With your index finger hook the long end.
- Pull the short end under it and through.
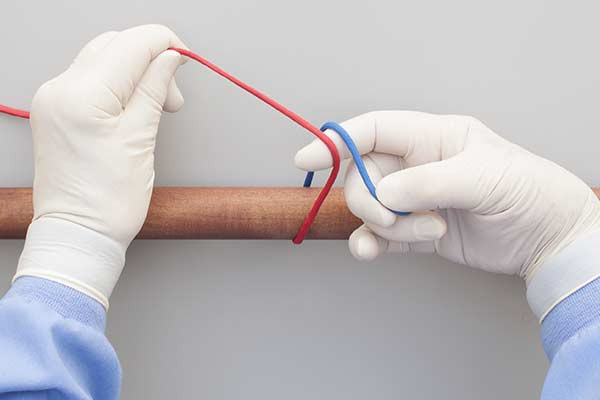
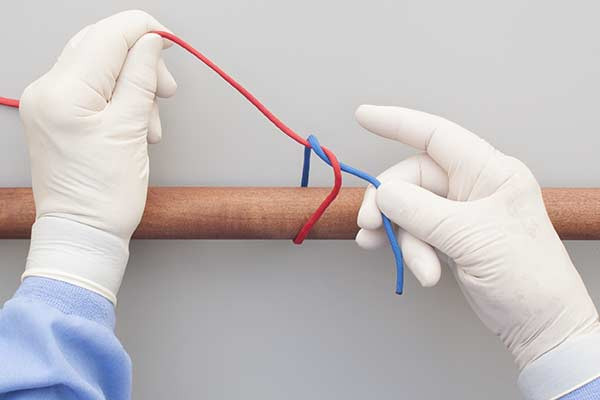
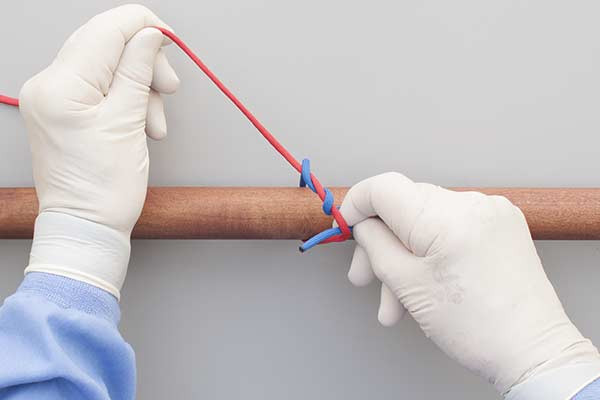
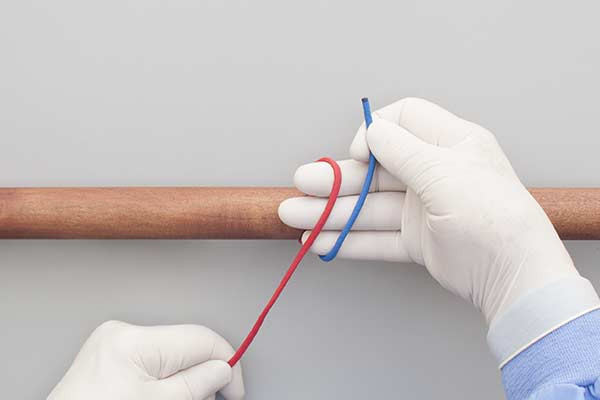
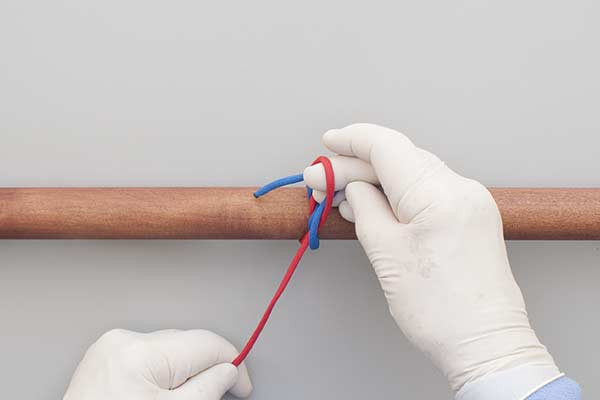
- Hook it again and pull the short end through.
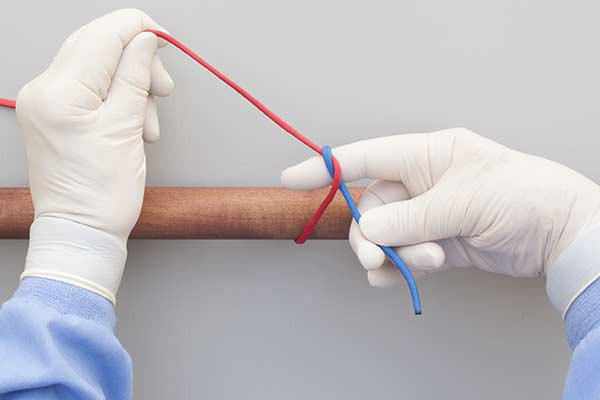
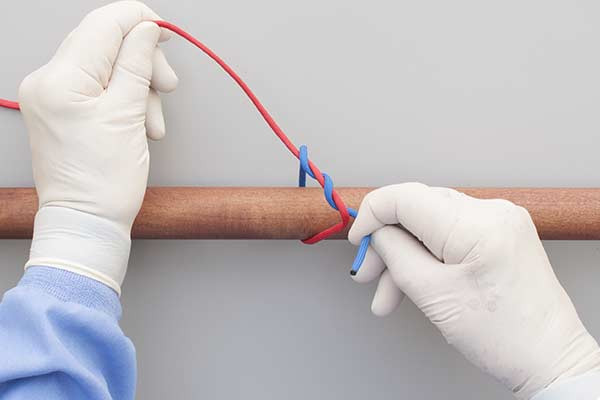
- Tighten the Half Knot.
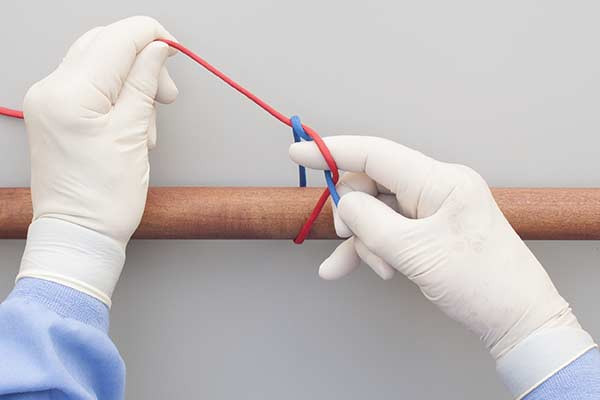
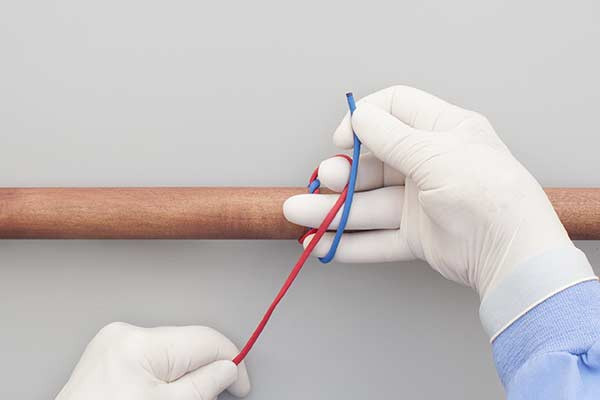
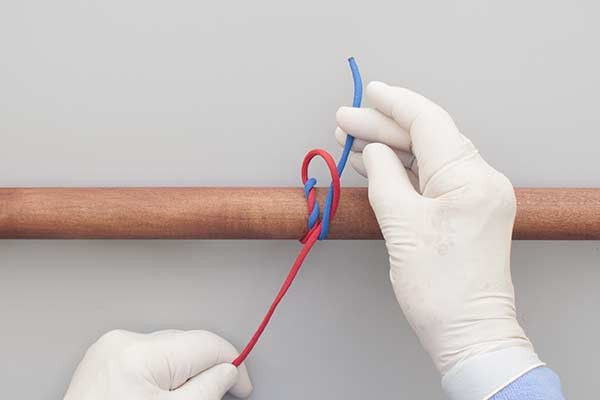
- Lay the short end, then the long end, over your hand.
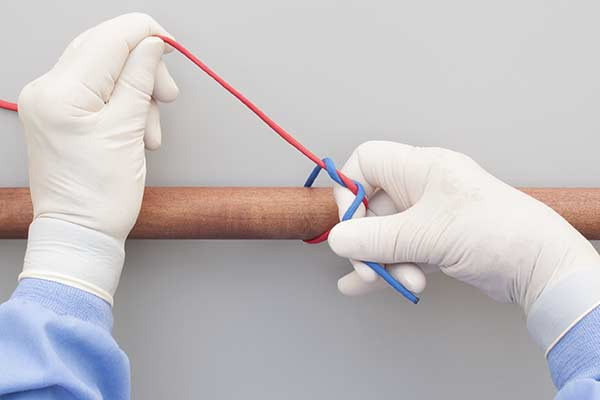
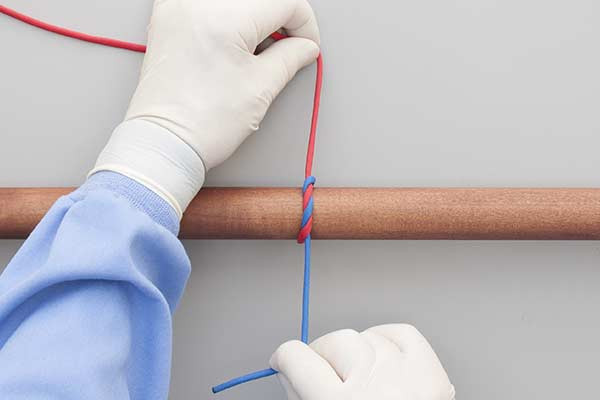
- With your middle finger hook the long end.
- Pull the short end under it and through.
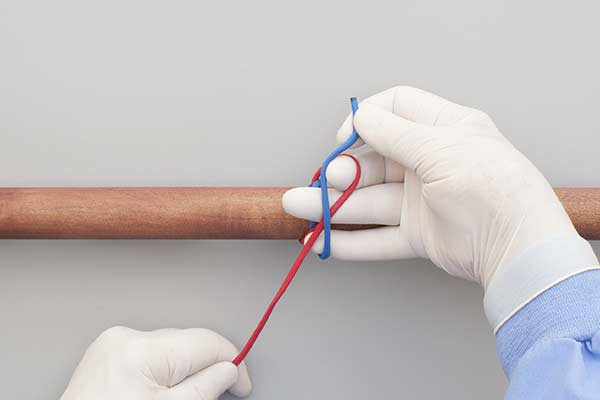
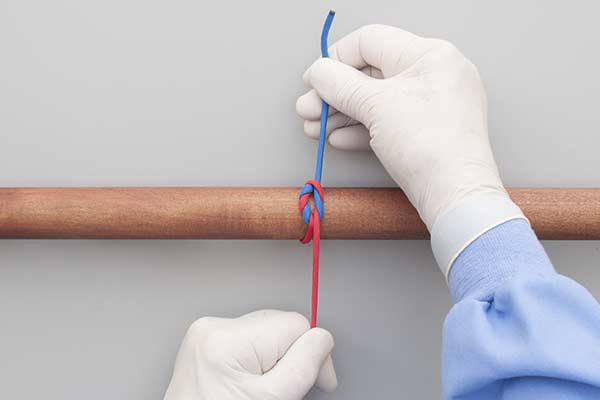
- Pull tight to complete the Ligature.

Common Mistakes to Avoid
Even experienced practitioners can encounter issues when performing the One Handed Ligature at high speeds. Attention to detail is vital for safety and security.
- Creating a "Granny Knot": One of the most common errors in outdoor rope techniques is failing to reverse the direction of the second throw. If the second half of the ligature does not mirror the first correctly, you will end up with a Granny Knot, which is prone to slipping.
- Insufficient Tail Length: If the short end is too short, it may slip back through the loops during the tightening phase. Always ensure you have at least 3-4 inches of "tail" remaining after the knot is cinched.
- Lack of Tension: A One Handed Ligature knot requires consistent tension on the long end. If the long end goes slack between step 4 and step 5, the initial Half Knot may unspool.
- Finger Placement: Using the wrong finger for the hook (e.g., using the index finger for the second throw instead of the middle finger) can lead to tangled cordage and an incomplete knot.
Safety Tip
Always inspect your knot before putting it under a heavy load. While the One Handed Ligature is excellent for binding, it should not be used as a primary life-safety knot (like a Bowline or Figure-8) in climbing or rescue operations unless specifically rated for such by a certified instructor.
Related Knots and Splicing
Understanding the family of knots related to the One Handed Ligature will help you become a more versatile outdoorsman.
The Square Knot (Reef Knot)
The Square Knot is the foundation of most ligatures. It is used to join two ropes of equal diameter together. It is simple, effective, but should only be used for non-critical loads as it can slip if the ropes are of different materials.
The Surgeon’s Knot
This is an evolution of the basic ligature. It involves an extra twist in the first Half Knot, which adds significant friction. This extra friction is vital when tying materials that are under high tension or are particularly "springy."
The Clove Hitch
While not a binding knot like the One Handed Ligature, the Clove Hitch is often used in conjunction with one-handed techniques to secure a rope to a cylindrical object quickly. It is an essential skill for any rope specialist.
The Taut-Line Hitch
This is an adjustable loop knot for use on lines under tension. It is useful when the amount of tension on your One Handed Ligature needs to be adjusted after the initial tie, providing a sliding friction hitch that grips when loaded.
Final Words
The One Handed Ligature is more than just a trick; it is a fundamental skill for anyone serious about mastering rope knots and outdoor rope techniques. The ability to manipulate cordage with precision using a single hand opens up a world of possibilities in gear management, crafting, and general utility.
By following the structured steps provided—focusing on the transition from the index finger hook to the middle finger hook—you can develop the muscle memory required to tie this knot in seconds. Remember that practice is the key to proficiency. Start with a thick, high-friction rope to understand the mechanics, and gradually move to thinner, slicker materials as your dexterity improves.
Whether you are securing a tarp in a storm or simply organizing your workshop, the One Handed Ligature knot is a reliable and impressive addition to your technical repertoire. Keep practicing, stay safe, and always ensure your knots are dressed and tightened properly before use.
