
In the world of technical cordage and outdoor survival, the ability to manipulate line with precision is more than just a hobby—it is a critical skill set. Whether you are securing a load on a rugged overland expedition or preparing for a high-stakes formal event, the geometry of a knot dictates its function, security, and aesthetic. Among the most iconic of these configurations is the Windsor Necktie.
While often associated with the boardroom, the Windsor Necktie represents a masterclass in symmetry and volume. For the outdoor enthusiast, practicing such intricate wraps builds the manual dexterity required for complex rope knots and outdoor rope techniques used in the field. Understanding how to manage the “long end” and “short end” of a line is a foundational concept that translates directly to lashings, hitches, and bends.
In this comprehensive guide, we will break down the mechanics of this classic knot, explore the materials best suited for high-performance cordage, and provide a definitive step-by-step tutorial.
Alternative Names: Full Windsor, Double Windsor, Scouter’s Knot (Decorative), The Duke’s Knot.
What Is a Windsor Necktie?
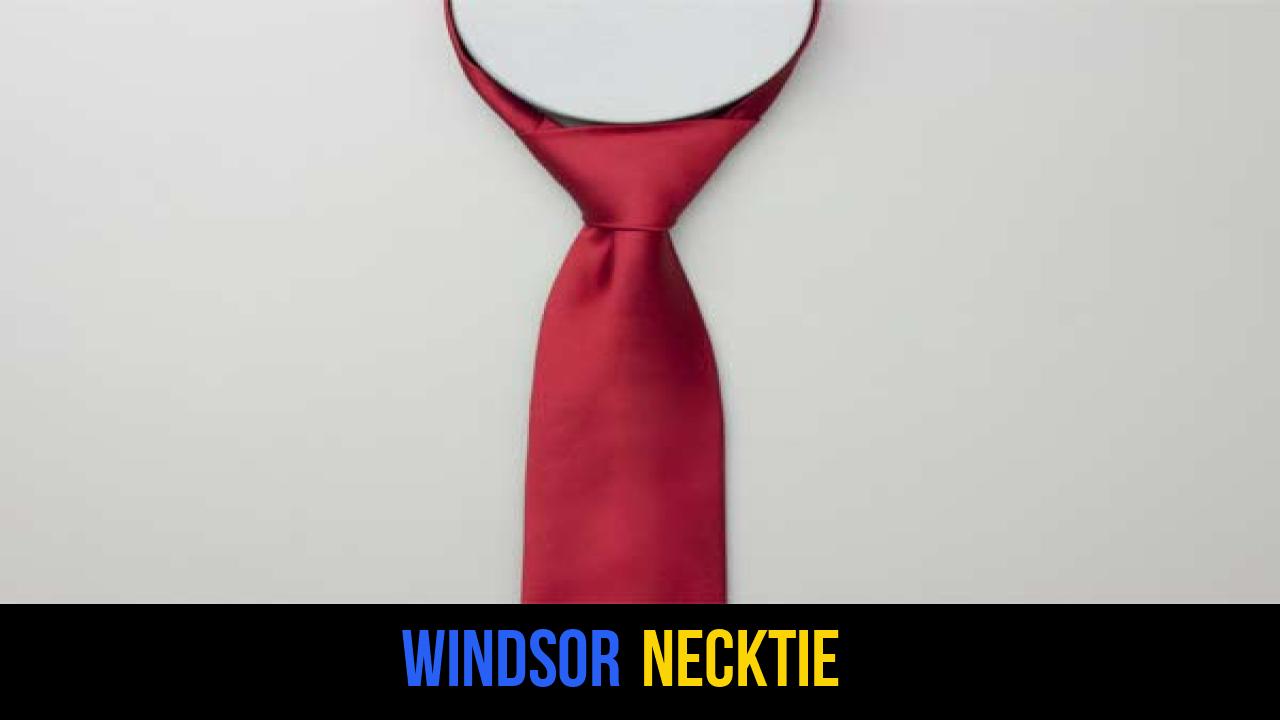
The Windsor Necktie is a wide, triangular knot that is prized for its substantial presence and impeccable symmetry. Named after the Duke of Windsor (though he likely achieved the look through specific fabric weights rather than the knot itself), it has become the gold standard for a professional and “power” appearance.
Practical Uses in Technical Contexts
While its primary application is in formal attire, the Windsor Necktie structure is an excellent educational tool for those studying rope knots.
- Symmetry Training: Unlike the Four-in-Hand, the Windsor requires wraps on both sides of the central core (the “short end”). This teaches the tier how to maintain balance in a knot, a skill vital for load-bearing outdoor rope techniques.
- Bulk Management: It is designed to take up more space. In outdoor applications, understanding how to “bulk” a knot can be useful when creating stoppers or decorative terminal ends on paracord lanyards.
- Friction and Tension: The final steps of the Windsor involve a specific tensioning sequence that mirrors how one might “dress” a climbing knot to ensure it sits correctly against a surface.
Materials and Tools Needed
To achieve a perfect Windsor Necktie—or any technical knot—the choice of material is paramount. In the context of outdoor rope techniques, the “hand” (the feel and flexibility) of the rope determines how well the knot will hold.
Rope Types and Cordage
- Silk and Microfiber: Standard for formal neckties, providing high friction and a crisp hold.
- 550 Paracord: For those practicing rope knots for outdoor use, paracord is an excellent medium. Its nylon sheath allows for smooth transitions during the “wrap around” phases.
- Kernmantle Utility Cord: A 3mm or 4mm accessory cord is perfect for technical practice, offering a realistic feel of how a knot “sets.”
Essential Considerations
- Length: The Windsor consumes a significant amount of material. Ensure your “long end” has enough lead to complete the double wrap.
- Texture: A rope that is too slick (like some polypropylenes) may cause the Windsor to slip. Look for materials with a matte finish or a tight weave.
- The “Core”: In this knot, the “short end” acts as the static core. In outdoor rope techniques, ensuring the core remains straight is vital for the knot’s integrity.
How to Tie Windsor Necktie?
To achieve the perfect shape, follow these instructions precisely. This sequence ensures the symmetry that the Windsor Necktie is famous for.
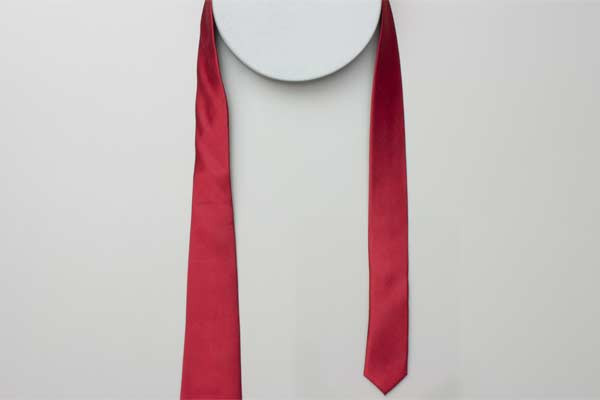
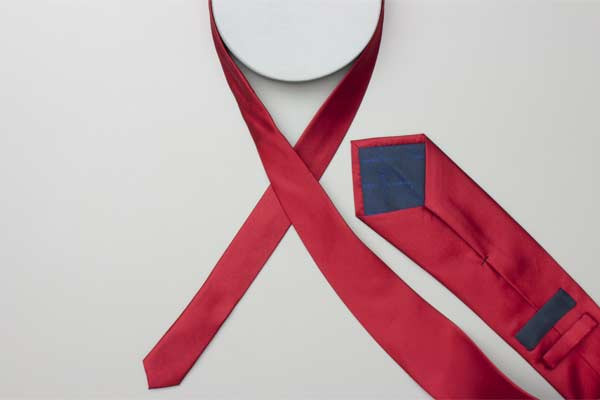
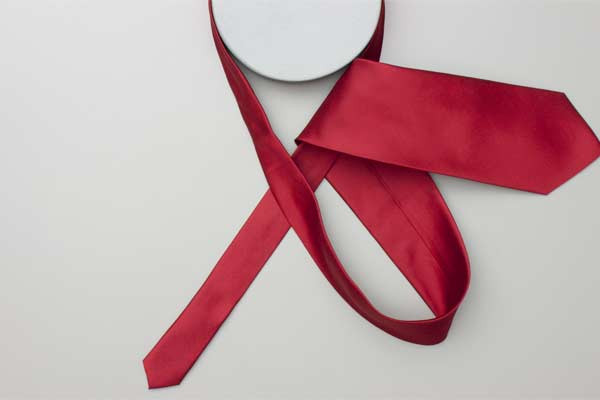
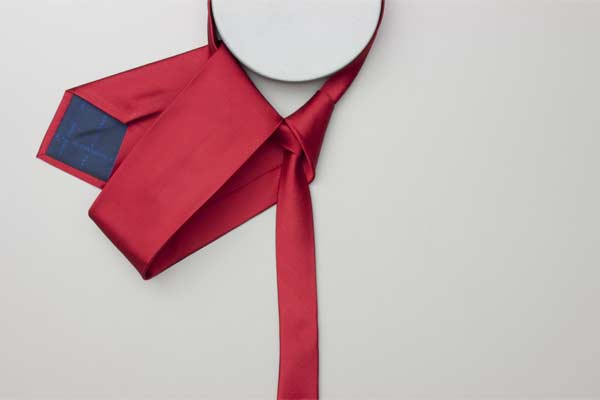
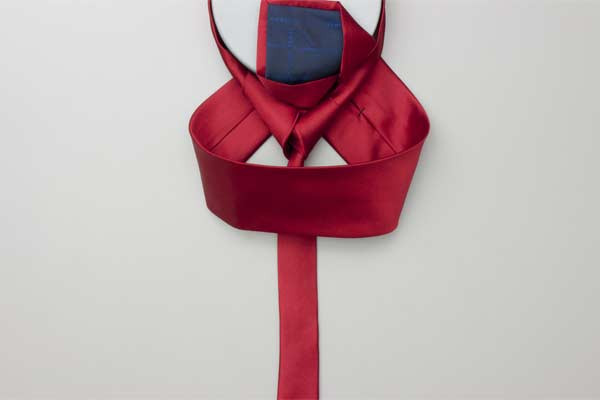
- Pass the long end over and around the short end.
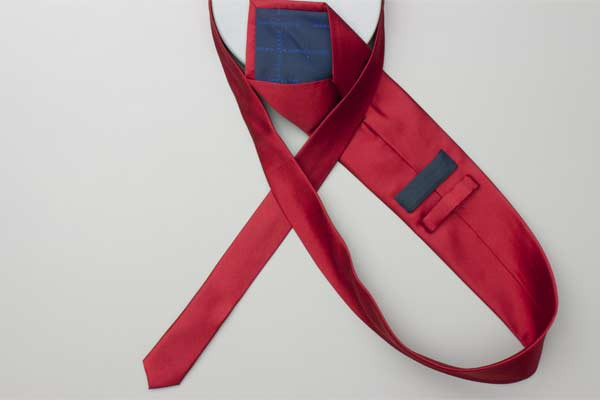
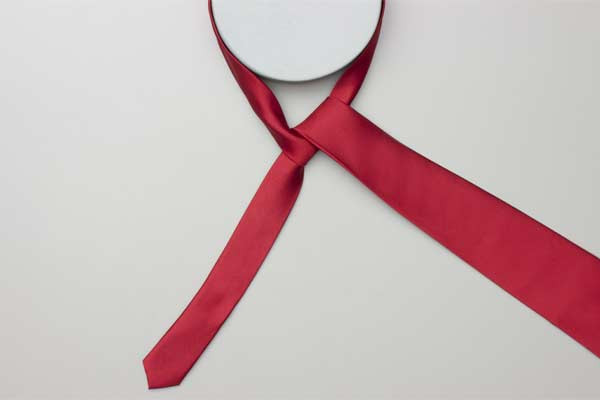
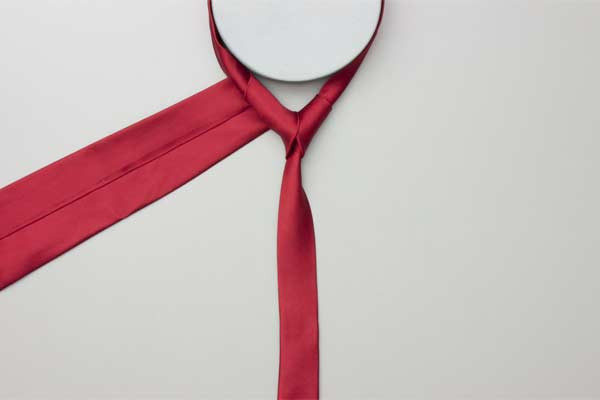
- Continue behind the short end and wrap around the opposite side.
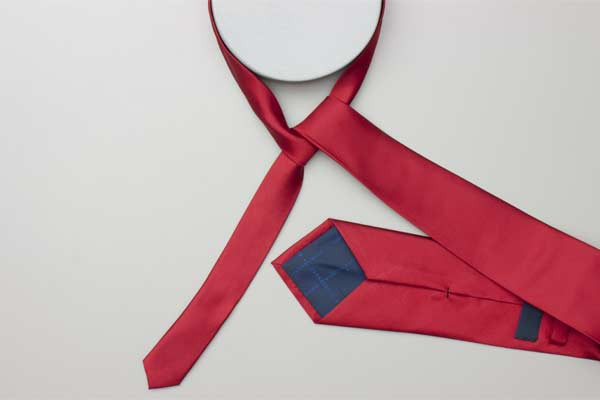
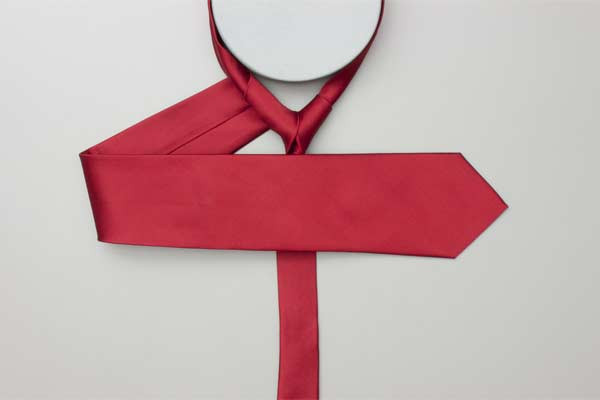
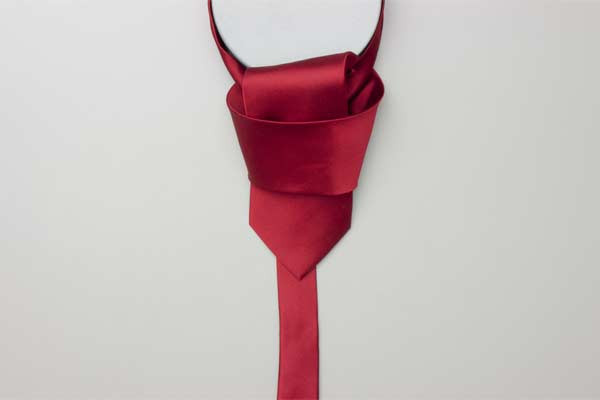
- Cross in front, pull up and forward by the neck, and then down under itself.
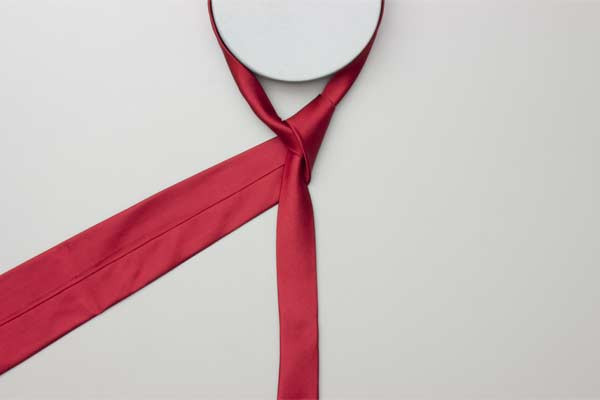
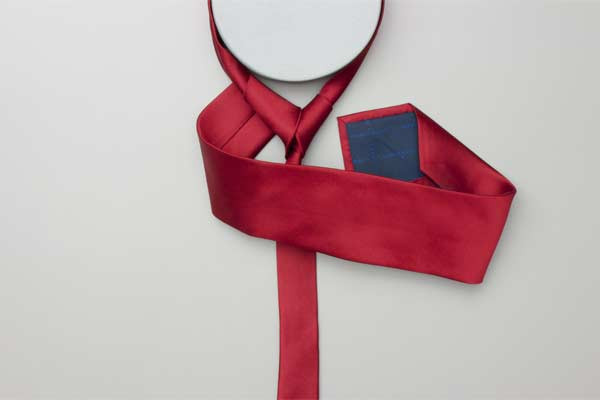
- Pull the long end to tighten the knot, then the short end to make snug against the neck.


Common Mistakes to Avoid
Even seasoned experts can encounter issues when the geometry of the knot is not respected. When practicing rope knots, keep the following safety and aesthetic tips in mind:
1. Neglecting the “Dress”
In the world of outdoor rope techniques, “dressing” a knot means straightening the strands so they don’t cross over each other unnecessarily. A messy Windsor will look lopsided and may fail to provide the necessary “snug” fit mentioned in the instructions.
2. Improper Tensioning
If you pull the long end too hard before the knot is seated, you risk distorting the triangular shape. Always tighten incrementally. As the instruction states, pull the long end to tighten the knot first to set the shape, and only then pull the short end to make snug.
3. Incorrect Start Length
Because the Windsor is a “double wrap” knot, it uses more material than a standard hitch. If your “short end” is too long at the start, you will run out of “long end” before you can finish the final tuck.
4. Material Thickness
Using a rope that is too thick for the intended loop can lead to a “choke” effect. Ensure the diameter of your cordage is appropriate for the scale of the knot you are tying.
Related Knots and Splicing
Expanding your repertoire of rope knots is essential for any technical outdoor specialist. Here are a few related configurations:
- Four-in-Hand Knot: A smaller, simpler, and more asymmetrical knot often used when less bulk is required in the cordage.
- Prusik Hitch: A critical outdoor rope technique using a loop of cord around a standing rope to create a friction hitch for climbing.
- Bowline Knot: Known as the “King of Knots,” this creates a fixed loop at the end of a rope that is secure and easy to untie after loading.
- Square Knot (Reef Knot): A simple binding knot used to secure a rope or line around an object; foundational for all beginners.
- Taut-Line Hitch: An adjustable loop knot for use on lines under tension, ideal for securing tent guy-lines in outdoor environments.
Final Words
The Windsor Necktie is more than just a symbol of formality; it is an exercise in precision, symmetry, and cordage management. By mastering the specific sequence of passing the long end over, behind, and through the “neck” of the knot, you develop the tactile awareness necessary for advanced rope knots and outdoor rope techniques.
Whether you are preparing for a professional engagement or simply sharpening your skills with a length of paracord in the backcountry, the principles of the Windsor remain the same: balance, tension, and order. Practice these steps until the motion becomes muscle memory, and you will find that your ability to handle more complex technical knots improves significantly.
Remember, the strength of any knot—be it for fashion or function—lies in the care taken during the tie. Keep your lines clean, your wraps tight, and your “snug” fit perfect.
Safety Disclaimer: The instructions provided are for educational purposes related to knot-tying techniques. When using ropes for climbing, arboriculture, or life-safety applications, always seek professional certification and inspect your gear for wear and tear.
