
In the world of rope knots and maritime traditions, few techniques are as revered for their strength and reliability as the Short Splice. While standard knots like the reef knot or the sheet bend are excellent for temporary connections, they inherently weaken the rope by creating sharp bends that concentrate stress. The Short Splice, however, is a fundamental outdoor rope technique that allows two ropes of the same diameter to be joined permanently while retaining a significantly higher percentage of the rope’s original breaking strength.
Whether you are a sailor, a traditional climber, a scout, or a DIY enthusiast working on a backyard project, understanding how to execute a proper Short Splice knot is a hallmark of true rope mastery. This guide will walk you through the history, the mechanics, and the precise steps required to create a professional-grade splice.
Alternative Names: Common Splice, Sailor’s Splice, Round Splice.
What Is a Short Splice?
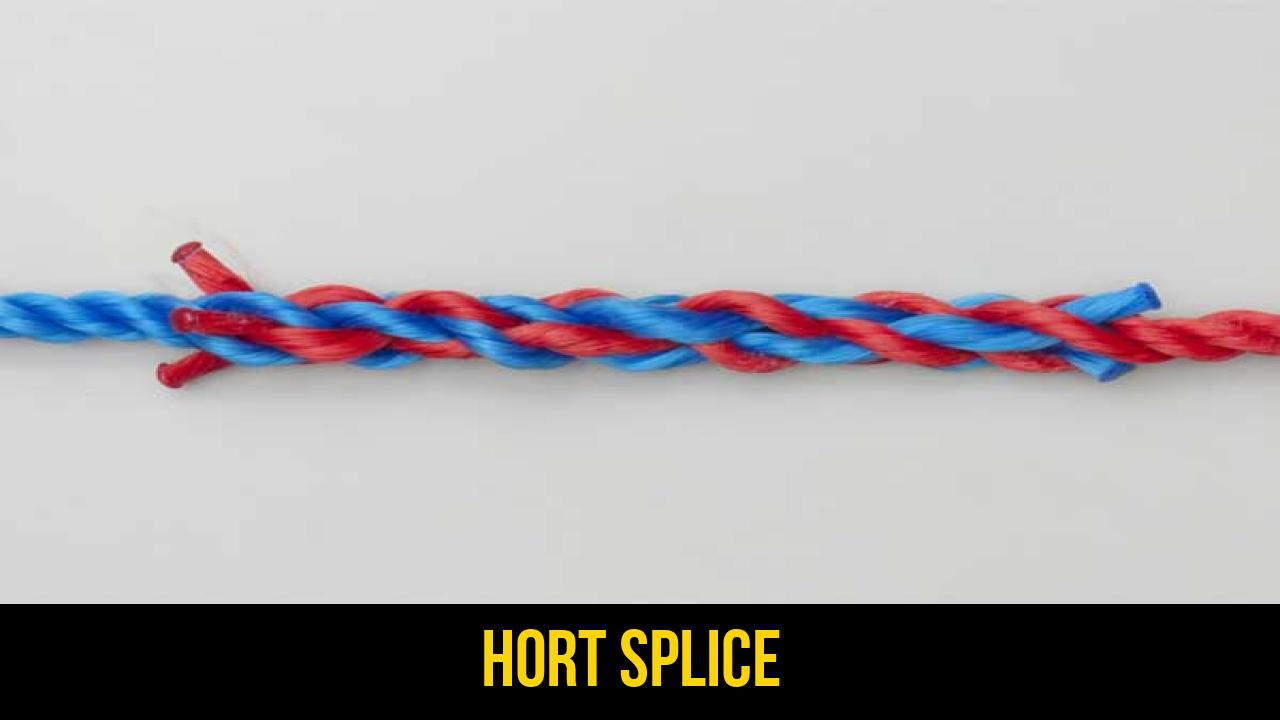
A Short Splice is a method of joining two multi-strand ropes (typically three-strand laid rope) by unravelling the ends and interweaving the strands back into the opposing rope. Unlike a knot, which relies on the rope biting against itself, a splice utilizes the friction of the strands over a larger surface area and the natural "lay" of the rope to create a bond that is nearly as strong as the rope itself.
Practical Uses and Advantages
The primary reason to choose a Short Splice over a knot is strength. A well-executed splice can retain up to 85% to 90% of the rope’s tensile strength, whereas many common joiner knots can reduce strength by 50% or more.
Common applications include:
- Repairing damaged lines: If a rope is frayed in the middle, the damaged section can be cut out and the two healthy ends spliced together.
- Creating long lines: When a single spool of rope isn’t long enough for a specific task.
- Decorative Rope Work: The aesthetic appeal of a splice makes it a favorite for handrails, swings, and nautical decor.
- General Utility: Any scenario where a permanent, high-strength join is required and the rope does not need to pass through a small pulley.
Important Note: A Short Splice significantly increases the diameter of the rope at the point of the join. Because the strands of two ropes are occupying the space of one, the joint will be roughly twice as thick as the original rope. If your rope needs to pass through a block or a pulley, a Long Splice may be required instead.
Materials and Tools Needed
Before beginning your Short Splice, it is essential to gather the right materials. While you can perform a splice with just your hands, specific tools will ensure a tighter, more professional finish.
1. The Rope
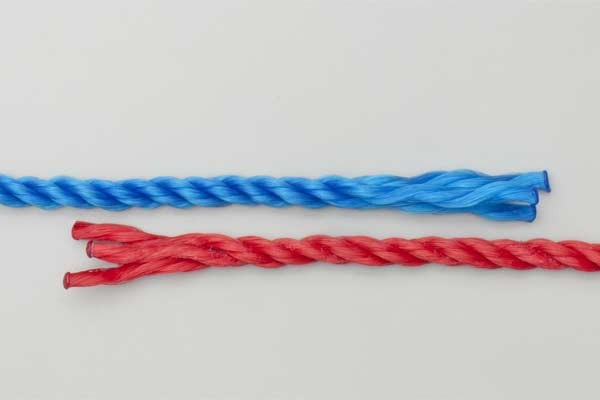
The Short Splice is designed for three-strand laid rope. This includes traditional materials like:
- Manila/Hemp: Traditional natural fibers with excellent grip.
- Nylon: Very strong and elastic, but can be slippery to splice.
- Polypropylene: Lightweight and floats, common in marine environments.
2. Essential Tools
- Tape (Electrical or Masking): Used to "whip" the ends of individual strands to prevent them from unravelling during the process.
- A Fid or Marlinspike: A tapered tool used to open the "lay" of the rope, making it easier to tuck the strands under.
- Sharp Knife or Scissors: For cutting the rope and trimming excess strands.
- A Lighter (for synthetic ropes): To heat-seal the ends of the strands once the splice is complete.
How to Tie Short Splice?
To ensure the integrity of the join, follow these steps exactly as they have been practiced by mariners for centuries. Precision during the "tucking" phase is the key to a secure and balanced splice.
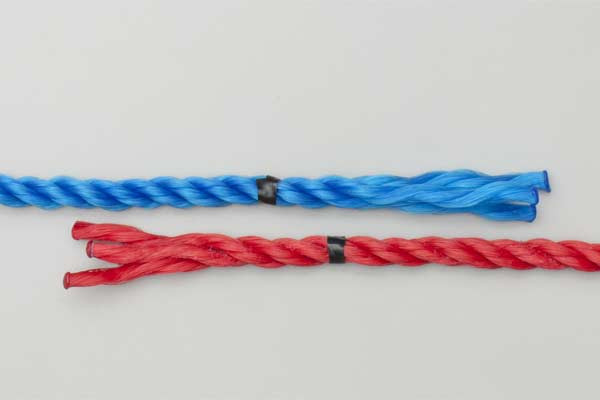
- Tape the rope. Begin by applying tape to the ends of both ropes to prevent fraying. You should also place a temporary wrap of tape around each rope at the point where you want the unravelling to stop.
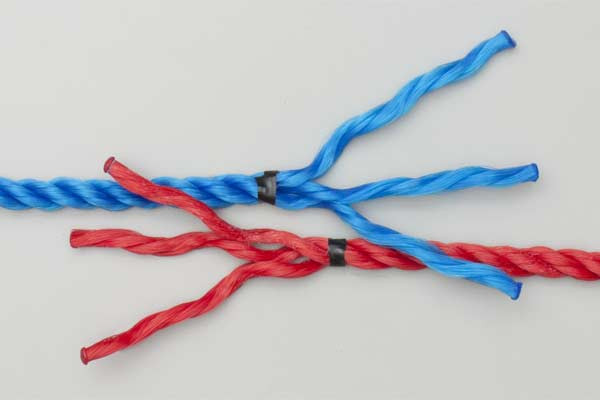
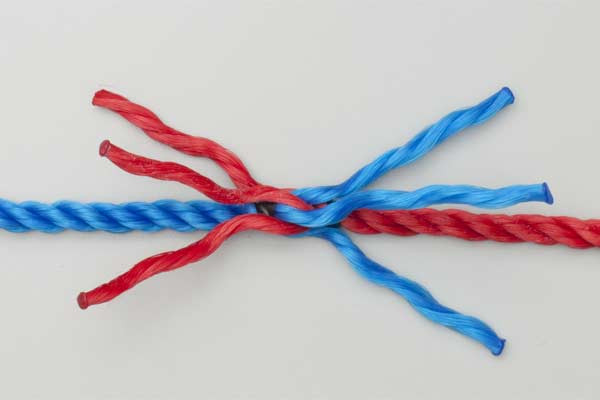
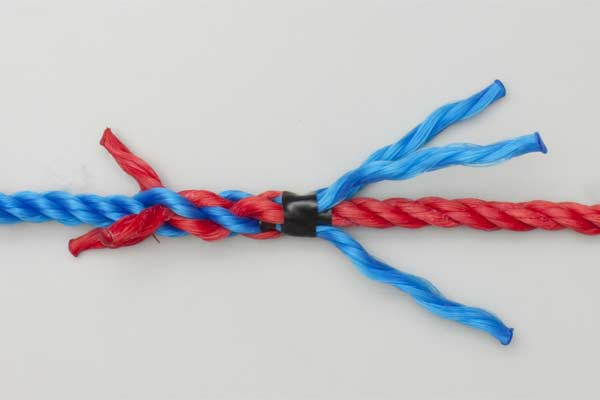
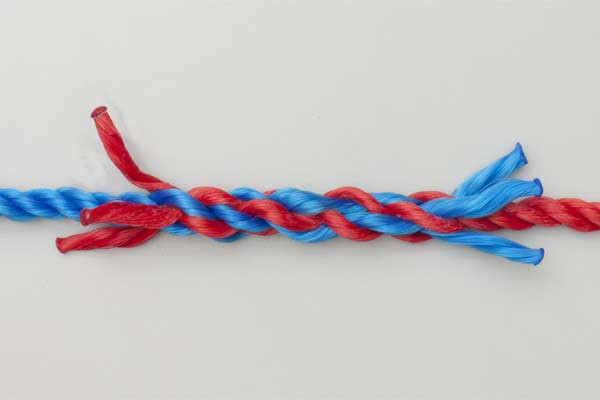
- Unravel enough for about 5 tucks (3 shown here). Carefully unlay the three strands of each rope. For a standard Short Splice, five "tucks" (passes) per side are recommended for synthetic ropes, while three may suffice for natural fibers.
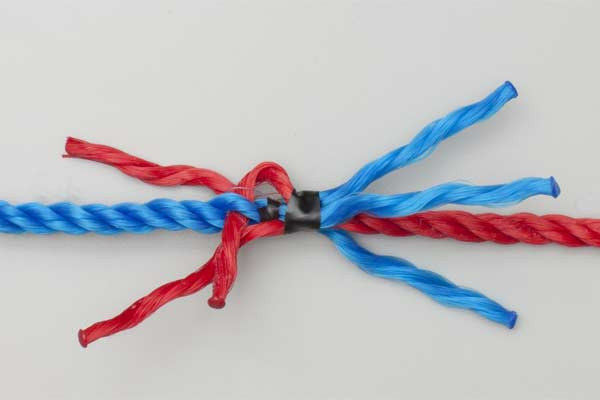
- Push the ends into each other and tape the middle. Bring the two ropes together so that the unlaid strands alternate (like meshing the fingers of your hands). Push them tightly against each other and use tape to secure the center "crotch" where the two ropes meet.
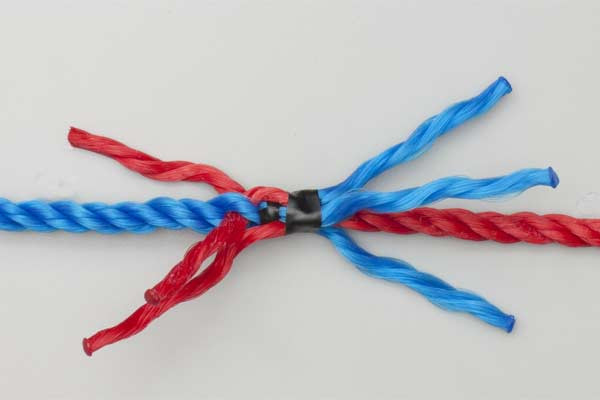
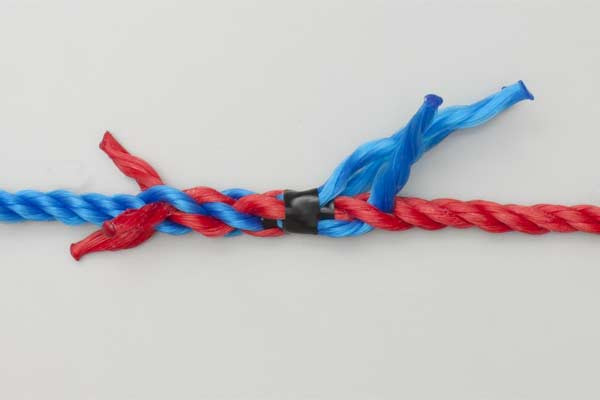
- Make the first complete set of tucks, and then another. Taking one strand from the left side, tuck it over the adjacent strand of the right-hand rope and under the next. Do this for all three strands on one side. Repeat the process to complete a second full set of tucks.
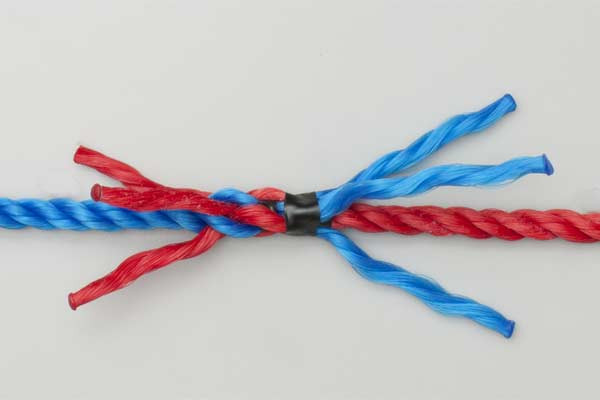
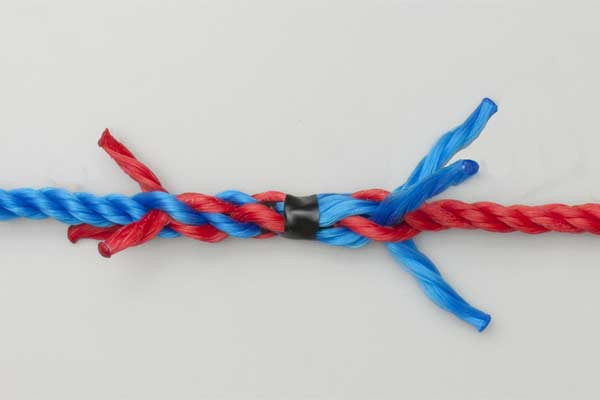
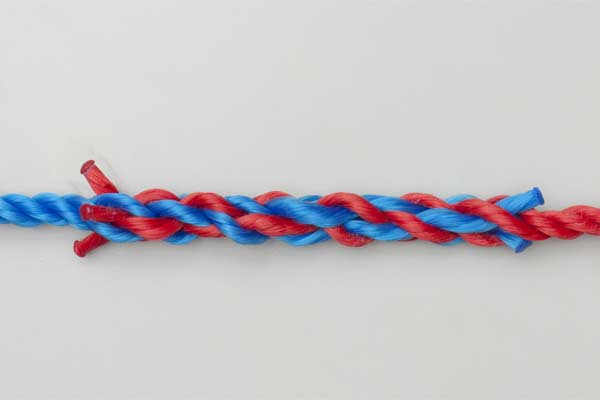
- Repeat this using the other end. Turn the rope around and perform the same over-under tucking process with the strands from the second rope, weaving them into the standing part of the first rope.
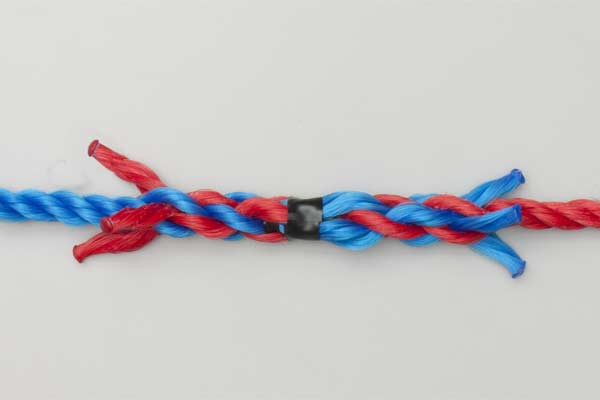
- Remove the tapes, tighten, and complete the remaining tucks. Once the structure is held in place by the initial tucks, remove any temporary middle tape. Pull each strand tight to ensure the splice is snug. Complete the remaining tucks (usually 3 to 5 total per side) to ensure maximum security.


Common Mistakes to Avoid
Even for those experienced in outdoor rope techniques, the Short Splice can be tricky. Here are the most common pitfalls:
- Tucking "With" the Lay: You must always tuck your strands against the lay of the rope. If you tuck in the same direction the strands are twisted, the splice will simply unroll when tension is applied.
- Uneven Tension: If one strand is pulled tighter than the others, the load will not be distributed evenly. This leads to a "cockled" splice that is prone to failure.
- Insufficient Tucks: For slippery synthetic ropes like polypropylene, three tucks are rarely enough. Always aim for at least five tucks to ensure the rope doesn’t slip under heavy loads.
- Forgetting to Taper: While not strictly necessary for strength, professional splicers "taper" the splice by thinning the strands (removing some fibers) for the final two tucks. This allows the splice to transition smoothly back into the main rope diameter.
Safety First
Never use a Short Splice in a life-safety application (like rock climbing or arboriculture) unless you have been formally trained and the splice has been verified. While incredibly strong, a splice is only as reliable as the person who made it.
Related Knots and Splicing
If the Short Splice isn’t exactly what you need for your specific project, consider these related rope knots and techniques:
- Long Splice:
The Long Splice is used to join two ropes without increasing the thickness of the rope significantly. This is essential for lines that must run through pulleys or blocks, though it is slightly less strong than a short splice. - Eye Splice:
The Eye Splice is used to create a permanent loop at the end of a rope. It is the gold standard for creating dock lines and anchor warps, providing a cleaner and stronger finish than any loop knot. - Back Splice:
A Back Splice is used to finish the end of a rope to prevent it from fraying. It creates a small, rounded "club" at the end of the line. It is more durable than simple whipping but prevents the rope from passing through tight openings. - Sheet Bend:
If you need a temporary way to join two ropes (especially of different diameters), the Sheet Bend is the most common knot choice. It is quick to tie and untie but lacks the permanent strength of a splice.
Final Words
The Short Splice is more than just a way to join two pieces of cordage; it is a foundational skill in the art of seamanship and outdoor craft. By mastering this outdoor rope technique, you move beyond temporary fixes and begin creating permanent, professional-grade gear.
Remember that practice is essential. Start with a piece of 1/2-inch three-strand twisted nylon or manila rope, as these materials hold their shape well and make it easy to see the "over-under" pattern. With patience and attention to detail, your Short Splice knot will become a reliable tool in your technical repertoire, ensuring that your ropes are joined with the maximum possible strength and durability.
Whether you are outfitting a boat or simply organizing your garage, the ability to splice is a skill that will serve you for a lifetime. Happy tying!
