
In the world of modern rigging, sailing, and heavy-duty recovery, the evolution of synthetic fibers has revolutionized how we handle tension and load. Among the most critical skills for any rigger or outdoor enthusiast is the ability to create a secure, high-strength eye at the end of a line. While traditional knots have served humanity for millennia, modern high-tech ropes—like those made from Dyneema or Spectra—require specialized methods to maintain their integrity. This is where the Splice – Brummel Demo comes into play.
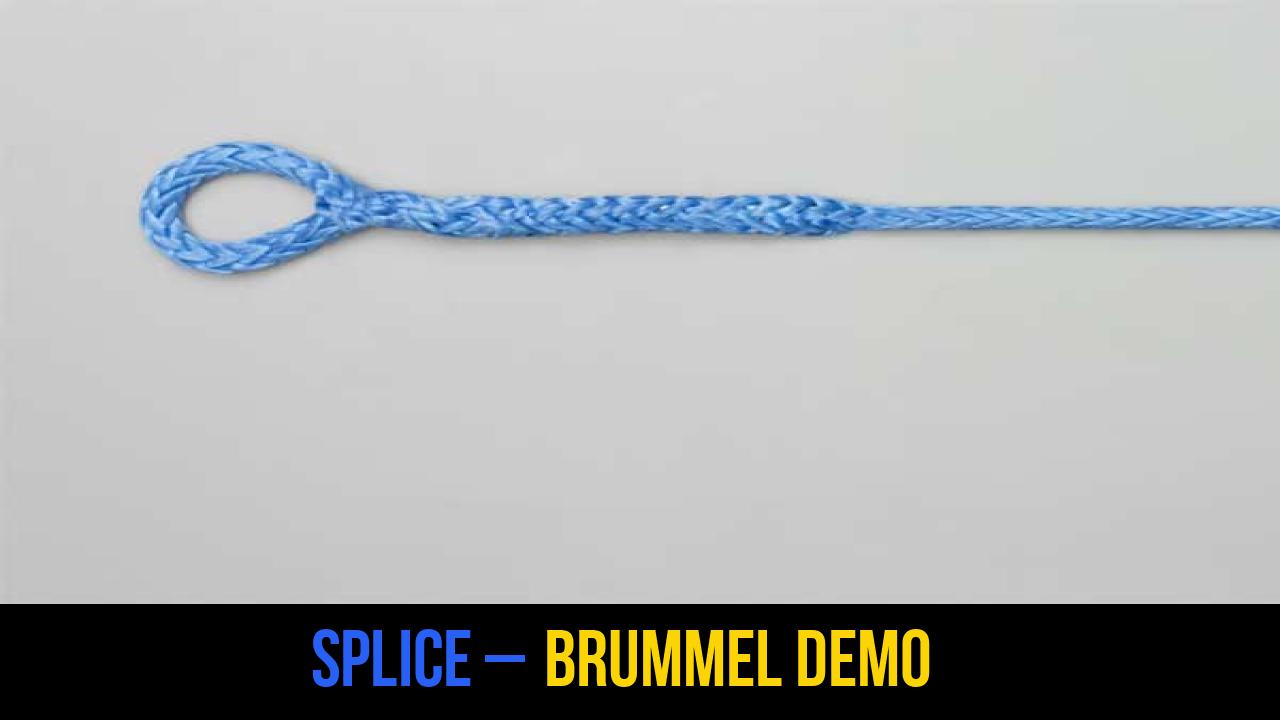
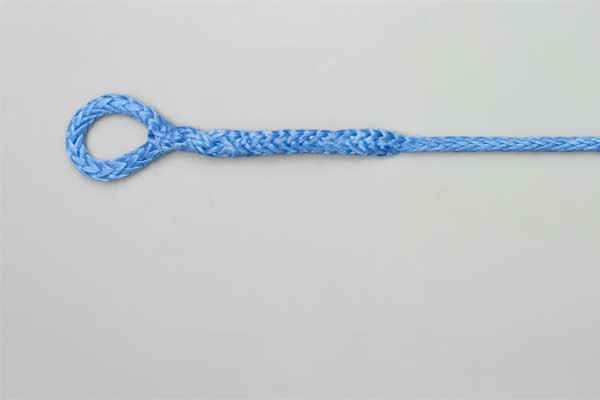
The Splice – Brummel Demo is a technique used to create a "locked" eye splice in 12-strand hollow braid rope. Unlike a standard bury splice, which relies solely on friction under tension, the Brummel method incorporates an interlocking pass-through that prevents the splice from slipping even when the line is slack. This makes it an indispensable tool for anyone working with outdoor rope techniques. Whether you are setting up a high-performance sailing rig, a lightweight winch line for off-roading, or an ultra-strong hammock suspension, understanding this splice is essential.
Alternative names for this technique include: Brummel Eye Splice, Locked Brummel Splice, Mobius Brummel, and 12-Strand Eye Splice.
What Is a Splice – Brummel Demo?
A Splice – Brummel Demo is a mechanical method of forming a permanent loop (an "eye") at the end of a hollow-core rope. To understand its value, one must first understand the limitations of traditional rope knots. When you tie a standard knot, such as a Bowline, in a high-modulus polyethylene (HMPE) rope, the tight bends within the knot can reduce the rope’s breaking strength by as much as 40% to 60%.
The Splice – Brummel Demo solves this problem by maintaining the linear alignment of the fibers as much as possible. It uses a "lock" created by passing the rope through itself in two directions. This "locked" section ensures that the eye remains fixed in size and position, even if the rope is not under load. Once the lock is established, the tail of the rope is buried back into the standing part, creating a "Chinese finger trap" effect. Under tension, the outer braid constricts around the buried tail, providing a grip that is often stronger than the rope itself.
Practical Uses
- Marine and Sailing: Used for halyards, sheets, and control lines where weight reduction and high strength are paramount.
- Off-Road Recovery: Creating soft shackles or eyelets on winch lines.
- Arboriculture: High-strength slings for rigging and climbing.
- Hammock Camping: Constructing "Whoopie Slings" for adjustable, lightweight suspension.
Materials and Tools Needed
To successfully perform a Splice – Brummel Demo, you need the right tools. Because this technique is specifically designed for hollow-braid rope, the requirements differ from traditional knot-tying.
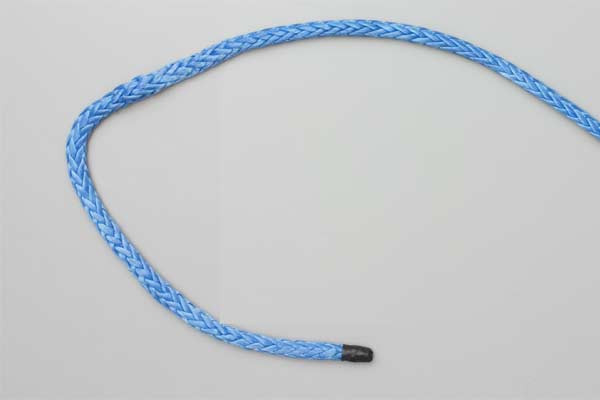
1. The Rope
The most common material for this splice is 12-strand single braid rope. Brands like AmSteel-Blue (Dyneema SK-75/78) are the industry standard. This rope is hollow in the center, which allows the tail to be "buried."
2. Splicing Fids or Wands
A fid is a specialized tool used to pull the rope through itself. For smaller diameters, a wire fid or a "D-Splicer" is excellent. For larger ropes, tubular aluminum fids are preferred. If you are in the field, a bent piece of floral wire or a knitting needle can sometimes suffice.
3. Cutting Tools
High-tech fibers are notoriously difficult to cut. A very sharp, serrated knife or specialized ceramic scissors are recommended to prevent fraying the strands.
4. Marking Tool
A felt-tip marker (like a Sharpie) is necessary to mark the "short end" (the tail) and the "long end" (the standing part) to ensure your measurements are accurate.
5. Masking Tape
Taping the end of the rope into a tapered point makes it much easier to pass through the tight weave of the braid.
How to Tie Splice – Brummel Demo?
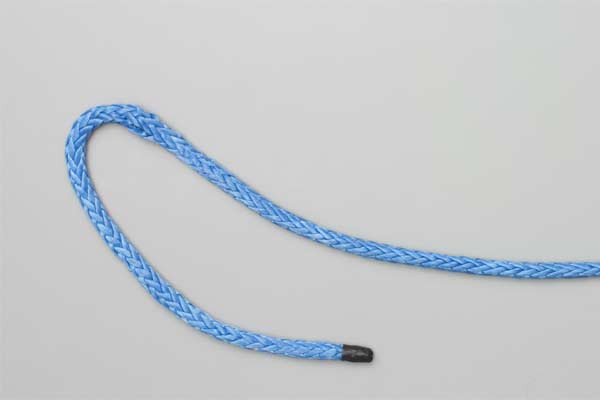
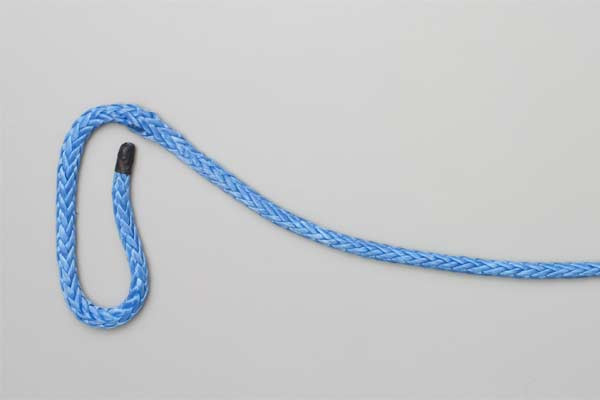
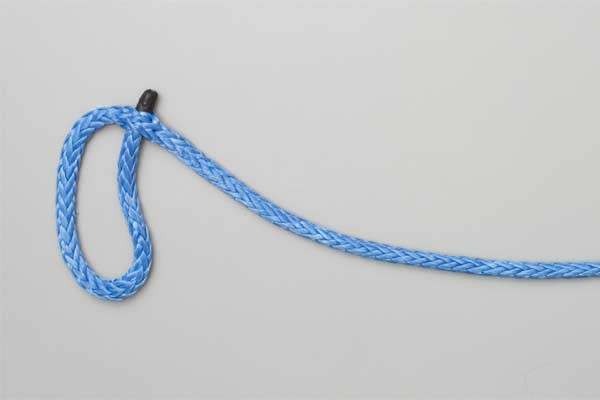
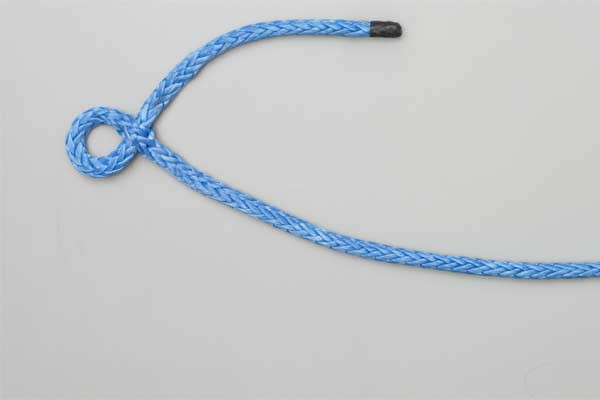
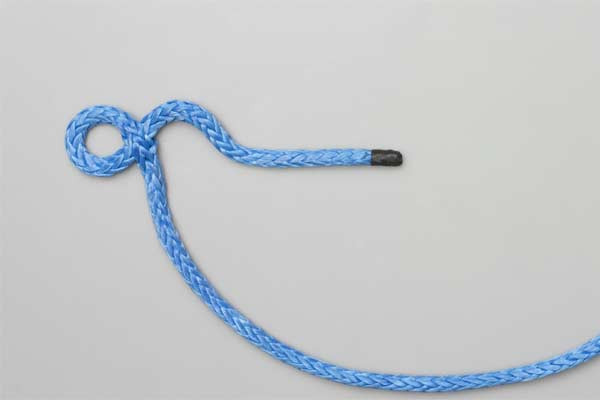
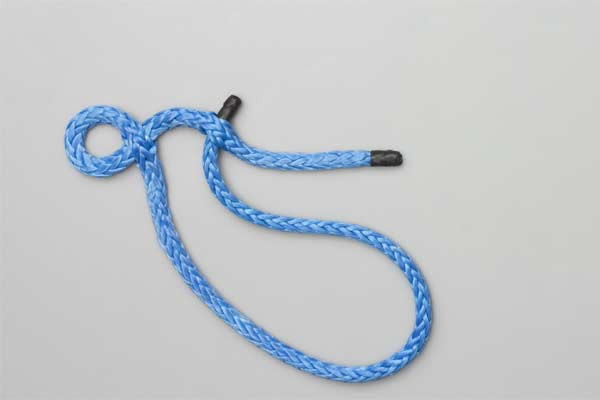
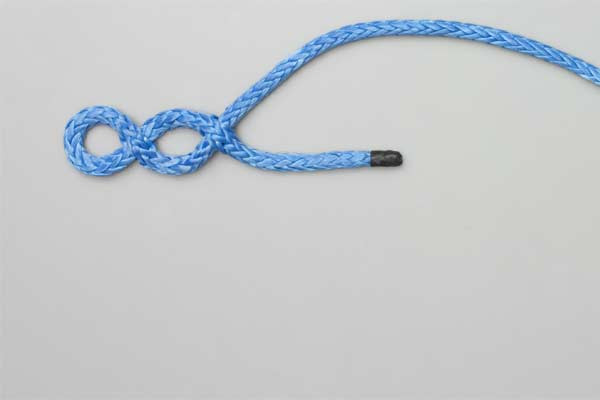
The following instructions outline the fundamental mechanical lock of the Brummel splice. Follow these steps precisely to ensure the lock is seated correctly before finishing the bury.
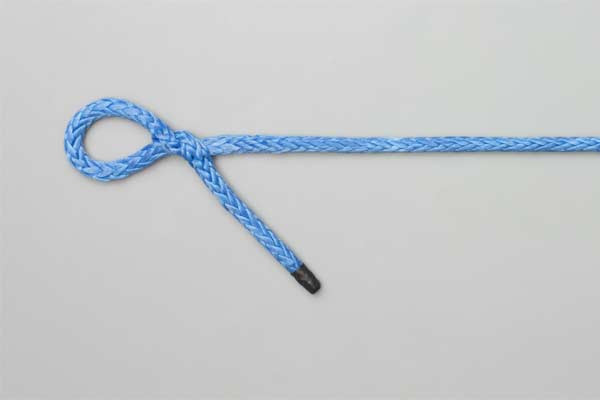
- Make a hole in the long end and pass the short end through it.
- Then, make a hole in the short end and pass the long end through it.
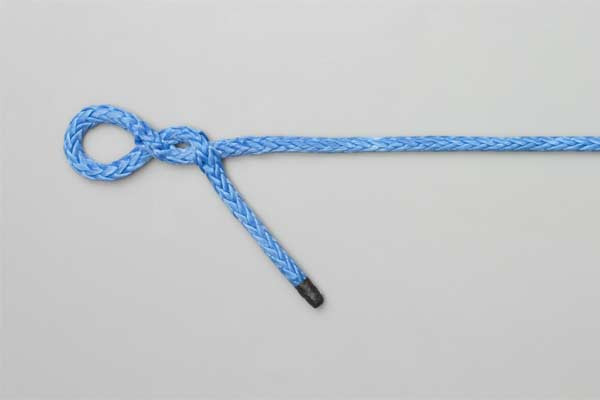
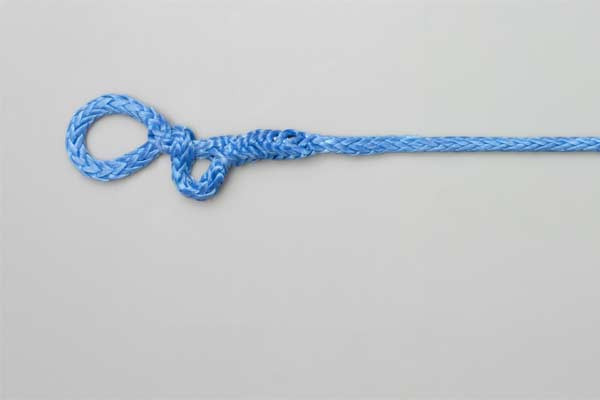
- Snug the splice together and pass the tail of the short end down the center of the long end.


Common Mistakes to Avoid
Even though the Splice – Brummel Demo is a reliable technique, small errors can lead to a failure of the splice or a significant reduction in the rope’s Rated Breaking Strength (RBS).
Neglecting the Taper
One of the most common mistakes is failing to taper the tail before passing it down the center of the long end. If the tail is left at its full diameter, it creates a "step" or a blunt end inside the rope. This creates a stress concentration point. To fix this, you should gradually remove strands from the tail (usually 4 pairs of strands) over a few inches before the final bury.
Incorrect Bury Length
The strength of a splice comes from the friction of the bury. A common rule of thumb is that the bury should be at least 72 times the diameter of the rope (or two full fid lengths). If the bury is too short, the tail may pull out under extreme loads, even with the Brummel lock in place.
"Milking" the Slack
After passing the tail into the long end, the outer cover will be bunched up. You must "milk" the cover—sliding your hand firmly down the rope away from the eye—to smooth the outer braid over the buried tail. Failure to do this properly means the tension won’t be distributed evenly.
Using the Wrong Rope Type
The Splice – Brummel Demo is specifically for single-braid hollow rope. Attempting this on a double-braid rope (which has a core and a separate cover) requires a much more complex procedure and is not recommended for beginners.
Related Knots and Splicing
Understanding how the Splice – Brummel Demo fits into the wider world of outdoor rope techniques helps in choosing the right tool for the job.
- Bury Splice: A simpler version of the eye splice that lacks the interlocking Brummel pass-through. It relies entirely on tension to stay secure and can slip if the line is frequently slack.
- Bowline Knot: A classic loop knot used when a temporary eye is needed. While versatile, it is significantly weaker than a splice and can slip in slippery synthetic fibers like Dyneema.
- Soft Shackle: A high-strength loop made by combining a Brummel splice with a Stopper Knot (like the Diamond Knot). It replaces heavy steel shackles in rigging.
- Whoopie Sling: An adjustable loop that utilizes a long bury splice. It is commonly used in arboriculture and hammock camping for its incredible strength-to-weight ratio.
Final Words
The Splice – Brummel Demo represents the pinnacle of modern rope knots and splicing technology. By mastering the simple three-step locking process—passing the short end through the long, the long through the short, and finishing with a clean bury—you gain the ability to create connections that are as strong as the rope itself.
Whether you are a professional mariner or an outdoor hobbyist, the reliability of a locked Brummel splice provides peace of mind. It eliminates the bulky profile of traditional knots and maximizes the performance of high-tech synthetic lines. Practice this technique with scrap pieces of 12-strand rope until the "inversion" of the lock becomes second nature. Once mastered, the Splice – Brummel Demo will become a staple in your technical toolkit for all your heavy-duty rigging needs.
