
In the world of nautical traditions and outdoor rope techniques, few knots carry the aesthetic prestige and functional versatility of the Turk’s Head knot. Whether you are a seasoned sailor, a bushcraft enthusiast, or a DIY crafter, understanding how to manipulate cordage into this intricate, cylindrical braid is a hallmark of true rope mastery.
The Turk’s Head is not just a knot; it is a mathematical marvel of weaving. Historically used on ships to identify the "king spoke" of a steering wheel or to provide grip on railings, it has transitioned into the modern era as a staple for outdoor gear customization. From wrapping the handles of hiking staves to creating durable lanyards for survival knives, the Turk’s Head is as practical as it is beautiful.
Alternative names for this knot include: Turk’s Head Braid, Sailor’s Woggle, Gasket Knot, and Nautical Turban Knot.
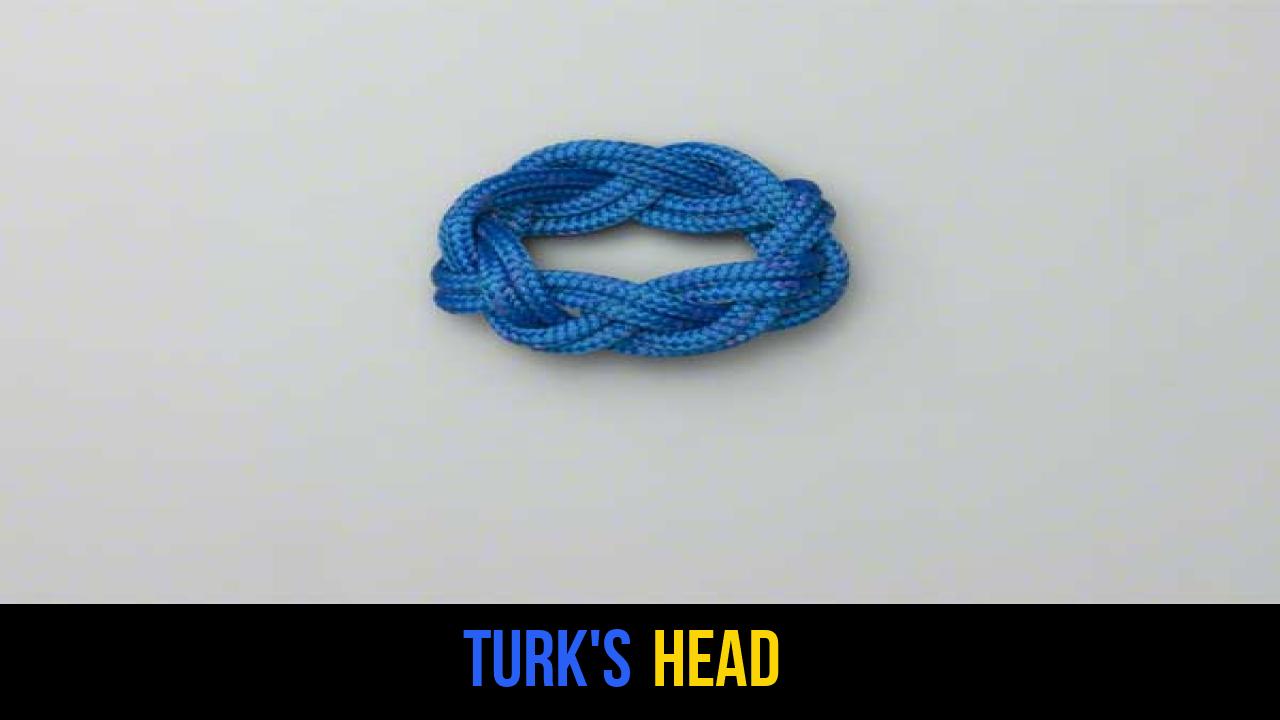
What Is a Turk’s Head?
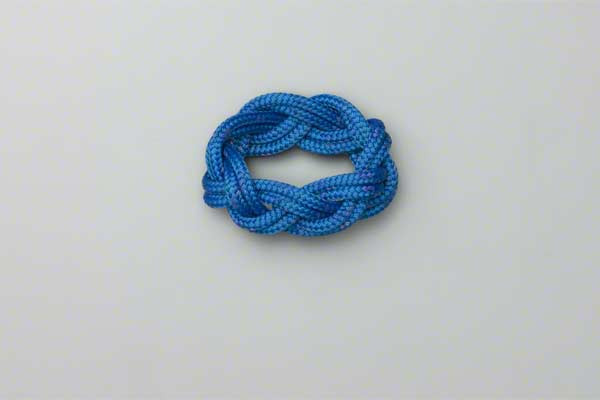
The Turk’s Head knot is a decorative, tubular braid that forms a continuous loop. It is categorized as a "globe knot" or a "cylindrical braid" because it is typically tied around a cylindrical object—like a pole, a tool handle, or even a finger. The knot is characterized by its "leads" (the number of strands going around the cylinder) and "bights" (the scalloped edges at the top and bottom).
Practical Applications in the Outdoors
While many view it as purely decorative, the Turk’s Head serves several critical functions in outdoor rope techniques:
- Enhanced Grip: When tied around a slippery surface, such as a metal flashlight or a wooden paddle, it provides an exceptional non-slip texture.
- Surface Protection: It acts as a buffer or "fender" to prevent wear and tear on wooden surfaces where ropes might rub.
- Position Marking: In sailing, it is used to mark the center point of a line or a specific spoke on a wheel.
- Repair and Binding: It can be used as a permanent seizing to hold two parallel poles together or to finish the end of a rope to prevent fraying.
Materials and Tools Needed
To achieve a professional-looking Turk’s Head knot, selecting the right material is paramount. The choice of rope affects the knot’s definition, durability, and ease of tightening.
Recommended Rope Types
- Paracord (550 Cord): The gold standard for modern rope knots. It is durable, comes in various colors, and its inner strands can be removed for a flatter profile.
- Cotton Cord: Best for decorative indoor projects or traditional nautical crafts. It takes dye well and has a classic look.
- Hemp or Jute: Ideal for a rugged, "old-world" aesthetic on hiking sticks or garden tools.
- Nylon or Polyester: High-performance options for maritime environments where UV and rot resistance are required.
Essential Tools
- The Mandrel: This is the cylindrical object you tie the knot around. In the instructions below, we refer to it as "wood" or your "hand."
- Marlinspike or Fid: A pointed tool used for opening loops and tightening the braid. This is essential for the "following" phase.
- Scissors or a Sharp Knife: For trimming the ends.
- Lighter: For singeing the ends of synthetic ropes to prevent unraveling.
How to Tie Turk’s Head?
To master this knot, follow these specific instructions. Ensure you have a cylindrical object (like a piece of wood) ready to act as your base.
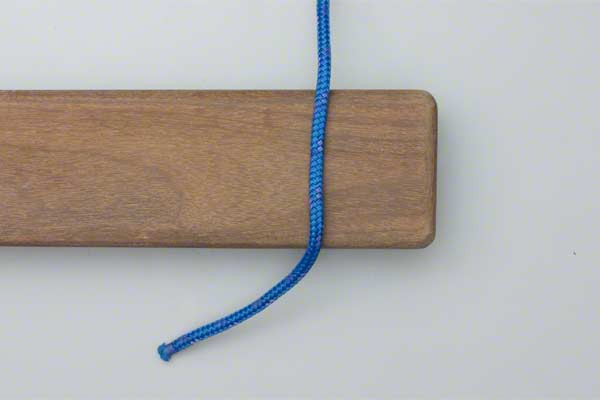
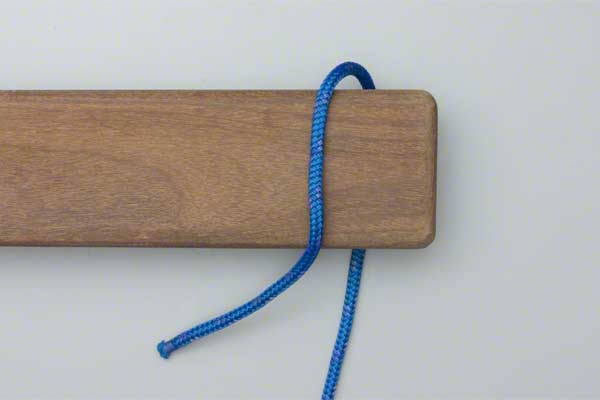
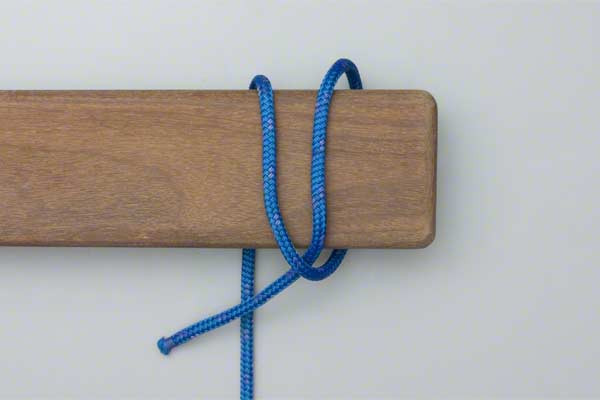
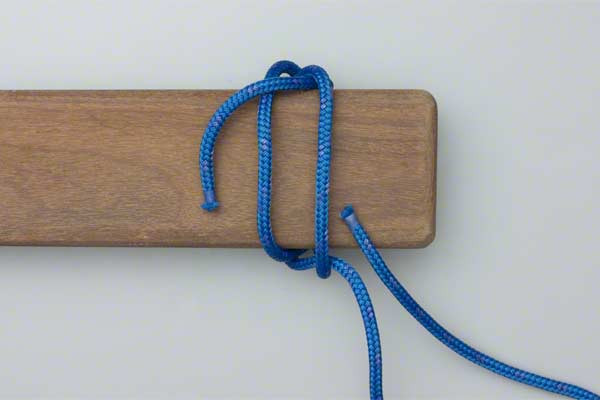
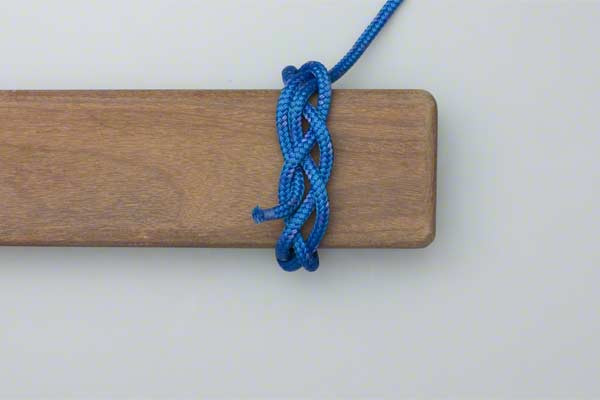
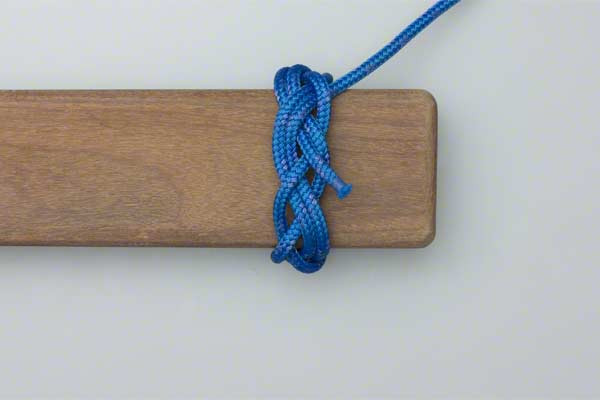
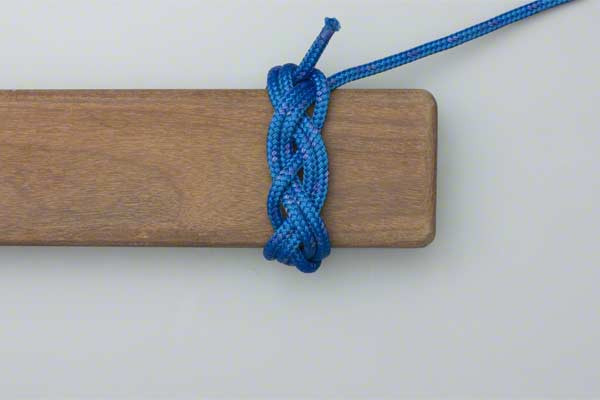
- Wrap the line around your hand (wood here) overlapping to start the braiding.
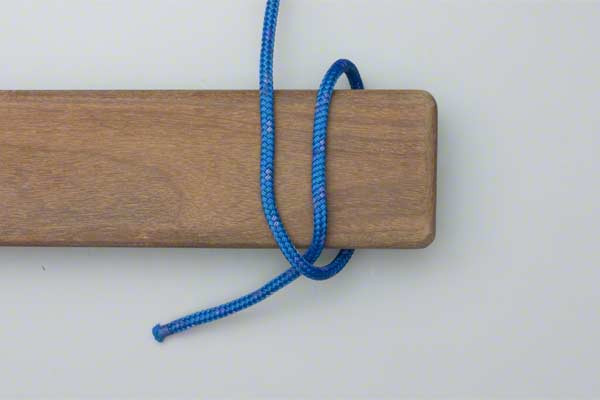
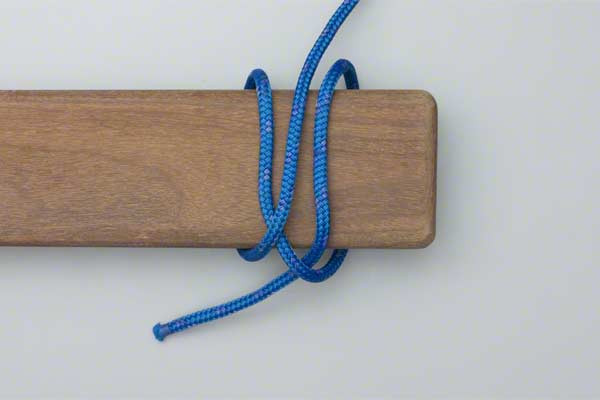
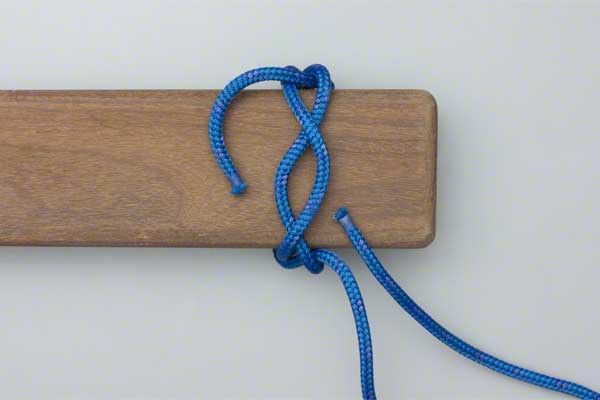
- On the third pass, braid the end and the loops together.
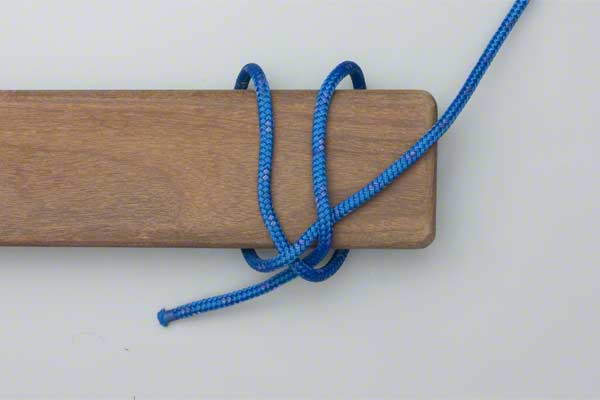
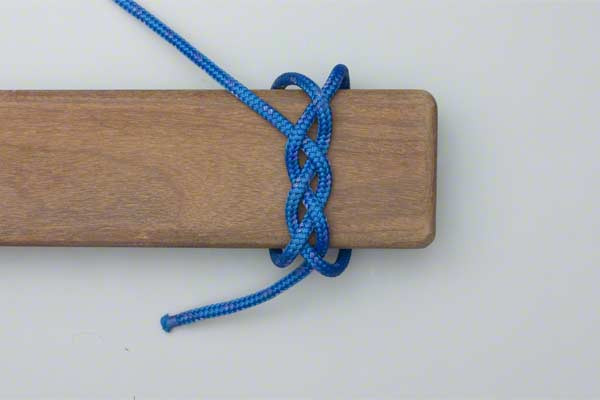
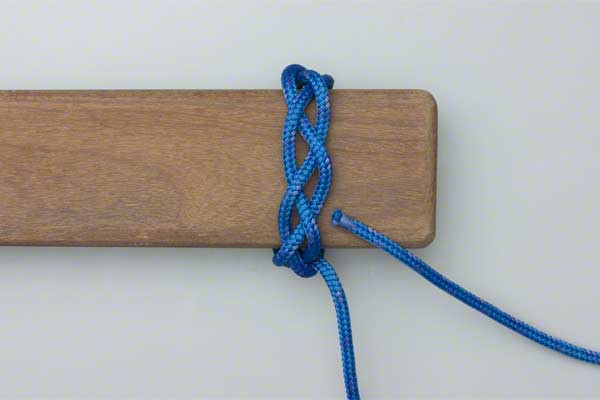
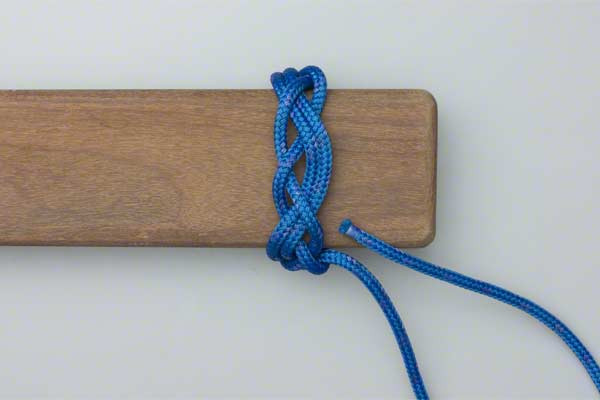
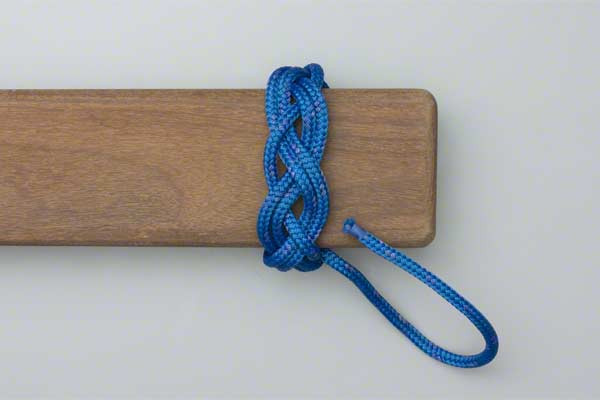
- Rotate the braid to keep it in view and continue braiding.
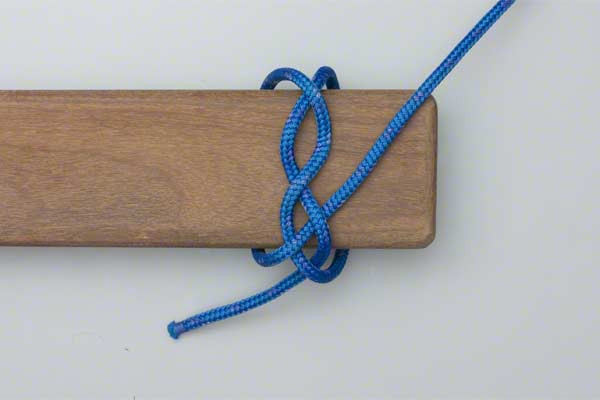
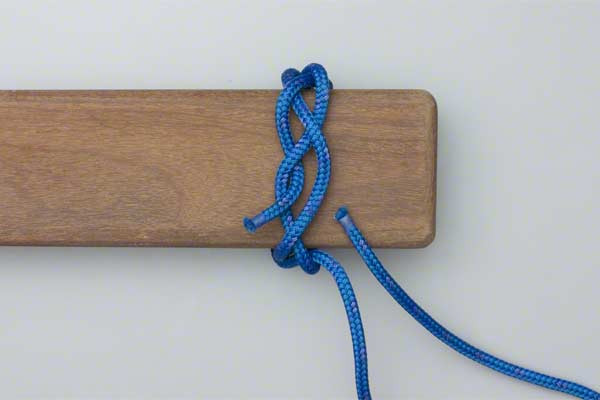
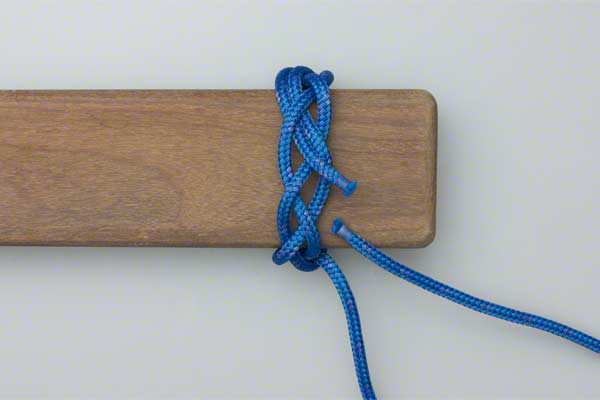
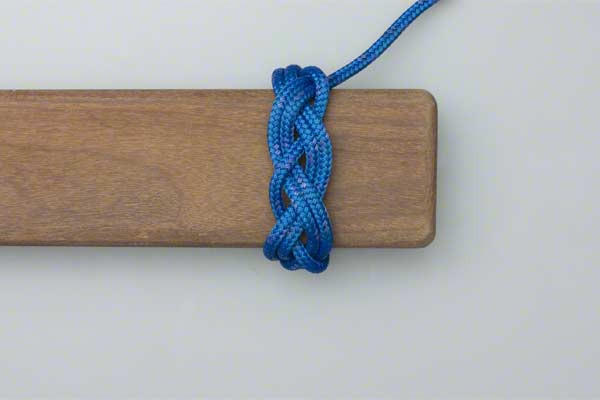
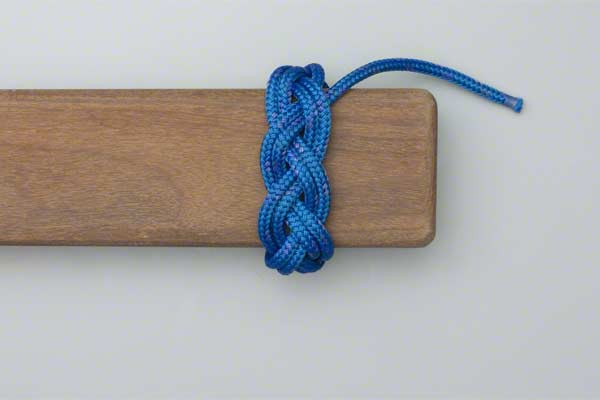
- Then continue braiding by following the rope around the same path for all three turns.
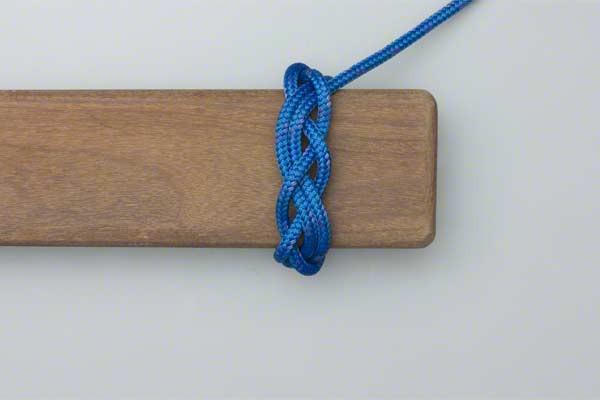
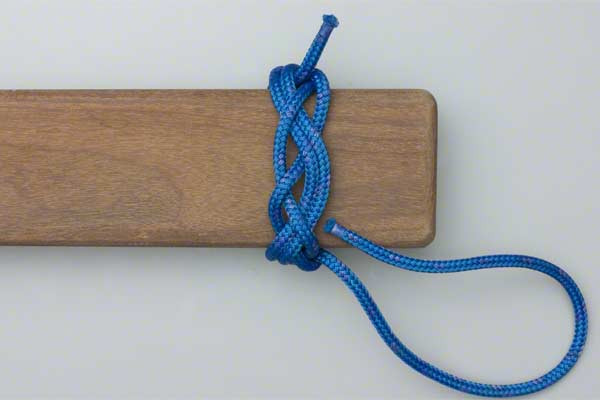
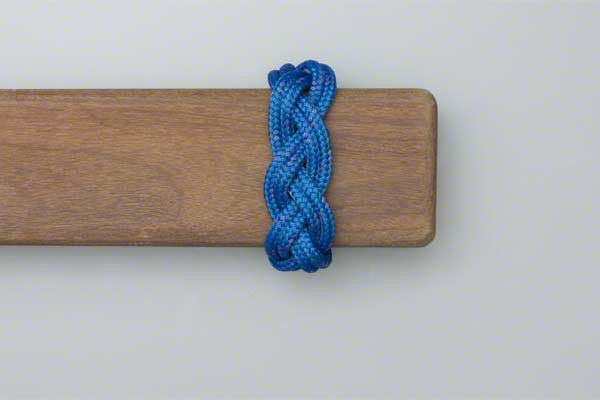
- Finish by tucking the ends in.
- Finished.


Common Mistakes to Avoid
Even for those experienced in outdoor rope techniques, the Turk’s Head can be challenging due to its repetitive nature. Avoid these common pitfalls to ensure a perfect finish:
1. Inconsistent Tension
The most common error is pulling the rope too tight during the first pass. If the initial "skeleton" of the knot is too tight, you will not have enough space to "follow the path" for the second and third passes. Keep the loops snug but flexible.
2. Overlapping the Wrong Way
The Turk’s Head relies on a specific "over-under" pattern. If you accidentally go "over" when you should have gone "under," the entire braid will lose its structural integrity and look disorganized. Always double-check your weave before starting the next pass.
3. Losing the "Lead"
When you begin following the rope for the second and third turns, it is easy to accidentally jump into the wrong "lane." Use a marlinspike to hold your place if you need to set the project down.
4. Safety Considerations
When tying the knot around your hand, be extremely careful not to cut off circulation. If the rope becomes too tight, stop immediately and transfer the knot to a wooden mandrel. Always cut away from your body when trimming ends.
Related Knots and Splicing
Expanding your knowledge of rope knots allows you to combine the Turk’s Head with other functional ties. Here are a few related techniques:
- Monkey’s Fist: A weighted decorative knot used at the end of a heaving line to make it easier to throw across distances.
- Diamond Knot (Lanyard Knot): A multi-strand stopper knot often used to finish the ends of a Turk’s Head lanyard or zipper pull.
- Common Whipping: A method of binding the end of a rope with thinner twine to prevent fraying, similar in "grip" function to the Turk’s Head.
- Carrick Bend: A decorative and highly secure bend used to join two large ropes, featuring an interwoven pattern similar to a flat Turk’s Head.
- Clove Hitch: A simple binding knot often used as the starting point for more complex lashings and decorative wraps.
Advanced Customization: Leads and Bights
Once you have mastered the basic steps provided, you can experiment with the "size" of your Turk’s Head. In the world of outdoor rope techniques, you will hear experts refer to a "3-lead, 4-bight" or a "5-lead, 4-bight" knot.
- Leads: These are the number of strands you see when looking at the knot from the side. Increasing the leads makes the knot wider (longer along the cylinder).
- Bights: These are the "points" or curves at the edges. Increasing the bights makes the knot larger in diameter.
By increasing the number of passes (the instructions above suggest three turns), you create a "tripled" Turk’s Head. This creates a thick, rug-like texture that is incredibly durable and aesthetically pleasing.
Finishing the Ends
For a professional look, the "tucking" of the ends should be invisible.
- For Synthetic Rope: Tuck the end under an existing strand, cut it short, and carefully melt the tip with a lighter, pressing it against the neighboring strand to "weld" it in place.
- For Natural Fiber: Use a needle and thread (whipping) to secure the tucked end to the interior of the knot so it cannot slide out under tension.
Final Words
The Turk’s Head knot is a bridge between utility and art. While it requires patience and a steady hand, the result is one of the most durable and visually striking rope knots in existence. By mastering this technique, you add a valuable skill to your repertoire of outdoor rope techniques, allowing you to customize your gear, improve your grip on tools, and carry on a centuries-old maritime tradition.
Whether you are wrapping a boat railing to protect it from the sun or simply creating a unique keychain, the Turk’s Head stands as a testament to the functional beauty of cordage. Practice with different materials like paracord or leather lace to see how the character of the knot changes, and soon, you’ll be applying this "braid" to everything in your outdoor kit.
