Buntline Hitch Tying
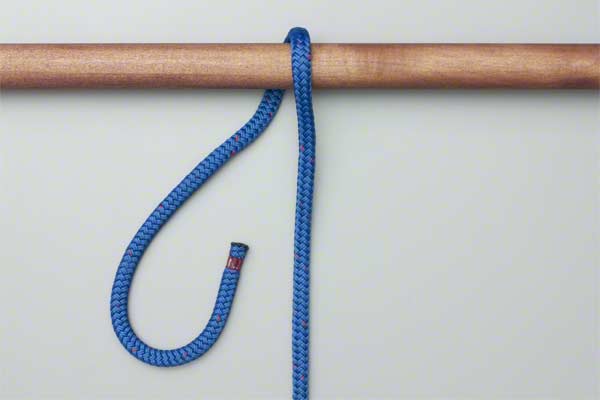
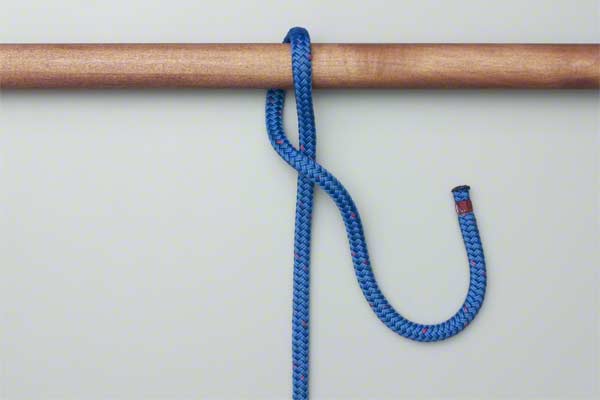
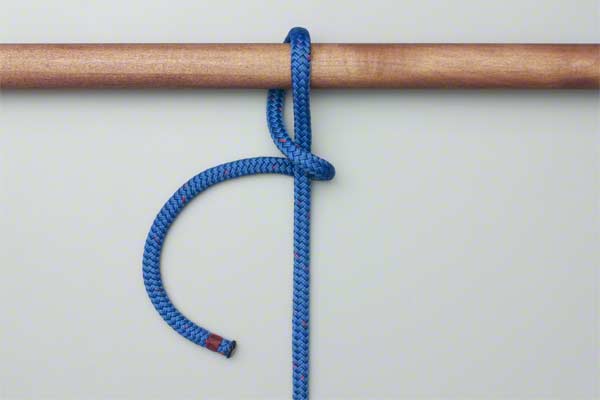
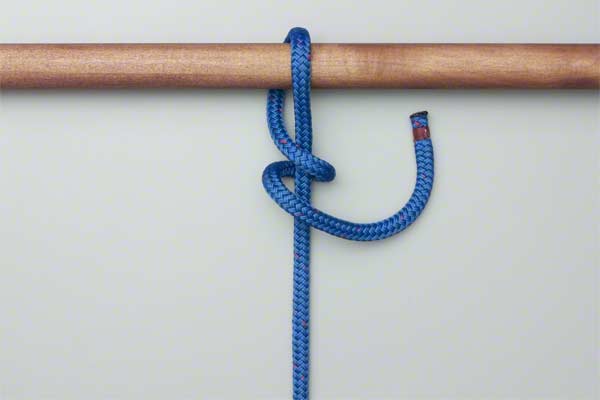
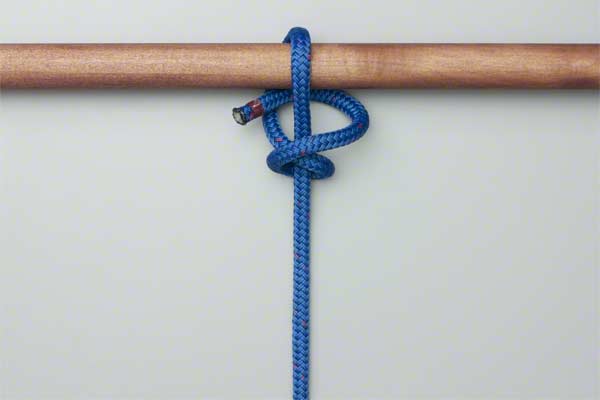
Pass the tail around the pole. Make a complete turn around the standing end and then through the hole beside the pole. Form a Half Hitch to complete the knot.

Buntline Hitch Details
Uses: The Buntline Hitch (ABOK # 1847, p 310) was originally employed to secure the buntlines to the foot of the square sails. Repeated shaking and jerking by a flapping sail tended to tighten this knot - hence its value.
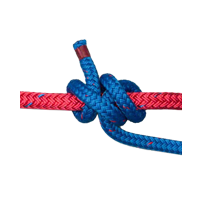
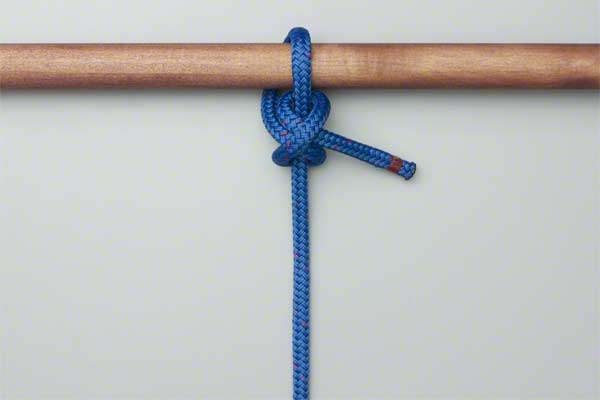
Structure When complete, the finished knot is a clove hitch around the standing end but the clove hitch is inverted when compared to the clove hitch in a Round Turn and Two Half Hitches. However, while it is being tied the first part of the knot should not be called a Half Hitch. Up to frame 5 in the animation the rope merely wraps around the standing end.
EStar – More Secure Version for Dyneema: The Buntline Hitch is secure in traditional ropes. However, like most knots it will slip when tied using Dyneema Hollow Braid, e.g., Samson Amsteel Blue. Evans Starzinger devised and tested the EStar Hitch which he reports does not slip. In the animation on the right the Buntline is completed but loose. The tail end is passed back around the bar and back down through the knot beside the standing end. The two ends are then compressed against each other as they try to slip in opposite directions.
Other Uses: Although it is not obvious, the same knot is widely used for neckties, where it is known as the Four-in-Hand Knot. The difference is merely in the material used and in the alignment of the final part of the knot so that the two ends emerge parallel.
Advantages: It is more secure than two Half Hitches and very resistant to shaking loose.
Disadvantages: This knot cannot be tied under a load and, after being heavily loaded, it is more liable to jam and be awkward to release than two Half Hitches.