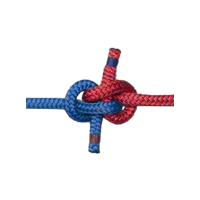
Figure 8 Bend (Flemish Bend) Tying
Start by tying a loose Figure 8 knot in one of the ropes. Follow the same path in reverse with the other rope, starting beside the tail and exiting beside the standing end.
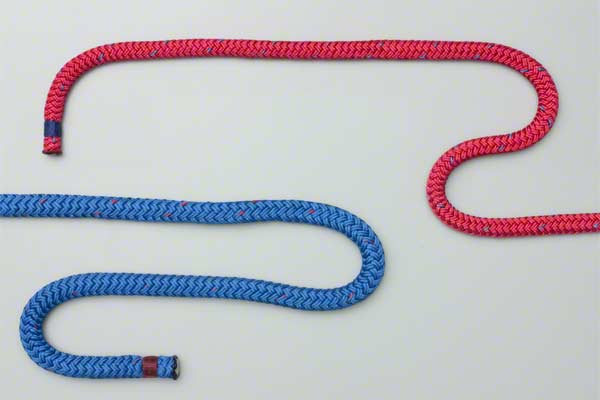
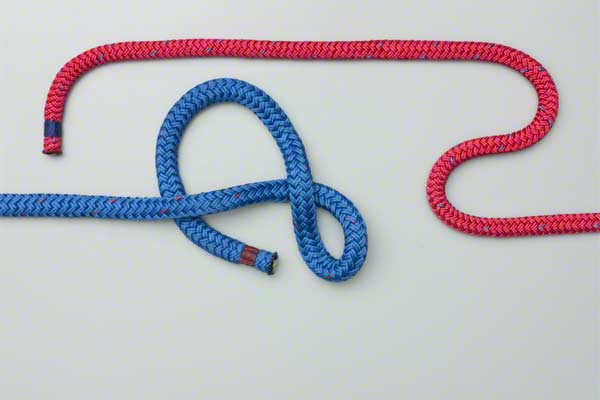
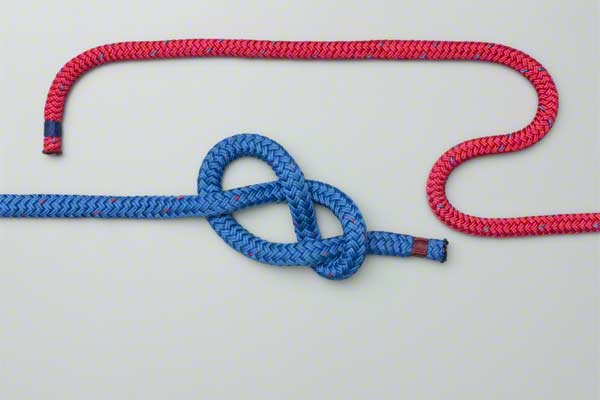
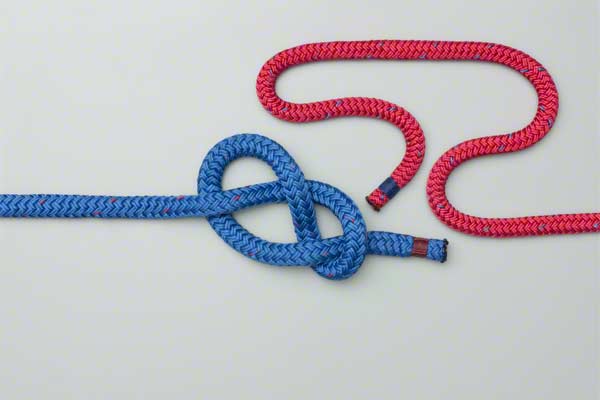
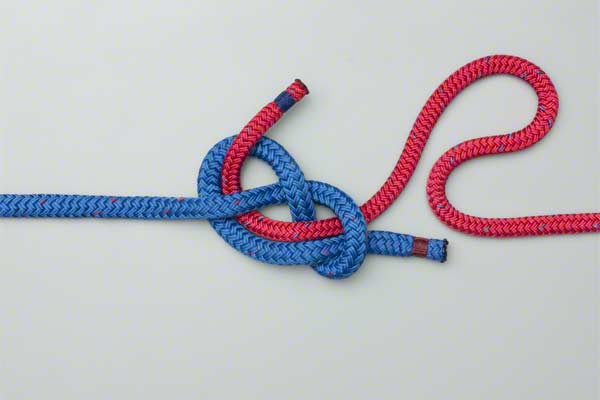
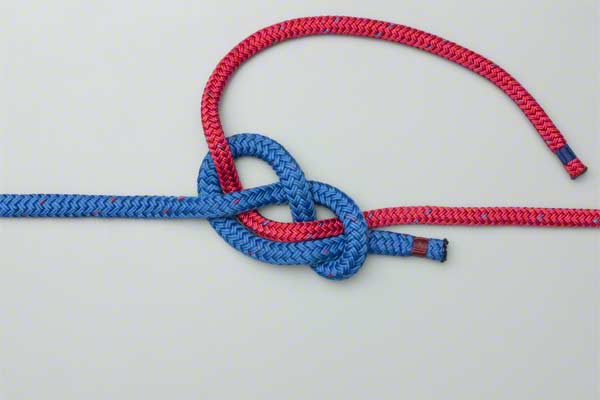
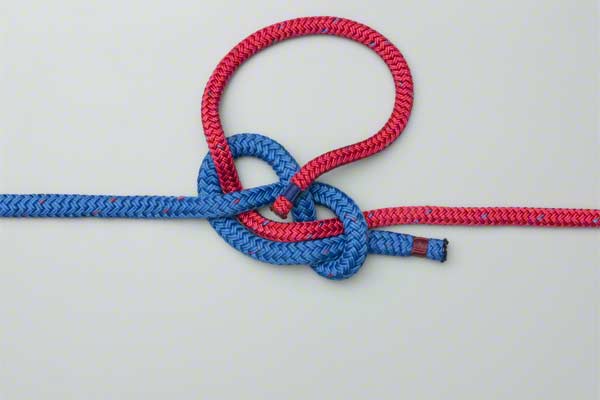
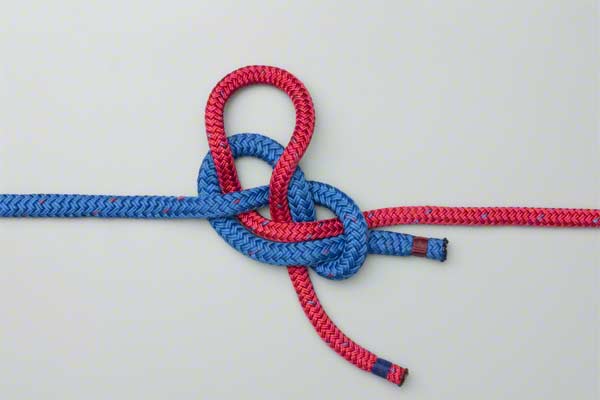
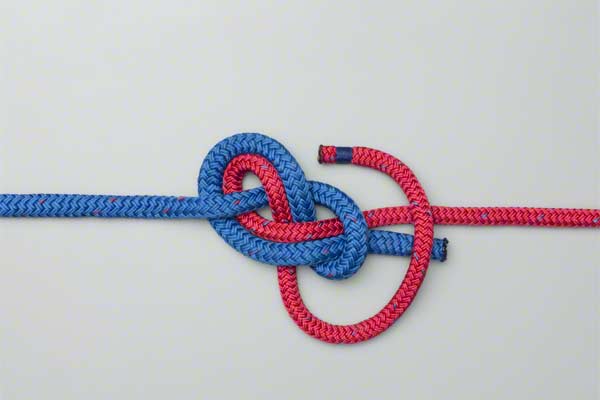
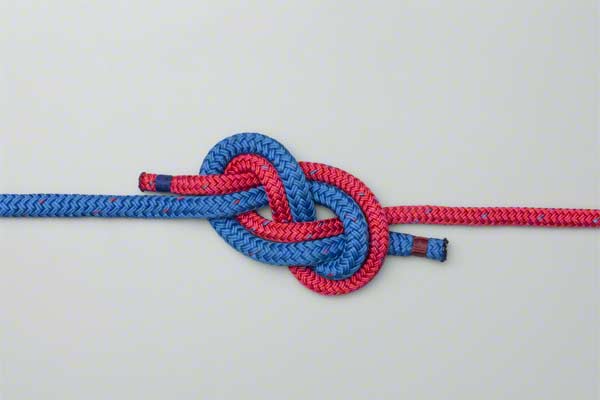

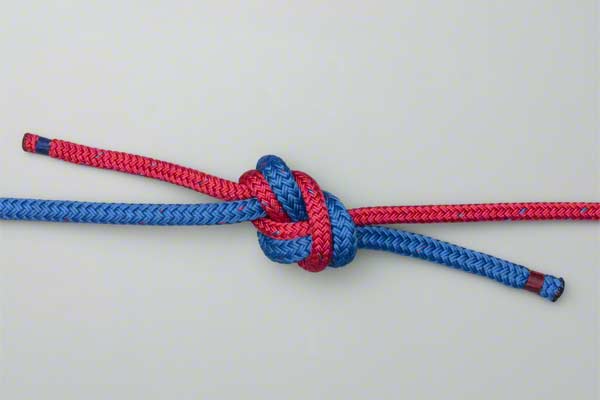
Figure 8 Bend (Flemish Bend) Details
Uses: The Figure 8, or Flemish, Bend (ABOK # 1411, p 258.) provides a safe, and simple way to join two ropes. It is reasonably easy to remember, tie, and check.
Safety: For critical loads, e.g., yourself (!), it should not be used with ropes that differ much in size and for safety the ends should be longer. Finally, for real security, each end should be tied in a double overhand stopper knot around the other standing end as shown here.
Final Dressing: To ensure that the knot is tied correctly, it is sensible to tie it in the "Flat" form shown. However, for taking a load, this knot should be carefully dressed so that the two outermost turns are brought in snug against the ropes they enclose – as a result the turns then finish on the other side of the turns they accompany. Dressed this way the knot withstands a load better.
Pros and Cons: The advantage of Figure 8 Bend is that even after considerable strain it remains relatively easy to undo.
Inspection: Ensure that there are two strands beside each other at each part of the knot. Dress the knot as described above. Then, pull it and observe that it tightens neatly and symmetrically.